
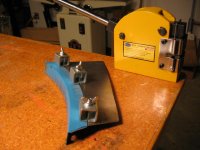
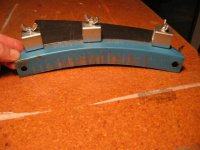
OK, it's a small one, but here it is. In the process of extending my truck's useful life as cheaply as possible, while using it as an excuse to purchase more equipment, I decided to try a little sheet metal fab in the form of these manageably-small rust repair patches for the fender wheel arch area that's disappearing on my truck. I bought a shrinker/stretcher set from Eastwood and used some scrap sheet metal to make these (pretty beefy---from old furnace fan cage thing). Didn't have time to weld them up and finish them yet. I was wondering how it would be to bend a curve into an angle in 2 different planes, but it seemed to work well. I'm happy with this purchase-----seems plenty good for a hobbyist like myself. I through-bolted it to the corner of my work table as shown when I was using it.
How do you go about replacing a patch like this where there is an inner fender and don't have access to the back? I'm kind of winging it and learning as I go with the help of the internet.
Just a quick note about the clamps: I found that the clamping surface on the slotted clamping surface was not flat! It was humped up in the middle, which translated into a angle in the two panals being joined. A few whacks with a hammer straightened them out and the panals pull into a nice flat plane when clamped now.
Thanks!
How do you go about replacing a patch like this where there is an inner fender and don't have access to the back? I'm kind of winging it and learning as I go with the help of the internet.
Just a quick note about the clamps: I found that the clamping surface on the slotted clamping surface was not flat! It was humped up in the middle, which translated into a angle in the two panals being joined. A few whacks with a hammer straightened them out and the panals pull into a nice flat plane when clamped now.
Thanks!
Attachments


Last edited: