To avoid these ads, REGISTER NOW!

First Steps

Bib Overalls

Well-known member
Joined
Dec 4, 2006
Messages
3,318
Location
Jonesboro, Arkansas
When I built my shop building ten years ago it was everything I dreamed it would be. But in the ensuing years the warts began to show. It was to hot in summer and to cold in winter. During the moderate times of the year all manner of buzzing, blood sucking, and stinging insects found the light through the open door very inviting. Storage of yard and pool tools brought in dirt and took up work space. The dirt and the dust from the table saw precluded any real mechanical work. Even on the rare perfect day.

This summer was the straw that broke the camels back. The particularly hot and dry season and my advancing age made any excursion to my shop building almost unbearable.

I don't know how much time I have left, none of us have any idea. But, at 68, the numbers are not encouraging. So, if there is to be any gold in my "Golden Years" I have to get up off my billfold and:

Build a general storage and garden/pool shed,

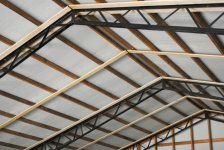
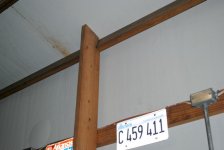
Insulate the ceiling of my shop building,

Improve the lighting,

And install HVAC.

The good news is that the long hot dog days of summer are behind us and I am finally motivated to get this done.

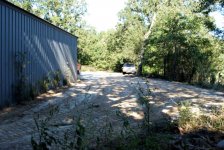
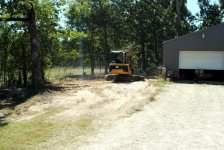
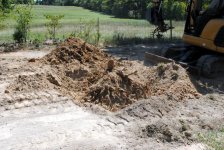
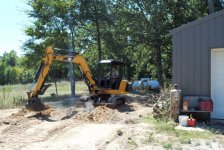
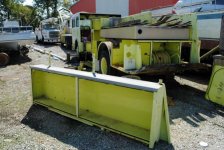
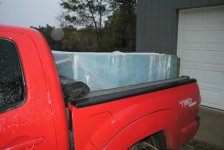
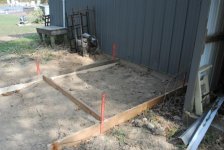
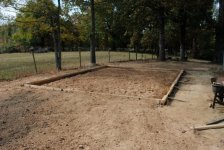
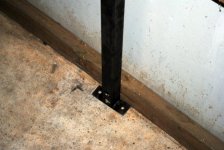
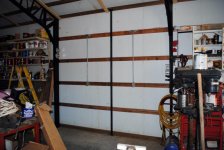
One photo shows the site of the garden/pool shed. The other shows my mess. This project is going to take some time. So don't expect a flood of daily updates. Just steady progress.
 

Attachments

  • Shop Remodel 01s.jpg
    Shop Remodel 01s.jpg
    90.5 KB · Views: 422
  • Shop Remodel 02s.jpg
    Shop Remodel 02s.jpg
    67 KB · Views: 543
To avoid these ads, REGISTER NOW!

rickairmedic

Well-known member
Joined
May 31, 2005
Messages
4,165
Location
louisville ,Ky
Bib I can see you need help and I am a giving kind of guy so I would be willing to stop by and haul off some of that old rusty metal for you that I see taking up valuable floor space . I certainly dont want to have to worry about you " in your golden years " getting tetanus :D. Good to see another " real " garage on here getting some attention.

Rick
 

D Force

Well-known member
Joined
Apr 26, 2010
Messages
101
Location
Tucson, AZ
Wow. What a great space. Lots of potential. I can see why you had such a great vision for this one. Good luck on your renovation. I feel like you're going to have fun doing this too.
 
OP
B

Bib Overalls

Well-known member
Joined
Dec 4, 2006
Messages
3,318
Location
Jonesboro, Arkansas
Yesterday I shook hands with a dirt mover and a foam insulation contractor. Both are highly regarded and both have a backlog. At a time when a lot of the trades are sitting around waiting for a call having to wait is a good sign.

The numbers are a bit staggering. But not unexpected.

The dirt guy has a reputation for fixing drainage problems. He picked up immediately on some issues and suggested rolling them into the job. More money, of course. But I know he is right and that it will be cheaper to do it now and get it all fixed at once.

Also said he would come by in a couple of days and dig a quick trench to dry out the swamp that developed after fill settled in the hole left by a large, now dug up and burned, tree stump.

Looks like I have passed the point of no return.
 
OP
B

Bib Overalls

Well-known member
Joined
Dec 4, 2006
Messages
3,318
Location
Jonesboro, Arkansas
I'm going to need a scaffold for my shop remodel project. I looked into renting a section of scaffold with casters and walk planks from Home Depot. The weekly rent was affordable. But my project could last for several months. Then I checked out new and used scaffolding on the net. There are a lot of sources but even the best deals, with shipping, were out of my range.

Then I found this set at Harbor Freight. Regularly sells for $250 and on perpetual sale for $200. With a 20% off coupon I was out the door for $175 including tax.

This unit is adjustable from about 2' to 6' in 4" increments. Perfect for the sloping ceiling in my shop.

Northern also sells a similar set for about the same price plus shipping. They also have the safety railing and stabilizer legs for use when adding a second level.

The Northern safety railing was $130 plus shipping and there is no assurance it will work with the Harbor Freight unit. I passed on that.

Unlike the scaffold, which has some complicated parts and precisely drilled holes, the safety railing is rather straight forward. I decided to make my own.

The vertical posts and top rails are 1.5" x 14 gauge mild steel square tubing. The lower rail is 1" x 14 gauge mild steel tubing.

I used 1.25" x 10 gauge mild steel square tubing to fit the scaffold legs to the receivers in the deck. When the deck goes up or down the safety railing moves with it. To get a tight fit in the legs I used some 14 gauge shims.

I bought 10' of 5/16" stainless steel chain at Lowe's for $5. A steal. I also got four links for $2 each. At the lower settings the end chain is not needed. But when the deck is 6' high it is essential.

Total investment in the safety railing is about $50-60. Cheap insurance.
 

Attachments

  • Scaffold 01s.jpg
    Scaffold 01s.jpg
    62.2 KB · Views: 101
  • Scaffold 02s.jpg
    Scaffold 02s.jpg
    43.4 KB · Views: 78
  • Scaffold 03s.jpg
    Scaffold 03s.jpg
    29.7 KB · Views: 76

catfish185

Member
Joined
Jun 6, 2011
Messages
6
Bib: what type pole barn have you got,also are those metal post or painted post?
how big garage? looking at doing a pole bar and was curious.looks like you have a lot of potential with that size.
catfish:thumbup::thumbup::thumbup:
 
OP
B

Bib Overalls

Well-known member
Joined
Dec 4, 2006
Messages
3,318
Location
Jonesboro, Arkansas
Bib: what type pole barn have you got,also are those metal post or painted post?
how big garage? looking at doing a pole bar and was curious.looks like you have a lot of potential with that size.
catfish:thumbup::thumbup::thumbup:

My shop building is 30' x 40' with 10' side walls. I built it with a package from Adams Truss in NW Arkansas. The package included the steel trusses, insulation board, steel siding and roof, trim, walk door, and all of the necessary nuts, bolts, and screws. I purchased the wood locally. The concrete was contracted out and I did the erection with a little help from some friends.

Several post builders told me that 30' x 40' is a "sweet spot" in terms of square foot price. Any smaller and the price goes up.
 
Last edited:
OP
B

Bib Overalls

Well-known member
Joined
Dec 4, 2006
Messages
3,318
Location
Jonesboro, Arkansas
Unexpected progress. I was expecting William Gann, my dirt guy to show up next week. Surprise, surprise! About noon, I was in town and got a call from my wife. He was already at work and found a stump I had forgotten. One I had cut flush 11 years ago. I hustled home in time to see the stump come out. Pictures show William at work and the finished job. Big change from the dismal swamp in the first post. Should start on the garden shed by the end of the month.


Tomorrow I am going to swing by the mini storage place and see about renting a space for the Model T, the Model A body, and stuff like the generator and pressure washer. That will clear the floor in the shop so I can start on the ceiling.

I'm stoked.
 

Attachments

  • Shop Remodel 07s.jpg
    Shop Remodel 07s.jpg
    102.7 KB · Views: 113
  • Shop Remodel 06s.jpg
    Shop Remodel 06s.jpg
    88.5 KB · Views: 115
  • Shop Remodel 05s.jpg
    Shop Remodel 05s.jpg
    90.5 KB · Views: 119
  • Shop Remodel 04s.jpg
    Shop Remodel 04s.jpg
    100 KB · Views: 112
  • Shop Remodel 03s.jpg
    Shop Remodel 03s.jpg
    95 KB · Views: 117
OP
B

Bib Overalls

Well-known member
Joined
Dec 4, 2006
Messages
3,318
Location
Jonesboro, Arkansas
Several years ago my friend Barry bought a Navy surplus 1974 Segrave fire truck at a government auction. It had been acquired by a volunteer fire department and set for years unattended after the motor threw a rod. Barry bought it to scrap out. I was looking at it one day and my over active mind saw a shop cabinet where the crew kept their gear. I started by removing the doors and setting them aside. I used a sawzall to cut the section I wanted free from the chassis. To access the area above the wheel well I had to cut the body away. Barry wants to reuse the tank so I was careful when making my cuts. The box was an easy job for the fork lift. It took me about three hours to reach this point. Over the next couple of days I am going to trim away the excess sheet metal and clean up the cuts. There is one rusted out area that will need a patch and I am also going to bend up some shelves.
 

Attachments

  • Fire Truck Cabinet 05s.jpg
    Fire Truck Cabinet 05s.jpg
    80.7 KB · Views: 82
  • Fire Truck Cabinet 04s.jpg
    Fire Truck Cabinet 04s.jpg
    61.6 KB · Views: 69
  • Fire Truck Cabinet 03s.jpg
    Fire Truck Cabinet 03s.jpg
    54.1 KB · Views: 66
  • Fire Truck Cabinet 02s.jpg
    Fire Truck Cabinet 02s.jpg
    60.3 KB · Views: 69
  • Fire Truck Cabinet 01s.jpg
    Fire Truck Cabinet 01s.jpg
    61.8 KB · Views: 76
Last edited:
OP
B

Bib Overalls

Well-known member
Joined
Dec 4, 2006
Messages
3,318
Location
Jonesboro, Arkansas
After days of drudge work I have real progress to report. The concrete form are in place garden/storage shed and the shop's heating and air conditioning "package" unit. Inside the old shop lights and associated wiring are down and the ceiling strapping is in place.

Overall, I am very pleased with my Adam's Truss building. One irritant has been the 2" x 6" wall stiffeners in the bays between the trusses. They make it hard to take full advantage of the available space. So my immediate effort is to pull them out of the building and replace them with 1.5" rectangular tubing that will eventually be buried in the finished walls. As of today the tubes have been cut and drilled and the feet are welded on. Over the weekend I am going to fit the tubes in place and weld them to the top tabs. I'll post pictures in a couple of days.

Finally, today I became an official member of the of the unofficial Garage Journal's Lista Cabinet Owners Society. I scored two units off of the local Craigslist for a very reasonable price. They need a little cosmetic work. And they are not red. But they are the real McCoy and I am stoked. I brought the larger unit home with me today. It is 28" x 28" x 54" and has 15 drawers. It took three men and a boy to get it in my truck. Hopefully some of my friends will rise to the occasion and help me unload it.
 

Attachments

  • Shop Remodel 14s.jpg
    Shop Remodel 14s.jpg
    48.8 KB · Views: 69
  • Shop Remodel 13s.jpg
    Shop Remodel 13s.jpg
    66.8 KB · Views: 77
  • Shop Remodel 12s.jpg
    Shop Remodel 12s.jpg
    30.8 KB · Views: 64
  • Shop Remodel 11s.jpg
    Shop Remodel 11s.jpg
    30.5 KB · Views: 67
  • Shop Remodel 10s.jpg
    Shop Remodel 10s.jpg
    64.7 KB · Views: 66
  • Shop Remodel 09s.jpg
    Shop Remodel 09s.jpg
    93.9 KB · Views: 69
  • Shop Remodel 08s.jpg
    Shop Remodel 08s.jpg
    87.4 KB · Views: 67
To avoid these ads, REGISTER NOW!
OP
B

Bib Overalls

Well-known member
Joined
Dec 4, 2006
Messages
3,318
Location
Jonesboro, Arkansas
I picked up the first, and largest of my Lista cabinets Thursday. It took three men and a boy to load. I checked some on line vendors and as best I can tell, the shipping weight is 750-800 pounds for one this size.

Friday's heart cath and the Doc's recovery instructions meant the cabinet would have to stay in my truck bed until today. My good friend Marty agreed to bring over the usual cast of characters to help sometime "after church."

So, to have things ready when they arrived I set up the shop crane and worked a nylon tie down strap around the body of the cabinet. Pleased with my progress I backed the truck into the shop and snapped the strap into the hook at the end of the short chain at the end of the boom.

Uncertain about the straps load limit I decided to do a little test and take up the slack. Effortlessly the cabinet lifted up from the bed and it was perfectly balanced on the strap. Taking this as an omen I got into the truck and drove it out from under the cabinet. Then I carefully lowered the cabinet to the floor. Horizontal of course.

Anyone with any common sense would have never gotten this far along rigging something of this size and weight by themselves.. But what the heck. I moved the strap up on the cabinet body a bit and repositioned the shop crane. A couple of pumps on hydraulic cylinder and the cabinet was semi erect with it's bottom firmly gripped by the shop crane's extended legs.

It looked like a little shove would carry it over center and vertical. I tried and discovered the shop crane would have to be lowered as the cabinet was pushed. So I did what any idiot would do. I stepped in between the shop crane and the cabinet.

Blindly controlling the hydraulic cylinder with my right hand and pushing with my left shoulder I got the cabinet proper vertical position.

My success was tempered by a sudden realization. Everything that I had done up to the final step was inherently safe. Even if the strap ad failed I would have escaped the falling cabinet. But a strap failure in the final step would have been a real *****. My cell phone was in the truck and my wife is out of town. She would have found my 68 year old *** sometime tomorrow sitting on the floor of the shop nestled between the shop cane's legs holding almost a half ton of Lista cabinet in my lap.

This scenario popped into my mind as I was checking the tie down strap. One of the sewn loops was coming unraveled.

On a happier note, the cabinet came through the ordeal without consequence. As you can see, some of the drawers have special plastic bins to hold machine tooling. On EBay it sells for about $75 a drawer.
 

Attachments

  • Shop Remodel 16s.jpg
    Shop Remodel 16s.jpg
    59.3 KB · Views: 75
  • Shop Remodel 17s.jpg
    Shop Remodel 17s.jpg
    61.8 KB · Views: 72
  • Shop Remodel 18s.jpg
    Shop Remodel 18s.jpg
    54.4 KB · Views: 64

nkachur

Well-known member
Joined
Jun 29, 2008
Messages
798
Location
Manitoba Canada
congratulations on the cabinets, hopefully the renovation and construction go well and you have many years of use ahead of you.
 

Nighttrain

Well-known member
Joined
Aug 6, 2009
Messages
2,682
Location
Dripping Springs, Tx
Bib thats a lot of work you have been doing. Just getting that swamp filled in is going to keep alot of bugs away.

Your hoist story reminds me of one my buddy told me. He and another buddy were lowering a big v-8 into his boat. They used a tree and a strap. Even ran extra strap from one branch to another for support. Well they get the engine up about 7' into the air to back the boat up under it. So far so good with just a couple of creaks fron the branch. Once the boat was under they started to lower the engine down. My buddy was feeling pretty good that there was only about 1' left to lower the engine when "Snap" the strap broke and the engine fell the rest of the way into the bilge. His buddy looked at the strap and said "Dang thats the second time that strap has broken".

Be safe out there and keep posting your re-build.
 
OP
B

Bib Overalls

Well-known member
Joined
Dec 4, 2006
Messages
3,318
Location
Jonesboro, Arkansas
Concrete contractor came by this morning to take a look the garden/storage shed slab job. He said he would come at 7 am but the dogs started barking at 6:30. Thinks he can get it in by the end of the week. Be nice if he can pull it off.

Today I installed five of the ten mid-bay steel tubing posts that replace the intrusive 2" x 6" boards I originally used. This particular wall section will contain my 9' wide fire engine sourced cabinet. Because of it's very heavy weight I am going to support it with three 1.5" square 11 gauge posts. The posts are lag bolted to the girts and the cabinet will be bolted to the steel posts. The other wall sections get a single post made out of 1.5" square 16 gauge tubing.

The electric outlets will be relocated and a light fixture will be located under the cabinet. My work bench and the shorter Lista cabinet go here as well.

Appreciate the positive comments. They help to keep me focused.
 

Attachments

  • Shop Remodel 21s.jpg
    Shop Remodel 21s.jpg
    37.1 KB · Views: 29
  • Shop Remodel 20s.jpg
    Shop Remodel 20s.jpg
    59.1 KB · Views: 26
  • Shop Remodel 19s.jpg
    Shop Remodel 19s.jpg
    59.7 KB · Views: 35
Last edited:

Lookin4'67Galaxieconv

Well-known member
Joined
Jul 2, 2008
Messages
16,620
Location
Atlanta, GA
Interesting thread. Esp. like the part about you seeing the potential in the fire truck cabinet. I love that kind of stuff.

Nice score on the Listas as well.

Subscribed! :)
 

shopnut

Well-known member
Joined
Feb 22, 2006
Messages
4,237
Location
Florida
I'm going to need a scaffold for my shop remodel project. I looked into renting a section of scaffold with casters and walk planks from Home Depot. The weekly rent was affordable. But my project could last for several months. Then I checked out new and used scaffolding on the net. There are a lot of sources but even the best deals, with shipping, were out of my range.

Then I found this set at Harbor Freight. Regularly sells for $250 and on perpetual sale for $200. With a 20% off coupon I was out the door for $175 including tax.
/snip/
You made the right choice to buy a scaffold, IMHO. I went through the same exact decision 5-1/5 years ago, and I'm still using them all the time today! And I actually thought I would only need to rent some for a few months - now that's crazy!

Keep up the good work!
 

Omphaloskeptic

Well-known member
Joined
Oct 11, 2008
Messages
2,346
Location
Ultima Ratio, Wa.
Looking good, B.O.!

Mind if I ask what those C.L. Listas set you back? The price you payed may warrant a 'YOU ****' award!

I love your idea for the re-purposed F.T. cabinets; that project may garner you the 'Jack Olsen Nifty-Thrifty Award'! lol But you mustn't spray them J.O. green; the wall cabinet deserves the 'Lista Blue' paint job. Who knows, that Lista blue might even become your 'signature color'. heh-heh

It was brave of you to come clean with your "WORK (not so) SAFE" story. We've all done something that afterwords, we give ourselves a well-deserved 'dope-slap'. For instance, you may recall Jack Olsen's incident involving an unplanned meeting of some heavy metal object (cabinet) and his little German track toy. One of my not-so-smart moves was working alone on a ladder chainsawing a snow-damaged tree trunk; 'nuf said!:shocking: I guess I could chalk that one up as a 'senior moment', but I've had those 'self-inflicted-dope-slap' moments all through my life!:lol_hitti
 

Linda@Lista

Well-known member
Joined
May 4, 2011
Messages
386
Location
Holliston, MA
I picked up the first, and largest of my Lista cabinets Thursday. It took three men and a boy to load. I checked some on line vendors and as best I can tell, the shipping weight is 750-800 pounds for one this size.

...On a happier note, the cabinet came through the ordeal without consequence. As you can see, some of the drawers have special plastic bins to hold machine tooling. On EBay it sells for about $75 a drawer.

Congrats on your first Lista cabinets! May I post your photos to our Facebook page for all to see?
Linda
 
OP
B

Bib Overalls

Well-known member
Joined
Dec 4, 2006
Messages
3,318
Location
Jonesboro, Arkansas
Congrats on your first Lista cabinets! May I post your photos to our Facebook page for all to see?
Linda

Please feel free to use my cabinet pictures. The tall cabinet has been joined by it's shorter sibling. I'll try and get a picture up for you tomorrow.

While I have your attention, can I get "Lista Blue" paint from the factory for touching up my cabinets?
 

Linda@Lista

Well-known member
Joined
May 4, 2011
Messages
386
Location
Holliston, MA
Please feel free to use my cabinet pictures. The tall cabinet has been joined by it's shorter sibling. I'll try and get a picture up for you tomorrow.

While I have your attention, can I get "Lista Blue" paint from the factory for touching up my cabinets?

HI there, I would have to look into it. I don't believe we sell the actual paint but let me find out...
 
OP
B

Bib Overalls

Well-known member
Joined
Dec 4, 2006
Messages
3,318
Location
Jonesboro, Arkansas
Today we test fitted the fire truck sourced cabinet that I am adapting to go over my workbench.

The cabinet is mounted to three 11 gauge 1.5" square tube posts that are lag screwed to the building's girts. The cabinet rests on three brackets that have a recess for the lip at the bottom of the back panel. Three additional bolts secure the cabinet at the top. Fasteners are 1/2"-13 TPI grade 8. They screw into allthread connectors welded through the tubes.

I've set some stackable bins that I bought at Fastinal and some other items on the bottom shelf. I'm trying to figure out the best shelf arrangement. Right now a single fixed shelf in the middle seems to be winning out over a more complex adjustable shelf configuration. What do you think?

Once the shelving and brackets for under cabinet lighting are in place it is off too the sand blaster and it will all be fire engine red when it comes back.

I have the original Seagrave and Navy ID plates. I am going to mount them on the inside of one of the doors along with a "before" picture.
 

Attachments

  • Fire Truck Cabinet 06s.jpg
    Fire Truck Cabinet 06s.jpg
    54.8 KB · Views: 11
  • Fire Truck Cabinet 07s.jpg
    Fire Truck Cabinet 07s.jpg
    36.3 KB · Views: 8
  • Fire Truck Cabinet 01s.jpg
    Fire Truck Cabinet 01s.jpg
    61.8 KB · Views: 7
  • Seagrave 02S.jpg
    Seagrave 02S.jpg
    61.8 KB · Views: 9
Last edited:
To avoid these ads, REGISTER NOW!
Top Bottom