blitzdemon
Member
- Joined
- Aug 21, 2009
- Messages
- 16
intro-
names brad, 23, and bought my first house last month. mainly bought the place because of the garage size. house is like ~960sq ft and garage is like 912sq ft (24x38).
house - 2bd, 1ba, half finished basement, very new kitchen appliances.

garage
lighting - 2 8ft florencents and 2 300watt bulbs
walkthrough door can only open 90degrees cuz it hits the hanging heater
one garage door opener - broken
20amp service - breaker inside the house
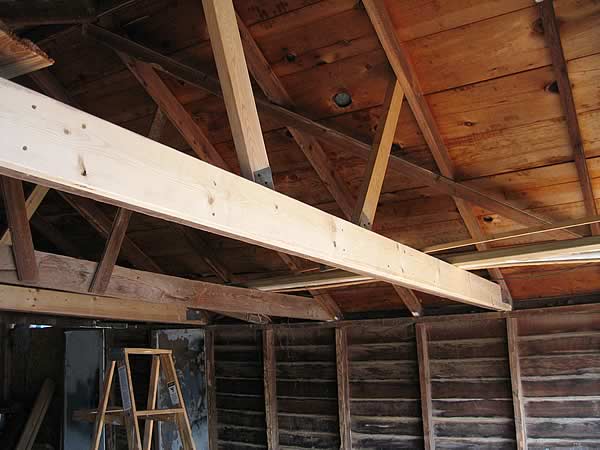
4ft rafters
whole garage leans to the north and west


southwall leaning to the west

first order was to get everything straightened up...or as close to straight as possible.


south wall - windows were put in leveled in the leaning wall

after pulling on everything...it all came dam close to level. i was very surprised considering how far off it was. unfortunately i forgot to get pix of it with a level after we were done pulling.
materials

put in more rafters

subbox

60amp service coming from house (other conduit for coax and cat5)


insulated

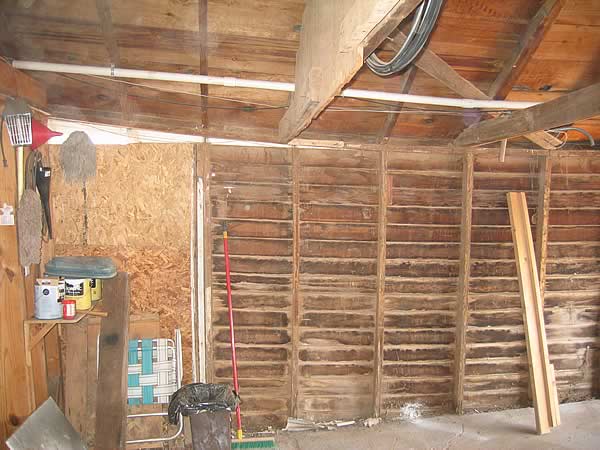
hanging osb


1x4's used inbetween rafters to help support the seams

going with 12 -2x4 recessed troffers. going to box them in since im blowing insulation in the attic.


gasline moved to west wall. 10/2 is for compressor (will be put in conduit).

that's where it stands currently.
theres a new steal walkthrough door hung, oddly also dont have a pic of that yet.
got new windows sitting in my basement for the garage. those wont go in until spring however.
the heater i mentions earlier is broke. should be fixable since it looks decently taken care of. need to get it hung and hooked back up to troubleshoot.
i got some cabinets sitting at my parents house we picked up for cheap.
edit - forgot to mention ALL of the old electrical was stripped. the 2 8fters were wired together with lamp cord, thats how bad it all was.
questions/comments/suggestions are welcome. sorry for the disorganization.
names brad, 23, and bought my first house last month. mainly bought the place because of the garage size. house is like ~960sq ft and garage is like 912sq ft (24x38).
house - 2bd, 1ba, half finished basement, very new kitchen appliances.
garage
lighting - 2 8ft florencents and 2 300watt bulbs
walkthrough door can only open 90degrees cuz it hits the hanging heater
one garage door opener - broken
20amp service - breaker inside the house
4ft rafters
whole garage leans to the north and west
southwall leaning to the west
first order was to get everything straightened up...or as close to straight as possible.
south wall - windows were put in leveled in the leaning wall
after pulling on everything...it all came dam close to level. i was very surprised considering how far off it was. unfortunately i forgot to get pix of it with a level after we were done pulling.
materials
put in more rafters
subbox
60amp service coming from house (other conduit for coax and cat5)
insulated
hanging osb
1x4's used inbetween rafters to help support the seams
going with 12 -2x4 recessed troffers. going to box them in since im blowing insulation in the attic.
gasline moved to west wall. 10/2 is for compressor (will be put in conduit).
that's where it stands currently.
theres a new steal walkthrough door hung, oddly also dont have a pic of that yet.
got new windows sitting in my basement for the garage. those wont go in until spring however.
the heater i mentions earlier is broke. should be fixable since it looks decently taken care of. need to get it hung and hooked back up to troubleshoot.
i got some cabinets sitting at my parents house we picked up for cheap.
edit - forgot to mention ALL of the old electrical was stripped. the 2 8fters were wired together with lamp cord, thats how bad it all was.
questions/comments/suggestions are welcome. sorry for the disorganization.
Last edited:


") ) good job you're doing there
) good job you're doing there 
 . I had to pass up about 3-4 houses with incredible garages (4+ car) because "the house was ugly".