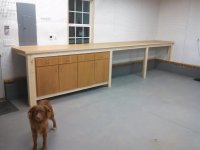
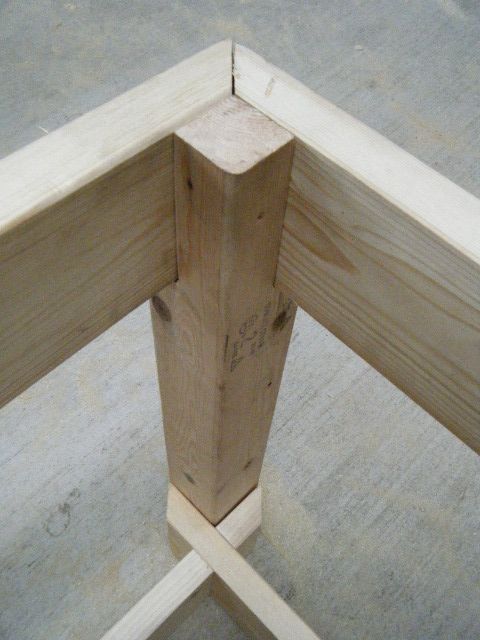
To avoid these ads, REGISTER NOW!

First Workbench build

classicJackets

Well-known member
Joined
Sep 26, 2014
Messages
448
Location
SE Michigan
Well, after acquiring a solid core door yesterday from my favorite dumpster on campus, I decided it is finally time to make a workbench. I have a few of the nice chemical resistant tops, but whatever bench I build now will likely stay where it is even after I graduate. I want to have the 2 chemical tops for later, so this door gives me the alternative.

I plan on going with 2x4 construction. Although it may not ever see much heavy pounding, it will spend some time outside, and generally take some disrespect from my 30+ room mates... :scared:
The door is about 35.5" x 82.5". I plan on having a 3-4" overhang all around, as the table won't be up against a wall. Legs will be doubled up 2x4s for extra strength. I plan on having a 2x4 crosspiece halfway down the length of the top frame as well as bracing along the sides.

Few questions - is 27.5" wide on the base too skinny to be very stable?

What's the standard recommendation as far as leaving door surface as it is or sanding down and staining/ anything else?

Recommendations for fixing the top to the frame - Drill in from underneath, glue on the bottom of the door, etc...?

Since the rest of the build will be in the name of overkill, I'm thinking of just dong 3" screws on the whole thing. For/against that?

This will be my first real venture into woodworking so I'm curious to see where I'll get hung up (as i'm relatively sure it'll happen). I'm here to learn and I'm excited to get to do my first real project and share it here.

Here's the door:

:rocker:

Doug
 
To avoid these ads, REGISTER NOW!

bamf

Active member
Joined
Mar 5, 2015
Messages
35
Location
Wake Forest, NC
I just got done building a "door" workbench. I ripped them to 30" and put the ripped side to the wall, but since yours is freestanding I would just rip enough off the hinge side to clean things up and use it as is. If you rip too much you'll get into the OSB core.

As to your stability question, technically the workbench height and the friction of the floor where it will be used would need to be known to determine if it will tip or slide. But 27.5 inches wide will probably be okay unless you go real high.
 

Attachments

  • IMG_20150314_202024_796.jpg
    IMG_20150314_202024_796.jpg
    139.4 KB · Views: 124
OP
C

classicJackets

Well-known member
Joined
Sep 26, 2014
Messages
448
Location
SE Michigan
Don't have the capability to rip, will probably just sand down the sides as they dont need to be perfect. Working with a circular saw and a miter saw and drills, haha. Just going about elbow height (I'm 5'11") so I guess it should be fine. On concrete when used outside and Laminate tile inside. Thanks for the input!
 

Scottwi

Well-known member
Joined
Jul 25, 2012
Messages
154
Location
Cedarburg, Wisconsin
I didn't cut the edge I added trim and a top that I can easily flip to have a dirty and clean side
81fcd4781ec7428f56a43b3bc8b4faa2.jpg


Sent from my iPhone using Tapatalk
 

aggierailroad

Well-known member
Joined
Jan 8, 2012
Messages
581
Location
Houston, TX
If you've got a circular saw, you can rip!

I fixed the top to mine using pocket screws. Another option is buy a packet of figure 8 fasteners, or run some stringers on edge, screw through them. Gravity works with you here, you don't need a ton of screws.
 

Scottwi

Well-known member
Joined
Jul 25, 2012
Messages
154
Location
Cedarburg, Wisconsin
My base is 30" wide and I only have single 2x4s. I used scrap 2x4s screwed to the door bottom to keep it inside the frame and let gravity hold it in. Mine is a fire door so it takes 2 guys to lift it.

I have had engine blocks on it and 3-4 guys sitting on it and never had an issue.


Sent from my iPhone using Tapatalk
 
To avoid these ads, REGISTER NOW!

bamf

Active member
Joined
Mar 5, 2015
Messages
35
Location
Wake Forest, NC
Yea I used a circular saw and a straight edge to rip mine. Sometimes I actually think I can rip better like that then with a table saw.
 

jimgood

Well-known member
Joined
Aug 4, 2014
Messages
2,394
Location
Marshall, VA
Make sure the frame underneath the top leaves 4" - 6" of the edge of the top exposed so you can clamp stuff to it easily. I would use 2" x 6" for the frame. Leave the corners open and fit the legs into them flush on the outside. Then you can use small triangles of plywood as gussets. Here's a basic drawing:

Red would be the legs. Green would be the plywood gussets.
View media item 49659
You could also (or alternatively) use a corner brace like this: http://www.woodcraft.com/Product/27A31/Hafele-Corner-Brace-Table-Leg.aspx

I would screw the top on from underneath with "L" brackets and short screws.
 
OP
C

classicJackets

Well-known member
Joined
Sep 26, 2014
Messages
448
Location
SE Michigan
I was happy with that, Until I read through The Gearhead Garage and realized what could be, haha.
I'd rather do it the more complex, stronger way now, even it it's overkill. That way, when I can do a lighter table, it'll seem easier!
If you haven't seen it..

DSCF1387_zpsadb5bef2.jpg

DSCF1391_zpse238ead8.jpg


Not sure I'll do the base this way, but man does that look nice.
IMG-20141217-00022_zps188ec9b8.jpg


We'll see. Still have some deciding to do :willy_nil
 
OP
C

classicJackets

Well-known member
Joined
Sep 26, 2014
Messages
448
Location
SE Michigan
Started and finished it up today. Couldn't have done it without some help from some friends, thankful to have them. Table turned out incredibly sturdy and should last a while, especially after I seal the 2x4's and 4x4's.

Here are a few pics of the end result, with cross braces on and all.


To avoid these ads, REGISTER NOW!
Top Bottom