gahrajmahal
Well-known member
Another "How To" from the old Gahraj. It would be a good companion piece to a thread many years ago Cane Rocker Repair . We do have many wicker furniture pieces at our home. This post is regarding our dining room chairs. We purchased these from a long ago Cincinnati manufacturer of wicker and cane furniture. They were prototypes and did not have any finish or seat bottoms. I made those myself from 3/4" plywood then sprayed the chairs with clear lacquer from a proper automotive spray gun. They have held up great over the years with exception of a few broken strands.
The missus was excited that I may actually "get off my ****" and fix our chairs after finally ordering replacement Reed from H.H. Perkins an online resource for wicker and cane supplies. Initially I went to the local Rockler and Woodworkers Supply, but neither of those places stock those supplies anymore. I purchased a bundle of #5 Round Reed and pro-crastinated for a while. Notice the emphasis on "Pro".
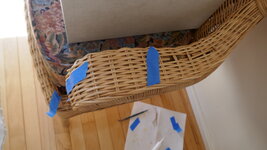
She "helped" by visually going over all the chairs and marking with blue painters tape where the missing wicker strips were. This was actually very helpful, and I recommend that you engage someone to handle that task too!
The repair process is actually quite simple and requires few tools and some carpenter glue. I used Titebond II Premium. I also used a "glue hypodermic" I purchased many years ago at Rockler to accurately squirt the glue under the cross reeds. Have a look...
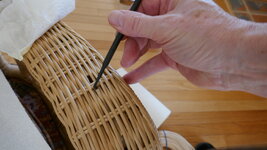
You need some kind of a small hooked tool. I used an o-ring remover, but a crochet hook, dental pick or bent paper clip may work good too. Pull up on the short fragment and attempt to snap it off under the double cross reeds.
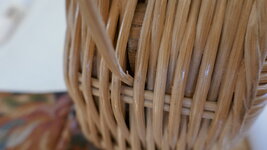
Our chairs are almost 30 years old so the wicker is brittle and snapped off easy on it's own. On the few that were bendy and stubborn, I just used the tip of a utility knife to score the reed just at the double cross reed.

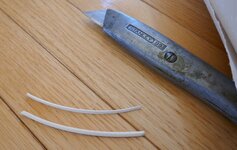
The new Reed, and the tools minus the utility knife (box cutter)
The missus was excited that I may actually "get off my ****" and fix our chairs after finally ordering replacement Reed from H.H. Perkins an online resource for wicker and cane supplies. Initially I went to the local Rockler and Woodworkers Supply, but neither of those places stock those supplies anymore. I purchased a bundle of #5 Round Reed and pro-crastinated for a while. Notice the emphasis on "Pro".
She "helped" by visually going over all the chairs and marking with blue painters tape where the missing wicker strips were. This was actually very helpful, and I recommend that you engage someone to handle that task too!
The repair process is actually quite simple and requires few tools and some carpenter glue. I used Titebond II Premium. I also used a "glue hypodermic" I purchased many years ago at Rockler to accurately squirt the glue under the cross reeds. Have a look...
You need some kind of a small hooked tool. I used an o-ring remover, but a crochet hook, dental pick or bent paper clip may work good too. Pull up on the short fragment and attempt to snap it off under the double cross reeds.
Our chairs are almost 30 years old so the wicker is brittle and snapped off easy on it's own. On the few that were bendy and stubborn, I just used the tip of a utility knife to score the reed just at the double cross reed.
The new Reed, and the tools minus the utility knife (box cutter)