To avoid these ads, REGISTER NOW!

Flush mount fuel filler cap

MotoDave

Well-known member
Joined
Jul 1, 2009
Messages
505
Location
Ventura, CA
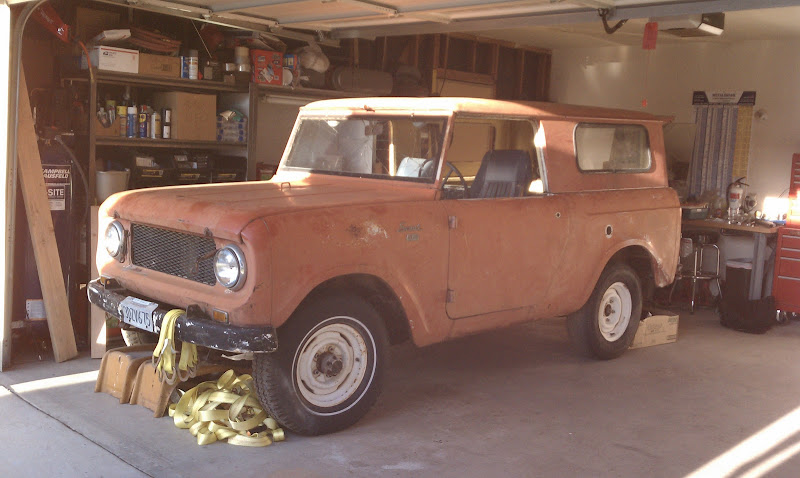
I've never really liked the look of the old school gas caps that came on my '62 Scout 80, they stand off of the body signifcantly. Plus mine are missing, and not trivial to find NOS. So a while ago I came across some sweet looking flush mount fuel filler caps, intended for homebuilt aircraft :)
http://www.aircraftspruce.com/pages/ap/fuel_caps_zacs/acstlockffc.php

Now, if i'm putting airplane parts on a crappy old truck, I better make them look good, right? The easy answer is to mount them on the face of the body, but I really wanted them flush. I had a big chunk of delrin left over from a project at work that came home with me, and a 5 gallon bucket of chips later I have a 2 piece die set:
2013-07-13%252014.03.31.jpg


I made another quick tool to center the hole saw on the existing fuel filler hole.
2013-07-14%252011.55.46.jpg

2013-07-14%252011.56.10.jpg


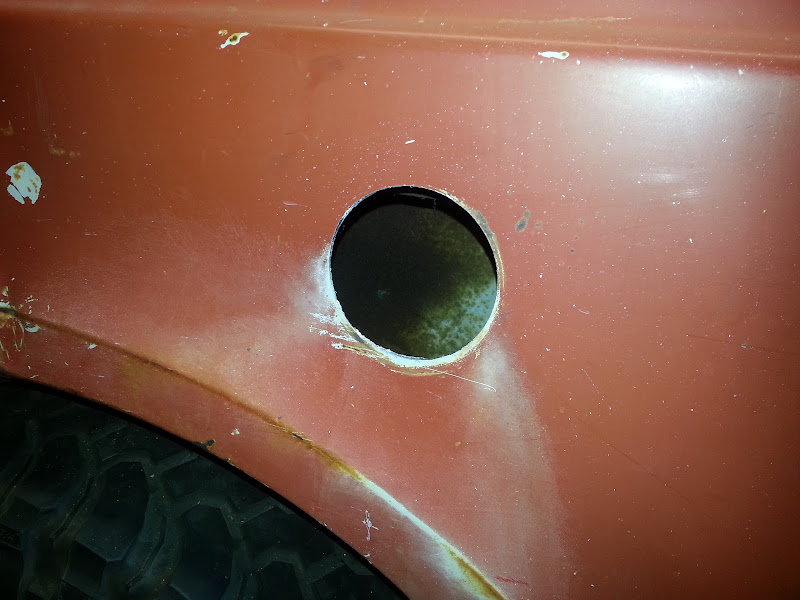
Slow and steady with the big wrist breaker drill, and we have a concerningly large hole in the side of the body
2013-07-14%252011.57.25.jpg


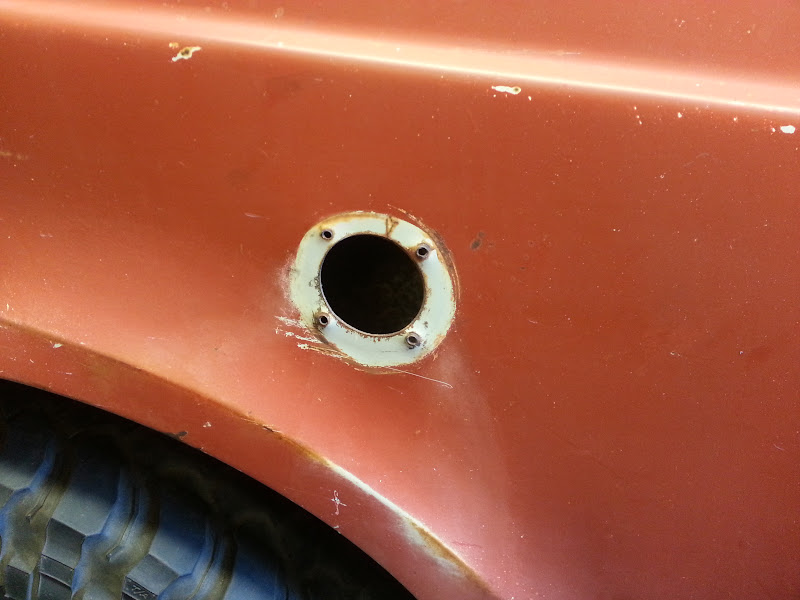
Using a 9/16 bolt to draw the dies together and my impact gun, the recess in the body is formed
2013-07-14%252012.06.56.jpg


Finished result came out better than I had hoped for using plastic tooling.
2013-07-14%252012.07.37.jpg


Anyways, it isn't much in terms of overall progress on the truck, but it was a successful weekend project that I'm very pleased with. I'm no expert at metal work, but its pretty satisfying when something like this goes to plan.
 
To avoid these ads, REGISTER NOW!

KerryH

Well-known member
Joined
Jun 23, 2013
Messages
113
Location
Ga
Wow, fantastic job! Keeping this page for future reference for sure!
 
OP
M

MotoDave

Well-known member
Joined
Jul 1, 2009
Messages
505
Location
Ventura, CA
Haha thanks for all the responses, I half expected to get told what all I was doing wrong. I've designed sheet metal stampings before for my day jobs, but never made the tooling myself.
 

astroracer

Well-known member
Joined
Jun 22, 2005
Messages
3,001
Location
Mid_Michigan
Looks like I need to pick up some delrin... I want to do the same thing to the van. I am relocating the fuel filler to just above the rear wheel well.
MVC015F-vi.jpg

MVC006F-vi.jpg

I was going to build a pocket and weld it on but this is MUCH cleaner!
Thanks for posting this!
Mark
 

Ed ke6bnl

Well-known member
Joined
Aug 1, 2005
Messages
495
Location
Agua Dulce, Calif.
I went this route but love what you did picked up a ford probe door.


I would have like to do what you did for my fuel fill on my Baja Bug rather then have it stick out but it is high and out of the way.
 
To avoid these ads, REGISTER NOW!

tarbellb

Well-known member
Joined
Apr 17, 2011
Messages
5,750
Location
Oregon
Looks great. I like your journalism style and thanks for posting the link to the cap retailer.

Now show us the truck! My quick guess- Chevy C10?
 
OP
M

MotoDave

Well-known member
Joined
Jul 1, 2009
Messages
505
Location
Ventura, CA
Looks great. I like your journalism style and thanks for posting the link to the cap retailer.

Now show us the truck! My quick guess- Chevy C10?

Just a bit off on the make :)
IMAG0108.jpg


Its a '62 IH Scout 80. I don't work fast enough for a build thread to be interesting, so I just post up little projects here and there. Full album is here if anyone's interested.
https://picasaweb.google.com/103006953150383895502/1962IHScout80?authuser=0&feat=directlink

Build specs (subject to change at any time, repeatedly, and for no good reason other than I feel like it)
- Chevy 350 V8 with TBI fuel injection
- NV4500 5 speed manual transmission
- Dana 300 Transfer case (eventually with 4:1 gearing)
- Dana 44 axles front and rear, Scout II width (4" wider than stock). ARB or E-locker front, Detroit rear. 4.56 gears. 35x12.5 tires.
- 3 link front suspension designed and built by me, using Early Bronco coils (or coil overs if I find the money)
- 56" chevy leaf springs in the rear (until I get bored and build a 4 link)
 
Last edited:

fred d

Well-known member
Joined
Dec 31, 2008
Messages
916
Location
Metro Houston Area
Ok
That looks fantastic

I have a 65 scout and need to know if you would be intrested in selling the tools since you are done with them?

I am the president of the local IH club and think that many members would love to have that setup. I think it would work on a ScoutII also
 
OP
M

MotoDave

Well-known member
Joined
Jul 1, 2009
Messages
505
Location
Ventura, CA
I've got some ideas I'm looking into as far as offering this as a semi-diy kit, so I'm not willing to give up the tool quite yet.
 

outsider347

Well-known member
Joined
Sep 27, 2011
Messages
97
Location
Orchard Park NY
Dave
What is the clearance that you allowed between the male & female parts of the die?

can you maybe show a sketch of the die set
or maybe the dimensions

I need to make a dimple in the floor of a Porsche I m restoring, but I have to do it without the hole in the center

Tks for the info
 

Stooge

Well-known member
Joined
Mar 24, 2013
Messages
3,533
Location
South Shore, MA
Thats pretty impressive, especially for a make it up as you go type job, makes me feel a little lazy for just burning in a Hagan latch door
2013-03-02_12-35-59_522_zpsa881e7ce.jpg
 
OP
M

MotoDave

Well-known member
Joined
Jul 1, 2009
Messages
505
Location
Ventura, CA
Dave
What is the clearance that you allowed between the male & female parts of the die?

can you maybe show a sketch of the die set
or maybe the dimensions

I need to make a dimple in the floor of a Porsche I m restoring, but I have to do it without the hole in the center

Tks for the info

Clearance between male and female should be the thickness of your sheet metal at minimum. The closer you get to line to line the more force it will take to draw the metal into the female die, but the more square your form will be. I'll measure the exact clearances tonight, I think I was shooting for ~.030" additional clearance sicne I wanted more of a gradual radius going into the form. I also took down the sharp edges on the male and female dies. For reference the scout has ~.040" thick sheet metal.

The idea for this isn't new, I saw it in a hot rod magazine a long time ago using plywood to make a male and female die for forming an irregular shaped recess for a door striker. You'll have to get creative if you're trying to form the dimple in place in existing floor boards without a through hole for a draw bolt. The more common method is to form a piece of sheet metal in a press, then weld it in like a patch panel. There is an excellent write up on this forum about patch panels.
 
OP
M

MotoDave

Well-known member
Joined
Jul 1, 2009
Messages
505
Location
Ventura, CA
What did you do on the backside for hooking up to the fuel hose?

Havent built that part yet :)

I'll make a mating flange that sandwiches the body with a rubber gasket inbetween. If I get motivated enough I'll make a swiveling hose barb type fitting that attaches to the flange, and would make the kit a fairly universal application. I like to use fuel rated hose that I get from a local industrial hose supply place, I think the proper size for scouts is 1.875" ID.
 

outsider347

Well-known member
Joined
Sep 27, 2011
Messages
97
Location
Orchard Park NY
Thanks Dave

I ll be the welding in patch panels with the dimple in the middle.

I ll have to eye-ball line it up when I press it, since no hole,

I tried to press some test panels...the dimple sorta worked OK, but the flat areas got really distorted ( spent 1 hr shrinking it back) But I think I had too much clearance (.125) between the dies.
Forgot to mention I m using 20 ga (.037) steel

I ll turn a smaller id female die tomorrow maybe .080 clearance & give it a try

Tks for your suggestions
 
OP
M

MotoDave

Well-known member
Joined
Jul 1, 2009
Messages
505
Location
Ventura, CA
Forming in a flat sheet is always going to distort the surrounding metal. Real tooling would have a spring loaded section that would hold the surrounding metal flat, then a center die would form the shape. Making your male and female die with a shoulder that closes on your sheet will help straighten out some of the wrinkles.

In my case it's a bit easier since I'm forming on a panel fixed to the truck, which has some shape to give it stiffness.

If you want to cheat you can see drill a hole, form the flange like I did, then fill in the hole with a patch. I have an easier time getting a flat patch to look good than straightening out a Pringles looking piece of sheet metal.
 

ChevyEFI

Well-known member
Joined
Sep 2, 2012
Messages
8,721
Location
Phoenix, AZ
How about instead of a spring-loaded section, using a form that's firmly bolted together to hold the surrounding metal flat (or "stock") while working the metal in the middle?

Nice work.
 

Jazz

Well-known member
Joined
Jan 12, 2010
Messages
2,762
Location
Newport News, VA
Just wondering how you plan to attach this? I'm planning on using one of these on a cafe' bike I'm building. Not sure which one yet. Maybe a gasket or silicon and then rivets? Since it's a gas tank the holes are blind but I could use a gasket and inserts. That might be my best bet. Thoughts?
 
OP
M

MotoDave

Well-known member
Joined
Jul 1, 2009
Messages
505
Location
Ventura, CA
Just wondering how you plan to attach this? I'm planning on using one of these on a cafe' bike I'm building. Not sure which one yet. Maybe a gasket or silicon and then rivets? Since it's a gas tank the holes are blind but I could use a gasket and inserts. That might be my best bet. Thoughts?

The flange is spot drilled from the backside for mounting screws. I'll have a flange on the inside of the body, either thick enough to thread the mounting screws into or with weld nuts on the back side. I'll use Flat head cap screws countersunk to be flush with the face of the flange.

If I were using it on a motorcycle tank I'd probably fabricate a mounting flange thick enough to have blind mounting holes, that would get welded into the tank recessed so that the cap was flush. Another option is just to have the cap mount on the surface, I just saw that Brian Fuller is using it on one of his bikes.

Note sure if the link copied correctly http://instagram.com/p/iJML1JLMCe/
 
To avoid these ads, REGISTER NOW!
Top Bottom