GarageSpider
Active member
- Joined
- Feb 3, 2014
- Messages
- 37
Was looking for clean look. I mostly only park cars in this garage, but the existing lighting was ****.
Went with Lithonia 4ft fixture at Home Depot. http://www.homedepot.com/p/Lithonia...ent-Troffer-SP8-F-2-32-A12-120-GESB/100249370
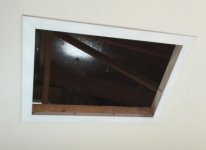
I have attic access above the ceiling, so I framed up with 2x4s, laying the long 2x4s down so the fixtures can clamp to it. In retrospect, 2x2s would be OK for the 4ft pieces and 2x4 to span the joists. My joists are 2x4s 24" on center.
The ceiling drywall is attached to metal furring, which is 1/2" thick.


The fixture is somewhat flimsy when handling it, but once installed, it's ok. I clamped down on the 4 clamping brackets in addition I had screwed the ends of the troffer into my joist blocks. This was a mistake as I cut my 4ft 2x4s to 48 1/8, which allows for clearance to fit the fixture, but I end up pulling the fixture ends (and the bulb sockets) away from each other.
I went with the Hollywood LED Lighting 4ft Bulbs, HLCW420 (4300 Kelvin). They are pricey, but they are dimmable, have 93+ CRI and 115 lm/watt.
https://www.hollywoodlightsled.com/...2A51-E432-463D-8EF6-480B1398FCED?category=all
In rewiring the fixture, I have to remove the ballast and put mains power on the lamp sockets.

The bulbs actually need all pins tied to power, so I simply snipped a couple of 2" wires off the wire and stripped them about 1/2" and put them into the empty holes on the lamp sockets.
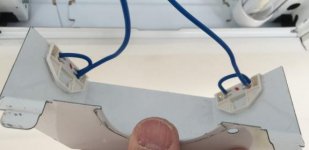
The bulbs are T8, but are rather large on the diameter, making it a bit difficult to install the bulbs. But they do fit.
Unfortunately, the bulb sockets are at 45 degree angles so the bulb cannot be installed facing down. They are 45 degrees from vertical, which is not ideal and I'm sure I'm losing light because of it. Without remaking the sheetmetal, I don't know any good way around it. I tried bending the sheetmetal, but it was damn near impossible to install the bulbs.

In the end, 2 of these in my 2 car garage add tons of light. The color of these bulbs are really ice, cool white, but not too blue. The dimmability of the bulbs are nice. The fact that they are made in Southern California about 10 miles from me is great, as they are repairable.
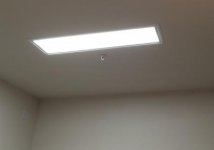
Went with Lithonia 4ft fixture at Home Depot. http://www.homedepot.com/p/Lithonia...ent-Troffer-SP8-F-2-32-A12-120-GESB/100249370
I have attic access above the ceiling, so I framed up with 2x4s, laying the long 2x4s down so the fixtures can clamp to it. In retrospect, 2x2s would be OK for the 4ft pieces and 2x4 to span the joists. My joists are 2x4s 24" on center.
The ceiling drywall is attached to metal furring, which is 1/2" thick.
The fixture is somewhat flimsy when handling it, but once installed, it's ok. I clamped down on the 4 clamping brackets in addition I had screwed the ends of the troffer into my joist blocks. This was a mistake as I cut my 4ft 2x4s to 48 1/8, which allows for clearance to fit the fixture, but I end up pulling the fixture ends (and the bulb sockets) away from each other.
I went with the Hollywood LED Lighting 4ft Bulbs, HLCW420 (4300 Kelvin). They are pricey, but they are dimmable, have 93+ CRI and 115 lm/watt.
https://www.hollywoodlightsled.com/...2A51-E432-463D-8EF6-480B1398FCED?category=all
In rewiring the fixture, I have to remove the ballast and put mains power on the lamp sockets.
The bulbs actually need all pins tied to power, so I simply snipped a couple of 2" wires off the wire and stripped them about 1/2" and put them into the empty holes on the lamp sockets.
The bulbs are T8, but are rather large on the diameter, making it a bit difficult to install the bulbs. But they do fit.
Unfortunately, the bulb sockets are at 45 degree angles so the bulb cannot be installed facing down. They are 45 degrees from vertical, which is not ideal and I'm sure I'm losing light because of it. Without remaking the sheetmetal, I don't know any good way around it. I tried bending the sheetmetal, but it was damn near impossible to install the bulbs.
In the end, 2 of these in my 2 car garage add tons of light. The color of these bulbs are really ice, cool white, but not too blue. The dimmability of the bulbs are nice. The fact that they are made in Southern California about 10 miles from me is great, as they are repairable.