To avoid these ads, REGISTER NOW!

For you (non-floor) tile experts

Rorin67

ALLIANCE MEMBER
Joined
Dec 16, 2008
Messages
133
Location
At the beach in SoCal
What plywood to use (and do I need backer-board):

Installing a bar-height countertop that will have a 10" overhand from its main support (think breakfast nook style counter-top, like in the kitchen pic below), and installing mosaic ceramic tile on top of it. The thickness of the counter cannot exceed 1-3/4", and the ceramic mosaic tile is already 3/8". I'm installing supports under the the 10" overhang.

Question is whether I use one layer of 3/4" plywood and one layer of 1/2" plywood and put the thinset directly onto the plywood?

This would give me 3/4" plywood + 1/2" plywood + 1/8" thinset + 3/8" tile = 1-3/4" thick

Or, do I use two layers of 1/2" plywood and one layer of 1/4" concrete backerboard?

This would give me 1/2" plywood + 1/2" plywood + 1/4 backerboard + 1/8" thinset + 3/8" tile = 1-3/4" thick

Or am I overthinking this too much?

The counter will be used mainly for leaning on and holding tasty beverages, no real work. Similar to the UPPER counter in this kitchen picture:

ceab43d59e04d3f304a799d7eab119dd--rounded-kitchen-peninsula-two-tiered-kitchen-island.jpg
 
Last edited:
To avoid these ads, REGISTER NOW!

unlvrebel

Active member
Joined
Sep 6, 2005
Messages
38
Location
Clearwater, FL
no need to use the concrete backerboard in my opinion.

Hmmm... I would disagree. In fact, I think the backerboard is of utmost importance... You need a substrate that bonds well with mortar. Plywood, not so much.

As to thickness, I'd think in terms of 3cm, or between 1" and 1 1/4". This is consistent with standard countertops. Also, what will you face the edges with? This might impact your desired thickness.

As to the makeup of the remaining ~3/4" (as backerboard is typically 1/4" plus tile and mortar)... I don't think that it matters. For reference, I built an island tile countertop with 1/2" ply and 1/4" backer. Was more than stable for the needs.
 

Todd.Brock

Well-known member
Joined
Jul 15, 2008
Messages
4,250
Location
Cincinnati
I would strongly consider steel. Not sure wood will support tile. J/k


My thought is that one sheet of 3/4 or 2 sheets of 1/2" plywood - actual plywood - would be sufficient with 1/4" backer. Backer board isn't going to add much rigidity. Since it's a 10" overhang that is supported, some flavor of 3/4 or 1/2" will be plenty in IMO...
 
OP
R

Rorin67

ALLIANCE MEMBER
Joined
Dec 16, 2008
Messages
133
Location
At the beach in SoCal
I'll face the edges with a chair-rail type of ceramic tile, which is 1 3/4" tall. That's why the thickness of the countertop cannot exceed 1 3/4".

I understand that for home interior flooring, two layers of 3/4" plywood is encouraged for a tile floor. So considering your build above I think two layers of 1/2" plywood plus a 1/4" backerboard would be plenty enough here.
 

Todd.Brock

Well-known member
Joined
Jul 15, 2008
Messages
4,250
Location
Cincinnati
I guess you could stand on it and test it out, :). I bought plywood this week at HD. I needed 7/16. I could find 15/32 or 19/32 ( I think) Just under or just over a half dammit... You may need to factor those sizes into your equation..
 

6768rogues

Banned
Joined
Nov 28, 2007
Messages
4,524
Location
Western NY
I would use one layer of 3/4 inch plywood with a layer of 1/2 inch Hardy tile backer board. Thinset over plywood is not the best as the plywood ***** too much moisture out of the thinset and it has a weak bond. Also, any small crack in the grout will let moisture get at the wood. The wood will swell and pop tiles loose. Then things start to rot. None of that is the case with cementitious backer.
 

ddawg16

Well-known member
Joined
Jul 11, 2008
Messages
21,005
Location
S. California
Me?

3/4" plywood.
1/2" HardiBoard
Thin set
Tile.

Make sure the plywood is attached to the bar securely. I'd use those Thorx screws...#10 min. Make sure you have at least 1" going into the wood below the plywood. It needs to be wood to wood.

Attach the HardiBacker using the right screws.

Take it from there.

If this was going to be on the floor, you would be putting thinset between the Hardibacker and floor. This just gives the hardibacker a more secure surface. It won't be an issue on your bar.
 

TexasShooter

Well-known member
Joined
Feb 16, 2017
Messages
98
Location
East Texas
I would always go the route to use Hardi board, this gives your thinset mortar the proper product to adhere to. Also know that 1/2 Hardi is not truly a 1/2", but 7/16.
 
To avoid these ads, REGISTER NOW!

Boomer343

Well-known member
Joined
Mar 19, 2012
Messages
519
I use mapei granirapid over exterior grade fir plywood but you don't want to go there.

Why even use thin set mortar? Use a tube of clear silicone and no more nails. The no more nails is for quick grab the silicone is for long term hold. Just run a bead of silicon around the perimeter and a couple beads of the no more nails in the middle. You want very little gap between pieces. I have laid 24 x 24 rectified marble floor tile this way with tight grout lines and it has been down since 2009 with no issues.

I also use epoxy grout exclusively on all my tile work.
 

hefnerconstructionlc

Well-known member
Joined
Nov 1, 2016
Messages
665
Location
Kansas
I would suggest something like a half-inch plywood Then set your backer board in a modified thin set mud bed using a quarter inch trowel. Then screw the backer board down. The modified thin set mud bed helps to bond the two pieces together and it makes it much more rigid. Then tape your seams with an alkali resistant mesh tape on the backer board. Coat the mesh tape/backer board joints with a thin coat of modified thin set. Allow that to set up Quench the backer board with your wet sponge and go about setting your tiles in a bed of modified thin set. Quenching the backer board with water helps to increase the bond of the tile to the backer board and keeps the backer board from wicking the moisture out of the thin set. This ensures proper hydration and bond strength of the thin set.
 

risc

Well-known member
Joined
Dec 21, 2012
Messages
220
You're local plywood supplier should be able to get you 1" plywood. I tend to overbuild so I might dado in some slots for some 1/2" bar. Someone, it eventually going to lean on the bar pretty hard and 10" is a pretty good lever.

Also, could you run the top tile over the edge tile? That would give you an extra 1/2" to work with.
 
OP
R

Rorin67

ALLIANCE MEMBER
Joined
Dec 16, 2008
Messages
133
Location
At the beach in SoCal
This is all great - thanks all! Lots to consider. :rocker:

BTW - I can't run the top tile over the edge tile per the design of the top tile - just wouldn't work. Thanks for the suggestion though. :thumbup:
 

rayra

Well-known member
Joined
Dec 1, 2014
Messages
4,724
Location
Escaped from Los Angeles
3/4" ply, 1/2" cement backer board, glued and screwed together. You want to bond the tile to the cementitious board, not plywood. And moisture in the plywood will make it move and crack your tile job. Likewise, you need to make the plywood as rigid as possible for the overhang. First time someone puts their weight on it to stand up, you'll get a cracked grout line.


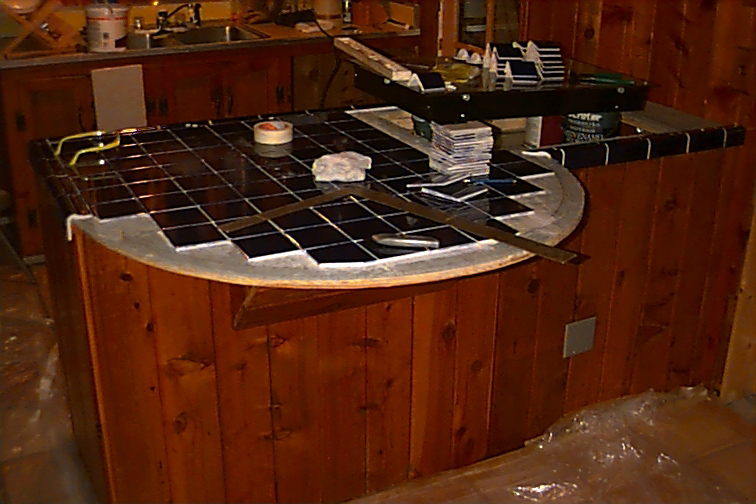
kitchen%20island%20tile%20begins%20010122.jpg

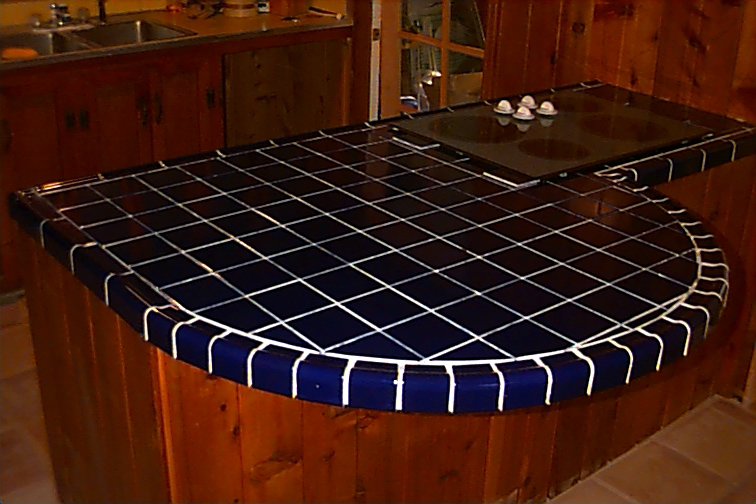
kitchen%20island%20tile%20done%202%20010204.jpg
 

Hot Rod Grampa

Well-known member
Joined
Jul 7, 2017
Messages
812
Location
Near Cooperstown New York
I just demoed a tile bath counter done in the 90's. PO or contractor used thinset to glue the tile down to the 70's vintage olive green Formica. Not one tile gave up without a fight. Is it possible to use a sealer directly over the ply then thinset? I have used a latex sealer over green Sheetrock then tiling tub surrounds. Just a thought.
 
OP
R

Rorin67

ALLIANCE MEMBER
Joined
Dec 16, 2008
Messages
133
Location
At the beach in SoCal
Thanks again all. I decided to go with 3/4" ply and 1/2" cement backer board (actually .42").

To bond them together, I'll use a layer of thinset (1/4" trowel) then backerboard screws. Then more thinset and lay the mosaic tiles. I'll then use construction adhesive to adhere the chair rail edging. Easier said than done, but I think this is the ticket.

Thanks all! :)
 
Last edited:
To avoid these ads, REGISTER NOW!
Top Bottom