To avoid these ads, REGISTER NOW!

Found a Jack

ZRX61

Well-known member
Joined
Aug 15, 2006
Messages
28,716
Location
Solar Blight Valley, SoCal
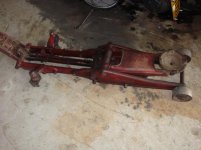
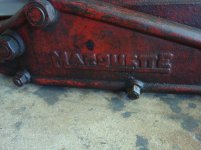
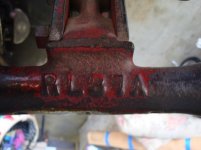
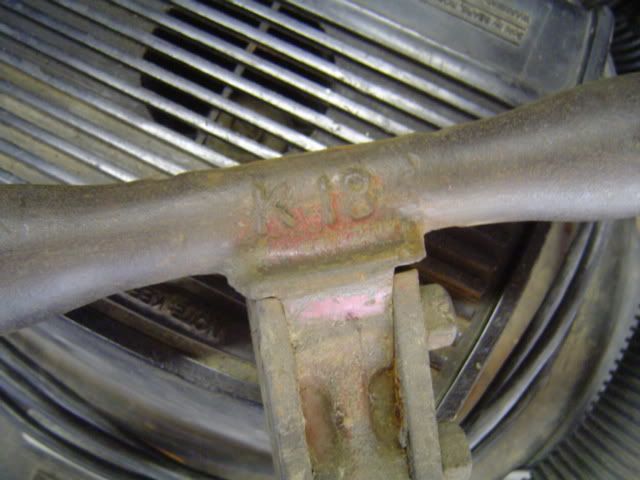
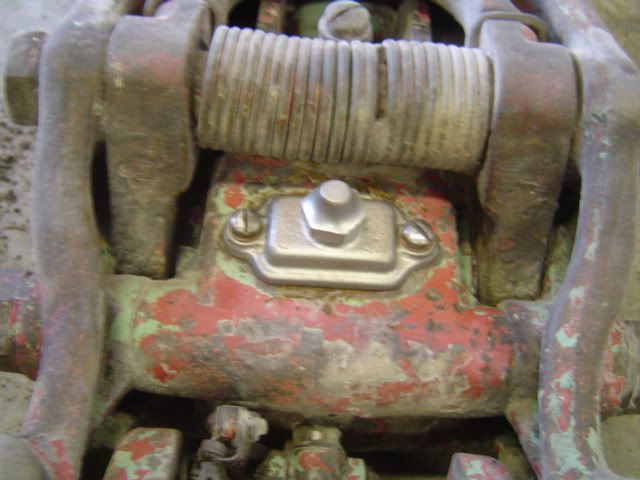
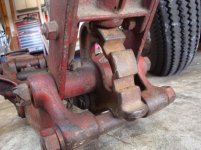
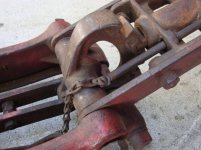
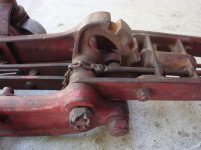
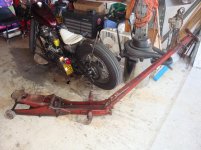
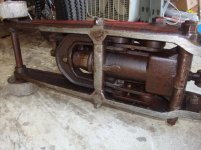
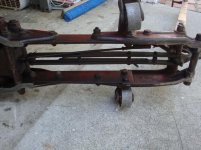
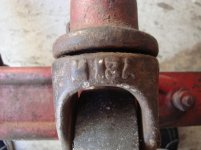
Found a Jack. Now with ongoing resto pics...

Now with ongoing resto pics :)


2-18-10026.jpg


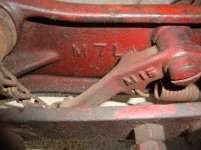
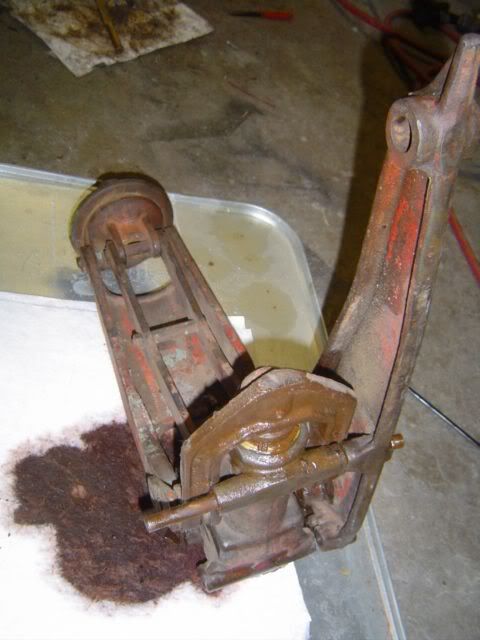
So, can anyone tell me anything about it?
 
Last edited:
To avoid these ads, REGISTER NOW!

Hiball

Well-known member
Joined
Apr 30, 2009
Messages
14,026
Location
Missery
Judging by the frame only im guessing "Walker" and by the looks of it a Rust nightmare.
 

Hiball

Well-known member
Joined
Apr 30, 2009
Messages
14,026
Location
Missery
I'm in the aircraft resto biz, piece of cake to bring that jack back from the dead :)

What can you tell me about Walker?

The Short version: They started making Mechanical jacks in the early 1900's and somewhere in the 30's they introduced there first Hydraulic version, Over the years they dominated the hydraulic field, inventing the first "Quick Lift" technology dating back to the 40's. They sold out to Lincoln Lube in the 80's and then Lincoln sold the hydraulic line to Hein Werner in 1994 and HW in turn totally canned 60 years of there own heritage to soley market Walkers design. The New HW jacks still utilize Walkers design and previous model numbers with little changes over the last 75 years which include moving the resevoir plug and Tank nut style.
 

Hiball

Well-known member
Joined
Apr 30, 2009
Messages
14,026
Location
Missery
As you can see its a marquette brand Jack. Kits are still available and i believe there is another GJ member here that recently picked up a similar jack. That jack is not to be confused with the Import Marquette line that marketed in the 90's. Your jack is much older and i dont belive it was made for many years, As far as that goes ive never worked on one so im clueless on its inner workings etc. The only kit i have available includes models K, KF and M and they are all 2 ton jacks.
 
Last edited:
OP
Z

ZRX61

Well-known member
Joined
Aug 15, 2006
Messages
28,716
Location
Solar Blight Valley, SoCal
The one issue I've discovered so far (apart from the fact it doesn't pump up) is that the handle will only move upwards about 30degree from horizontal.

The end of the release lever on the arm is also broken off so I'll need to fabricate a new. I'll ****** about with it this weekend & see where i get. :)

Thanks for the info.
 

deathbound

Well-known member
Joined
Feb 6, 2010
Messages
280
Location
Long Beach, California Uber Alles
Hiball was referring to my jack, here's pics...4th pic is on the handle-maybe a model# & the 5th pic is at the base of the handle. Great old jack. Check my thread for details.
 

Attachments

  • DSC01824.jpg
    DSC01824.jpg
    58.8 KB · Views: 145
  • DSC01826.jpg
    DSC01826.jpg
    69.3 KB · Views: 123
  • DSC01827.jpg
    DSC01827.jpg
    61.9 KB · Views: 134
  • DSC01828.jpg
    DSC01828.jpg
    43.1 KB · Views: 120
  • DSC01829.jpg
    DSC01829.jpg
    41.7 KB · Views: 108
OP
Z

ZRX61

Well-known member
Joined
Aug 15, 2006
Messages
28,716
Location
Solar Blight Valley, SoCal
Hiball was referring to my jack, here's pics...4th pic is on the handle-maybe a model# & the 5th pic is at the base of the handle. Great old jack. Check my thread for details.


Can I get a pic of the release lever it as mine is broken off where it passes through the flat part of the handle? I need to fabricate a new one. thanks :)
 
OP
Z

ZRX61

Well-known member
Joined
Aug 15, 2006
Messages
28,716
Location
Solar Blight Valley, SoCal
Does yours have any #'s on the handle or base?
Dagnabbit, that's what I forgot to look for, brb. :thumbup:

OK, it has *K 18* on the handle, nothing visible on the base
Project1002.jpg


Project1004.jpg


..but I haven't got it moving yet where I can see all of it. It's still locked up. The handle will raise enough to move the plunger doohicky in & out about 1.5in, but I can tell there's no pressure in there to lift the arm etc. Then it hits something *solid* internally.

On the upside, the rear caster that was locked solid now spins freely... so I do have progress of sorts :)

Next step is remove the handle so I can get the rest of it up on the bench for disassembley/investigation
 
Last edited:
OP
Z

ZRX61

Well-known member
Joined
Aug 15, 2006
Messages
28,716
Location
Solar Blight Valley, SoCal
Removed a cover & found where i assume the hydraulic oil goes.. except there's ****** all in there...
Project2002.jpg


So while I had the cover off I cleaned it up a tad... I think the little *** on the top is a breather?
Project2004.jpg


& the handle where the K18 is...
Project2005.jpg
 
OP
Z

ZRX61

Well-known member
Joined
Aug 15, 2006
Messages
28,716
Location
Solar Blight Valley, SoCal
Managed to seperate the handle & then just about gave myself a hernia carrying it 70ft & getting it into the blast cabinet. Loaded the cabinet up with plastic media. The fine white kind, not the usual "mostly white with colored speckles" coarse plastic.

Project3001.jpg


Project3002.jpg


Project3004.jpg


Project3006.jpg


Project3005.jpg


& found another number (K7) on the bracket the arm bolts to:
Project3008.jpg
 
Last edited:
To avoid these ads, REGISTER NOW!
OP
Z

ZRX61

Well-known member
Joined
Aug 15, 2006
Messages
28,716
Location
Solar Blight Valley, SoCal
More progress :)
Managed to free it up & get the arm all the way up.... however that was by manually lifting it, it won't stay there without the piece of wood wedged in there.

Project4003.jpg


Project4002.jpg


Next step was to knock the side plates off but I need a 1 -1/4in socket so this means...

*fanfare*

A trip to the toy, er, tool store! YAY!
 

deathbound

Well-known member
Joined
Feb 6, 2010
Messages
280
Location
Long Beach, California Uber Alles
Hey ZRX61....got some pics. 1st pic is the lever that lowers the jack-I think the one that is broken on your jack. 2nd pic (M17) is the smaller "T" handle used to adjust the height (angle) of the main handle (as seen in the next 3 pics), 6th pic is the part (M6 or M8) with the 3 indents that positions the main handle at 3 different heights/angles (flat, about 30 degrees, & about 45 degrees). The overall length with the handle laying flat is 7', the main body of the jack is 45" long, the handle is 39" long. More pics in next post.
 

Attachments

  • DSC01966.jpg
    DSC01966.jpg
    89.5 KB · Views: 57
  • DSC01955.jpg
    DSC01955.jpg
    111.2 KB · Views: 56
  • DSC01954.jpg
    DSC01954.jpg
    101.8 KB · Views: 58
  • DSC01953.jpg
    DSC01953.jpg
    95 KB · Views: 63
  • DSC01950.jpg
    DSC01950.jpg
    138.3 KB · Views: 68
  • DSC01945.jpg
    DSC01945.jpg
    84.5 KB · Views: 77

deathbound

Well-known member
Joined
Feb 6, 2010
Messages
280
Location
Long Beach, California Uber Alles
More pics.....1st pic shows right inside of frame (M7R), 2nd pics shows left inside of frame (M7L) with (M15) which is the pivot part that the lever used to lower the jack is connected to-R & L are pretty self explanatory, 3rd pic shows 1 of the swivel casters (M18A) both have the same#, 4th pic shows the underside of the frame with the rods that raise & lower the jack, 5th pic shows underside of the main body of the jack, 6th pic shows full view of the jack, 7th pic shows the jack folded. Hope this isn't confusing. Good luck with your jack, it's looking better already.
 

Attachments

  • DSC01967.jpg
    DSC01967.jpg
    113.9 KB · Views: 63
  • DSC01960.jpg
    DSC01960.jpg
    119.7 KB · Views: 44
  • DSC01959.jpg
    DSC01959.jpg
    112.6 KB · Views: 35
  • DSC01965.jpg
    DSC01965.jpg
    78.2 KB · Views: 34
  • DSC01958.jpg
    DSC01958.jpg
    125.3 KB · Views: 34
  • DSC01957.jpg
    DSC01957.jpg
    107.5 KB · Views: 34
  • DSC01969.jpg
    DSC01969.jpg
    102.4 KB · Views: 56
OP
Z

ZRX61

Well-known member
Joined
Aug 15, 2006
Messages
28,716
Location
Solar Blight Valley, SoCal
Perfect! Now I know what kind of handle I need to weld onto the remaining piece of rod for the release :)
Looks to me like the ram, levers etc on the actual lifting part on yours is the same as mine.

Managed to get the 4x 1-1/4 in nuts off. In the morning I'll take off the other smaller nuts, front wheels etc & attempt to seperate the side plates from the ram.
 

deathbound

Well-known member
Joined
Feb 6, 2010
Messages
280
Location
Long Beach, California Uber Alles
Cool, keep the pics coming. Anxious to see how it turns out. I wonder if yours is some sort of "K" model & mine is an "M" model????????? Mine has the same filler cap as yours, forgot to snap a pic though.
 
OP
Z

ZRX61

Well-known member
Joined
Aug 15, 2006
Messages
28,716
Location
Solar Blight Valley, SoCal
It's fighting me this morning. Managed to get one of the 3/4in pins out but the other isn't moving. Also managed to get the front wheel spindle about 1/3 of the way out. Time to break out the acetone/ATF mix and/or the *blue wrench* ;)

Also filled the rezzy with ATF last night to see if I could get any pressure, no dice.

Anywho, coffee break over, back to the task... :)
 
Last edited:
OP
Z

ZRX61

Well-known member
Joined
Aug 15, 2006
Messages
28,716
Location
Solar Blight Valley, SoCal
I think I'm done for today, going to take the Kaw 11 out for a bit. Managed to get one side plate off & found another number:

Project5005.jpg


Going to leave it alone for a while while the penetrant does it's thing. Got the front spindle out tho. :)

Project5001.jpg


I see some beadblasting in my future.....
Project5003.jpg


Right now I'm thinking paint it while apart & have the hardware plated with Cad 1.
 
Last edited:
OP
Z

ZRX61

Well-known member
Joined
Aug 15, 2006
Messages
28,716
Location
Solar Blight Valley, SoCal
Well the planned ride over to a local bar to look at some boobies didn't pan out as it's now absolutely ******* down.. So I spent another 2 hours in the garage working on the jack. Right now the only hold up is seperating the other side plate from the main gubbins. It's seized on this one stud:

Project5a002.jpg


Stuff....
Project5a004.jpg


Found yet another number..

Project5a007.jpg


The mess...

Project5a008.jpg


Bluergh..

Project5a005.jpg


Once I get the side plate seperated I can get this bit disassembled & in the cabinet..

Project5a003.jpg
 
OP
Z

ZRX61

Well-known member
Joined
Aug 15, 2006
Messages
28,716
Location
Solar Blight Valley, SoCal
Monday morning success! I got the other side plate seperated are resorting to my largest *inertial adjustment device*.. (the sledgehammer) :)

Project5b001.jpg


Now I can get the rest of the gubbins apart, cleaned up some more & maybe even start painting today. Hope I can also get the ram disassembled today.
 
OP
Z

ZRX61

Well-known member
Joined
Aug 15, 2006
Messages
28,716
Location
Solar Blight Valley, SoCal
More progress.
project5c002.jpg


This is where I'm at right now:
project5c004.jpg


All the gack is off the parts & the next stage is a bit of bead blasting on some parts & aluminum oxide blasting on a couple of other bits.
 

GDA

Well-known member
Joined
Nov 19, 2006
Messages
935
Location
Dallas, Texas
Great thread! Us guys can learn alot from just watching the disassembly and clean up. That's gonna be one cool jack once you get it rebuilt and restored.

Q - do you know if that deep red is the original factory color? What's needed for the hydraulics rebuild?
 

Even 11

Well-known member
Joined
Dec 7, 2009
Messages
1,322
Location
Colorado
Very cool thread!! Where does one find a jack anyway? Looks like it was in a riverbed from the pic!

-Dane
 
OP
Z

ZRX61

Well-known member
Joined
Aug 15, 2006
Messages
28,716
Location
Solar Blight Valley, SoCal
Slight set back. Got the ram apart today, it's toast :(

So options are:
1: Paint it red, leave the handle off & hang it on the garage wall as art.

2: Have the extremely pitted ram welded up & reground etc...

3: Find another ram

4: Make another ram.

I'll have pics of the damage later tomorrow.
 

Hiball

Well-known member
Joined
Apr 30, 2009
Messages
14,026
Location
Missery
Slight set back. Got the ram apart today, it's toast :(

So options are:
1: Paint it red, leave the handle off & hang it on the garage wall as art.

2: Have the extremely pitted ram welded up & reground etc...

3: Find another ram

4: Make another ram.

I'll have pics of the damage later tomorrow.

Dont be dissapointed show me where the damage is, It may not be as bad as you think.
 

Elroy

Banned
Joined
Oct 15, 2005
Messages
3,467
Location
kentucky
Slight set back. Got the ram apart today, it's toast :(

So options are:

4: Make another ram.

I'll have pics of the damage later tomorrow.

Isn't this great fun.

Elroy would say you'll play hell finding a replacement ram so have one made if the damage is in the high pressure zone. When it's all said and done you'll be glad to have a working jack. Elroy burnt a good 50 hours plus on the Hein-Werner OS.

Want to take a bet on how long this rebuild takes???

Keep after it. :beer:
 
To avoid these ads, REGISTER NOW!
Top Bottom