
You are using an out of date browser. It may not display this or other websites correctly.
You should upgrade or use an alternative browser.
You should upgrade or use an alternative browser.
Between 485 & 705 SQ/FT From a "double" to a DOUBLE
- Thread starter Purist
- Start date
Workspaces between 485 and 705 squarefeet.


10/3/20
We got some heavy rain and found a very small leak in the foundation. I got to work trying to address it from the outside, with Drylock and adjusting the pitch of the garden:


Bathroom vanity arrived:

Oh and since I had barely used any of the Drylock gallon I purchased, I went to town in the basement and applied more Drylock wherever I saw the reinforcement bars:


We got some heavy rain and found a very small leak in the foundation. I got to work trying to address it from the outside, with Drylock and adjusting the pitch of the garden:
Bathroom vanity arrived:
Oh and since I had barely used any of the Drylock gallon I purchased, I went to town in the basement and applied more Drylock wherever I saw the reinforcement bars:


10/15/20
Of course my "fix" outside didn't address the leak, so we had to call in the experts.


Not my house, but this is basically what the fix consisted of. Using dimple mat to keep any moisture away from the framing/insulation and to direct it downwards, allowing it to drain under the slab. Luckily it's a VERY small leak, so apparently this is a very common fix for this type of issue.

Of course my "fix" outside didn't address the leak, so we had to call in the experts.
Not my house, but this is basically what the fix consisted of. Using dimple mat to keep any moisture away from the framing/insulation and to direct it downwards, allowing it to drain under the slab. Luckily it's a VERY small leak, so apparently this is a very common fix for this type of issue.


And now for one other thing that did happen recently (mind you, I'm going to copy and paste from my other thread because it's Friday and I'm feeling lazy and the weather ***** right now and it's just so much easier to do it that way).

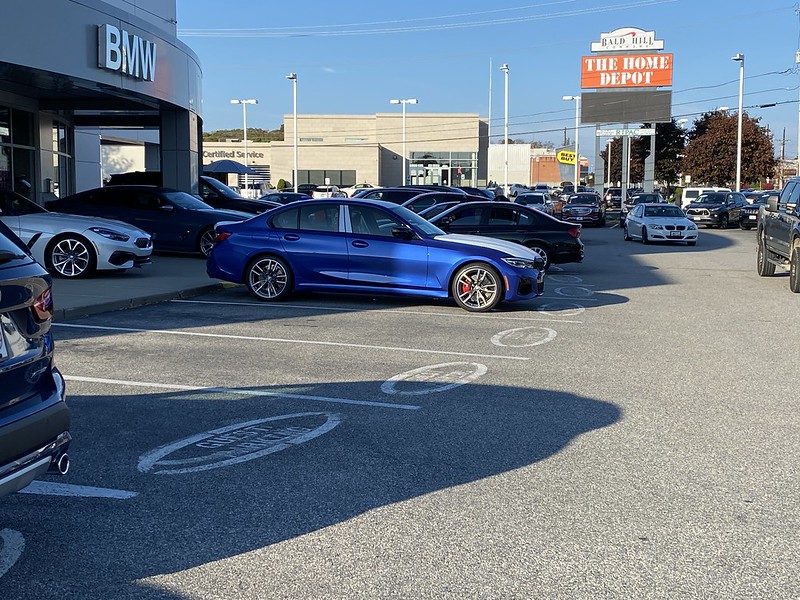
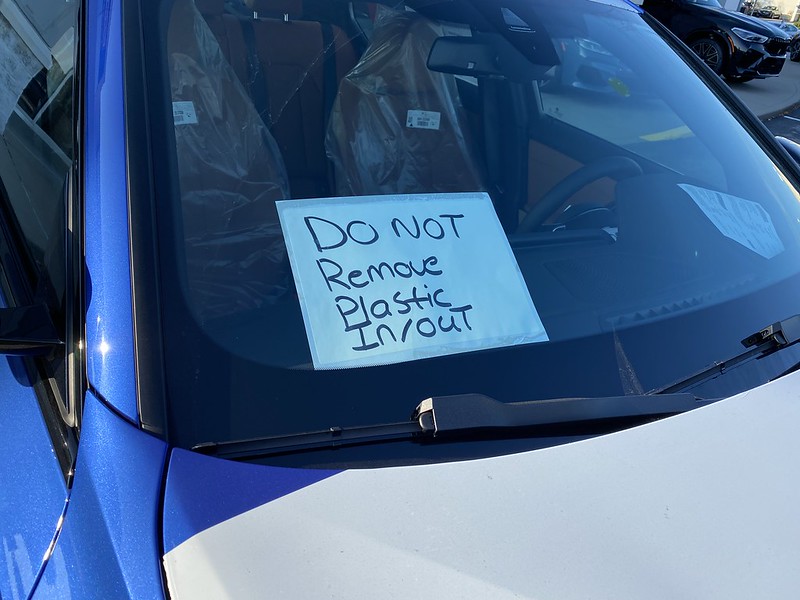
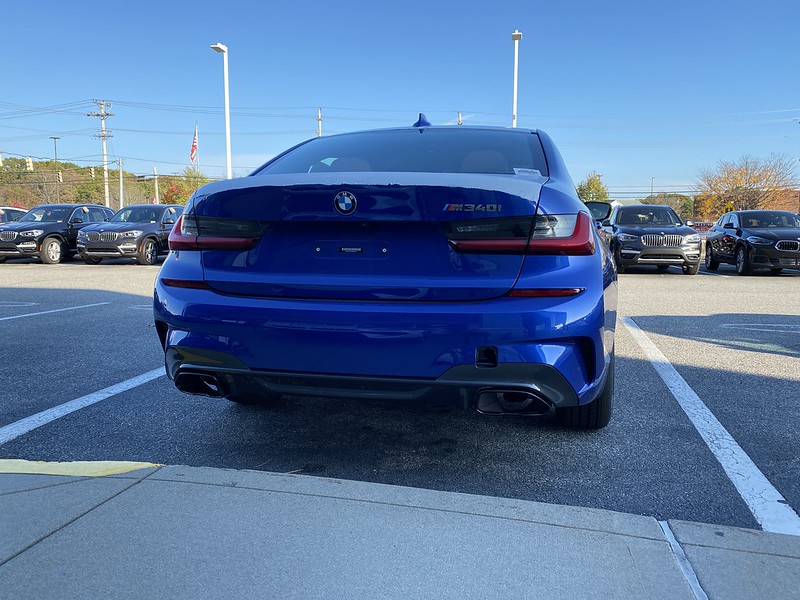
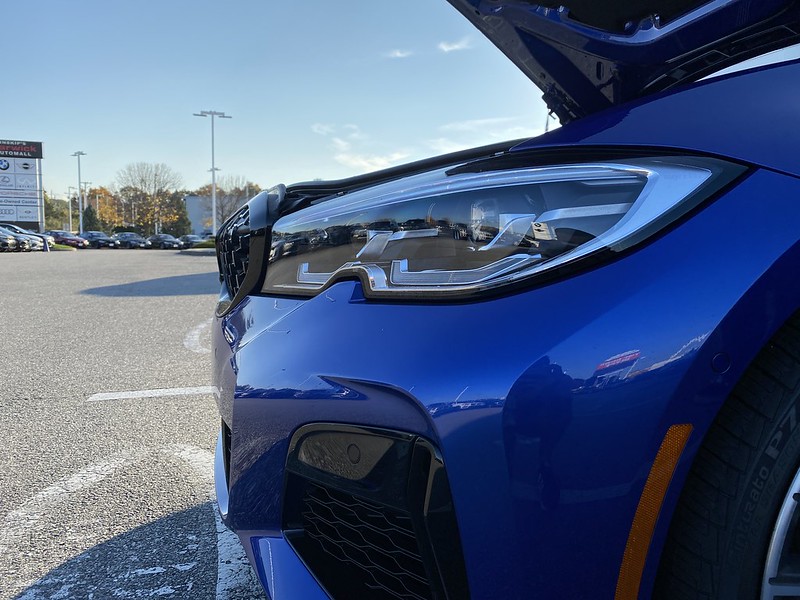
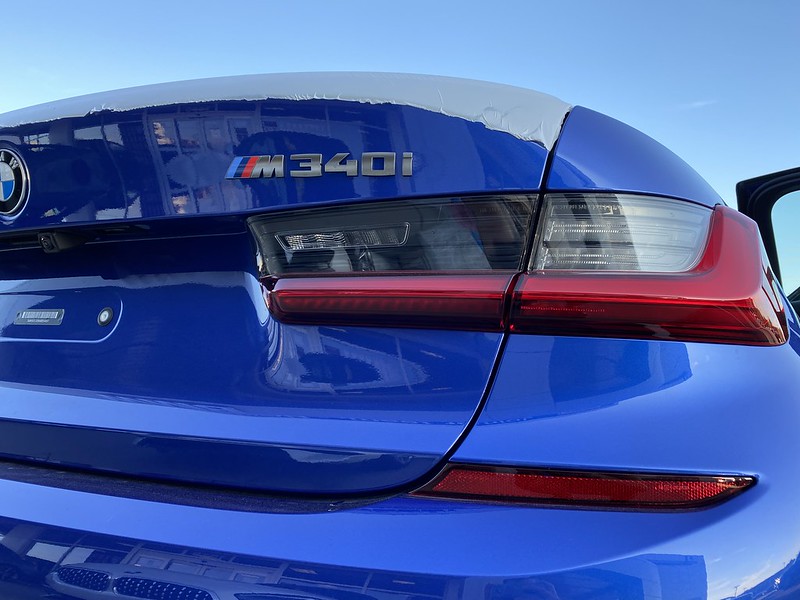
After just about 5 months, 2 production slots and a model year changeover, my 2021 M340i has FINALLY arrived!!
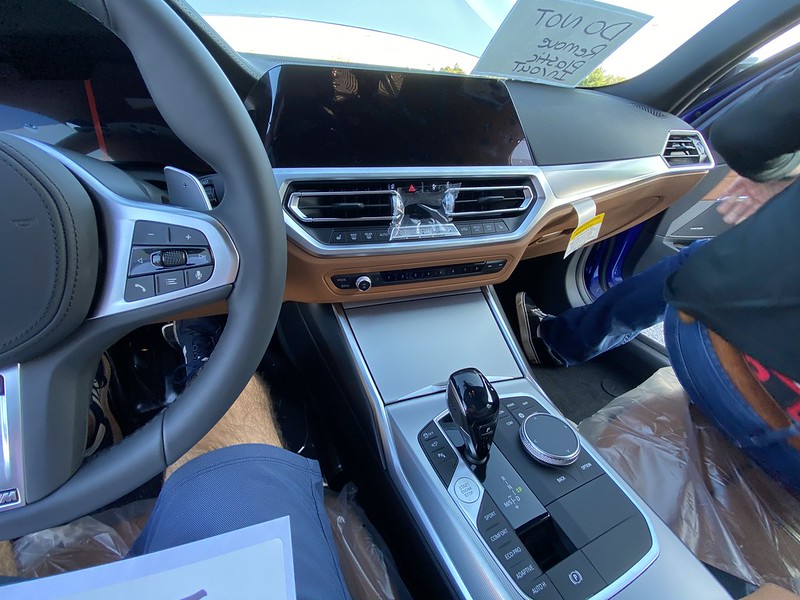
The car arrived at BMW of Warwick on 10/23; a day when it was 70 degrees and I was wearing shorts. You'll see why I bring this up shortly. Here are the photos I took that day, in all it's plastic glory (thanks to my CA for ensuring all plastic was left on/in the vehicle):


OK so now fast forward one week (to clarify, this is 7 days later) to 10/30. The plates/registration finally come in and I head off to the dealership to pick up the car. Mind you, in 35 degree/snow accumulating on the ground type of weather. We ended up getting like 4" of snow, BEFORE Halloween. Goddamn you, New England.
I arrive at the dealership and the car is waiting for me in one of the delivery bays:


Because one of my garage doors is currently blocked by a dumpster, as we are in the process of having our basement finished, I had to 30 point turn my E46 M3 over to the next stall (the blocked one) in order to pull in the M340i. I may or may not need a new clutch now, but at least both cars are in and protected from the elements until later this week (when temps are expected to creep back into the 60s for at least 6 or so straight days). I'll use this time to both dial in the M340i for winter (paint correction/wax/sealant/etc) and get the E46 M3 cleaned up and ready to be stored under her NOAH BMW car cover in the garage.
Once the dumpster is gone, the M340i will take my wife's garage spot (where you see the M3 currently sitting), as she so lovingly offered it up to me UNTIL we replace her '13 Jeep Grand Cherokee late next summer.


I got to peeling off the plastic, which was an incredibly satisfying feeling:


Once we (a buddy of mine has offered to help me out with the paint correction and getting the car ready for winter) start addressing the paint later this week, I do have some other fun stuff lined up for the car. Nothing major...but here are some sneak peeks as to what is in store for the car:


Cheers!
After just about 5 months, 2 production slots and a model year changeover, my 2021 M340i has FINALLY arrived!!
The car arrived at BMW of Warwick on 10/23; a day when it was 70 degrees and I was wearing shorts. You'll see why I bring this up shortly. Here are the photos I took that day, in all it's plastic glory (thanks to my CA for ensuring all plastic was left on/in the vehicle):
OK so now fast forward one week (to clarify, this is 7 days later) to 10/30. The plates/registration finally come in and I head off to the dealership to pick up the car. Mind you, in 35 degree/snow accumulating on the ground type of weather. We ended up getting like 4" of snow, BEFORE Halloween. Goddamn you, New England.
I arrive at the dealership and the car is waiting for me in one of the delivery bays:
Because one of my garage doors is currently blocked by a dumpster, as we are in the process of having our basement finished, I had to 30 point turn my E46 M3 over to the next stall (the blocked one) in order to pull in the M340i. I may or may not need a new clutch now, but at least both cars are in and protected from the elements until later this week (when temps are expected to creep back into the 60s for at least 6 or so straight days). I'll use this time to both dial in the M340i for winter (paint correction/wax/sealant/etc) and get the E46 M3 cleaned up and ready to be stored under her NOAH BMW car cover in the garage.
Once the dumpster is gone, the M340i will take my wife's garage spot (where you see the M3 currently sitting), as she so lovingly offered it up to me UNTIL we replace her '13 Jeep Grand Cherokee late next summer.
I got to peeling off the plastic, which was an incredibly satisfying feeling:
Once we (a buddy of mine has offered to help me out with the paint correction and getting the car ready for winter) start addressing the paint later this week, I do have some other fun stuff lined up for the car. Nothing major...but here are some sneak peeks as to what is in store for the car:
Cheers!
And my next update in that other thread, again, copied and pasted!
With the help of a buddy, we spent the better part of Thursday and Friday getting the M340i dialed in for winter. I'll list out what products were used in case anyone is interested. Side note, if anyone does decide to purchase any products from Obsessed Garage, I'd kindly ask that you do so through my affiliate link (in my signature). :thumbsup:
Thursday - Day 1
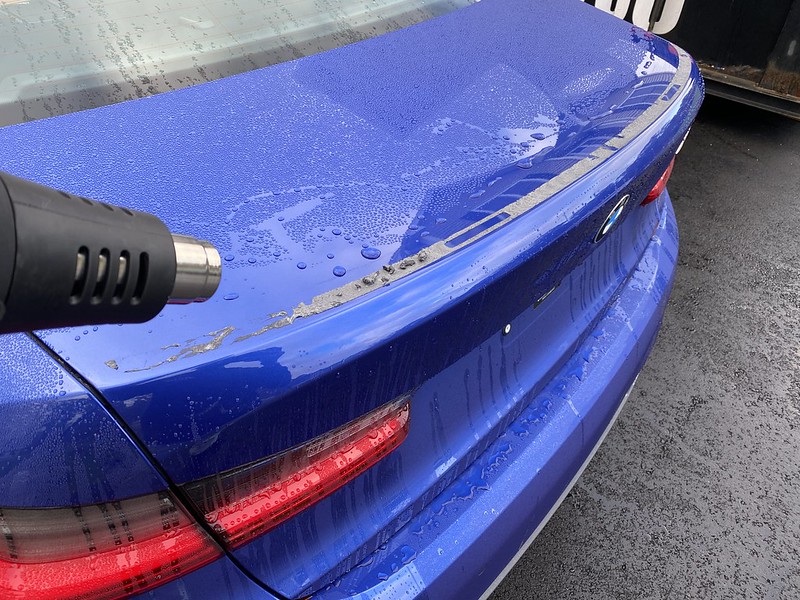
Prior to washing, I removed the stock lip spoiler using fishing line. I then used heat, 3M adhesive remover and my fingers to try and get rid of the remaining adhesive, but after some time (and a bunch of blisters), I gave up and decided I would get back to it after washing the vehicle.

Decontamination
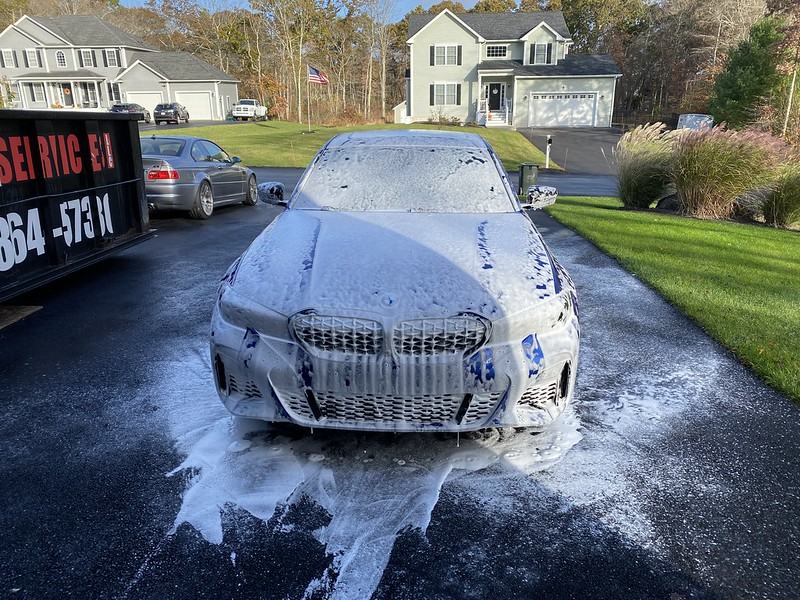
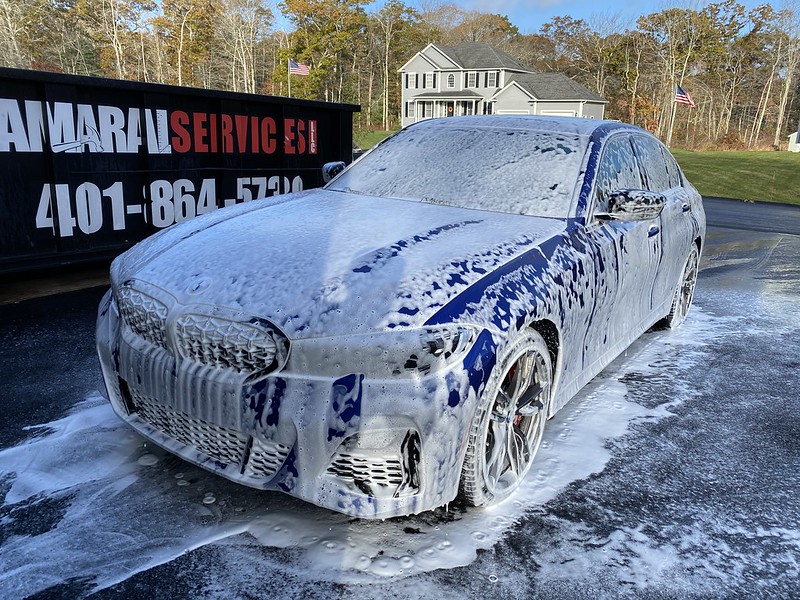
Step 1: I started off the day by giving the car a quick rinse using my pressure washer setup. I then gave it a proper decontamination wash using the Obsessed Garage Decon Soap. Did this via the two bucket method, along with my MTM PF22.2 foam cannon.
Step 2: After rinsing the car off again, I covered the vehicle in Adam's Iron Remover. I let this sit on the car for about 4-5 minutes (do NOT let this dry on the paint), then rinsed the car off again.
Step 3: Prior to "claying" the paint, as the sun was starting to break through the clouds, I pulled the car into the garage. Next, I got my bottle of NanoSkin Glide, and went to town "claying" the paint, panel by panel, using both the AutoScrub pad and sponge (for the smaller/harder to reach areas), being sure to heavily lubricate each panel while doing so.

After the entire car was clayed, I pulled it back out of the garage and my buddy rinsed it off yet again.

I then pulled back into the garage and used my EGO 530 leaf blower to dry off the car and get it ready for polishing:
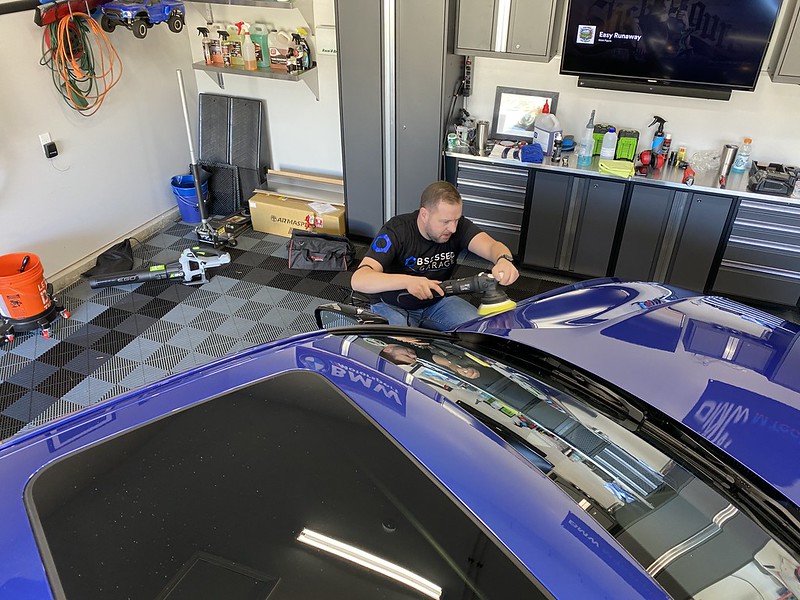
Paint Correction
My buddy and I both polished the vehicle, each basically doing 1/2 the car, straight down the middle. We each used Maxshine M15 Pro Series II 15mm Dual Action Polishers w/ 5" Rupes fine polishing pads, along with Sonax Perfect Finish. We also used my Adam's SK Micro DA Polisher w/ 1" Rupes fine polishing pads, as well as my buddies 3" Griots DA, when needed.


Getting back to the rear spoiler adhesive. We ran out to grab some Five Guys for lunch and before doing so, I picked this up at Advanced Auto Parts and even though I scoffed at the price ($44.99, I believe), it would up being worth EVERY penny.


This thing got the remaining adhesive off in minutes...cut through it like butter and left the paint with only minimal marring that the paint correction would address, anyway:


Applied more 3M double-sided tape on the AA Concepts M Performance style rear spoiler:

Prior to mounting, I wiped down the trunk with CarPro Eraser to ensure proper adhesion.
Here we are test fitting the spoiler:


And finally, tape removed and mounted:

Now, we moved onto the fun part. Applying one coat of Jescar Power Lock Plus Polymer Paint Sealant using the Adam's Wax/Sealant Hex Grip Applicator Pads. After letting the car cure for about 30 minutes, we wiped off using clean microfiber towels.
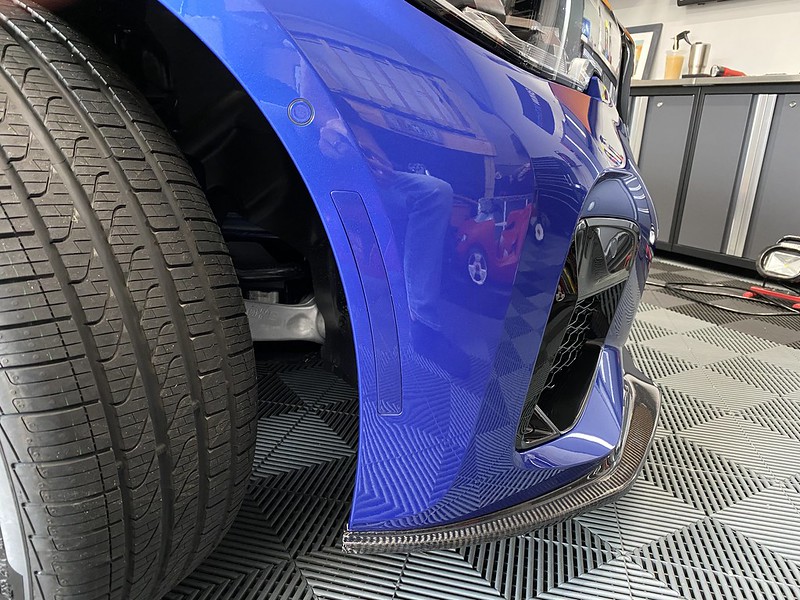
We then put the car up on ramps to make it easier to mount and drill the self-tapping screws for the AA Concepts front lip:


Here is where we called it a night and my buddy went home. However, I went back out later after my two boys went to bed and applied the first layer of Collinte 845, again using an Adam's Hex Grip Applicator pad. By the time I got the whole car covered, it was time to go and wipe off with clean mf towels. Doing it before bed allowed the first layer of 845 to fully cure overnight before we would apply the 2nd and final coat.
Exhausted and sore, it was now time for bed.
Friday - Day 2
I woke up Friday morning and the first thing I did was get the car off the ramps. I then installed my IND-Distribution painted side markers:


Next up, using Bead Maker and clean mf towels, I cleaned all the door jambs and trunk jambs, as well as all the painted areas under the hood.

I then prepped the tires for tire dressing using Stoner Tarminator and a wheel mf towel.
My buddy showed up again right after breakfast and together we applied the 2nd coat of Collinite 845, then wiped off.
After that, we got the interior and exterior glass dialed in using Stoner Invisible Glass. My buddy applied the CarPro Perl tire dressing with a RaceGlaze XL brush and we let that sit and soak in while we coated all the exterior glass with Adam's Polishes Glass Sealant. We used Adam's Glass Boost and the Stoner Invisible Glass to wipe the glass sealant off. We ended up going with 2 coats on just the windshield.
Once the windows were properly coated, I used a clean MF wheel towel to wipe off the excess Perl.

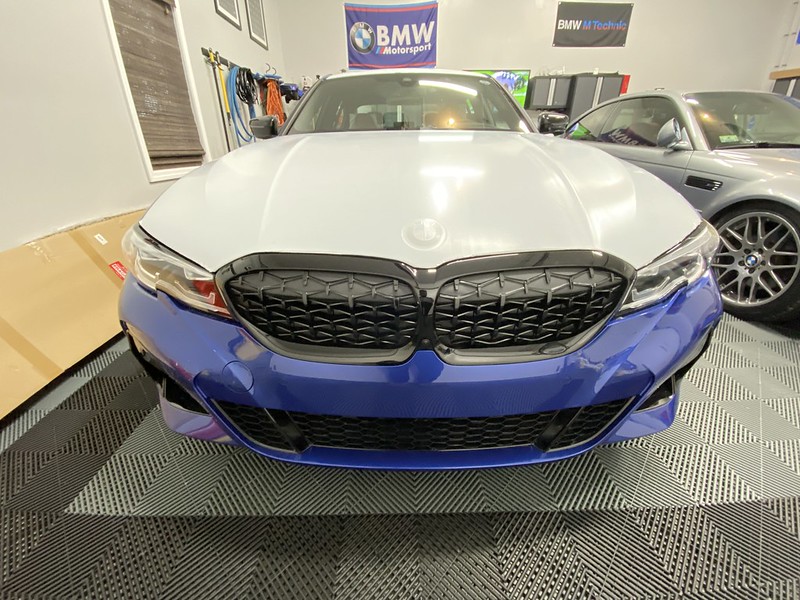
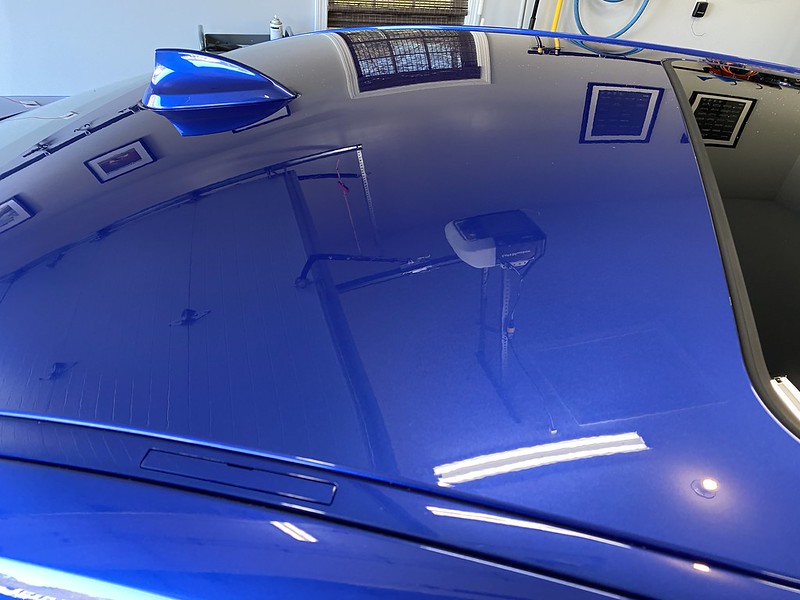
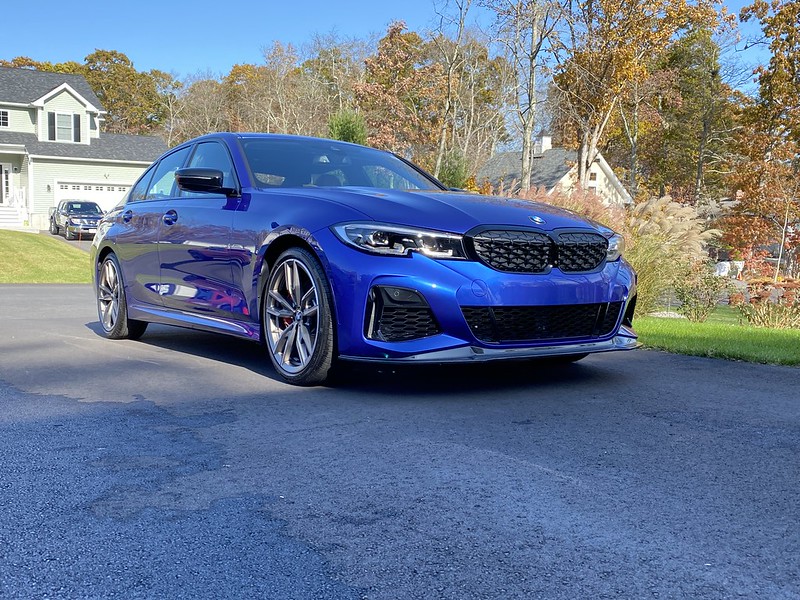
And once all that was done, I pulled the car out of the garage to check it out under the sun and man were we impressed with the results. Even though the car was brand new and I drove it home with 6 miles on the odometer, I was still shocked at the excellent condition of the paint from the factory. Hence the 1 step correction. That's truly all it needed. Here is the finished product:


Products used:
With the help of a buddy, we spent the better part of Thursday and Friday getting the M340i dialed in for winter. I'll list out what products were used in case anyone is interested. Side note, if anyone does decide to purchase any products from Obsessed Garage, I'd kindly ask that you do so through my affiliate link (in my signature). :thumbsup:
Thursday - Day 1
Prior to washing, I removed the stock lip spoiler using fishing line. I then used heat, 3M adhesive remover and my fingers to try and get rid of the remaining adhesive, but after some time (and a bunch of blisters), I gave up and decided I would get back to it after washing the vehicle.
Decontamination
Step 1: I started off the day by giving the car a quick rinse using my pressure washer setup. I then gave it a proper decontamination wash using the Obsessed Garage Decon Soap. Did this via the two bucket method, along with my MTM PF22.2 foam cannon.
Step 2: After rinsing the car off again, I covered the vehicle in Adam's Iron Remover. I let this sit on the car for about 4-5 minutes (do NOT let this dry on the paint), then rinsed the car off again.
Step 3: Prior to "claying" the paint, as the sun was starting to break through the clouds, I pulled the car into the garage. Next, I got my bottle of NanoSkin Glide, and went to town "claying" the paint, panel by panel, using both the AutoScrub pad and sponge (for the smaller/harder to reach areas), being sure to heavily lubricate each panel while doing so.
After the entire car was clayed, I pulled it back out of the garage and my buddy rinsed it off yet again.
I then pulled back into the garage and used my EGO 530 leaf blower to dry off the car and get it ready for polishing:
Paint Correction
My buddy and I both polished the vehicle, each basically doing 1/2 the car, straight down the middle. We each used Maxshine M15 Pro Series II 15mm Dual Action Polishers w/ 5" Rupes fine polishing pads, along with Sonax Perfect Finish. We also used my Adam's SK Micro DA Polisher w/ 1" Rupes fine polishing pads, as well as my buddies 3" Griots DA, when needed.
Getting back to the rear spoiler adhesive. We ran out to grab some Five Guys for lunch and before doing so, I picked this up at Advanced Auto Parts and even though I scoffed at the price ($44.99, I believe), it would up being worth EVERY penny.
This thing got the remaining adhesive off in minutes...cut through it like butter and left the paint with only minimal marring that the paint correction would address, anyway:
Applied more 3M double-sided tape on the AA Concepts M Performance style rear spoiler:
Prior to mounting, I wiped down the trunk with CarPro Eraser to ensure proper adhesion.
Here we are test fitting the spoiler:
And finally, tape removed and mounted:
Now, we moved onto the fun part. Applying one coat of Jescar Power Lock Plus Polymer Paint Sealant using the Adam's Wax/Sealant Hex Grip Applicator Pads. After letting the car cure for about 30 minutes, we wiped off using clean microfiber towels.
We then put the car up on ramps to make it easier to mount and drill the self-tapping screws for the AA Concepts front lip:
Here is where we called it a night and my buddy went home. However, I went back out later after my two boys went to bed and applied the first layer of Collinte 845, again using an Adam's Hex Grip Applicator pad. By the time I got the whole car covered, it was time to go and wipe off with clean mf towels. Doing it before bed allowed the first layer of 845 to fully cure overnight before we would apply the 2nd and final coat.
Exhausted and sore, it was now time for bed.
Friday - Day 2
I woke up Friday morning and the first thing I did was get the car off the ramps. I then installed my IND-Distribution painted side markers:
Next up, using Bead Maker and clean mf towels, I cleaned all the door jambs and trunk jambs, as well as all the painted areas under the hood.
I then prepped the tires for tire dressing using Stoner Tarminator and a wheel mf towel.
My buddy showed up again right after breakfast and together we applied the 2nd coat of Collinite 845, then wiped off.
After that, we got the interior and exterior glass dialed in using Stoner Invisible Glass. My buddy applied the CarPro Perl tire dressing with a RaceGlaze XL brush and we let that sit and soak in while we coated all the exterior glass with Adam's Polishes Glass Sealant. We used Adam's Glass Boost and the Stoner Invisible Glass to wipe the glass sealant off. We ended up going with 2 coats on just the windshield.
Once the windows were properly coated, I used a clean MF wheel towel to wipe off the excess Perl.
And once all that was done, I pulled the car out of the garage to check it out under the sun and man were we impressed with the results. Even though the car was brand new and I drove it home with 6 miles on the odometer, I was still shocked at the excellent condition of the paint from the factory. Hence the 1 step correction. That's truly all it needed. Here is the finished product:
Products used:
Obsessed Garage Decon Soap- MTM PF22.2 Foam Cannon
- Adam's Polishes Iron Remover
- NanoSkin Glide
- NanoSkin AutoScrub pad
- NanoSkin AutoScrub sponge
- Rupes 5" Fine Polishing Pads
- Rupes 1" Fine Polishing Pads
- 3M Adhesive Eraser Wheel
- CarPro Eraser
- Sonax Perfect Finish
- Jescar Power Lock
- Adam's Wax/Sealant Hex Grip Applicator Pads
- Collinite 845
- P&S Bead Maker
- Stoner Tarminator
- Stoner Invisible Glass
- CarPro Perl
- RaceGlaze XL Brush
M-technik-3
Well-known member
Wow that's a huge update, was wondering where you went. 340i is interesting, that doesn't have a dct correct it's an 8spd that's in the supra/z4?
Arclitgold
Well-known member
- Joined
- Dec 20, 2017
- Messages
- 317
Holy moly. That’s just perfect. I wanted to do the same procedure with my wife’s car when she got it, but we had a baby instead. Now it’s been 2 years and it’s only been waxed twice. Sigh
Sent from my iPhone using Tapatalk
Sent from my iPhone using Tapatalk
Classic OG move there! Nice new sedan!
 Thank you!
So.Much.Content.
Loved it! Thanx for the updates!
Anytime, man! I was hoping to have the basement done by now....that would have been a much more exciting update. Oh well, soon enough. Hope you're well!
Wow that's a huge update, was wondering where you went. 340i is interesting, that doesn't have a dct correct it's an 8spd that's in the supra/z4?
Yeah, just been busy with life and work and all the goings on around my house of late.
Correct...8 speed ZF auto. But tuned so amazingly. I'm trying to be responsible and waiting for the 600 mile break in before really opening her up, but man does this thing want to boogie.
Holy moly. That’s just perfect. I wanted to do the same procedure with my wife’s car when she got it, but we had a baby instead. Now it’s been 2 years and it’s only been waxed twice. Sigh
Sent from my iPhone using Tapatalk
Thank you!! But man, I get it, trust me! Babies/family are the priority. I had to take 2 full days of work off to get the car dialed in. But as my boys get older, things like this should hopefully get easier in terms of managing free time.
Also, I think I've washed my wife's Grand Cherokee twice over the last 3 years. It is so neglected but it is what it is and that's why it'll be getting traded/sold sometime next summer/fall.


TX4runner
Well-known member
I know photos don't do it justice, but nice job with the paint correction. Enjoy the new daily!!
I know photos don't do it justice, but nice job with the paint correction. Enjoy the new daily!!
So accurate...pictures truly don't do it justice. The car looked amazing when we were done. Thank you, sir!
Mpower5266
Well-known member
Wow I haven't been on too often lately. The car and basement are looking great.
Mr. Roboto
Well-known member
Wow! HUGE updates man. The basement is going to be incredible when it's all done. All that extra space will be awesome. The new car looks spectacular too. I see you went the OG route and took it as is, all wrapped up. really cool. Thanks for sharing as always, looking forward to seeing the basement come together too. Don't forget to get that plumber to get your garage sink plumbed in while he is there! 
Wow I haven't been on too often lately. The car and basement are looking great.
Thanks, Nick. And likewise...been MIA for a bit. Things have started to quiet down and hopefully they stay that way. Take care!
Wow! HUGE updates man. The basement is going to be incredible when it's all done. All that extra space will be awesome. The new car looks spectacular too. I see you went the OG route and took it as is, all wrapped up. really cool. Thanks for sharing as always, looking forward to seeing the basement come together too. Don't forget to get that plumber to get your garage sink plumbed in while he is there!
Haha, yep, sorry for bombarding you all!
It's funny you mentioned that because I legit texted him this morning to ensure he was doing that portion after the final inspection. We're still on!

thetastelingers
Well-known member
I see you didn't take my advice to wash with dawn, scrub down and send it. LOL
I see you didn't take my advice to wash with dawn, scrub down and send it. LOL

Nope, sorry, just couldn't do it!! Hahaha


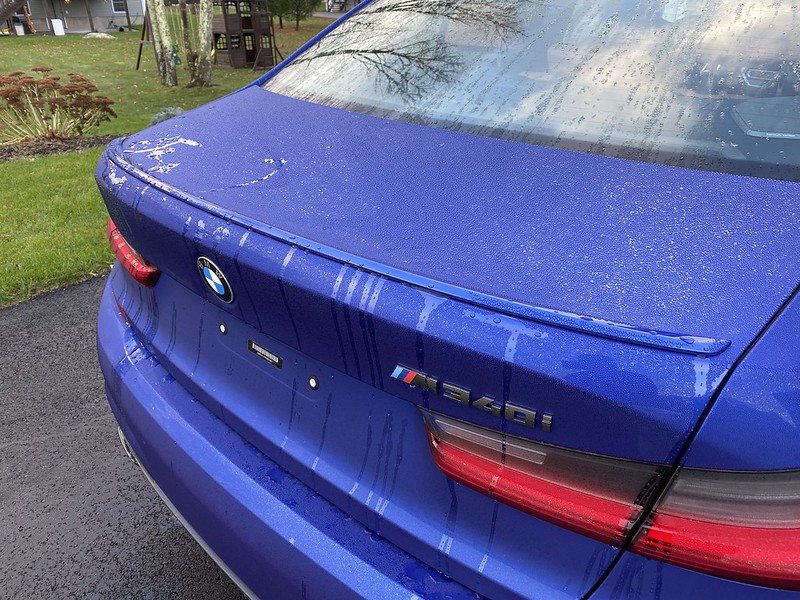
Got the car setup last week for dad duties:

Running errands in this is much more thrilling than it was in the Accord:


Think I may try and install the new Armaspeed intake this weekend. The box is just sitting in my garage, begging to go in.
Running errands in this is much more thrilling than it was in the Accord:
Think I may try and install the new Armaspeed intake this weekend. The box is just sitting in my garage, begging to go in.
What a beautiful colour.
It needs bigger wheels and a drop. But it's a DD, it's ok. But... It needs bigger wheels and a drop. But it's a DD, it's O-K! It NeEds BiGgEr WhEeLs AnD a DrOp!!!!!1111!!111
*head explodes*
[emoji23] Thanks, man! A drop, yes. Bigger wheels, no. These are already the optional 19’s (they come standard with 18’s). A slight drop and some spacers will help fill the wheel wells and make sure the wheels don’t look too small! Haha.
[emoji2962]
Sent from my iPhone using Tapatalk
M-technik-3
Well-known member
Is the new G series a run flat tire car? If so wonder what it would be like with real tires. Basement is looking great, i so wish my basement had real height ceiling so I could make a room or two downstairs. Ceiling is 7 foot so walls might make it claustrophobic.
Is the new G series a run flat tire car? If so wonder what it would be like with real tires. Basement is looking great, i so wish my basement had real height ceiling so I could make a room or two downstairs. Ceiling is 7 foot so walls might make it claustrophobic.
They're optional. But I'm fairly certain the non-runflats were for the summer tires only. Seeing as this is my daily driver, I wanted the all-seasons (until I eventually have dedicated summer and winter wheels/tires for the car), so had to get runflats. They aren't as bad as I remember the runflats on my 2007 335i being.
Thanks! We're hoping just another week or 2 until it's done. Couch should be getting delivered first week of December. I verified that the cat6 cable I ran into the basement from my router works, which is great. So while the WiFi should have no problem getting down there, since I'll be working in the basement moving forward, I needed to ensure I had a backup in case WiFi was ever wonky. Also grabbed an 8 port network switch, so all my devices (PS4, Xbox, laptop, etc.) should be able to run off the ethernet cables instead of relying on WiFi.
Once done, I'm looking forward to getting my new TV mounted and all my AV devices setup and wired. I pre-wired for the 2 rear surround speakers and also ran two speaker wires to either side of the back basement wall (that faces my backyard) to install 2 outdoor speakers that I'll mount directly to the siding. We like to have music outside when people are over and for parties, so this will work much better than the Nixon Blaster bluetooth speaker that I bring outside for such occassions.
To make this work, I bought a speaker selector so I can either run the 5.1 surround in the basement, the 2 outdoor speakers, or all speakers (indoor and outdoor) at once.

Mpower5266
Well-known member
What a beautiful colour.
It needs bigger wheels and a drop. But it's a DD, it's ok. But... It needs bigger wheels and a drop. But it's a DD, it's O-K! It NeEds BiGgEr WhEeLs AnD a DrOp!!!!!1111!!111
*head explodes*
LTWS, clears, and a drop. The BFC e36 recipe for success.
Mr. Roboto
Well-known member
Always nice to see the wall board go up.... the space really starts to come together at that point. Brace yourself the mess that tape and mud will bring next! Glad to hear you were on the plumber about the garage sink too, very important
LTWS, clears, and a drop. The BFC e36 recipe for success.
BFC??
Always nice to see the wall board go up.... the space really starts to come together at that point. Brace yourself the mess that tape and mud will bring next! Glad to hear you were on the plumber about the garage sink too, very important
Yep, can finally start to visualize the rooms and get very excited about it. They started to tape and fill the drywall screws yesterday.
I cannot WAIT to have a working sink in the garage!!
11/19/20


M-technik-3
Well-known member
It's always nice to have lan drops as data is transferred so much faster that way and tv's are stutter free. When I remodeled the house I'm in back in 2011 I did a new panel and a media box, while the media box is not needed these days it's still nice to have drops everywhere.
So now that the basement is conditioned space how did you go about hvac? Will your existing setup have enough reserve for what appears to be another 1400 square feet.
So now that the basement is conditioned space how did you go about hvac? Will your existing setup have enough reserve for what appears to be another 1400 square feet.
It's always nice to have lan drops as data is transferred so much faster that way and tv's are stutter free. When I remodeled the house I'm in back in 2011 I did a new panel and a media box, while the media box is not needed these days it's still nice to have drops everywhere.
So now that the basement is conditioned space how did you go about hvac? Will your existing setup have enough reserve for what appears to be another 1400 square feet.
Hell yeah! I didn't want to depend on WiFi down there. I honestly didn't know about network switches prior, or I would have used one in my existing setup in the living room. Right now, my PS4 uses ethernet, but my Xbox is on WiFi. Didn't realize I could have it all hardwired. Glad I know that now!
You might have missed it, but in post #1008, I mentioned a mini-split. It'll be a dedicated unit just for the basement, as the existing system was designed to heat just the first and second floors of the home.
First non-aesthetic mod on the M340i done (mind you this is mostly a copy of a post I just made on bimmerpost, but I've tried to edit it to fit in here):
Ordering
I went with the ARMA Speed Full Carbon Fiber kit, as I wanted to dress up the entire engine bay. My order shipped on 10/18/20 from Taiwan and arrived at my doorstep 2 days later., which blew my mind. Here's the tracking to prove it:

Unboxing

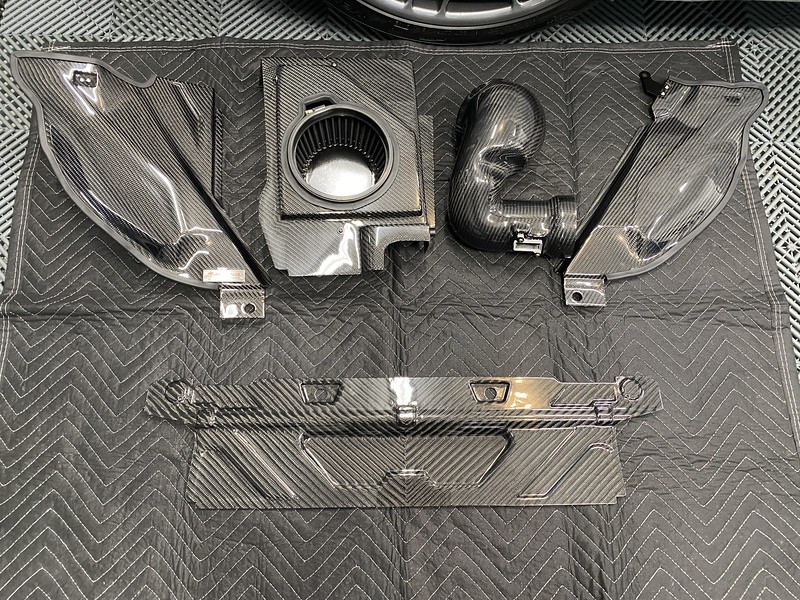
The intake came incredibly well packaged. Each piece was individually wrapped and taped in a ton of bubble wrap.
This intake is legit. The carbon fiber weave is top notch and as I took each piece out of the box and unwrapped them, I knew I had made the right decision. Even matches/complements my AA Concepts front lip and rear spoiler!


Install
Much to my shock and surprise, the intake came with complete, well-written COLOR instructions. Usually instructions come black and white, which makes seeing the minute details in photos fairly difficult. Not the case here! :thumbsup:

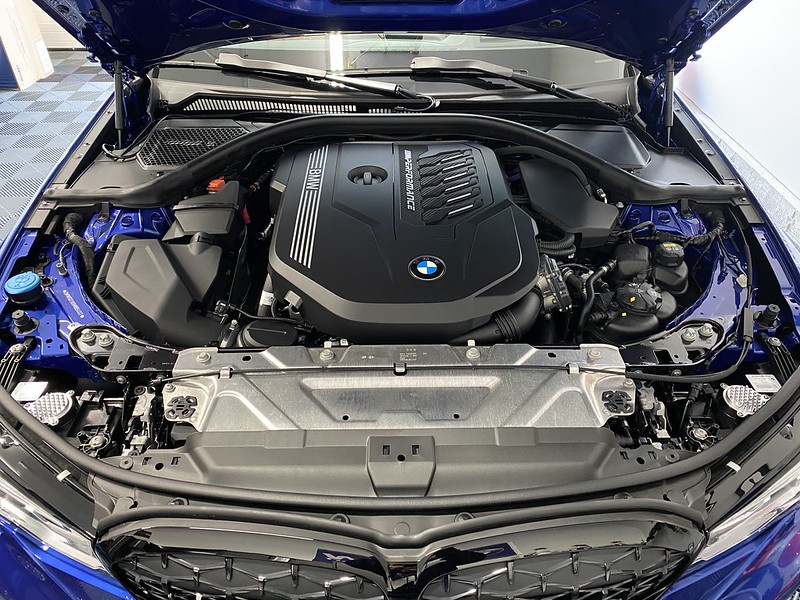
Here is the stock engine bay:

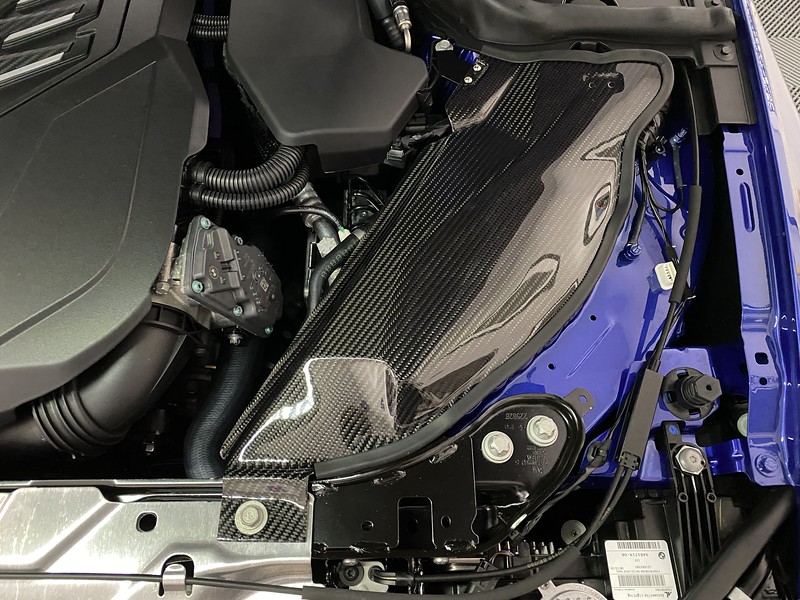
Stock airbox out:


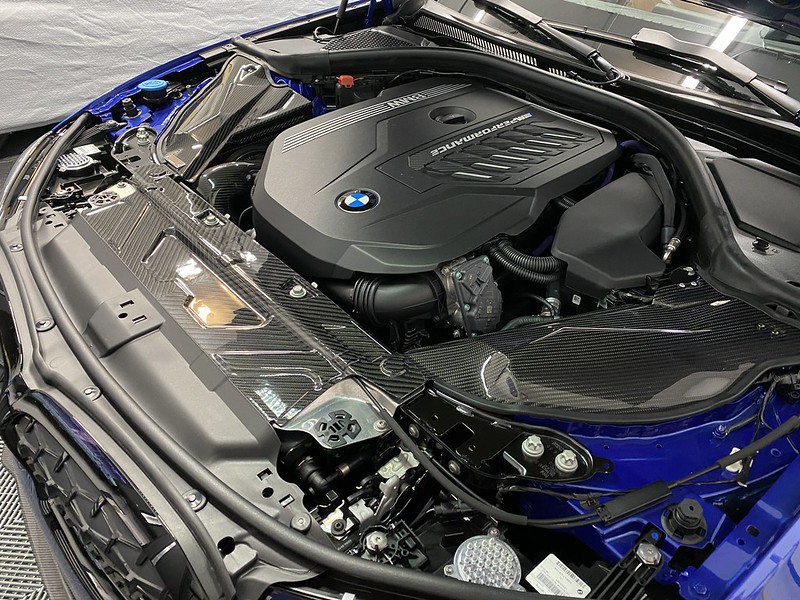


Conclusion
Install went pretty uneventfully. I took my time and had it done in under 2 hours. Everything lined up exactly how it should, which is always a question mark when it comes to aftermarket parts.
I realize intakes don't do much, performance-wise. But that's not why I opt for them (I also have an intake in my E46 M3). I like the induction noise that they provide...and you can certainly hear this one! You can hear the turbo spool up much more than before, too, which is always enjoyable.
Cheers!
Ordering
I went with the ARMA Speed Full Carbon Fiber kit, as I wanted to dress up the entire engine bay. My order shipped on 10/18/20 from Taiwan and arrived at my doorstep 2 days later., which blew my mind. Here's the tracking to prove it:
Unboxing
The intake came incredibly well packaged. Each piece was individually wrapped and taped in a ton of bubble wrap.
This intake is legit. The carbon fiber weave is top notch and as I took each piece out of the box and unwrapped them, I knew I had made the right decision. Even matches/complements my AA Concepts front lip and rear spoiler!
Install
Much to my shock and surprise, the intake came with complete, well-written COLOR instructions. Usually instructions come black and white, which makes seeing the minute details in photos fairly difficult. Not the case here! :thumbsup:
Here is the stock engine bay:
Stock airbox out:
Conclusion
Install went pretty uneventfully. I took my time and had it done in under 2 hours. Everything lined up exactly how it should, which is always a question mark when it comes to aftermarket parts.
I realize intakes don't do much, performance-wise. But that's not why I opt for them (I also have an intake in my E46 M3). I like the induction noise that they provide...and you can certainly hear this one! You can hear the turbo spool up much more than before, too, which is always enjoyable.
Cheers!
thetastelingers
Well-known member
Saw it on the gram already, but MAAAAN That carbon looks GOOOOOD!!!
M-technik-3
Well-known member
There is no PPI dress up kit from the factory as an option or it was to outrageously priced vs aftermarket. That looks like a quality made piece, Taiwan does alot of carbon fiber work, most bicycles now come out of Taiwan being either high end composites or aluminium.
BFC??
bimmerforums
Clears, LTW, drop is a long-standing recommendation