To avoid these ads, REGISTER NOW!

“Full custom” 1960s influenced Garage Build

Baja_XJ

Active member
Joined
Jul 10, 2011
Messages
32
Location
Bedford, IN
Been on this Forum for a long time as I’d planned on a garage build for a long time. I’m finally getting around to it so so thought I’d share the progress here with you guys, as I know there’s several that are like minded and will enjoy.

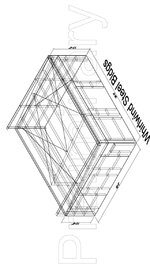
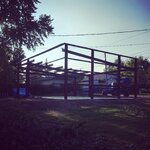
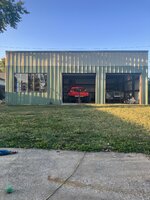
So for about 10-12 years now I’d been wanting to do a build but just wasn’t in the right place in life and had other priorities so I just worked out of my parents garage inconveniently about a 20 minute drive each way. About 3 years ago I started getting more optimistic about it and was thinking yeahhh shouldn’t be too much longer I might be able to build something. 2 years ago I finally decided yes. I’m doing this. But, it wasn’t that easy. Building a garage from the ground up and knowing that it would be what I worked out of for a long time, if not the rest of my life, and being very centered around the late 50-early 70s way of life, I decided not to build a cookie cutter garage and wanted something that fit my own personality. The issue there, nobody that works at the places that design buildings seem to have the taste I had or really understand what it meant to have this place fit my ideas. I decided one day after talking to 5 different designers and they couldn’t seem to get where I wanted to be with it, that I just clean slate designed the place myself in Solidworks. It’s not huge but what fit the guidelines of what the city would let me and again, being a 60s style place I didn’t believe I needed some ungodly huge place anyway. Less is more and learn to work in the space you have available. So, this is what I came up with after a few months of planning. It’s a 36x30 with parapet wall, (2) overhead doors offset to the right side, which leaves one entire bay to be reserved for engine building, fabrication etc. One thing I’ve learned previously, if there’s a door to get in, something will end up in it and then you have nowhere to work. So, 2 doors in a 3 bay, 1 bay being workshop space only. The workshop bay have a 6x8 steel casement window that I pulled from an abandon factory in Indianapolis before they tore it down. The workshop bay end wall will also have (3) 5x5 steel casement windows and the personnel walk door.

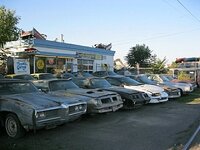
After I got done with my solidworks design, I sent that file to Whirlwind Steel Buildings in Texas and they reverse engineered it and made it into an actual structure for me, and made my kit. Now, after 2 years of processes I am on week 5 of assembly. The aesthetics and colorway comes from the late 50 early 60s Speedshop/ Mechanic shops when drag racing was first founded and the guys building the cars were just getting started mainstream and establishing businesses. Gas stations ehhh yeah they also somewhat looked like this but that’s not the idea behind it as much as vintage speedshop.

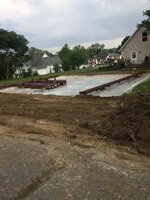
The concrete I’m not super thrilled about but it does the job. The two things I specified to the concrete guy was 1) I don’t want it polished and 2) I don’t want a gloss sealer put on it. Guess what I ended up with. So now as soon as I get the roof up I’m renting a concrete grinder and grinding the floor so I can use Hellfire to coat it with.

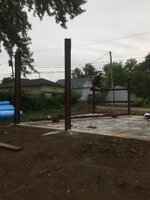
Have some final squaring to do this weekend from where we squared everything vertically before setting the trusses then come to find out the truss connection plates aren’t on the exact angle and threw off the square slightly so going to come-a-long those in vertical and shim the baseplates under those 2 columns then it’s onto door and window framing.

It’s been a process and 65000 to get to this point but I’m beyond humbled I’m actually getting to build the garage of my dreams. Might not be huge but as I stated above, I didn’t ever want anything huge anyway.

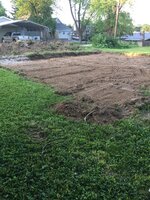
Onto the pictures.
 

Attachments

  • 22A6899E-083D-48A4-A851-11050AC23F26.jpeg
    22A6899E-083D-48A4-A851-11050AC23F26.jpeg
    192.2 KB · Views: 735
  • 906FD5BF-1F63-40CB-A714-36F86AD57D07.jpeg
    906FD5BF-1F63-40CB-A714-36F86AD57D07.jpeg
    144.3 KB · Views: 609
  • 8E1F9164-4C7F-43B3-A35D-83EEFF6E2B58.jpeg
    8E1F9164-4C7F-43B3-A35D-83EEFF6E2B58.jpeg
    672.2 KB · Views: 477
  • A7AA246D-7BC9-4FB3-9197-A5C19701F95B.jpeg
    A7AA246D-7BC9-4FB3-9197-A5C19701F95B.jpeg
    515.4 KB · Views: 445
  • C6EA3B83-92CC-423B-9915-D3F91ED56FD4.jpeg
    C6EA3B83-92CC-423B-9915-D3F91ED56FD4.jpeg
    453 KB · Views: 431
  • B9D0DF1B-7E1E-4BE7-9858-C68DC411503E.jpeg
    B9D0DF1B-7E1E-4BE7-9858-C68DC411503E.jpeg
    347.1 KB · Views: 426
  • 27C8CD41-01F4-42C5-9AD8-320C4F3DF459.jpeg
    27C8CD41-01F4-42C5-9AD8-320C4F3DF459.jpeg
    293.1 KB · Views: 418
  • AB07EB1B-8A41-4B1C-A8A7-2170DAC8FC0D.jpeg
    AB07EB1B-8A41-4B1C-A8A7-2170DAC8FC0D.jpeg
    414.4 KB · Views: 422
  • F03F8E8D-E69E-4321-BBD8-81125AA31DB9.jpeg
    F03F8E8D-E69E-4321-BBD8-81125AA31DB9.jpeg
    446.5 KB · Views: 428
  • 7931D4EF-2BC9-456D-8A9E-D113D0278215.jpeg
    7931D4EF-2BC9-456D-8A9E-D113D0278215.jpeg
    418.9 KB · Views: 457
To avoid these ads, REGISTER NOW!

Bert_

Well-known member
Joined
Dec 24, 2016
Messages
9,863
Location
NW Iowa
I like it. You have a nice design. It's amazing that no one could draw up a building like this. Not like it's anything new.

I'm looking forward to seeing more progress!
 

CraigStu

Well-known member
Joined
May 22, 2014
Messages
4,075
Location
Blacksburg, Va
I like it too. I have twice added a 3rd bay to an existing garage. One had the wall 75% removed and the other just had a 48 inch walk through w/ no door. Our retirement house has a 28D x 32W garage w/ a 16ft door on the left. Wife gets to park all the way to the left next to the house wall and I pull in and park on an angle maybe 1/2 way in the extra bay space. You have a few extra feet each way than I have so I think you will be fine. Be sure you have a shed to keep all the lawn and garden **** from invading your space.
 

58Yeoman

Well-known member
Joined
Oct 1, 2010
Messages
8,999
Location
Central IL
I agree with Bert_. Looks like it will be great, and it's not really a new design, so I don't see where the problem was with the designers.
 

bradpac

Well-known member
Joined
Sep 8, 2013
Messages
721
Location
Central TX
Looks like it's going to be a cool place. I think the third bay window instead of a door actually helps with the period look as well since in a lot of these shops the first bay was an office. I can't wait to see how it progresses and what you fill it with.
 

Max

ALLIANCE MEMBER
Joined
Jun 16, 2018
Messages
3,386
Location
Georgia
Looks great! The “office” area and the multi-pane window in front really give it that 60s feel.
 
OP
B

Baja_XJ

Active member
Joined
Jul 10, 2011
Messages
32
Location
Bedford, IN
Thanks guys, I'm excited that after 2 years of designing, planning, coordinating, quoting, and working 80-90hrs a week to be able to pay cash for it all had finally started to pay off and see the project moving forward.

The office/ workshop bay has the 6x8 casement that I'm restoring for the front and then also has the (3) 5x5 casements that are doing down the walkdoor side that I also ended up with but hadn't planned so they aren't on my original Solidworks model. They're taking some engineering to be able to mount them up in a steel building with ribbed exterior metal as these early 1900s iron windows were only an inch and a half deep and made to go in block and brick buildings where the exterior is smooth and they could flush mount and they are heeeavvvvyyyy. The big one is every bit of 300#. Smaller ones about 175. I am also having modern glass panes cut to put in them so they don't shatter by looking at them wrong, after installation of course.

On the design, that's exactly my thoughts as well. It just seems that nobody wanted to mess with any specialty work and if it wasn't cookie cutter where they could use their stocked production trusses they just weren't interested. That's honestly the main reason I went steel instead of post frame. I found out real quick that any of the local post building shops weren't going to yield me the results I was after and after putting this amount of money in it I wanted it to be exactly what I had envisioned, not a very very loose interpretation of it. This is the point where I modeled it myself and sent it in to steel manufactures. Originally was looking at cold formed since the price was nearly identical to post frame wood construction but the more and more I considered that and done my research the more and more I thought it would be good to last 10-15 years and be falling in. Then, I started quoting it as red iron I-beam and it was only going to run about an extra 5-7000. Mainly due to the special fabrication involved like all the window framing, and the parapet wall. Those two things really spiked the cost up but again, I planned on only doing this once and it being exactly what I had imagined it to be and would not settle for less just to save a few thousand bucks.

This is one example of the post frame building designs I got back. They said the would not could not offset the doors to the one side and they would have to be centered “to look right” and wasn’t even giving me the option of doing it how I wanted. Sadly this is the closest rendering I could get without modeling myself and sending off to Whirlwind. And they would only do it in a 4:12 pitch so to end up with 8’ interior height the exterior was close to 16-18’ high. Working with whirlwind I could get it in a 1:12 which gave me 9’ interior height at only 12’ 6” exterior height
 

Attachments

  • 5CE320D0-D4D5-4092-97D5-9E21E931B1A4.jpeg
    5CE320D0-D4D5-4092-97D5-9E21E931B1A4.jpeg
    33.1 KB · Views: 430
Last edited:

rmmiller

Well-known member
Joined
Nov 24, 2012
Messages
2,410
Location
Kennewick, WA
Has a similar layout to my grandpa's Union 76 for the 60's-70's. It's a dream of mine to have a building like he did but as cool as it would be it won't happen. I have found one that is sitting empty but it's a long way from home and in rough shape.

Now let's talk about that avatar, are you building a Maverick?

This is the same building (not "the" building) grandpa had.


garage_out2.jpg
 
OP
B

Baja_XJ

Active member
Joined
Jul 10, 2011
Messages
32
Location
Bedford, IN
That’s the exact reason I wanted to build one. I love the Route 66 and relic mechanic shops of the southwest in general and in our area the abandon shops of the era, all of the ones locally are completely in disrepair and they want too much for them as land value to justify the purchase of for restoration.

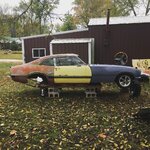
As for the maverick, yes. That’s the first thing to get done in the place once I get it done. I’ve got all of the parts I’ve collected for a early 70s era maverick funny car rolling chassis and is sitting at my parents house collecting dust as I’ve never had anywhere to store it or build it, just collected a bunch of parts over the last few years knowing that one day I’ll have a place to build the thing out. The rear wheels are currently the centerpiece in my living room.

That’s the long term build out. I’ve got a short term build out of an S10 late 80s stadium truck that will be my daily driver which will happen a lot faster. Growing up in the era of Mickey Thompson trucks at the RCA dome I feel that was the greatest thing I was around for that way still great and hadn’t became overly corporately ran, SODA racing, the Mickey Thompson MTEG, Monster Trucks, and Truck pulling
 

Attachments

  • 2C574BD3-DD94-4B23-9BB7-883CD1744FBE.jpeg
    2C574BD3-DD94-4B23-9BB7-883CD1744FBE.jpeg
    683.5 KB · Views: 380
  • 0850A704-51EC-4AE0-8326-A23FA9E1FF4B.jpeg
    0850A704-51EC-4AE0-8326-A23FA9E1FF4B.jpeg
    809.1 KB · Views: 357
  • B02A06BF-1E44-4C10-B5FC-87E4C09F0C4E.jpeg
    B02A06BF-1E44-4C10-B5FC-87E4C09F0C4E.jpeg
    218.3 KB · Views: 406
Last edited:

Miss the Pontiacs

Well-known member
Joined
Nov 7, 2016
Messages
16,665
Location
Saskatchewan Canada
Nice garage. Take a look at mine and tell me if you see any similarities.
I drew mine out and then took it to a draftsman. Did the same for my cabin.
You will definitely enjoy your new found space. 👍
 
OP
B

Baja_XJ

Active member
Joined
Jul 10, 2011
Messages
32
Location
Bedford, IN
Nice garage. Take a look at mine and tell me if you see any similarities.
I drew mine out and then took it to a draftsman. Did the same for my cabin.
You will definitely enjoy your new found space. 👍
Very nice Pontiac! I was actually originally going to go with wood but was told there was no way to go that low of slope with wood frame construction and I got a quote for a rubber roof to be about 15000 so everything combined it just made more sense for me to go steel but yes it appears we have done nearly the same process and like minded styling
 

Miss the Pontiacs

Well-known member
Joined
Nov 7, 2016
Messages
16,665
Location
Saskatchewan Canada
Wow prices must have gone wild on roofing. My garage was built about 5 years ago. I paid somewhere around $8k CDN for my torched on roof. No problem with the pitch with our potential snow load.
I guess I will find out todays costs of building as we are in the initial phases of having a stand alone garage built at the lake. This time we will likely go Hardie Board versus stucco.
Enjoy your space. 👍
 

Uncle murph

Well-known member
Joined
Jan 28, 2021
Messages
1,504
Location
Harford county
Thanks guys, I'm excited that after 2 years of designing, planning, coordinating, quoting, and working 80-90hrs a week to be able to pay cash for it all had finally started to pay off and see the project moving forward.

The office/ workshop bay has the 6x8 casement that I'm restoring for the front and then also has the (3) 5x5 casements that are doing down the walkdoor side that I also ended up with but hadn't planned so they aren't on my original Solidworks model. They're taking some engineering to be able to mount them up in a steel building with ribbed exterior metal as these early 1900s iron windows were only an inch and a half deep and made to go in block and brick buildings where the exterior is smooth and they could flush mount and they are heeeavvvvyyyy. The big one is every bit of 300#. Smaller ones about 175. I am also having modern glass panes cut to put in them so they don't shatter by looking at them wrong, after installation of course.

On the design, that's exactly my thoughts as well. It just seems that nobody wanted to mess with any specialty work and if it wasn't cookie cutter where they could use their stocked production trusses they just weren't interested. That's honestly the main reason I went steel instead of post frame. I found out real quick that any of the local post building shops weren't going to yield me the results I was after and after putting this amount of money in it I wanted it to be exactly what I had envisioned, not a very very loose interpretation of it. This is the point where I modeled it myself and sent it in to steel manufactures. Originally was looking at cold formed since the price was nearly identical to post frame wood construction but the more and more I considered that and done my research the more and more I thought it would be good to last 10-15 years and be falling in. Then, I started quoting it as red iron I-beam and it was only going to run about an extra 5-7000. Mainly due to the special fabrication involved like all the window framing, and the parapet wall. Those two things really spiked the cost up but again, I planned on only doing this once and it being exactly what I had imagined it to be and would not settle for less just to save a few thousand bucks.

This is one example of the post frame building designs I got back. They said the would not could not offset the doors to the one side and they would have to be centered “to look right” and wasn’t even giving me the option of doing it how I wanted. Sadly this is the closest rendering I could get without modeling myself and sending off to Whirlwind. And they would only do it in a 4:12 pitch so to end up with 8’ interior height the exterior was close to 16-18’ high. Working with whirlwind I could get it in a 1:12 which gave me 9’ interior height at only 12’ 6” exterior height
To cool,the man knows what he wants and builds it.
 
OP
B

Baja_XJ

Active member
Joined
Jul 10, 2011
Messages
32
Location
Bedford, IN
Hey guys, came here to check in on floor coatings and had to sign in to view picture attachments in the thread I was reading. Thought while I was here that I would check back at my thread and see if anyone had posted on it.
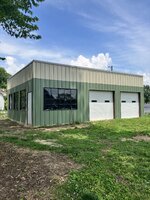
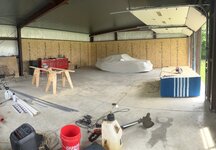
It is done (sort of). I took a break from it once I got it shelled in to catch up on life for a couple of years. I’ve had an extension cord ran back there for a couple years now so that it was a usable space haha finally this year returning to finishing this place out inside. Installing a ceiling, covering the walls, doing surface mount electrical, getting real lighting in, and then this fall once it’s proper climate… coating the floor. Won’t get around to doing the driveway until next year. I’ve got a perimeter drain to put down, a tree to drop, an existing slab to rip out all before doing the driveway and that will all eat up enough time that I just don’t see that happening this year.
Here are a few updated pictures of the exterior. Will try keeping this more up to date for the people who are interested once I get back out there in a couple months. Still on my winter projects which are inside the house right now.
 

Attachments

  • IMG_3005.jpeg
    IMG_3005.jpeg
    1.2 MB · Views: 459
  • IMG_4017.jpeg
    IMG_4017.jpeg
    1.1 MB · Views: 451

jollygreengiant

Well-known member
Joined
Nov 10, 2013
Messages
2,381
Location
Ontario, Canada
Keep posting as you make progress! That's a cool building, it would be cool to see more of it.

And as someone else who ran their shop on an extension cord for years, there's nothing quite so satisfying as the last time you ever have to plug that stupid cord in lol.
 
To avoid these ads, REGISTER NOW!

captain14

Well-known member
Joined
Dec 19, 2012
Messages
7,100
Location
Near College Park Maryland 20740
And as someone else who ran their shop on an extension cord for years, there's nothing quite so satisfying as the last time you ever have to plug that stupid cord in lol.
I did the same thing with my single car garage. Now it feels nice to plug an extension cord in from the garage outlet to have power for my yard tools or a drop light in the driveway!
 

JSHOUSE1

Active member
Joined
Jun 18, 2013
Messages
28
Location
Lawrenceburg, TN
Looks good man, I went the traditional roof route on a 30x40 to keep my 12ft ceiling throughout the shop, just because we have a really good metal post frame company in town, but I love the way yours looks too.
 
OP
B

Baja_XJ

Active member
Joined
Jul 10, 2011
Messages
32
Location
Bedford, IN
Been 3-4 months since an update. I’ve got the ceiling in, that took right about 40 hours, doing it completely myself. Wasn’t bad but wasn’t the easiest thing either. Working on building walls now. It’s a little further along than what this picture shows, this was early last week. Going to finish up the 2.5 walls I’ve been working on then have to take a break from wall covering to make handles and seals for my four casement windows so they’ll stop seeping water in to the base of the floor when it rains. Once I know that’s weather tight I’ll finish the sheeting of that side wall and the small section I left open on the front wall. I’m die-hard on getting my 2 hours a day in out there so progress is steady. Hope to be wiring by the end of July

IMG_8068.jpeg
 

Hooked

Well-known member
Joined
Sep 24, 2010
Messages
477
Location
League City, Texas
I somehow missed this back when you started. I have used Whirlwind for all our metal building materials over the years.
I really like the design/look you came up with. Having built our 40x60 steel building I can relate to how much longer it takes than paying a contractor to do it in a few days. Good job and congrats.
 
OP
B

Baja_XJ

Active member
Joined
Jul 10, 2011
Messages
32
Location
Bedford, IN
Love my whirlwind and they were amazing company to deal with during the entire process. I won’t touch this thing again until Tuesday but should have the walls I need sheeted done in plywood by next weekend so I can go back and drywall and then get the electrical box and meter hung so I can trench my new meter to the house and get the power turned on. Dealing with the electric company and it’s contractors is going to be long and drawn out so I’m trying to stay up with them to keep progress moving forward on their end. Once I get the breaker and meter up and service connected back to the house I’ll continue the wall sheeting, so there won’t be much visual progress for a couple months I feel.
 

69charged

Well-known member
Joined
Sep 20, 2007
Messages
470
Location
carberry, manitoba
Been 3-4 months since an update. I’ve got the ceiling in, that took right about 40 hours, doing it completely myself. Wasn’t bad but wasn’t the easiest thing either. Working on building walls now. It’s a little further along than what this picture shows, this was early last week. Going to finish up the 2.5 walls I’ve been working on then have to take a break from wall covering to make handles and seals for my four casement windows so they’ll stop seeping water in to the base of the floor when it rains. Once I know that’s weather tight I’ll finish the sheeting of that side wall and the small section I left open on the front wall. I’m die-hard on getting my 2 hours a day in out there so progress is steady. Hope to be wiring by the end of July

IMG_8068.jpeg
Looks good. I know progress is slow doing it yourself, but the satisfaction you get when a particular step is done and your closer to the finish line feels great. I do all my own work as well and it’s been a couple years now that I’m still working on my garage. But you’ll get there.
I like the design. You did a great job bringing the vision in your head to life!!
 
OP
B

Baja_XJ

Active member
Joined
Jul 10, 2011
Messages
32
Location
Bedford, IN
It does take awhile, that’s an understatement. I did take a break on it for a good year or two also, so that didn’t help. I just didn’t want it to come out too industrial or actual garage looking and have my own style that’s hard to put into words for someone else to do the work and hit the design or appeal I had in mind. And, doing it myself if I see that it’s not coming out quiet like I think it should and need to change the way I’m doing it, I can do that at any point so it stays on track with what I think needs to happen.
 
OP
B

Baja_XJ

Active member
Joined
Jul 10, 2011
Messages
32
Location
Bedford, IN
Thanks for the complements guys, I have made some more progress but I’m not a step-by-step progress poster so I’ll be back with updates once I get this stage buttoned up. I will say, I had a 4-5?week set back so I’ve shuffled a few things around and am focused on getting the overhead door 22’x30’ section sheeted in with wall panels, which is basically its own section of the structure, so I can get moving on getting electric ran into it and heat installed before fall which is coming up fast. Then, I’ll be able to work in there all winter wallboarding the other section where the windows and walk door are then painting the entire interior at once. Not what I planned on or wanted to do but yeah, expect delays! Original plan was to wallboard the entire thing, then paint, then install and run electric but there just isn’t time to do that with it basically being the beginning of August. I figure I got right around 90 days before I’m going to start needing that heat.
 
OP
B

Baja_XJ

Active member
Joined
Jul 10, 2011
Messages
32
Location
Bedford, IN
Alright, let’s have an update. I’m sure you’ve all heard before, the last 10% takes 90% of the time. This is being proven right now as I’m going on my 3rd week of buttoning up the vintage casement windows. When I erected the place, I only had them sandblasted, then I painted, installed, and had a glass installer come cut and glaze in new panes. They never had seals, they never had handles, they’ve always seeped and leaked water. Not finishing them back then has caught up to me as I’m having to do it now. Sourced some handles for a different brand of vintage casement windows, modified my existing frames since these take 1/4” screws and my frames were all built for 5/16” hardware. Got the timing set on all the handles then went back with bleach cleaner and scotch brited all the white glaze to get all the 3 years of funk scrubbed off, have everything there to make up seal kits for the jambs, some of the panes didn’t get enough silicone from the installer and seep in water around the pane then out the glaze on the inside so I have bought more silicone to hit every pane with from the outside to fix that issue then once I’m sure all the leaks are fixed I’ll paint the glaze on the inside. It has rained since I put handles on them and that, along with siliconing around the J channel on the exterior, have fixed 95% of the leaks. At the same time, I won’t move on until there is zero leaks at all so that it don’t hold enough moisture inside the wall to rot out the plywood, and dang sure don’t want it running down the sill on the inside and getting the plywood or drywall either one physically wet. I’m hoping by this time next month to have all the plywood base hung so I can get moving on the drywall. I’m going to be cutting it real close on beating the weather. Once I get past these windows and the last wall sheeted, the window wall, I’m going to cut short and only drywall the back wall for starters so I can get my electrical box hung and connected, then get heat installed. Once I get those done, I’ll go back and drywall the entire rest of the place. Not the order I wanted things to happen in but I’ve seemed to come up about 2 full months behind my projected schedule I made in the spring so I have to work with the hand I’m dealt. The original logic was to be done drywalling everything, paint the entire place, then put in the electric so I could paint the wall behind the panel and everything but that’s just not going to happen. Fingers crossed that I should be caught up with all that and the place have heat, basic electric meaning like 1-2 outlets, all the walls drywalled and painted by the first part of December. Then I’ll go back and to finish wiring the place out and hang my lights after the holidays.

One last note, anyone doing a project like this, expect a labor of love and never give up when it gets difficult, it’s going to get difficult. I’ve worked on this place religiously since basically Easter, 15+ hours a week, and this is how far I’ve made it. Granted, I’ve done all of this interior work 100% solo, so this may not be everyone’s case, but I don’t like being a burden and asking friends or family to donate time.

IMG_8540.jpegIMG_8556.jpeg
 
OP
B

Baja_XJ

Active member
Joined
Jul 10, 2011
Messages
32
Location
Bedford, IN
Busy weekend. Said I wasn’t going to go out and work on it and would take a much needed break to catch my breath and rest. That turned into telling myself I’m sure I could sneak this in or that in, these won’t take too long, 30 minutes to an hour, that snowballed into I bit the bullet and finished sheeting the walls with plywood.
Windows are done, plywood is done, taking this week to do some cleanup since I’m done making sawdust, sweep everything up and wipe everything down, reorganize materials and tools, and get caught up on some end of summer yard work then next Monday September 8th I’ll be starting drywall.
I will be drywalling just the back wall to start with so I can get the meterbase on, hole drilled through the interior and exterior walls for breaker box, then do drywall finish work, mount the breaker so I can get put in the queue with the electric company for service cutover. I’ll go around and do the rest of the drywall while I wait on Duke Energy and affiliated contractors to come by.

IMG_8755.jpeg
 

Jayman17

Well-known member
Joined
Feb 6, 2017
Messages
3,837
Location
Seattle, Wa
Great looking building, love that wall of windows, really lets in the light! Your choice of windows gives your building great character. (y)
 
To avoid these ads, REGISTER NOW!
Top Bottom