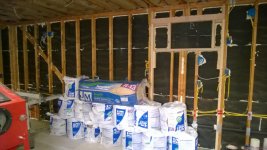
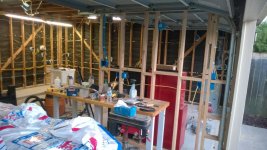
After being in my home (purchased new) for almost 10 years, I felt it was time (and with a lot of positive pressure from a good friend) to overhaul my unfinished detached garage.
Over the years I had made accommodations in the unfinished space, but I had always known those to be temporary. So I refer to those minor improvements as Garage 1.1, 1.5 etc.
The name “Garage 2.0” - this is the starting over and doing it exactly as I want.
I've now put about three months into the project, but working full time+ and doing all of this work alone on weekends and evenings, I guess I am good with progress / timing thus far.
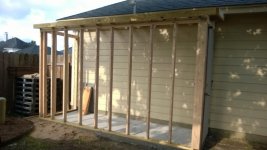
Along the back of the garage, I have built a 4 x 12 lean-to. Originally, I planned this to be smaller (4 x 4 or 4 x 8). It houses my air compressor and vac. I then thought to make it 12' and also use it as a "parking spot" for the mower and outdoor equipment. This works well since the compressor and vac are stationary fixtures in the back of the space.
I began this project in Sketch-Up and drafted a general idea of reworking the space, yet much has changed in what may be considered a “design-(as-you-go)-build”
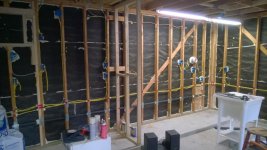
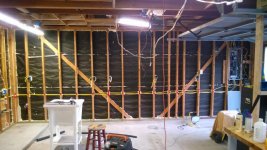
I mentally split the rebuild into three phases: I – Lean-To build, II – everything “behind the scenes”, and III – completing the interior build out post drywall.
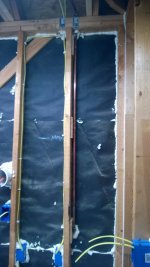
Phase I and II are coming to completion as I set out to start and complete drywall over the next week that I have taken vacation. I see questions from time to time such as "what all should I do / add while building my garage / shop. The following list details everything that has gone into phases I and II that I wanted:
Low Voltage:
Garage Door Opener 1 Sensors
Garage Door Opener 2 Sensors
Garage Door Opener 1 Button / Remote Receiver
Garage Door Opener 2 Button / Remote Receiver
Audio (Ceiling Speakers, Subwoofer, Outdoor, Line-In, Homerun to two locations)
SMC w/ 5 Homeruns to House
Alarm Keypad Relocation
Photo Sensors Rewire / Relocate
NanoStation Rewire to SMC with POE adapter in SMC
UniFi (entry ceiling) wired into SMC with POE adapter
Parking Indicator and wiring back to Alarm Photo
Behind Garage / Shed Camera
Alarm Siren Rewire
Irrigation Controller Relocation
Relocate RG6 Service Entrance run into newly built bulkhead
Conduit to Lift Control
Cat 5 From Attic to Lift Control Box
Garage Camera Ceiling Drop
ENT Drops
Network Drop to Computer Locations
Line Voltage:
Irrigation Controller Power Outlet
SMC Power Outlet
Gate Power Outlet
Kid Zone Lighting
Outdoor Lights (6) dedicated 15A branch - 4 Zone Switches
IR Blaster Photo Controlled Outlet
14/3 from Master Motion to Switch override on wall
240v to Shed - Compressor (Switched)
240v to AC
120v to Shed - Vac (4 Way Switched top / Constant Bottom)
Attic Lighting
Shop Outlets - Alternating on two 20A GFCI branches
Shop Lights, dedicated 15A branch, 3 Zones (post motion switch)
Air Compressor Switch & Indicator Light
Shed Lighting
Attic Outlets
Dedicated Outlet 20A branch – Future 6 Gal Wall Mount Point of Use Water Heater Option
Ceiling Outlets x2 GDOs
Ceiling Outlets x3 (cord reels)
ENT into panel
Air Cleaner Switched Outlet
Upper Cabinet (Audio / Charger) Outlet
Sub-woofer Outlet
Other:
Lean-To Shed
Plumb Water Supply Line (tapping irrigation 1" main behind garage)
Add Hose Spigot behind Garage when extending water up into wall
Central Vac Plumbing
Compressed Air Plumbing
Rough-In AC Opening
Entry Wall
Back Wall Division Wall
Kid Zone Wall
Alarm Photo Sensor Wall Pass-through
4" Vac Duct through wall into shed
Close up old wall vents
Stub Out water supply line x2 cold
Grey Water drain through wall into dry well
Hose Real Blocking
Relocate Attic Stairs
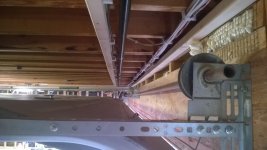
Garage Door Track Support Blocking
Insulation
T8 Strip Blocking for mounting
Ceiling Sheetrock blocking (Entry Side)
Sealing (Caulk, Foam, etc)
Sheetrock blocking on Walls etc…
Insulate In Wall Pipe
GDO Blocking
Over the years I had made accommodations in the unfinished space, but I had always known those to be temporary. So I refer to those minor improvements as Garage 1.1, 1.5 etc.
The name “Garage 2.0” - this is the starting over and doing it exactly as I want.
I've now put about three months into the project, but working full time+ and doing all of this work alone on weekends and evenings, I guess I am good with progress / timing thus far.
Along the back of the garage, I have built a 4 x 12 lean-to. Originally, I planned this to be smaller (4 x 4 or 4 x 8). It houses my air compressor and vac. I then thought to make it 12' and also use it as a "parking spot" for the mower and outdoor equipment. This works well since the compressor and vac are stationary fixtures in the back of the space.
I began this project in Sketch-Up and drafted a general idea of reworking the space, yet much has changed in what may be considered a “design-(as-you-go)-build”
I mentally split the rebuild into three phases: I – Lean-To build, II – everything “behind the scenes”, and III – completing the interior build out post drywall.
Phase I and II are coming to completion as I set out to start and complete drywall over the next week that I have taken vacation. I see questions from time to time such as "what all should I do / add while building my garage / shop. The following list details everything that has gone into phases I and II that I wanted:
Low Voltage:
Garage Door Opener 1 Sensors
Garage Door Opener 2 Sensors
Garage Door Opener 1 Button / Remote Receiver
Garage Door Opener 2 Button / Remote Receiver
Audio (Ceiling Speakers, Subwoofer, Outdoor, Line-In, Homerun to two locations)
SMC w/ 5 Homeruns to House
Alarm Keypad Relocation
Photo Sensors Rewire / Relocate
NanoStation Rewire to SMC with POE adapter in SMC
UniFi (entry ceiling) wired into SMC with POE adapter
Parking Indicator and wiring back to Alarm Photo
Behind Garage / Shed Camera
Alarm Siren Rewire
Irrigation Controller Relocation
Relocate RG6 Service Entrance run into newly built bulkhead
Conduit to Lift Control
Cat 5 From Attic to Lift Control Box
Garage Camera Ceiling Drop
ENT Drops
Network Drop to Computer Locations
Line Voltage:
Irrigation Controller Power Outlet
SMC Power Outlet
Gate Power Outlet
Kid Zone Lighting
Outdoor Lights (6) dedicated 15A branch - 4 Zone Switches
IR Blaster Photo Controlled Outlet
14/3 from Master Motion to Switch override on wall
240v to Shed - Compressor (Switched)
240v to AC
120v to Shed - Vac (4 Way Switched top / Constant Bottom)
Attic Lighting
Shop Outlets - Alternating on two 20A GFCI branches
Shop Lights, dedicated 15A branch, 3 Zones (post motion switch)
Air Compressor Switch & Indicator Light
Shed Lighting
Attic Outlets
Dedicated Outlet 20A branch – Future 6 Gal Wall Mount Point of Use Water Heater Option
Ceiling Outlets x2 GDOs
Ceiling Outlets x3 (cord reels)
ENT into panel
Air Cleaner Switched Outlet
Upper Cabinet (Audio / Charger) Outlet
Sub-woofer Outlet
Other:
Lean-To Shed
Plumb Water Supply Line (tapping irrigation 1" main behind garage)
Add Hose Spigot behind Garage when extending water up into wall
Central Vac Plumbing
Compressed Air Plumbing
Rough-In AC Opening
Entry Wall
Back Wall Division Wall
Kid Zone Wall
Alarm Photo Sensor Wall Pass-through
4" Vac Duct through wall into shed
Close up old wall vents
Stub Out water supply line x2 cold
Grey Water drain through wall into dry well
Hose Real Blocking
Relocate Attic Stairs
Garage Door Track Support Blocking
Insulation
T8 Strip Blocking for mounting
Ceiling Sheetrock blocking (Entry Side)
Sealing (Caulk, Foam, etc)
Sheetrock blocking on Walls etc…
Insulate In Wall Pipe
GDO Blocking