To avoid these ads, REGISTER NOW!

Garage Build

JJOrzech

Active member
Joined
Jun 1, 2017
Messages
32
Location
Syracuse, NY
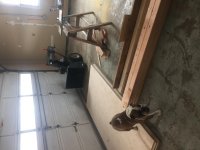
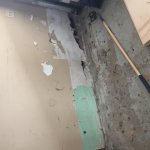
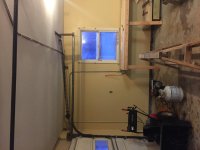
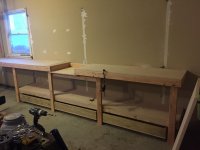
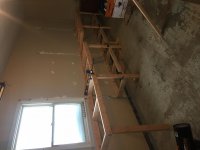
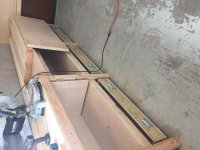
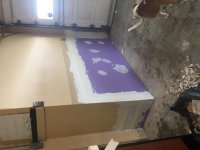
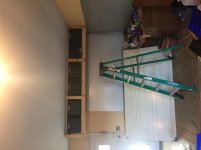
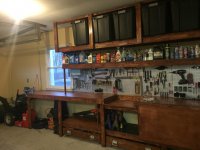
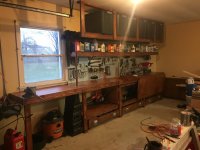
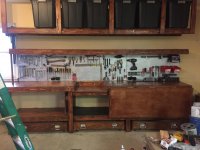
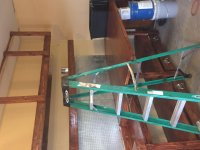
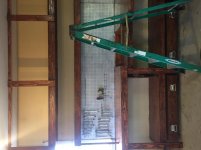
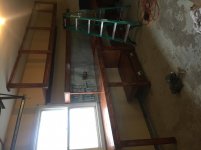
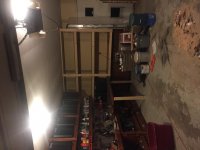
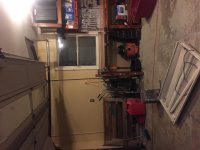
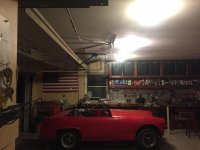
so I am the father of a family of 6 and naturally when you have that many people under one roof you tend to collect a lot of items. For a couple years not I have been saying that I need to organize the garage to it has more functionality and usefulness that I huge unorganized mess. Well I walked into the garage and saw this and thought to myself...enough is enough and the build began. Mind you my carpentry skills are elementary but I figured if I could image in my head what I wanted I could build it. Here is my journey...it is not finished but it is getting there.
 

Attachments

  • IMG_3417.jpg
    IMG_3417.jpg
    155 KB · Views: 62
To avoid these ads, REGISTER NOW!
OP
J

JJOrzech

Active member
Joined
Jun 1, 2017
Messages
32
Location
Syracuse, NY
So my wife was out of town and I figured it would be the best time to get started on it. Step one was to clear out as much junk as I could from the entire garage. We have a whole floor in the house that we don't use so figured that was a good place to store everything while the build began.

I immediately found some serious rot in the front corner of the garage. The previous owners use to keep their dogs in the garage so I'm assuming this was the area of the garage where they peed all the time. This was gonna have to be repaired.

I pulled all the 2" angle iron off the walls and filled the holes in best I could.
 

Attachments

  • IMG_3467.jpg
    IMG_3467.jpg
    139.6 KB · Views: 23
  • IMG_3469.jpg
    IMG_3469.jpg
    135.1 KB · Views: 26
  • IMG_3465.jpg
    IMG_3465.jpg
    138 KB · Views: 24
  • IMG_3442.jpg
    IMG_3442.jpg
    131.3 KB · Views: 24
  • IMG_3440.jpg
    IMG_3440.jpg
    126.8 KB · Views: 24
  • IMG_3439.jpg
    IMG_3439.jpg
    133.2 KB · Views: 27
  • IMG_3420.jpg
    IMG_3420.jpg
    127.8 KB · Views: 33

sublime68charger

Well-known member
Joined
Sep 9, 2014
Messages
5,415
Location
SW Wisconsin
Umm good luck!

Be sure to check back with progress picks and hopefully this thread can you motivated to get that space cleaned up and more functional!
 
OP
J

JJOrzech

Active member
Joined
Jun 1, 2017
Messages
32
Location
Syracuse, NY
I REALLY wanted a multifunctional workbench and I had an idea that used as much space as possible and still be functional.
 

Attachments

  • IMG_3467.jpg
    IMG_3467.jpg
    139.6 KB · Views: 15
  • IMG_3466.jpg
    IMG_3466.jpg
    131.2 KB · Views: 18
  • IMG_3465.jpg
    IMG_3465.jpg
    138 KB · Views: 18
  • IMG_3452.jpg
    IMG_3452.jpg
    135.4 KB · Views: 24
  • IMG_3451.jpg
    IMG_3451.jpg
    143 KB · Views: 19
  • IMG_3450.jpg
    IMG_3450.jpg
    128.1 KB · Views: 18

R5P7Duster

Well-known member
Joined
Jan 16, 2016
Messages
58
Location
Menomonee Falls, WI
Whoa! You really cleaned house er umm garage ha ha. Looking good so far. I was going to start a thread on mine but haven't had time to take current pics. Thanks for the motivation.

Sent from my XT1585 using Tapatalk
 
To avoid these ads, REGISTER NOW!
OP
J

JJOrzech

Active member
Joined
Jun 1, 2017
Messages
32
Location
Syracuse, NY
took a break from building the workbench to tackle the rotted wall. Ended up being all three sides of that corner. So purple board, tape and loads of mud and sanding and the wall was as good as new. Then back to the workbench.

There was a lot of space UNDER the workbench that I thought could be better utilized so I build a couple drawers on fixed casters that just pull right out and can hold A ton of weight. even built in a recessed spot for my table saw that will eventually be flush with the top so I have an extended feed table.
 

Attachments

  • IMG_3482.jpg
    IMG_3482.jpg
    126.3 KB · Views: 13
  • IMG_3481.jpg
    IMG_3481.jpg
    133.8 KB · Views: 11
  • IMG_3480.jpg
    IMG_3480.jpg
    136.1 KB · Views: 11
  • IMG_3472.jpg
    IMG_3472.jpg
    130 KB · Views: 12
  • IMG_3471.jpg
    IMG_3471.jpg
    136.1 KB · Views: 13
  • IMG_3469.jpg
    IMG_3469.jpg
    135.1 KB · Views: 11
  • IMG_3468.jpg
    IMG_3468.jpg
    137.5 KB · Views: 11
OP
J

JJOrzech

Active member
Joined
Jun 1, 2017
Messages
32
Location
Syracuse, NY
Next thing I wanted to do was hang some peg board for hand tools and build some overhead shelves. I anchored all the overhead shelves to wall and ceiling studs. Added a small floating shelf for chemicals and car wash stuff. and then built some more overhead shelves over the crafting corner. I also resurfaced the counter top
 

Attachments

  • IMG_3546.jpg
    IMG_3546.jpg
    139.7 KB · Views: 12
  • IMG_3504.jpg
    IMG_3504.jpg
    140.5 KB · Views: 13
  • IMG_3485.jpg
    IMG_3485.jpg
    127.9 KB · Views: 14
  • IMG_3484.jpg
    IMG_3484.jpg
    136.2 KB · Views: 11
OP
J

JJOrzech

Active member
Joined
Jun 1, 2017
Messages
32
Location
Syracuse, NY
Then since I will be using the garage a lot I decided to stain the majority of the area where I will be doing most of the work.
 

Attachments

  • IMG_3545.jpg
    IMG_3545.jpg
    136.6 KB · Views: 18
  • IMG_3543.jpg
    IMG_3543.jpg
    138.3 KB · Views: 17
  • IMG_3542.jpg
    IMG_3542.jpg
    139.7 KB · Views: 14
  • IMG_3536.jpg
    IMG_3536.jpg
    136.5 KB · Views: 11
  • IMG_3535.jpg
    IMG_3535.jpg
    138.1 KB · Views: 12
  • IMG_3534.jpg
    IMG_3534.jpg
    128.1 KB · Views: 9
  • IMG_3538.jpg
    IMG_3538.jpg
    143.3 KB · Views: 13
OP
J

JJOrzech

Active member
Joined
Jun 1, 2017
Messages
32
Location
Syracuse, NY
More shelves and more loading it up with stuff
 

Attachments

  • IMG_3588.jpg
    IMG_3588.jpg
    133 KB · Views: 18
  • IMG_3589.jpg
    IMG_3589.jpg
    136.3 KB · Views: 17
  • IMG_3590.jpg
    IMG_3590.jpg
    127.9 KB · Views: 20
  • IMG_3654.jpg
    IMG_3654.jpg
    129.7 KB · Views: 28
To avoid these ads, REGISTER NOW!
Top Bottom