To avoid these ads, REGISTER NOW!

Garage Lighting For Future Auto DIY Paint Job.

Joined
Nov 8, 2013
Messages
18
Location
Lancaster Co. PA
Hi. First post but I've been lurking for a while.:beer:

I've been working on my '69 vette for a while now and getting closer and closer to gelcoating/primer/painting it.

It's a rental house but I decided I'll need more lighting. Went to HD, saw the F54T5HO lights and was amazed and had to have them but didn't want to spend $40+bulbs each. Went on ebay and scored 8 of them for $27/ea w/ bulbs.

SO... Now I'm trying to figure out the best way to lay them out to aid in the future paint job with the least amount of damage mounting. Every pic I see of DIY paint booth they have fixtures on the wall... I'm a bit worried with them on the wall they'll get hit way easier and break.

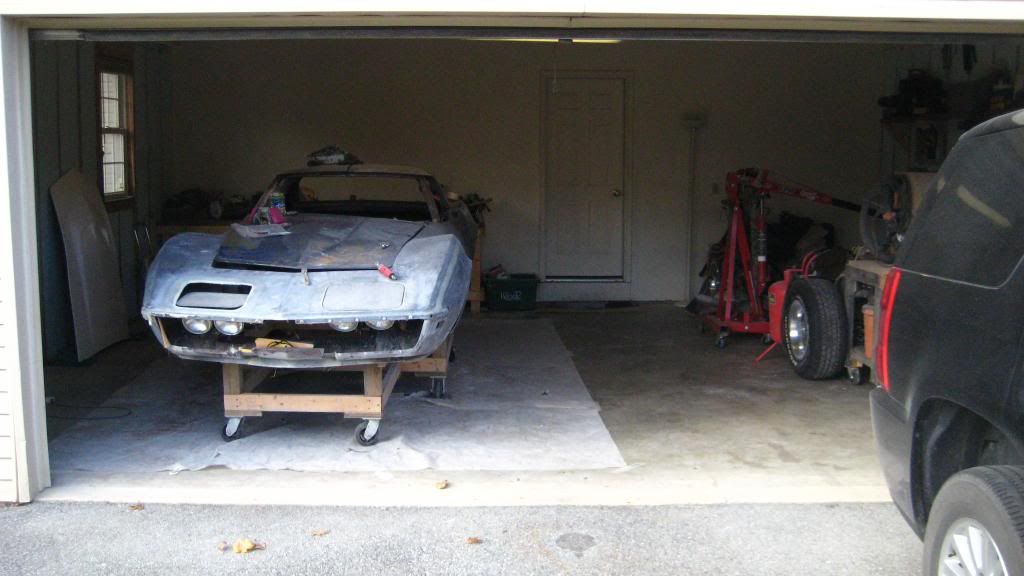
Here's the current garage. I'll be using the left 2/3's of it to paint in. What are your suggestions if you had 8 figures to do as you wished. I plan on taking down the T8x4 fixture and putting it in the basement. Garage is a 20amp and the empty unfinished attic above is 15amp. So I can tie into that if need be.

pic of the 2/3's side I'll be using.


Here's the visual design layout I was messing around with. thinking I could put up the 6 fixtures in the first 2 columns, skip the right 3, which leaves 2 extra I can put one on each wall if I wanted.
 
To avoid these ads, REGISTER NOW!

2ManyProjects

Well-known member
Joined
Jul 18, 2013
Messages
757
Hi. First post but I've been lurking for a while.:beer:

I've been working on my '69 vette for a while now and getting closer and closer to gelcoating/primer/painting it.

Congratulations on your work-in-progress. May you continue to make progress at a rewarding rate. 1969 was a pretty good year for Corvettes, at least as compared to most of the '70s & early '80s. My cousin had a "1970-1/2" model, with the last of the high-compression small-blocks. It was a nice ride.

It's a rental house but I decided I'll need more lighting. Went to HD, saw the F54T5HO lights and was amazed and had to have them but didn't want to spend $40+bulbs each. Went on ebay and scored 8 of them for $27/ea w/ bulbs.

Ouch.

Regardless of what you paid for them, you bought the wrong lights, at least if your plan was to (eventually) use them for general shop illumination. Based on the photos, it appears that you have the typical "nine feet or so" ceilings so often found in suburban residential garages. That's just too low for T5HO lights to work properly.

The one potential saving grace here is, you said you wanted to set this up specifically for painting. That means you're going to want a LOT more light than is normally the case; and so you MAY be able to salvage at least some of those fixtures by using them in whatever becomes your "paint booth".

SO... Now I'm trying to figure out the best way to lay them out to aid in the future paint job with the least amount of damage mounting. Every pic I see of DIY paint booth they have fixtures on the wall... I'm a bit worried with them on the wall they'll get hit way easier and break.

The reason you see that arrangement in paint booths is because, in addition to LOTS of light, you need the light to be coming at the work surface from as many different angles as possible, all at the same time. The point here is to eliminate ALL shadows, even ones which would normally be too trivial to worry about -- AND including the ones that you yourself will be casting as you move about the vehicle to apply the paint.

Here's the current garage. I'll be using the left 2/3's of it to paint in.

How are you planning to cordon off that area from the rest of the garage? Not only do you need to keep ALL dust, debris, insects, and other contaminants out of the "paint booth" (including during the drying period long after the spraying itself is done); you also need to protect that garage you don't own from overspray and similar. You will likely want to set up some sort of forced air-exchange system in the "paint booth", with a high-capacity exhaust fan and some generously sized filtered air intakes, so that you don't kill yourself from the noxious fumes before the job is done (and also to help keep things clean).

What are your suggestions if you had 8 figures to do as you wished. I plan on taking down the T8x4 fixture and putting it in the basement.

I'd probably start by designing the paint booth itself. Given its "temporary" nature and the fact that you don't own the space, you're probably looking at setting up some sort of free-standing framing (made from 1x2 lumber or similar), and covering it with heavy-gauge polyethelene sheeting. Seal the joints/seams with wide tape, and set up a "double flap" of the stuff to make a service door for you to get in and out of the booth (i.e., two layers, with each one affixed on the opposite sides of the "door frame" and across the top, but left unattached on the "other" side so it can be pulled aside to pass).

From there, attach the lights to the 1x2 framing as needed. Some can be on the "ceiling"; some can be attached to the "walls": I might start with one or two fixtures vertically in each corner, plus one or two more horizontally in the middle of each "wall" at about waist height (maybe a tad lower, considering the minimal height of the vehicle in question); and still others will likely be best put on portable stands that you can move from one side of the car to the other as you work. Yes, you're surely going to need still more lights than you already have. Note that NONE of these lights really need to be T5HO types; and in fact, plain-vanilla F32T8s would surely be better. It is FAR better to have somewhat lower-intensity lights "everywhere", than to have just a few very intense light sources. But since you already have those fixtures, you might as well try to make do with them; the "ceiling" and corners will likely be the least obnoxious places to put them.

When it comes time to populate all these light fixtures with tubes, THE most important thing to consider is the CRI ("Color Rendering Index") rating. Those "run-of-the-mill F54T5HO tubes" I spoke of above (no doubt including the ones you bought via eBay) generally **** in this regard. The best one I could find on 1000bulbs.com (http://www.1000bulbs.com/product/7738/HALCO-35081.html) has a rated CRI of just 86; and the color tempurature (which is the second-most critical item) is less than ideal at just 3000 Kelvin. By comparison, CRI ratings of up to 95-98 are available in F32T8 tubes:

http://www.1000bulbs.com/product/4722/F-32T8TL950P.html
http://www.1000bulbs.com/product/97598/F-36W965-10CS.html

...and their Color Temperatures are better, too.

But regardless of what tubes you eventually select, it is imperative that they all match in terms of both Color Temp and CRI. Preferably, they should all be the same make/model for best uniformity.

Garage is a 20amp and the empty unfinished attic above is 15amp. So I can tie into that if need be.

You may well have to, considering that you're going to be sucking up at least SOME of that 20A circuit to run the air compressor, the ventilation system, and other non-lighting stuff.

Here's the visual design layout I was messing around with.

Throw that away and start over. As mentioned above, the lights you bought are not really suitable for general illumination of that garage; and the paint booth scenario is a special case.

 
OP
P
Joined
Nov 8, 2013
Messages
18
Location
Lancaster Co. PA
Regardless of what you paid for them, you bought the wrong lights, at least if your plan was to (eventually) use them for general shop illumination. Based on the photos, it appears that you have the typical "nine feet or so" ceilings so often found in suburban residential garages. That's just too low for T5HO lights to work properly.
9ft. Hard to buy lights when I don't know what my future garage will be. I wanted the brightest I could get which these seem to put out. They're able to flush mount and from what I read 8-10ft is "okay" for them. Since I wanted a ton of light with as few fixtures as possible(it not being my house) I figured I needed to pack the most lumens possible per fixture. Sure i'll take them down when I leave but the least disturbance the better.

The one potential saving grace here is, you said you wanted to set this up specifically for painting. That means you're going to want a LOT more light than is normally the case; and so you MAY be able to salvage at least some of those fixtures by using them in whatever becomes your "paint booth".
Yeah. I was planning on using 2-4 of them as always on with the switch for extra lighting every day. Then the other 4-6 will be only when I get ready for paint.


The reason you see that arrangement in paint booths is because, in addition to LOTS of light, you need the light to be coming at the work surface from as many different angles as possible, all at the same time. The point here is to eliminate ALL shadows, even ones which would normally be too trivial to worry about -- AND including the ones that you yourself will be casting as you move about the vehicle to apply the paint.
I'll have to see the beam they create I guess but I figured with such a small space and the amount of light these put out there would be plenty of overlap depending on how I lay them all out.


How are you planning to cordon off that area from the rest of the garage? Not only do you need to keep ALL dust, debris, insects, and other contaminants out of the "paint booth" (including during the drying period long after the spraying itself is done); you also need to protect that garage you don't own from overspray and similar. You will likely want to set up some sort of forced air-exchange system in the "paint booth", with a high-capacity exhaust fan and some generously sized filtered air intakes, so that you don't kill yourself from the noxious fumes before the job is done (and also to help keep things clean).
I haven't decided fully yet. The plan was to build a temp wall and line everything with plastic sheeting. This would allow for mounting lights to that wall if needed BUT i've seen some plans for booths involving cables that the plastic gets thrown over. Much cheaper and easier to put up/tear down during the different coats.

When it comes time to populate all these light fixtures with tubes, THE most important thing to consider is the CRI ("Color Rendering Index") rating. Those "run-of-the-mill F54T5HO tubes" I spoke of above (no doubt including the ones you bought via eBay) generally **** in this regard. The best one I could find on 1000bulbs.com (http://www.1000bulbs.com/product/7738/HALCO-35081.html) has a rated CRI of just 86; and the color tempurature (which is the second-most critical item) is less than ideal at just 3000 Kelvin. By comparison, CRI ratings of up to 95-98 are available in F32T8 tubes:

http://www.1000bulbs.com/product/4722/F-32T8TL950P.html
http://www.1000bulbs.com/product/97598/F-36W965-10CS.html

...and their Color Temperatures are better, too.

But regardless of what tubes you eventually select, it is imperative that they all match in terms of both Color Temp and CRI. Preferably, they should all be the same make/model for best uniformity.

I already ordered these bulbs:
http://www.1000bulbs.com/product/94228/FHO-54T5865F-25PK.html?ref=none
I was told that CRI isn't a "huge" deal unless I'm color matching paints. Plus the ones I picked out are 85 which isn't terrible. Plus I wanted the higher color temp since I like that vs. the yellowish ones I have now. And for the price I wasn't really willing to pay $6-10 per bulb.


You may well have to, considering that you're going to be sucking up at least SOME of that 20A circuit to run the air compressor, the ventilation system, and other non-lighting stuff.
Compressor is in the basement with a line coming up through the floor/wall. But you're right in that I will have at least 2-4 fans running. The plan right now is 2-4 box fans exhausting out the two windows(with filters on them). Then 2-4 box fans pulling warm air from the house(with filters on them too). I've looked into squirrel cage fans but haven't decided yet on what the final fan setup will be. It would definitely be easier for me to just plug into the garage outlets but I do like the idea of using the attic... I'll have to do some more research on cost/reward for that and how easy it'll be to tie into the attic(pretty sure it'll be easy.)


Throw that away and start over. As mentioned above, the lights you bought are not really suitable for general illumination of that garage; and the paint booth scenario is a special case.
How would you lay them out then given I need better lighting for every day work but will need that extra lighting for painting?
 
Last edited:

rclassic

Member
Joined
Apr 29, 2013
Messages
23
Location
N.W.PA.
I would ask the home owner his thoughts on using the garage for a spray booth.
Box fans won't cut it,after 10 min. you won't be able to see anything. If you are in a cold winter area thats a whole bunch of problems with heating/humitity.
I'm only speaking from experiance, and trying to the exact same thing your doing.
I would ask employees of body shops if they do any side work,a lot of times they can use employers facility to do there own work. Just my 2 cents.........good-luck!
 

D-fens

Well-known member
Joined
Nov 9, 2013
Messages
109
I did exactly this a few years ago (2008). Attempted to arrange for the use of a real spray booth but that didn't happen. Because drama. You know how it goes.

I didn't tell the landlord first. But the house was a run down dump anyway.

Painted all the walls primer white, and hung a line of 8' T12 fixtures around the garage. Even on the doors. This worked pretty well, didn't have any dark spots.

Started by cleaning the place really thoroughly, got all the cobwebs and BS off the walls and out of the corners.

The garage had three windows, two on the front and on the side. I put a box fan in the side window, facing out, with a cheapo AC filter taped over the inside. This didn't work as well as I wanted but did keep maybe half the overspray from escaping.

The other two windows got high-dollar 3M Filtrete filters over them in an attempt to keep dust out. This also did okay, didn't get much dust or BS in the clear.

I wet down the floor before spraying, both base and clear, with a vegetable sprayer. Not really so much wet it down, just dampened it to keep the dust down.

Based the car Saturday afternoon, let it sit overnight. Tacked it off really early Sunday AM, wet the floor down again, and cleared it.
 
OP
P
Joined
Nov 8, 2013
Messages
18
Location
Lancaster Co. PA
I would ask the home owner his thoughts on using the garage for a spray booth.
Box fans won't cut it,after 10 min. you won't be able to see anything. If you are in a cold winter area thats a whole bunch of problems with heating/humidity.
I'm only speaking from experience, and trying to the exact same thing your doing.
I would ask employees of body shops if they do any side work,a lot of times they can use employers facility to do there own work. Just my 2 cents.........good-luck!

Man...so much negativity here :sad:

I've lived here 3 years already and never talked to the owners. They'll just have to deal with it or I'll move out and figure something else out. With what I pay and how I've taken care of the house so far they better be okay with it. With plastic set up there shouldn't be any issues hurting the house anyway.

I'm not looking for a professional quality booth... If 4ish box fans in/out doesn't cut it I'll have to reevaluate but I'm not just giving up before I even try. Unless I hear of a better solution that's equally cost effective.

The cold is definitely going to be an issue. The plan was to gelcoat/primer during the winter and wait for the final coats till spring. That gives me plenty of time to block sand and get all the body work in good shape. The garage is insulated so I can easily heat it to temp and let it sit at that temp for a while. Then that's why I'd pull air from the house which will be heated. I'll be painting the old hood first for practice so obviously if it doesn't work I'll know not to try... but again... I don't like being negative! Or maybe I'm just ignorant and don't want to see it:eek2:
 
OP
P
Joined
Nov 8, 2013
Messages
18
Location
Lancaster Co. PA
I did exactly this a few years ago (2008). Attempted to arrange for the use of a real spray booth but that didn't happen. Because drama. You know how it goes.

I didn't tell the landlord first. But the house was a run down dump anyway.

Painted all the walls primer white, and hung a line of 8' T12 fixtures around the garage. Even on the doors. This worked pretty well, didn't have any dark spots.

Started by cleaning the place really thoroughly, got all the cobwebs and BS off the walls and out of the corners.

The garage had three windows, two on the front and on the side. I put a box fan in the side window, facing out, with a cheapo AC filter taped over the inside. This didn't work as well as I wanted but did keep maybe half the overspray from escaping.

The other two windows got high-dollar 3M Filtrete filters over them in an attempt to keep dust out. This also did okay, didn't get much dust or BS in the clear.

I wet down the floor before spraying, both base and clear, with a vegetable sprayer. Not really so much wet it down, just dampened it to keep the dust down.

Based the car Saturday afternoon, let it sit overnight. Tacked it off really early Sunday AM, wet the floor down again, and cleared it.

Thanks! Yeah. I'm hoping with both windows on mine exhausting and the ability to stack up to 4 fans on the window there should be at least decent to good enough exhausting going on. Plus pulling air form the house I'm hoping it'll be cleaner air than from outside but we'll just have to see!

Did you set up the booth to do primer? I'm always curious if other set it up then have to tear it all back down while they sand to avoid a lot of dust getting in everything.
 

creativecars

Well-known member
Joined
Nov 15, 2010
Messages
4,300
Location
Indiana- where horse and buggies still roam
The lights over the top are not bad, you might even be able to get away with four. You will definitely want some lights down at knee level around the vehicle. You don’t need color matching lights as you are not matching anything by doing a complete. What you want is for it to be even… You will need enough light to make sure you have complete coverage on every part of the car. The best way to do this is to get robot like when spraying, so you are delivering the same amount of material to every square inch of the car.

What you are doing has been done for years with many success stories, but also with many failures. Drop the plastic but be sure to give yourself room to move around. Dampen the floor; get it as warm as you can as you will want to shut the house door before you begin. Turn on the fans and get it sprayed. Doing the primer and gel coat now will let you know how to adjust things before spraying color and clear. Especially concentrate on the hard to reach places.
Good luck
 

D-fens

Well-known member
Joined
Nov 9, 2013
Messages
109
Thanks! Yeah. I'm hoping with both windows on mine exhausting and the ability to stack up to 4 fans on the window there should be at least decent to good enough exhausting going on. Plus pulling air form the house I'm hoping it'll be cleaner air than from outside but we'll just have to see!

Did you set up the booth to do primer? I'm always curious if other set it up then have to tear it all back down while they sand to avoid a lot of dust getting in everything.

I didn't use my "booth" set up for primer. In retrospect maybe I should have.

Multiple fans, in my opinion, will move too much air and cause dust issues. The single box fan system I used pulled out the overspray reasonably well without stirring things up too much.

I have some pics, I think, but am not in a position where I can post them right now.
 

creativecars

Well-known member
Joined
Nov 15, 2010
Messages
4,300
Location
Indiana- where horse and buggies still roam
I didn't use my "booth" set up for primer. In retrospect maybe I should have.

Multiple fans, in my opinion, will move too much air and cause dust issues. The single box fan system I used pulled out the overspray reasonably well without stirring things up too much.

I have some pics, I think, but am not in a position where I can post them right now.

Put several furnace filters on the fans, It will slow down the air movement but still allow flow. Google it there are many designs out there. Most of the car magazines have done write ups on "homemade booths"
 
OP
P
Joined
Nov 8, 2013
Messages
18
Location
Lancaster Co. PA
So after looking at a lot of booths online last night I came up with idea 2. They kept saying that horizontal lighting is preferred vs. vertical since it'll reduce shadows if I walk in front of the light. and almost none of them had much lighting on the ceiling. Since I'm not a huge fan of lighting at car level due to increased chances it'll get hit I did this:

So. Here I have only 2 on the ceiling centered over the car painting area(also used for normal every day lighting before/after I'm done)

Then I have one set up in each corner at a 45degree(or more). and one on each side at car level before I paint.


2ManyProjects

Well-known member
Joined
Jul 18, 2013
Messages
757
9ft. Hard to buy lights when I don't know what my future garage will be. I wanted the brightest I could get which these seem to put out. They're able to flush mount and from what I read 8-10ft is "okay" for them. Since I wanted a ton of light with as few fixtures as possible(it not being my house) I figured I needed to pack the most lumens possible per fixture.

Well that right there was the first place your thinking fundamentally derailed; that "most lumens possible per fixture" assumption is exactly the OPPOSITE of what you really need in that space. I recently explained the "why" of this in some detail in another thread; so rather than repeat all that here, I refer you to: http://www.garagejournal.com/forum/showpost.php?p=3496799&postcount=11.

Sure i'll take them down when I leave but the least disturbance the better.

Were it me, I'd NOT count on removing the fixtures once they are permanently installed in that garage (if they get used only in your makeshift "paint booth", that's another matter). First, you ARE going to make several holes in the ceiling and wall(s), not only for the mounting hardware but also for the wiring & switches; and these holes would need to be repaired (patch the drywall, spackle, sand, paint, etc.) if you subsequently remove the lights. You'd also have to remove the wiring itself, in order to NOT leave an undecipherable (and possibly hazardous) mess behind. All in all, it's just not worth the trouble. What you're investing in those (permanently installed) lights is what's called a "leasehold improvement". As such, you MIGHT be able to write it off your taxes; or maybe the landlord would be willing to rebate some of the cost against your rent. But even assuming neither of those scenarios, the value of salvaging some used light fixtures & wiring pales by comparison to the cost & effort required to properly restore the space to it previous condition.

{re: using the T5HOs for painting}
Yeah. I was planning on using 2-4 of them as always on with the switch for extra lighting every day. Then the other 4-6 will be only when I get ready for paint.

You're missing my point.

The ONLY reason I suggested that those fixtures could possibly be salvaged for paint-booth duty was because that would mean they would NOT get permanently installed as general garage lighting. Ever.

I'll have to see the beam they create I guess but I figured with such a small space and the amount of light these put out there would be plenty of overlap depending on how I lay them all out.

That's just the problem. I again refer you to the full explanation in that other thread; but in short, by the time you get the lights laid out closely enough to produce truly even illumination with only nine feet of ceiling height to work with, you're going to have WAY more light en toto than you either want or need. This is in part because, due to the restricted mounting height, you're going to need well more than eight fixtures to properly cover that space.

{re: constructing the paint booth}
I haven't decided fully yet. The plan was to build a temp wall and line everything with plastic sheeting. This would allow for mounting lights to that wall if needed BUT i've seen some plans for booths involving cables that the plastic gets thrown over. Much cheaper and easier to put up/tear down during the different coats.

The problem with at least the first approach is that it still leaves some of the real garage surfaces exposed "inside" the paint booth. That's not good, for all the reasons I already mentioned.


{SIGH}

More good money after bad. But I suppose those are little or no worse than any other T5HO tubes you might find.

I was told that CRI isn't a "huge" deal unless I'm color matching paints.

I disagree. The whole time you're painting, you're constantly making on-the-fly judgements about coverage, where the wet edge is, too much vs. too little paint in any given area, etc.; and these judgements are (subconsciously, if nothing else) based in part on subtle color shifts.

Plus the ones I picked out are 85 which isn't terrible.

Yes, a CRI of 85 IS "terrible", at least in the context of painting. Could you do still worse? Sure. But that is hardly the point.

Plus I wanted the higher color temp since I like that vs. the yellowish ones I have now.

On this part, at least, we agree. (Glad to see that there is SOMETHING we agree on!)

And for the price I wasn't really willing to pay $6-10 per bulb.

How much time, effort, and MONEY do you think you'll have ******* in that 'Vette by the time you are well and truly DONE? In that context, what's another couple hundred bucks? Don't be penny-wise and pound-foolish.

Compressor is in the basement with a line coming up through the floor/wall. But you're right in that I will have at least 2-4 fans running. The plan right now is 2-4 box fans exhausting out the two windows(with filters on them).

Bzzzzt!

No. Putting filters on EXHAUST fans will do you exactly ZERO good (it might do the neighborhood some good; but that's another matter). It is the air INTAKES which need to be filtered, in order to keep contaminants out of the work space.

Further, while you do indeed want your ventilation system to move a goodly quantity of air, you ALSO need it to do so while keeping the air VELOCITY to a minimum. The idea is that any particulates, dried overspray, etc., (including what you kick up by walking around the booth) can fall out of suspension and drop to the floor BEFORE it gets stirred up by the "wind" and deposited on your fresh wet paint.

Then 2-4 box fans pulling warm air from the house(with filters on them too).

Why from the house? Odds are that air is dirtier (think cooking residue, pet -- AND human -- dander, the **** you kick up everytime you walk across a carpet, etc.) than what's outside. And you CERTAINLY don't want the air you're drawing in to be significantly warmer than the ambient air in the paint booth (and especially the car itself), lest condensation become an issue.

{re: layout of general garage lighting}
How would you lay them out then given I need better lighting for every day work but will need that extra lighting for painting?

The paint booth and the general illumination for the garage are two entirely different things, which should be approached separately. But in both cases, I'd start with different fixtures, based on F32T8 tubes.

For general-purpose garage illumination, I'd probably run three rows front to back, one on each side of the garage door and one in the middle; then fill in with a fourth row running cross-ways across the back of the garage, perhaps 2-3 feet off the back wall. Ideally, the outer rows would also be spaced about 2-3 feet off the side walls; but 1.5-2 feet will suffice if that's what it takes to keep them from being blocked when the overhead door is open. If you can't manage even that much spacing without them getting blocked by the garage door (when open), I'd fabricate some "L-shaped" brackets to suspend them JUST below (and a foot or so "inside of") the (open) door. The middle row may or may not be contiguous or full-length, depending on what other complications the garage door and/or its opener impose. Finish it off with a ceiling-mounted trouble light on a retractable cord reel, approximately in the center of the space. Switching for all of this is another matter which needs to be carefully considered; but for the moment, suffice it to say that it should NOT be an "all or nothing" proposition.


I would ask the home owner his thoughts on using the garage for a spray booth.

Good point! The OP may get an answer he neither expects nor desires. :(

Box fans won't cut it,after 10 min. you won't be able to see anything.

I'm curious about this point. What is the issue with box fans, in particular? Too much velocity? Not enough airflow? Prone to failure? Care to elaborate?

If you are in a cold winter area thats a whole bunch of problems with heating/humitity.

Agreed he should NOT try to pull air from the house, unless perhaps it is mid-Summer and the house is well-cooled by central air-conditioning. But even then, I can foresee some potential problems.

I'm only speaking from experiance, and trying to the exact same thing your doing.

How did you wind up solving the myriad problems inherent in trying to set up a proper paint booth at home?

I would ask employees of body shops if they do any side work,a lot of times they can use employers facility to do there own work.

Another good idea.


D-fens

Well-known member
Joined
Nov 9, 2013
Messages
109
There's a lot being posted in this thread by people I suspect have never painted anything in their lives. A little practical application will kick theory's *** every time.
My setup:

garage2.jpg


garage1.jpg


(The night before spraying, I moved pretty much everything outside, with the exception of my box and the workbench)

Finished:

DSC00784.jpg


Result:

5EDE50F9-3060-443D-8EF7-0E758C1E13CD-213-00000013B204B7CC.jpg
 

creativecars

Well-known member
Joined
Nov 15, 2010
Messages
4,300
Location
Indiana- where horse and buggies still roam
2manyprojects, I disagree...

"Quote:
I was told that CRI isn't a "huge" deal unless I'm color matching paints.

I disagree. The whole time you're painting, you're constantly making on- the-fly judgements about coverage, where the wet edge is, too much
vs.too little paint in any given area, etc.; and these judgements are
(subconsciously, if nothing else) based in part on subtle color shifts.

When painting you will be concentrating on speed, distance and overlap. All of these can be accomplished with almost any light. Watching a wet edge is easiest to see through reflection of the new coat against the previous coat. Using proper technique is way more important than which light you choose, as long as you have light. Did the op say whether it was a solid or metallic color? Solids don't shift... You either have it covered or you don't.
 

2ManyProjects

Well-known member
Joined
Jul 18, 2013
Messages
757
Hmmm... Lots of posts to this thread while I was composing my previous replay. So in short...

Man...so much negativity here :sad:

I don't think it is so much "negativity", per se, as folks trying to keep you from making easily predictable mistakes.

I've lived here 3 years already and never talked to the owners. They'll just have to deal with it or I'll move out and figure something else out. With what I pay and how I've taken care of the house so far they better be okay with it.

That's not a good approach (or attitude). Your landlord may be the sweetest, most easy-going guy on the face of the Earth; or, he may be the sonovabitch to end all sonovabitches. Either way, you need to discuss this project with him BEFORE you make any "permanent" changes to HIS property. If he's a nice guy, and what you propose is reasonable, it may well turn out to be a pleasant surprise when he says something to the effect of, "Sure, go ahead; and send me the bill for the materials." Or, if he's a sonovabitch, it will at the least help keep you out of a courtroom later.

With plastic set up there shouldn't be any issues hurting the house anyway.

I may have misunderstood; but from your various comments, I got the distinct impression that you were NOT planning on COMPLETELY sealing off the spray booth area from the rest of the garage (including the immediately adjacent walls and/or ceiling). That would be a mistake.

I'm not looking for a professional quality booth... If 4ish box fans in/out doesn't cut it I'll have to reevaluate but I'm not just giving up before I even try. Unless I hear of a better solution that's equally cost effective.

"Better solutions" are manifold; and you have been given several suggestions along those lines. But "cost effective" is another matter entirely. What you seem to be planning thus far is inadequate on several fronts; and it WILL cost more to do it right.

The cold is definitely going to be an issue. The plan was to gelcoat/primer during the winter and wait for the final coats till spring.

The finished job can and will be only as good as what lies beneath it. You CANNOT "make up for" errors made in the prep work and base coats by slathering on still more top coats.

but again... I don't like being negative! Or maybe I'm just ignorant and don't want to see it:eek2:

Please don't take this the wrong way. I REALLY am NOT trying to "be negative". But I think you just did indeed hit the nail on the head there. Multiple people have tried to steer you in the right direction, and you seem to be resisting that at every turn. For example:

So after looking at a lot of booths online last night I came up with idea 2. They kept saying that horizontal lighting is preferred vs. vertical since it'll reduce shadows if I walk in front of the light. and almost none of them had much lighting on the ceiling. Since I'm not a huge fan of lighting at car level due to increased chances it'll get hit I did this:

In order to PROPERLY see what you're doing while spraying, you NEED those low-mounted lights all around the car. If you didn't, you wouldn't keep being told about it. If the possibility of inadvertently bashing a tube is that big a worry, use fixtures which will provide some form of impact protection, such as:

http://www.homedepot.com/p/Lithonia-Lighting-2-Light-Utility-Light-3348-2L32W-WRAP/100654395
92eeea00-35d4-4de6-9cd6-11e57dd051fc_300.jpg


Or even:

http://www.engproducts.com/products...ixtures-accessories/GFF-and-GFFW-Lamp-Guards/
119_lamp_guards.png


So. Here I have only 2 on the ceiling centered over the car painting area(also used for normal every day lighting before/after I'm done)

You REALLY need to lose the idea of making the same lights do double duty for both paint-booth use and as general garage illumination.

 
To avoid these ads, REGISTER NOW!
OP
P
Joined
Nov 8, 2013
Messages
18
Location
Lancaster Co. PA
Well that right there was the first place your thinking fundamentally derailed; that "most lumens possible per fixture" assumption is exactly the OPPOSITE of what you really need in that space. I recently explained the "why" of this in some detail in another thread; so rather than repeat all that here, I refer you to: http://www.garagejournal.com/forum/showpost.php?p=3496799&postcount=11.
Sorry. We'll just have to disagree on EVERYTHING I guess.:sad: You're far too "negative" and are obviously after the perfect professional paint booth...which this is NOT. This is a DIY garage build for an amateur. I've seen people paint in a tent in their back yard...I'd imagine you'd have a stroke if you saw that? :scared::D I know you're trying to help but offering up expensive or counter productive solutions just wastes your time and mine. I WILL be painting this in the garage, I WILL be using the fixtures and bulbs i bought, and I WILL be painting at least the gelcoat this winter. With that established... all I was asking was how to lay out what I have bought to best suit what will be done. Scrapping it all and starting over is not a very "positve" suggestion despite your best intentions.


Were it me, I'd NOT count on removing the fixtures once they are permanently installed in that garage (if they get used only in your makeshift "paint booth", that's another matter). First, you ARE going to make several holes in the ceiling and wall(s), not only for the mounting hardware but also for the wiring & switches; and these holes would need to be repaired (patch the drywall, spackle, sand, paint, etc.) if you subsequently remove the lights. You'd also have to remove the wiring itself, in order to NOT leave an undecipherable (and possibly hazardous) mess behind. All in all, it's just not worth the trouble. What you're investing in those (permanently installed) lights is what's called a "leasehold improvement". As such, you MIGHT be able to write it off your taxes; or maybe the landlord would be willing to rebate some of the cost against your rent. But even assuming neither of those scenarios, the value of salvaging some used light fixtures & wiring pales by comparison to the cost & effort required to properly restore the space to it previous condition.
Why would I not remove the fixtures? 2 screws, a little wiring, and a dab of spackle seems very easy to take down... and I'll be damned if the owners try to say what I put in the house can't be taken down. Same goes for pictures on the walls...do they get to keep those too? Plus if they're on the unfinished wall it won't matter. I have all intentions on leaving the house the way I found it. There are already holes going up to the attic from current and previous wiring that I won't even have to drill new ones. I understand your method of more lights would be better... but it would also require more mounting and more wiring and more taking down/patching.... I'm not saying my lights are the best and that I wont' have a dark area here or there... But I can say it'll be fine for me... ;)


{re: using the T5HOs for painting}

You're missing my point.

The ONLY reason I suggested that those fixtures could possibly be salvaged for paint-booth duty was because that would mean they would NOT get permanently installed as general garage lighting. Ever.

That's just the problem. I again refer you to the full explanation in that other thread; but in short, by the time you get the lights laid out closely enough to produce truly even illumination with only nine feet of ceiling height to work with, you're going to have WAY more light en toto than you either want or need. This is in part because, due to the restricted mounting height, you're going to need well more than eight fixtures to properly cover that space.
Look.... There are 2 bulbs and a cheap T12 fixture in there now and somehow I survived this far without truly even illumination. I think you're missing the point in what is NEEDED vs. WANTED. Sure...I'd want perfection...but what I need is it to be good enough...which I'm positive I'll get it there.


{re: constructing the paint booth}

The problem with at least the first approach is that it still leaves some of the real garage surfaces exposed "inside" the paint booth. That's not good, for all the reasons I already mentioned.
The inside walls will be lined with plastic too... misscommunication there. Everything plastic lined.

{SIGH}
More good money after bad. But I suppose those are little or no worse than any other T5HO tubes you might find.
I'll survive with a CRI of 85...since I didn't even know what it was till the other day. Comes back to Need vs. Want again.


No. Putting filters on EXHAUST fans will do you exactly ZERO good (it might do the neighborhood some good; but that's another matter). It is the air INTAKES which need to be filtered, in order to keep contaminants out of the work space.
The filters on the exhaust are just for that. To keep from hitting the outside of the house or going into the environment more than needed. They won't be the fancy filters but something to keep some of the overspray from escaping will be a plus. The intake will also be filtered...


Further, while you do indeed want your ventilation system to move a goodly quantity of air, you ALSO need it to do so while keeping the air VELOCITY to a minimum. The idea is that any particulates, dried overspray, etc., (including what you kick up by walking around the booth) can fall out of suspension and drop to the floor BEFORE it gets stirred up by the "wind" and deposited on your fresh wet paint.
I'll just have to play around with the ventilation when I get closer or while doing the not so critical gelcoat/primer stages. I have some ideas but only trial/error will get the results needed for my application I'm guessing.


Why from the house? Odds are that air is dirtier (think cooking residue, pet -- AND human -- dander, the **** you kick up everytime you walk across a carpet, etc.) than what's outside. And you CERTAINLY don't want the air you're drawing in to be significantly warmer than the ambient air in the paint booth (and especially the car itself), lest condensation become an issue.
Why from the house? It'll be possibly 30 degrees or so out during the winter. Can't pull that air in. I KNOW!!!! it's not good to paint in the winter... but I have to at least get the gelcoat on to give me something to do all winter....I'll find a way to make that happen that doesn't involve taking it to someone else. I have a hard time believing you think the house air is dirtier than outside air. House air is pre filtered at the furnace plus will be filtered before the booth again so overall has more filtration than outside air. Plus i'd be willing to bet less dust/dirt, bugs, pollen, and all sorts of debris than would be coming from outside air.


{re: layout of general garage lighting}

The paint booth and the general illumination for the garage are two entirely different things, which should be approached separately. But in both cases, I'd start with different fixtures, based on F32T8 tubes.

For general-purpose garage illumination, I'd probably run three rows front to back, one on each side of the garage door and one in the middle; then fill in with a fourth row running cross-ways across the back of the garage, perhaps 2-3 feet off the back wall. Ideally, the outer rows would also be spaced about 2-3 feet off the side walls; but 1.5-2 feet will suffice if that's what it takes to keep them from being blocked when the overhead door is open. If you can't manage even that much spacing without them getting blocked by the garage door (when open), I'd fabricate some "L-shaped" brackets to suspend them JUST below (and a foot or so "inside of") the (open) door. The middle row may or may not be contiguous or full-length, depending on what other complications the garage door and/or its opener impose. Finish it off with a ceiling-mounted trouble light on a retractable cord reel, approximately in the center of the space. Switching for all of this is another matter which needs to be carefully considered; but for the moment, suffice it to say that it should NOT be an "all or nothing" proposition.
Wow...good luck with that lol. New fixtures and offering up a best case scenario for a rental house was a waste of your time and mine. What I was asking was how you'd arrange the 8 fixture i have in a way that'll optimize them as best that they can. Which I guess to you would be all in the trash and paint in the dark?:D


I'm curious about this point. What is the issue with box fans, in particular? Too much velocity? Not enough airflow? Prone to failure? Care to elaborate?
I'd also be interested. Pretty sure I'll use box fans unless I can figure out a better solution that is equally as cost effective....which I haven't seen yet. Nothing short of a pro grade air exchanger in a pit design probably isn't going to work...doubt the house owners would like me digging up the floor to put in a pit ventilation. ;)


Agreed he should NOT try to pull air from the house, unless perhaps it is mid-Summer and the house is well-cooled by central air-conditioning. But even then, I can foresee some potential problems.
I assume 70 degree house air will be less problematic than 30 degree outside air? Sure... this spring when I do the BC/CC I'll pull from outside if it's better.
 
Last edited:

CNGsaves

Well-known member
Joined
Sep 26, 2012
Messages
13,233
Location
KS and OK
Holy data center hard-drive filling posts by 2ManyProjects !!! :eyecrazy:

Looks like WAR & PEACE . . . . who wants to read all that??

Go for it OP . . . . simple paint booth is easy to setup and tear down, even if in a rental. Just return the garage to same/better condition than when you got it. If you end up leaving behind several light fixtures, make sure they are "legal enough" to not cause landlord problems.

Let's see pic of that Vette primered, then painted !! No more 50,000 character posts !! :D
 
OP
P
Joined
Nov 8, 2013
Messages
18
Location
Lancaster Co. PA
Holy data center hard-drive filling posts by 2ManyProjects !!! :eyecrazy:

Looks like WAR & PEACE . . . . who wants to read all that??

Go for it OP . . . . simple paint booth is easy to setup and tear down, even if in a rental. Just return the garage to same/better condition than when you got it. If you end up leaving behind several light fixtures, make sure they are "legal enough" to not cause landlord problems.

Let's see pic of that Vette primered, then painted !! No more 50,000 character posts !! :D

Thank! That's the plan. Do what I need, then leave the place in the same if not better shape when I leave.

It'll be a while before I paint lol. Still doing a ton of body work but I'll never shy away from posting some pics of it :D

Currently: Previous owner sealed up the headlights so I had to cut them back out and do massive repairs to get it back to normal.


Just got done with the rear end. Corvettes have "seams" in all 4 1/4 panels and the rear where they are attached to the main body with what was a cement like substance... overtime it dries out and shrinks so the solution is to grind it out and replace or fiberglass solid.

Also eliminated the rear exhaust(went side pipes) and made the rear valance solid instead of bolt on.


How about my artisic paint removal(was using weak stripper only took off a layer at a time till I got the good stuff)


Wanted modern so went with a 2002 LS1 with a 6sp. Side pipes were NOT easy to build for someone who's never welded before:eyecrazy:
 
OP
P
Joined
Nov 8, 2013
Messages
18
Location
Lancaster Co. PA
I change what color I want to paint about every week. The options are:

Red(would work well with the black side pipes and okay with the chrome bumpers.)
Black. Works well with chrome but I don't like too much black/chrome. Probably won't look well with the side pipes.

Cyber Gray. Metallic so WAY harder to paint for someone like me but the results would be cool. They also did a Baldwin paint stripe/pattern which would be cool but also harder.

NOT MINE...but what I would like it to look like. Other than the rims, side vents/nose changes...
 
Last edited:

460Rustang

Well-known member
Joined
Oct 9, 2013
Messages
208
Location
Nawlins
Do you have a write up thread anywhere, curious to see why and how you set this up,....

There's a lot being posted in this thread by people I suspect have never painted anything in their lives. A little practical application will kick theory's *** every time.

My setup:

garage2.jpg


garage1.jpg


(The night before spraying, I moved pretty much everything outside, with the exception of my box and the workbench)

Finished:

DSC00784.jpg


Result:

5EDE50F9-3060-443D-8EF7-0E758C1E13CD-213-00000013B204B7CC.jpg
 

2ManyProjects

Well-known member
Joined
Jul 18, 2013
Messages
757
Sorry. We'll just have to disagree on EVERYTHING I guess.:sad: You're far too "negative" and are obviously after the perfect professional paint booth...which this is NOT. This is a DIY garage build for an amateur. I've seen people paint in a tent in their back yard...I'd imagine you'd have a stroke if you saw that? :scared::D I know you're trying to help but offering up expensive or counter productive solutions just wastes your time and mine. I WILL be painting this in the garage, I WILL be using the fixtures and bulbs i bought, and I WILL be painting at least the gelcoat this winter. With that established... all I was asking was how to lay out what I have bought to best suit what will be done. Scrapping it all and starting over is not a very "positve" suggestion despite your best intentions.

Suit yourself.

Part of the problem here is that what you're asking is analogous to asking "What is the best way to make cherry pie out of apples?" And you're not liking the fact that the only really right answer is, "Start with cherries."

 
OP
P
Joined
Nov 8, 2013
Messages
18
Location
Lancaster Co. PA
Suit yourself.

Part of the problem here is that what you're asking is analogous to asking "What is the best way to make cherry pie out of apples?" And you're not liking the fact that the only really right answer is, "Start with cherries."


It's more like "what's the best way to make a cherry pie" and you keep telling me my kitchen can't make one...I need to buy a 6 burner oven and go get a culinary degree.

I find it hard to believe that the lighting I bought is completely useless and I can't do a thing with it...yet that's all you keep saying.


I prefer cobbler anyway xmas
 

D-fens

Well-known member
Joined
Nov 9, 2013
Messages
109
Do you have a write up thread anywhere, curious to see why and how you set this up,....

The how is on the 1st page of this thread. Turning an old, dark, dusty garage into a semi-suitable quasi-spray booth isn't difficult, but it is a lot of work.

The why: painter I made a deal with to do the car was too busy chasing the dope man to do much paint and bodywork. He put me off for well over a year, and put other people in line ahead of me and it got old. I've worked as a painter at several different jobs, just not cars.

I mean I'm the last one to say my car is perfect cause it ain't, but it looks pretty good for a garage bomber spray job, and more importantly I learned a lot. Which I plan to apply tp my next disaster.

It's more like "what's the best way to make a cherry pie" and you keep telling me my kitchen can't make one...I need to buy a 6 burner oven and go get a culinary degree.

I find it hard to believe that the lighting I bought is completely useless and I can't do a thing with it...yet that's all you keep saying.


I prefer cobbler anyway xmas

Your man appears to be that guy who wastes so much time trying to get everything perfect that he never gets anything done.

Okay. If you want real-world advice about how to set your garage up for paint, there is a really good book written by former Hot Rod mag editor Pat Ganahl. Title is How to Paint Your Car At Home. Barnes and Noble used to stock it, but you may have to check Amazon now. Ganahl is a walking Wikipedia about how to get a decent looking paint job at home. Even though the book ain't perfect and some of the info is out of date, the why and how is still golden.

A lot of the same info was published in Hot Rod back in the 80's, like maybe mid 1985 through summer 1986 (back when HRM actually did stuff like that).
 
Last edited:
OP
P
Joined
Nov 8, 2013
Messages
18
Location
Lancaster Co. PA
Well lights are up despite them not being the right ones ;). At least the 4 that went on the ceiling tied to the switch. I'm pretty sure the other 4 will go on either side of the car at knee level but I'll make them easily mountable/removable to a safer spot when not painting.

Pics don't do it justice, especially the ones with the door open and blocking two(my call putting them there I guess)


Comparison. Not really fair since the old lights hadn't warmed up yet...they were just turned on for this pic.
 
Last edited:

D-fens

Well-known member
Joined
Nov 9, 2013
Messages
109
OP that's a big improvement. I might suggest both moving all the parts and tools outside when you spray, and temporarily mounting some lights on the wall down low, so you can see the rockers and lower quarters.

As for airflow, trial and error has taught me you want a pretty good airflow through the space, but at a very slow speed.

In my previous workspace I liked to use a single 28" box fan facing out, running on the lowest speed setting. This seemed to work best for that particular spot. It's a balance between moving enough air to keep from fogging the place up, but not so much you start pulling in dust and trash from outside or stirring up whatever's already in there.
 

sberry

Banned
Joined
Jun 18, 2005
Messages
35,747
Location
Brethren, Michigan
I could rig that to paint. There are a couple ways to do it and If I can would just as soon raise the door, mask off with carboard and draw with box fans there either thru a window or thru the house where you could filter a screen door maybe if needed but could have heat stored and furnace running while painting.

Part of this same setup can be used to ventilate garage post paint work. I wouldn't want to lock up a fresh paint job to a residence. A couple electric heaters are great, turn the fan on low, reduce the intake to draw on the room for a day or 2. As for lights would rig up some overhead and simply set some on the floor behind me along wall floor or on a crate.
 
Last edited:

sberry

Banned
Joined
Jun 18, 2005
Messages
35,747
Location
Brethren, Michigan
Painting can really be done on the cheap but the link I posted is a good start. A good experiment is to put a box fan in a bedroom window, cover the heated air regs and play with a door as the inlet and burn incense, can walk right up to a proper room and never smell a thing.

Even though my booth is makeshift no odor or fumes escape during painting and often have wood stove roaring as well as furnace. I use my building walk door as intake and restrict the "booth " with plastic so it draws over the top of the end, warm air as possible and makes for heated down draft. I can feel it warm up. I really need a variable speed, could and would provided I did it more.

I quit doing paint work in the building in the winter when I was living in it. You really need tight booth and make up heat, hi for painting, low for drying. As much an issue is bugs as dirt.

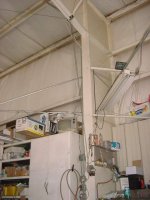
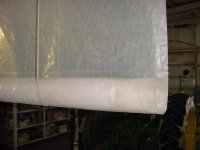
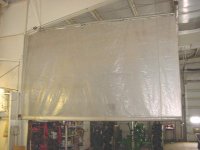
In pic 3 you can see I sprayed the rops I have clamped to the pallet, took the overspray right over the tractor I painted next. When I was happy with that I lifted the curtain and inserted the rest of it on skids with pallet jack, I rotate pieces in the light and up wind , can cover my overspray as I go.
 

Attachments

  • paint booth down.JPG
    paint booth down.JPG
    29.3 KB · Views: 18
  • paint booth lit.JPG
    paint booth lit.JPG
    28 KB · Views: 17
  • paint booth half way 2.JPG
    paint booth half way 2.JPG
    42.1 KB · Views: 16
  • paint booth half way.JPG
    paint booth half way.JPG
    39.3 KB · Views: 12
  • paintbooth_end.JPG
    paintbooth_end.JPG
    36.7 KB · Views: 13
Last edited:

sberry

Banned
Joined
Jun 18, 2005
Messages
35,747
Location
Brethren, Michigan
A lot of this is easier in a smaller garage as the scales are different. I like clear poly better than a blue tarp cause you can see thru it. A big cardboard carpet tube might be about right. Pull it right up to the celing for storage, screw a 2x4 along ceiling to tape the top of the tarp to. Ideally be able to divide the room in this scheme
 

sberry

Banned
Joined
Jun 18, 2005
Messages
35,747
Location
Brethren, Michigan
If I don't have junk stored there can be rigged in 10 minutes and about the same to put it all away. This is perfect for me, out of the way for the 99.95% of the time I don't need it, I use the space. Not a problem when I do.
 

Attachments

  • paint curtain winch.JPG
    paint curtain winch.JPG
    33.5 KB · Views: 12
  • paint curtain endwall.JPG
    paint curtain endwall.JPG
    30.4 KB · Views: 12
  • paint booth roll.JPG
    paint booth roll.JPG
    28.4 KB · Views: 13
  • paint curtains hung.JPG
    paint curtains hung.JPG
    29.6 KB · Views: 13

HotRodHudson

Well-known member
Joined
Nov 18, 2013
Messages
373
Sberry,

Your set up is well thought out and looks quite useable for what you need it to do.

I am in the beginning stages of setting up a 21'x27' (11ft ceilings) area of my garage for multipurpose use and I like the way you did the roll up plastic to separate things when you need it.
 
To avoid these ads, REGISTER NOW!
Top Bottom