To avoid these ads, REGISTER NOW!

Above 1200 Sq/FT Garage Refurb®

Wokspaces above 1200 squarefeet.
To avoid these ads, REGISTER NOW!
OP
N

NUTTSGT

Super Moderator
Staff member
Joined
Sep 14, 2009
Messages
51,130
Location
Northern Central Ohio
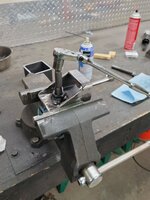
Well, I swear, if it's not one thing, it's another. While trying to drill out the leg mounts, the bit kept stopping. Hmmm, more oil....drill, stop. Nope

Let's check belt tightness... yeah could be lighter... check.... Drill, stop, nope.

Well damn.

But on the pulley/spindle, the nut came off.. but was still riding in top of the pulley.
KIMG1144.JPG

Let's put it back on and drill. Nope

KIMG1143.JPG

Does it ever stop ?

Off to work overtime.
 
Last edited:

burger

Well-known member
Joined
Jun 6, 2005
Messages
998
Location
Erf
None, which I'm currently considering now. I could "hot wire" the furnace blower when I'm doing this type of work.

But I think will keep an eye out for something out there.

I tape a 20x20 filter to a box fan. Downside is that it's loud compared to your furnace, especially with the box fan under load from the restrictive filter.
 

Mr.zippy

Well-known member
Joined
Apr 27, 2020
Messages
2,221
Location
Wyoming
Well, I swear, if it's not one thing, it's another. While trying to drill out the leg mounts, the bit kept stopping. Hmmm, more oil....drill, stop. Nope

Let's check belt tightness... yeah could be lighter... check.... Drill, stop, nope.

Well damn.

But on the pulley/spindle came off.. but was still riding in top of the pulley.
KIMG1144.JPG

Let's put it back on and drill. Nope

KIMG1143.JPG

Does it ever stop ?

Off to work overtime

I’ve found these things come in threes……😕
 

zmotorsports

ALLIANCE MEMBER
Joined
Oct 20, 2009
Messages
21,466
Location
Northern Utah
I feel for ya Eric. Some days I feel like it's one step forward and three steps back, especially as my fleet of vehicles age and my time is demanded elsewhere. The key is to keep forward pressure and you'll make progress. Although easier said than done, I know.

Keep at it buddy, the table is turning out great.
 
OP
N

NUTTSGT

Super Moderator
Staff member
Joined
Sep 14, 2009
Messages
51,130
Location
Northern Central Ohio
Thanks again Mike. . . . However, I had issue rear it's head again.

I had this issue before, chucked one partial spool of wire, bought another spool of Hobart wire. It ran good for a bit and started to do the same thing. I was pissed, never had this problem with the smaller Hobart 175 in 15 years.

Today, it does the same at about the same spot in the wire spool.
KIMG1151.JPG

I pulled about 25' of wire out. Tried again, nope... Okay so what the **** is going on? Yeah, Eric is slightly more than pissed as I was waiting on a phone call too.

Do I have the right size feed rollers ? Yeah, . Well no... Well yeah. I thought I had .035 but I have .030 wire, a roll of Blue Demon. We're good there but now that I have my readers on.

KIMG1152.JPG

Can you see the wear pattern ? Yep, the roller alignment is off. Not sure how I ever missed that.
 

zmotorsports

ALLIANCE MEMBER
Joined
Oct 20, 2009
Messages
21,466
Location
Northern Utah
Eric, drive system tension can be a tricky adjustment. Too loose and the drive rolls slip and therefore increase wear and cause damage. Too tight and it can deform the wire and therefore also damage the liner plus if/when it hits a snag, rather than slip it stacks up creating a bird's nest resulting in wasted time and definitely wasted wire (ie. $$$$). I used to fight tension issues early in my career until a guy showed me a trick to get the tension correct. This will also test the integrity of the drive rolls as well.

Back the tension off on the drive system, place the gun's nozzle directly on a the concrete floor, squeeze the trigger and begin feeding and simultaneously increase the tension on the drive system. As soon as the gun pushed up away from the floor stop and that is enough tension.


As for the nuts, I quit mechanically removing the zinc coating by abrasive measures years ago and now soak them in muricatic acid for a bit. I usually keep a few sizes on hand with the zinc removed for those quick jobs. When I have a specific job I'm soaking fasteners for, I will just toss in a few extra of various sizes and keep them on hand for exactly these kinds of projects. I refuse to weld any fasteners with the coating still on anymore as the results are always terrible.

Just keep the muriatic acid away from anything else carbon based in the shop or you'll be sorry. I generally pour a little in a steel container and set it outside my shop door for an hour or so, then wash the fasteners and blow off with compressed air.
 
OP
N

NUTTSGT

Super Moderator
Staff member
Joined
Sep 14, 2009
Messages
51,130
Location
Northern Central Ohio
That's basically what I did prior with the wire Mike. When I had the issue before, I did a little YouTube research. Now, I see the whole issue, hopefully, was wire alignment.

The left green nuts are what I was using. The right ones are what I just bought. Never really had an issue with them after a roloc.

KIMG1155.JPG

Got some practice....
KIMG1154.JPG
 
OP
N

NUTTSGT

Super Moderator
Staff member
Joined
Sep 14, 2009
Messages
51,130
Location
Northern Central Ohio
If you soak galvanized nuts and bolts in muriatic acid they come out bare steel. You might already know this. You might have some other coating on the current nuts.
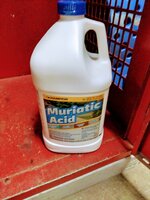
Yes the Grade 5 are coated with some green ****.

Edit: Looking like I'll be getting some muriatic acid. That first one welded like **** too.
 
Last edited:

68400BIRD

Well-known member
Joined
Nov 14, 2017
Messages
333
Location
Shorewood, MN
Love and hate that stuff. I used it for years to clean the hull of our boat. Kneeled down it to long one fall by accident and the skin on my knee is always regenerating. Be careful with gloves and breathing it in.
 
To avoid these ads, REGISTER NOW!
OP
N

NUTTSGT

Super Moderator
Staff member
Joined
Sep 14, 2009
Messages
51,130
Location
Northern Central Ohio
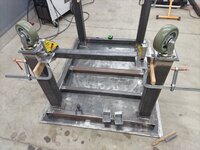
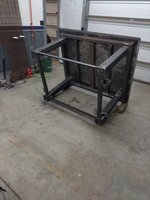
As far as I know, all the bottom frame welds are done, at least to this part of the build.

KIMG1165.JPG

I believe next is going to be adding receiver tubing. I'm putting 4 on, one each corner but facing different directions.

KIMG1166.JPG
KIMG1167.JPG

See the blue arrows ? They will come out this direction and opposite on the other side. I figure this will give me good work arounds from wherever I'm working.

EDIT: I didn't realize those pics weren't that good after taking them with my phone.
 
Last edited:
OP
N

NUTTSGT

Super Moderator
Staff member
Joined
Sep 14, 2009
Messages
51,130
Location
Northern Central Ohio
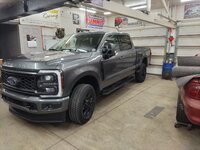
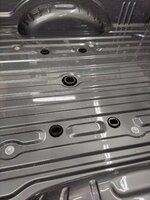
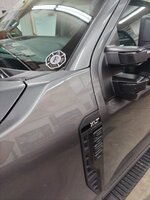
Eric, thats a good looking truck! New race hauler for the Mustang, next?
Wife asked same thing when she realized I spec'ed out the gooseneck prep.

No plans for a new trailer but just in case, it was cheaper to add the prep package now rather than later.

I believe the charge for it was only $550. So in the grand scheme of things, that's cheap on a new truck.
 
OP
N

NUTTSGT

Super Moderator
Staff member
Joined
Sep 14, 2009
Messages
51,130
Location
Northern Central Ohio
Congrats on the new truck Eric.
Thanks Mike. I ordered it in November and it took about 3 months exactly to get it. I believe the timing was right with Ford coming back right after strike, I don't think there was a lot of orders being placed, especially Ford employees.

The real awesome part was the phone call I got on the way up to the dealership. The guy that bought the JD 1025R wanted to come look at it that night and committed to buying it.
 
OP
N

NUTTSGT

Super Moderator
Staff member
Joined
Sep 14, 2009
Messages
51,130
Location
Northern Central Ohio
I finally got tired of the headgear on my Miller welding helmet not staying up. I emailed them a few months back and talked to a rep about it. Basically, it was "buy new headgear", or new helmet option. I received an email from Miller about a week ago for a newly released headgear. I found it on Cyberweld and with a $50 order, I got free shipping, so I bought a few more things.

I believe I needed a new outside lense cover. The original one is getting nasty.
KIMG1177.JPG

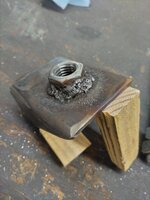
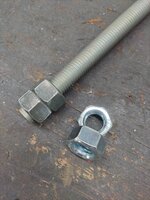
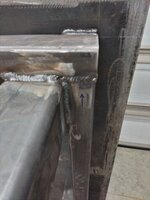
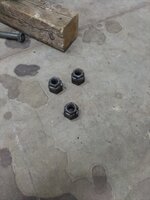
After the welded nuts cooled, they were spun on the threaded rod. Just under flush


KIMG1178.JPG
Then welded up.KIMG1179_01_BURST1001179_COVER~3.JPG
 
OP
N

NUTTSGT

Super Moderator
Staff member
Joined
Sep 14, 2009
Messages
51,130
Location
Northern Central Ohio
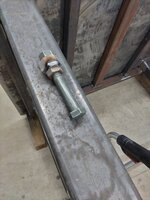
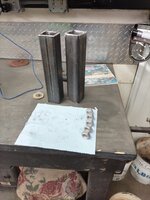
Next up, cut some of the DOM tubing for the receiver tubes getting mounted on the underside of the table. I had to clean up a few more 3/4" for all the tubes.

.KIMG1183.JPG

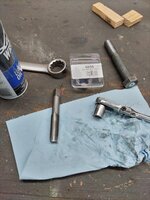
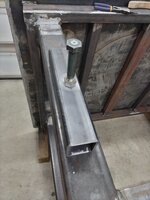
I drilled a 3/4" hole for a nut to be welded over it.
KIMG1180.JPG

I located the nut/hole with a bolt down through the hole.

KIMG1181.JPG
 
To avoid these ads, REGISTER NOW!
Top Bottom