To avoid these ads, REGISTER NOW!

Above 1200 Sq/FT Garage Refurb®

Wokspaces above 1200 squarefeet.
OP
N

NUTTSGT

Super Moderator
Staff member
Joined
Sep 14, 2009
Messages
50,904
Location
Northern Central Ohio
Re: garage refurb

Wow:bowdown::bowdown::bowdown:

I have spent the entire day reading your thread
All I can say is Wow you have the energy of a 30 year old
and the experience of a 65 year old
I am the latter and man am I tired, you have worn me out watching you work on this project.
I know how you pay attention to detail and you have earned all of our respect (we that are following your build)
Your craftmanship is supreme.

I want to say THANK YOU for sharring but it dosen't seem like it covers how I feel I truly enjoyed the read today

again thanks
Don

Thanks Don, coming from somebody that has a place like yours and you spent a good bit of time away from it reading my thread. :beer:
 
To avoid these ads, REGISTER NOW!
OP
N

NUTTSGT

Super Moderator
Staff member
Joined
Sep 14, 2009
Messages
50,904
Location
Northern Central Ohio
Re: garage refurb

I'd like to stop for a minute.

For all those that have been reading my thread, thank you. I've tried to respond to all the compliments and questions over the months of the ongoing refurb. If I have missed anybody, I'm sorry, it wasn't intentional. The compliments have made it all worth the extra effort, the time to stop to snap a few pics and trying to explain exactly what I'm doing.

From the bottom of my heart, thank you for the compliments, they are very much appreciated. I can't thank you enough. :bowdown:
 
OP
N

NUTTSGT

Super Moderator
Staff member
Joined
Sep 14, 2009
Messages
50,904
Location
Northern Central Ohio
Re: garage refurb

I didn't do much today even though it was nice out. I took yesterday off and got one thing accomplished today. That was finish laying the block that I had and take some pictures of what I was doing.

Keep in mind, I'm not a mason, block layer nor am I instructing a class. This is merely for informational purposes of what I'm doing.

This is where I picked up today. You can see two pieces of rebar that concreted in the block holes, all the holes are filled about 1-1 1/2" to the top.
06252012chimneypics006.jpg

Looking down inside, you can see the liner. The liner joints are in the middle of the block and not matched to the block joints. You can also see the sand between the liner and block.
06252012chimneypics007.jpg

Leaning back from the ladder (and hanging on) is what it looks like from the side and how far the rebar sticks up.
06252012chimneypics008.jpg
 

Attachments

  • GR397.jpg
    GR397.jpg
    133 KB · Views: 8
  • GR398.jpg
    GR398.jpg
    69.5 KB · Views: 8
  • GR399.jpg
    GR399.jpg
    138.7 KB · Views: 8
Last edited:
OP
N

NUTTSGT

Super Moderator
Staff member
Joined
Sep 14, 2009
Messages
50,904
Location
Northern Central Ohio
Re: garage refurb

One block laid and the liner in also.
06252012chimneypics009.jpg


Here you can see the wooden wedges I use to hold the liner level. They do get removed and not left in.
06252012chimneypics010.jpg


That first block sitting over one of the pieces of rebar.
06252012chimneypics011.jpg
 

Attachments

  • GR402.jpg
    GR402.jpg
    87.8 KB · Views: 7
  • GR401.jpg
    GR401.jpg
    88.2 KB · Views: 7
  • GR400.jpg
    GR400.jpg
    70.4 KB · Views: 7
Last edited:
OP
N

NUTTSGT

Super Moderator
Staff member
Joined
Sep 14, 2009
Messages
50,904
Location
Northern Central Ohio
Re: garage refurb

Looking down inside the liner, I tried to make sure to wipe out the excess mortar that had squeezed out. From what I have read, this prevents an area for creosote to build up.
06252012chimneypics012.jpg

Leveling up the liner with a torpedo level.
06252012chimneypics014.jpg

and checking it the other way.
06252012chimneypics015.jpg


I had read that the liners may not always be perfect, so they needed to be leveled. If you think about it,they are clay and are soft until they are baked. They are soft enough to deform, which I have one the isn't perfect, it'll be the last one. Sine the ends of the liner may not be perfect, I wasn't gooing to kill myself if the liner wasn't dead nuts perfect.
 

Attachments

  • GR403.jpg
    GR403.jpg
    29.3 KB · Views: 9
  • GR404.jpg
    GR404.jpg
    73.2 KB · Views: 9
  • GR405.jpg
    GR405.jpg
    78 KB · Views: 9
Last edited:

ConCretin

Well-known member
Joined
Jan 20, 2011
Messages
3,378
Location
Central Maine
Re: garage refurb

Great job on the chimney, cricket and flashing. That chimney will outlast all of us. Just proves you don't need to be an expert at something to think your way through a project.
 
OP
N

NUTTSGT

Super Moderator
Staff member
Joined
Sep 14, 2009
Messages
50,904
Location
Northern Central Ohio
Re: garage refurb

Here's a shot of the roof with the unfinished vent stack. That is tomorrows project along with the ceiling inside. I'd ratehr work outside but I need to get the mess inside clened up and back in order.
06252012chimneypics016.jpg

back to the chimney. . . I have filled the holes and added 2 more pieces of rebar. I have alternated where I put the rebar.
06252012chimneypics017.jpg

Standing back on the ground, ready for another block.
06252012chimneypics018.jpg


I am out of block now and need to buy 8 more. I am currently 16 block high, about 10.5 feet. Since the liner was set down inside the last block I set the other day, it is again down inside where you can't see it from the ground.
06252012chimneypics020.jpg
 

Attachments

  • GR409.jpg
    GR409.jpg
    51.9 KB · Views: 5
  • GR408.jpg
    GR408.jpg
    83.8 KB · Views: 4
  • GR407.jpg
    GR407.jpg
    127.4 KB · Views: 4
  • GR406.jpg
    GR406.jpg
    141.2 KB · Views: 5
Last edited:
OP
N

NUTTSGT

Super Moderator
Staff member
Joined
Sep 14, 2009
Messages
50,904
Location
Northern Central Ohio
Re: garage refurb

Great job on the chimney, cricket and flashing. That chimney will outlast all of us. Just proves you don't need to be an expert at something to think your way through a project.

Thank you and I hope it out lasts me. If it makes it to the ripe age of 31 like the last chimney, I'll be 72 if I'm still kicking. :thumbup:
 

Dustoff 35

Well-known member
Joined
Nov 16, 2007
Messages
160
Location
Northern Kentucky
Re: garage refurb

Nice work Eric. How did you secure in the chimney to the existing block wall? Were there existing serviceable masonry ties from the old chimney still in the wall?
 
OP
N

NUTTSGT

Super Moderator
Staff member
Joined
Sep 14, 2009
Messages
50,904
Location
Northern Central Ohio
Re: garage refurb

Nice work Eric. How did you secure in the chimney to the existing block wall? Were there existing serviceable masonry ties from the old chimney still in the wall?
Yes, there were a couple of ties then I added two more. The two I added went in where I went through the wall for the thimble.

You can see one of the originals in this picture.

06122012001.jpg


Above the right side of the level you can see one of the ones I added. What I used was wire, that originally came from a political yard sign. I figured it was no different than the reinforcing wire that is used when laying block courses. It's bent down inside the holes before I filled them.
06152012chimney009.jpg
 

Attachments

  • GR410.jpg
    GR410.jpg
    140.7 KB · Views: 8
  • GR411.jpg
    GR411.jpg
    110.7 KB · Views: 9
Last edited:

kald

Well-known member
Joined
Mar 31, 2012
Messages
672
Location
Central Fl
Re: garage refurb

Very Nice! I've been following your build and must have missed it but where did you get knoledge of construction?
 
OP
N

NUTTSGT

Super Moderator
Staff member
Joined
Sep 14, 2009
Messages
50,904
Location
Northern Central Ohio
Re: garage refurb

Very Nice! I've been following your build and must have missed it but where did you get knoledge of construction?

Thank you.

Honestly, the majority of it is hands on. As a kid, I'd watch Norm on "this old House". I took 4 years of Industrial Arts in HS, this gave me some experience working with my hands, the hows and whys of using regular power tools. A couple of years of Mechanical Drawing (nothing like blue prints though) helped me learn how to picture stuff (like 3-D) in mind.
I had an uncle that we'd visit (100 miles away) he used to build houses and then started to do serious carpenty work like custom circular stairways built-ins for higher end homes in the Toledo area. When we'd go up for the weekend, he'd always give advice on building stuff, not just how to do stuff, but more importantly the "how and why". He passed away many years ago but there's days I do something and I step back and wonder where I learned it, it was just words from good old Uncle Fritz.
As I got older, I watched more TOH, Hometime and other home improvement shows. I did a little reading and just tried to apply what I learned from everywhere. I figured when you hire something done, 1/3 of the cost is materials, the rest is overhead, labor/profit for the contractor. I figured I could screw it up twice and still be ahead of the game.

There is no better way to learn other hands on experience. Throw in someone giving you good advice or teaching you, for most people you're golden.
 
OP
N

NUTTSGT

Super Moderator
Staff member
Joined
Sep 14, 2009
Messages
50,904
Location
Northern Central Ohio
Re: garage refurb

nice work, didn't know I would be so interested in a chimney build lol... keep it up...

haha, being someone with no chimney myself (and no aspirations for one at my current location), it is quite interesting to watch!

I didn't know it would be this interesting either. :D 
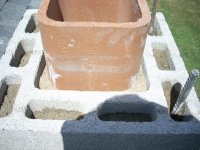
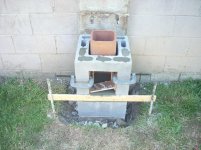
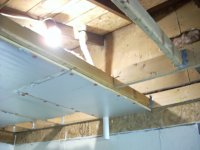
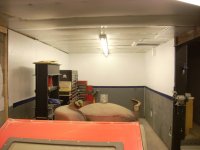
I just though the one day that I take pics of everything else, why not try to get some detail pics of what I was doing. I figured it would do one of two things, keep people interested or bore them. :spit:

Thank you guys.
 

56rpm

Well-known member
Joined
Apr 19, 2012
Messages
354
Location
Bakersfield, Ca
Re: garage refurb

Days off from a big project is a very important step in the process of completing the do it yourself project. They are always a well deserved break for the body AND mind. Again, you're doing a fantastic job. Bob.
 

Lurking in Maine

Well-known member
Joined
May 14, 2012
Messages
77
Re: garage refurb

Absolutely fantastic.

I just read through the whole thread. You are doing a great job and your posts are very informative. One of my favorite threads for sure.

Keep up the good work :rocker:
 

kald

Well-known member
Joined
Mar 31, 2012
Messages
672
Location
Central Fl
Re: garage refurb

Thank you.

Honestly, the majority of it is hands on. As a kid, I'd watch Norm on "this old House". I took 4 years of Industrial Arts in HS, this gave me some experience working with my hands, the hows and whys of using regular power tools. A couple of years of Mechanical Drawing (nothing like blue prints though) helped me learn how to picture stuff (like 3-D) in mind.
I had an uncle that we'd visit (100 miles away) he used to build houses and then started to do serious carpenty work like custom circular stairways built-ins for higher end homes in the Toledo area. When we'd go up for the weekend, he'd always give advice on building stuff, not just how to do stuff, but more importantly the "how and why". He passed away many years ago but there's days I do something and I step back and wonder where I learned it, it was just words from good old Uncle Fritz.
As I got older, I watched more TOH, Hometime and other home improvement shows. I did a little reading and just tried to apply what I learned from everywhere. I figured when you hire something done, 1/3 of the cost is materials, the rest is overhead, labor/profit for the contractor. I figured I could screw it up twice and still be ahead of the game.

There is no better way to learn other hands on experience. Throw in someone giving you good advice or teaching you, for most people you're golden.

I'm a big fan of those shows as well. I wish I had the resources they have though when I'm working. :)
I agree with the your DIY philosophy hiring vs doing it your self completely.
 
To avoid these ads, REGISTER NOW!

ODIS

Well-known member
Joined
Apr 30, 2012
Messages
2,110
Location
Pacific Northwest
Re: garage refurb

Great job, Eric. Have been enjoying your work from the start of this thread. Looking forward to all the rest too.

Take care.

Ody.
 
OP
N

NUTTSGT

Super Moderator
Staff member
Joined
Sep 14, 2009
Messages
50,904
Location
Northern Central Ohio
Re: garage refurb

Days off from a big project is a very important step in the process of completing the do it yourself project. They are always a well deserved break for the body AND mind. Again, you're doing a fantastic job. Bob.

I knew I was heading for a small break, after the heat I worked in a week ago or so, I was getting a little burned out. Hopefully, I can get some storm damage cleaned up (tree limbs) and a few things done in the garage. We are going with the neighbor to pick her son up at the airport (Army on leave) and having a cook out. They're calling for a few days of rain, so maybe I can get right back to it strong this coming week.

Absolutely fantastic.

I just read through the whole thread. You are doing a great job and your posts are very informative. One of my favorite threads for sure.

Keep up the good work :rocker:

Thank you, I'm glad that you find it informative and one of your favorites. :beer:
 
OP
N

NUTTSGT

Super Moderator
Staff member
Joined
Sep 14, 2009
Messages
50,904
Location
Northern Central Ohio
Re: garage refurb

I'm a big fan of those shows as well. I wish I had the resources they have though when I'm working. :)
I agree with the your DIY philosophy hiring vs doing it your self completely.

I'd love to have some of their resources also. I have found when saving the money by doing it yourself, the savings you create allows you to make the purchase of tools that make the job easier and save time. This in turn allows you to do more yourself and buy more tools . . . . . I think you see where I'm going here.

Great job, Eric. Have been enjoying your work from the start of this thread. Looking forward to all the rest too.

Take care.

Ody.
Thank you, I enjoy your thread also. I loved the JD in the bedroom, well around the corner. :thumbup:
 
OP
N

NUTTSGT

Super Moderator
Staff member
Joined
Sep 14, 2009
Messages
50,904
Location
Northern Central Ohio
Re: garage refurb

I finally got my **** back in gear and got something done today. The exception is the attic access for the back ceiling. Since the funds are low, I reused the foil backed insulation I took down. I wanted to get the ceiling back up so it wasn't so stinking hot in the garage.

I had part of it done the other day when I took a break from the garage.
07022012backceiling010.jpg

I cheated with the fiberglass insulation. Since alot of the edges tore when I pulled it down, I put it up after the ceiling was nailed in place.
You can see the 2" PVC drain pipe I ran to vent the blast cabinet to the outside along with a single incadescent light in the attic.
07022012backceiling012.jpg
 

Attachments

  • GR412.jpg
    GR412.jpg
    75.2 KB · Views: 11
  • GR413.jpg
    GR413.jpg
    69.7 KB · Views: 10
Last edited:
OP
N

NUTTSGT

Super Moderator
Staff member
Joined
Sep 14, 2009
Messages
50,904
Location
Northern Central Ohio
Re: garage refurb

I believe you can see it better from this angle.
07022012backceiling016.jpg


You'll also note the plastic cap nails holding the rigid fiol insulation up. They will get covered with foil tape. The seams will also get the same treatment.
07022012backceiling015.jpg


Just need to tape the joints and get the light fixtures hung back up. Then I can paint the recently hung OSB and move stuff back where it belongs. Once that is done, I can start on the siding. I need to get my garage back in order though, the wife's Explorer is overdue for an oil change and my truck just got to that point.
My plan for the winter is to completely redo the lower ceiling here. Since I'll be doing that, I wasn't to worried what the insulation looked like. When I do that, I think I'll box in the back of the I-beam and give it a cleaner look.
 

Attachments

  • GR415.jpg
    GR415.jpg
    64.2 KB · Views: 9
  • GR414.jpg
    GR414.jpg
    74.2 KB · Views: 9
Last edited:

Bob Heine

ALLIANCE MEMBER
Joined
Oct 24, 2009
Messages
10,705
Location
Boca Raton, Florida
Re: garage refurb

Eric,

Great progress! With all the lines on that wall it looks like one of those circus optical illusion rooms (giant on one side of the room, little person on the other).

Insulation really makes the garage a better place to work. I managed to put R-13 insulation in the wall framing and R19 in the garage attic, along with 5/8-inch sheetrock. Finished it off with two-inch foam board added to the three garage doors, along with some weather stripping. Not much compared to what's done in the northern states but pretty good in South Florida. Spent most of today working in the 77-degree garage while it was 90 outside (in the shade). Getting it buttoned up and air conditioned makes all the difference in the world. I have a real small electric heater just in case but the coldest it has ever gotten in the garage is mid-60s (low-40s outside).
 
OP
N

NUTTSGT

Super Moderator
Staff member
Joined
Sep 14, 2009
Messages
50,904
Location
Northern Central Ohio
Re: garage refurb

Thanks Bob. You're right about the insulation. That's why I always recommmend it for a garage/shop whether you live in a warm or cold climate. I always consider insulation an investment as it continually saves you money. :thumbup:
 

flybefree

Well-known member
Joined
May 18, 2008
Messages
1,111
Location
Ohio/Kentucky
Re: garage refurb

Glad you did not have too much storm damage...that was some storm. Looking good...have a happy 4th of July, hope you get a chance to relax.

Shaun
 
OP
N

NUTTSGT

Super Moderator
Staff member
Joined
Sep 14, 2009
Messages
50,904
Location
Northern Central Ohio
Re: garage refurb

Glad you did not have too much storm damage...that was some storm. Looking good...have a happy 4th of July, hope you get a chance to relax.

Shaun

Thanks, I'll be working tomorrow on Independecne Day. When ever I plan on having an easy day, it's a busy one. :dunno:
 

STINEY

Well-known member
Joined
Jan 23, 2009
Messages
270
Location
Bucyrus Ohio
Re: garage refurb

I just had a chance to catch up on your continuing saga, nice chimney man!


I took 4 years of Industrial Arts in HS, this gave me some experience working with my hands, the hows and whys of using regular power tools. A couple of years of Mechanical Drawing (nothing like blue prints though) helped me learn how to picture stuff (like 3-D) in mind.


Good ole' Mr V and Mr Suter. They gave me a kickstart too, never looked back.
 
OP
N

NUTTSGT

Super Moderator
Staff member
Joined
Sep 14, 2009
Messages
50,904
Location
Northern Central Ohio
Re: garage refurb

Well, it did cool down a little bit and I went back out to the garage. Thursday or Friday I had put a couple of coats of Kilz over the newly hung OSB. I touched up a few spots and painted a spot that previously had a cupboard hanging up.

I was not to impressed with the way it dried. Not really the way it dried but what I quickly realized was another problem.

kilzpics002.jpg

kilzpics001.jpg


The uncovered Kilz oil based primer had yellowed over the last 1 1/2 years. It did it at such a slow rate that I never caught it. Now that there is fresh Kilz on the wall, it stands out.

For all those that might have follwd my recommendations of using Kilz-oil based primer alone, I apologize and I'm sorry. I had no idea it would do that. I'm now advising you top coat the Kilz with some type of paint. Top caoting mine will be a winter project I guess.
 

Attachments

  • GR416.jpg
    GR416.jpg
    33.6 KB · Views: 9
  • GR417.jpg
    GR417.jpg
    35 KB · Views: 9
Last edited:
OP
N

NUTTSGT

Super Moderator
Staff member
Joined
Sep 14, 2009
Messages
50,904
Location
Northern Central Ohio
Re: garage refurb

Thanks for the heads-up on the Kilz discoloring over time. I'll have to get some paint on my Kilz-coated osb walls soon...

Not a problem my friend, I put one coat of Kilz Pro-X 170 (interior paint) on yesterday. I'll find out if it needs a second this morning.
 

Weekend_warrior

Well-known member
Joined
Feb 4, 2005
Messages
320
Location
Hearland (Forney), Tx
Re: garage refurb

My guess is that primer is not UV protected. I learned that the hardway on some stuff I primered out doors and left unpainted until I "got around to it" It was very dry and cracked. I ended up scraping it off and repainting with primer and topcoat. Much better.
 
OP
N

NUTTSGT

Super Moderator
Staff member
Joined
Sep 14, 2009
Messages
50,904
Location
Northern Central Ohio
Re: garage refurb

I rolled one coat of paint on yesterday and let it dry. It looked good enough for me. I could still a few spots that maybe a whole recoat with the primer would have been better. Since this is an area that isn't well traveled, good enough.
Started moving stuff back today.

07102012backcorner001.jpg


Most of it is back in place. I did do some rearranging since I moved the attic access. One of the cupboards went down by a wall shelf and the welder is up by the press & welding table now.

07102012backcorner007.jpg
 

Attachments

  • GR418.jpg
    GR418.jpg
    57.3 KB · Views: 12
  • GR419.jpg
    GR419.jpg
    67.2 KB · Views: 12
Last edited:
To avoid these ads, REGISTER NOW!
Top Bottom