To avoid these ads, REGISTER NOW!

Above 1200 Sq/FT Garage Refurb®

Wokspaces above 1200 squarefeet.

madison069

Well-known member
Joined
Nov 5, 2010
Messages
4,141
Location
Monroeville, PA
It's been a common scene on construction sites. They have stuff that's been on order for 4 months and still haven't gotten the order.

I ordered some weather striping for the camaro and they didn't send the door seal. Said it will be toward end of December before I get it.
 
To avoid these ads, REGISTER NOW!
OP
N

NUTTSGT

Super Moderator
Staff member
Joined
Sep 14, 2009
Messages
50,884
Location
Northern Central Ohio
I got started on insulating the ceiling yesterday. I got almost all the pieces cut for the ceiling before I started out of 6 full rolls. I wanted to keep the insulation all in one piece if I could, which I knew I could. It was just a matter of cutting the insulation to the correct length.

attachment.php


The rolls of faced R-19 were 39' long. I needed 160" for the ceiling. I got 2 pieces cut per roll. After those pieces were cut, I measured for the walls. The rest of the roll yielded one wall piece and a shorter piece.


The shorter pieces will fill in the adjoining garage wall. The insulation is all the same since I used 2x6 for wall studs. I wanted full pieces for the ceiling as to have no gaps or breaks in the insulation. I figured this is the best bang for the buck. Next will be the outside wall east wall to get filled. That will have full length pieces too. Then I'll move to the south wall.

Ceiling was finished up last night and it was 6pm. Time to go inside, strip off the "fiberglassed" clothing, get a shower and eat some supper.

attachment.php
 

Attachments

  • KIMG0705.jpg
    KIMG0705.jpg
    77.9 KB · Views: 984
  • KIMG0706.jpg
    KIMG0706.jpg
    69.6 KB · Views: 981
Last edited:
OP
N

NUTTSGT

Super Moderator
Staff member
Joined
Sep 14, 2009
Messages
50,884
Location
Northern Central Ohio
Since I have to finish up the attic access hole so it'll hold the cover in, I stuffed a cut piece of insulation in for the night. I put a couple of insulation wires in to hold it just in case it decided to move during the night.

attachment.php


Here is another shot of the front inside corner. I still need to put the cover on the breaker box as the wiring is done for now. I spray foamed around the door/wall gaps. This has yet to be trimmed back. The OSB at the bottom of the wall will get removed today before I start insulating the walls.

attachment.php


I'll make a few suggestions for those that have never insulated anything before.

1. If you are doing more than a couple of rolls, spend the extra bucks, $30, and buy an electric stapler. It makes life much easier. Then buy an extra box of staples. . . because you'll put more in with an E-stapler. Also grab a hook like attached below. It helps with hands free.


Secondly, wear safety glasses and a dust mask , if you can. My safety glasses fog up when wearing a mask so I pass on the mask. Wear long sleeves and some thin gloves.

When you take off your clothes after finishing up, wash your jeans/pants and shirt separate from everything else. You may need to wash it twice to get the fiberglass out of it. You don't want to put the stuff on next time and be itching because of residual fiberglass stuck in the clothes.

Most importantly, DON'T wash your underwear with them. I guarantee, you'll be scratching you *** or junk the next time you wear them.
BTDT.

:beer:
 

Attachments

  • KIMG0707.jpg
    KIMG0707.jpg
    63 KB · Views: 974
  • KIMG0708.jpg
    KIMG0708.jpg
    50 KB · Views: 970
  • 93333-MONSTER-HOOK_1.jpg
    93333-MONSTER-HOOK_1.jpg
    19 KB · Views: 61
Last edited:
OP
N

NUTTSGT

Super Moderator
Staff member
Joined
Sep 14, 2009
Messages
50,884
Location
Northern Central Ohio
It's been a common scene on construction sites. They have stuff that's been on order for 4 months and still haven't gotten the order.

I ordered some weather striping for the camaro and they didn't send the door seal. Said it will be toward end of December before I get it.

I get it and it's aggravating. Fortunately, my livelihood doesn't rely on it like some of the members here. I feel sorry for them. I'd express my true distain for this year but I would have to ban myself, so I'll bite my tongue here. I'm just as unhappy as everybody else.
 

Johanfpa

Well-known member
Joined
Dec 27, 2016
Messages
241
Location
Aberdeen Scotland
Most importantly, DON'T wash your underwear with them. I guarantee, you'll be scratching you *** or junk the next time you wear them.
BTDT.

Found this out the hard way but as an upside I will never do this again!
I now always use disposable coveralls, well worth the couple $ they cost.

Here in the UK we tend to use extruded polystyrene boards more than fibreglass insulation, not itchy but you need to wear a facemask when cutting it. It is more expensive but better thermal qualities for same thickness.
 
OP
N

NUTTSGT

Super Moderator
Staff member
Joined
Sep 14, 2009
Messages
50,884
Location
Northern Central Ohio
Some where in my figuring, I came up with a false number. I thought I needed 14 rolls for the walls and 5 for the ceiling. I caught my mistake last night after I made that post prior.

Looking at the notepad that I did my math on, I have a number and I don't know where it came from. What I needed was a total of 23 rolls. I bought an extra roll just in case. Turns out 24 was a good number as the rolls come in a bale of 6.


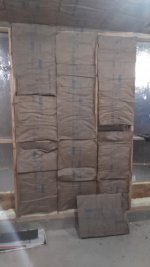
Well, if you have been following along, you might remember the post above. Somewhere in the figuring, I screwed up the math. I needed more than I originally figured. . . . well it comes full circle.


What you see here is a full bale (6 rolls) and another bale minus 1 roll. I can only guess what happened, but, but, but I know this, my math must really ****. I have never been this far on buying building supplies. . . . 11 rolls off ?


:headscrat

attachment.php


I do know this, I used a little bit left over from my parents. That saved maybe a roll. I believe I figured 10' walls and between the block, sill/bottom plates and spray foam filling the bottom wall cavity, I'm cutting the pieces at 9 feet. So I save 1 foot per wall cavity. I think I may have figured for the O/H door and man door to use that as some possibly extra as a buffer. Then I wonder if I looked at the roll length of the R13 (32') rather than the R19 at 39'/roll.

Well, I suppose, if I made all those mistakes, it could be off tens rolls. But in reality, it doesn't matter, it'll be going back. Less out of pocket cost for me, at $275 for the credit. I'm good with that.


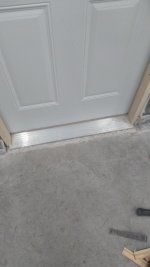
That's good news. The bad news for the day. . . . I broke my electric stapler. It died and I have to buy a new one. like my framing nailer and roof nailer. It's only $30, so I can't be too upset about that. I could have broke out my old T50 chrome Arrow stapler and manually put them in. Nope, I switched gears and cut up what I needed for the wall.

attachment.php


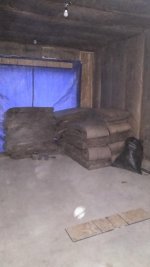
Cutting all my pieces to size left me all these short sections. There was enough to fill 3 wall cavities. I still have a longer piece stuff up in the attic access hole that has to come down.

attachment.php
 

Attachments

  • KIMG0711.jpg
    KIMG0711.jpg
    40.3 KB · Views: 937
  • KIMG0710.jpg
    KIMG0710.jpg
    40.7 KB · Views: 924
  • KIMG0709.jpg
    KIMG0709.jpg
    40.7 KB · Views: 924
Last edited:
OP
N

NUTTSGT

Super Moderator
Staff member
Joined
Sep 14, 2009
Messages
50,884
Location
Northern Central Ohio
So I went to Menard's today and bought a new electric stapler. A Bostitch, which looked like the older Stanley I dropped and broke.

It worked fine for the first 2 or 3 rolls. What a hunk of ****. Its going back tomorrow.
 

fourbyford

Well-known member
Joined
Aug 3, 2017
Messages
913
Location
North Idaho... almost Canada!
Seems that, all too often, I'm returning one thing or another that just doesn't work. Paying good money for **** is not only aggravating, it takes time to return the defective stuff and hope to find something that will get the job done.

Your build is looking great... You've made incredible progress!

...D
 

1Garageman

Well-known member
Joined
May 12, 2009
Messages
4,417
Location
Columbus, Ohio
I highly recommend the Milwaukee Stapler. I got this two years ago and have used it a ton, and love it! It is on sale right now at HD for $99. I got this mainly for my wife, but I have stolen it for many things. We have a 3amp and 1.5 amp battery.


:thumbup:
Screen Shot 2020-12-08 at 8.19.59 AM.jpg


Oops, you have have to by a kit with the charger also, which is $25 on Amazon.
 

Bob Heine

ALLIANCE MEMBER
Joined
Oct 24, 2009
Messages
10,703
Location
Boca Raton, Florida
^^^+1
Eric, I have owned a couple of hand staplers and corded electric staplers and the M12 Milwaukee does a better job than any of them. It's also great when you have to be up and down a ladder. It also has enough weight so the staples go in flush every time (unless you aren't paying attention).

On the down side, once you have one Milwaukee M12 tool, their friends show up unexpectedly and you completely lose control.
 

vertguy

Well-known member
Joined
Apr 6, 2010
Messages
1,260
Location
SE WI
Perfect timing since I have some pending repairs in the basement at my MILs following some minor flooding last spring and was not looking forward to manually stapling the insulation and vapor barrier. So GJ once again resulted in another $100 tool purchase.

Back on topic... the new garage is coming along nicely. Looking forward to watching your progress.
 
OP
N

NUTTSGT

Super Moderator
Staff member
Joined
Sep 14, 2009
Messages
50,884
Location
Northern Central Ohio
Thanks guys, I picked up an Arrow Stapler. T50ACD. It was the same price as the Stanley I took back. I'm not a big staple user so I wasn't going to spend big money on one. I did consider buying the Dewalt Multi tacker but it was almost $60 and none in stock at HD.

Granted, probably wouldn't have bought it at HD anyways, I've kind of swore them off after their "fake" rebate (IMHO) scheme and email escalation I had with them, 2 weeks and no response by their executive escalation team.


EDIT: I have no Milwaukee tools so I'd probably not start with buying RED cordless stuff being a stapler.

I have a couple of pics that I'll upload tomorrow.
 
OP
N

NUTTSGT

Super Moderator
Staff member
Joined
Sep 14, 2009
Messages
50,884
Location
Northern Central Ohio
The attic access is a piece of 1/2" Zip OSB, with white trailer aluminum siding on it. It is through bolted with 5 or 6 pieces of 3/4" foil faced polyiso. I'm going to toss a loss piece of fiberglass insulation on top of it. I should say, I hope it falls down on top of it to hep seal up the gaps around the cover.

Before I put the metal ceiling in, I'll wrap the frame with white coil stock.


attachment.php


This was the last corner I did and covered it with plywood. Once I had it covered, I reattached the blue tarp across the door opening. After this was done, I screwed up another blue tarp on the outside of the door frame to help cut down cold air intrusion.

attachment.php
 

Attachments

  • KIMG0724.jpg
    KIMG0724.jpg
    45.5 KB · Views: 709
  • KIMG0721.jpg
    KIMG0721.jpg
    57.6 KB · Views: 705
Last edited:
OP
N

NUTTSGT

Super Moderator
Staff member
Joined
Sep 14, 2009
Messages
50,884
Location
Northern Central Ohio
Late start today. I wanted to have this trench dug, tile in and start hauling dirt back into the area. I had to help my SIL with her furnace so I didn't get started till after lunch.

Once I got digging I had a guy stop and talk for about a half hour. He recently moved back from the DC area after retiring from a Gov't job and his prior career as a back seat in F4s and F18s in the Marines. It was an interesting conversation and we had a few laughs.

This will have a 4" tile that goes to a drop in the old drive way. It comes from the french drain (river rock) along side the walls of the garage.
attachment.php


attachment.php


You can see the edge of the second exterior blue tarp.
 

Attachments

  • KIMG0730.jpg
    KIMG0730.jpg
    124.2 KB · Views: 705
  • KIMG0731.jpg
    KIMG0731.jpg
    130.6 KB · Views: 705
Last edited:
OP
N

NUTTSGT

Super Moderator
Staff member
Joined
Sep 14, 2009
Messages
50,884
Location
Northern Central Ohio
Eric busy working? How is the progress going?

Kinda busy between work, OT, Christmas and the addition.


The tile is in, trench filled and I started to haul dirt to fill in the old driveway. The small pile to the side of the garage with the landscape timbers on it is gone. It's been filled and then I started with the pile in the back.

I worked Tuesday and filled in the first 12 OT today, so no progress. It's snowing now and not sure what the weather will be doing tomorrow.

There can be snow on ground and I might be moving dirt. If it's really crappy, I'll be working on other stuff inside. No reason to freeze my **** off moving dirt.
 
To avoid these ads, REGISTER NOW!
OP
N

NUTTSGT

Super Moderator
Staff member
Joined
Sep 14, 2009
Messages
50,884
Location
Northern Central Ohio
Still in standby mode waiting on the O/H door to come in. I'll be picking up the light fixtures and LED bulbs tomorrow after some Christmas gift cards and cash.

Plan is for 4 four bulb 8' light strips with LED conversions. I'll probably pick up a few sheets of 1/2" plywood for the walls as well when I make the trip.
 

coljar

Well-known member
Joined
Sep 26, 2010
Messages
6,243
Location
Belpre, Ohio
With nothing to add, I've just been checking your progress with the addition from time to time. It's coming right along nicely.
 
OP
N

NUTTSGT

Super Moderator
Staff member
Joined
Sep 14, 2009
Messages
50,884
Location
Northern Central Ohio
With nothing to add, I've just been checking your progress with the addition from time to time. It's coming right along nicely.

Thanks, I picked up the light fixtures, bulbs and 5 sheets of plywood today. I was going to grab 2 sheets but had a Menard's rebate show up in the mail. Since it came, I decided not to waste the trip and picked up 5 sheets instead.

I just wish the O/H door would come in. I just don't want to cut the man door in without having the main door in. So with 2 tarps over the door opening, I've effectively "sealed" up the addition.

I now have 12 sheets of plywood for the walls, foil faced polyiso for the ceiling, a man door, 4 light fixtures and paint waiting on the O/H door to arrive.

Next payday, I'll probably buy the duct work to get heat moving that direction . . . . door probably won't be in till Spring with my luck.

:sad:
 

xtremek

Well-known member
Joined
Apr 13, 2012
Messages
11,603
Location
St. Johns, Mi
The Deere and the other stuff is in the new addition already? If so, how will you put up the OH door when it comes in?
 
OP
N

NUTTSGT

Super Moderator
Staff member
Joined
Sep 14, 2009
Messages
50,884
Location
Northern Central Ohio
The Deere and the other stuff is in the new addition already? If so, how will you put up the OH door when it comes in?

No, all that stuff is in the old section of the garage. That's why I'm running out of room.

The mower deck is off, sitting flat on the floor in front of the Deere, which has the loader bucket and backhoe on it. That's in one stall.

The other stall is taken up by the desk, polyiso, plywood, leftover lumber, miter saw, kitchen cabinets and a set workmate clones.

The mitersaw can go back on the other side once I hang up my aluminum brake. It's not getting hung up until I get the fascias and soffits wrapped. I also have to wrap around the O/H opening. I can't do that with the tarp screwed over the opening.

My 8' step ladder is also in the addition, I need that to wrap the fascias too. I didn't think the door would take this long to come in when I sealed it shut.


Im just leery of putting in the mandoor when someone can get behind the blue tarps and work virtually hidden while breaking in. I also want extra time for the man door installation, I need to cut part of the old foundation out.

Between the holidays, my 24 hour shifts, working OT and other running I have to get done, it has made it difficult to dedicate to even attempt it. I can't do a partial install and let it sit for a few days.
 

xtremek

Well-known member
Joined
Apr 13, 2012
Messages
11,603
Location
St. Johns, Mi
Thanks for the explanation. I'm on the right page now, and I agree with you. I wouldn't put in the man door until I had the outside (OH Door) secured.
 
OP
N

NUTTSGT

Super Moderator
Staff member
Joined
Sep 14, 2009
Messages
50,884
Location
Northern Central Ohio
I was waiting on finishing this interior wall until I got the door installed. If I have to "adjust" opening size, I wanted it to be easier if the OSB wasn't on the wall.

I said heck with it and ripped the old sheet and screwed it in place. Once it was up, I caulked the seams.
 

Attachments

  • KIMG0764.jpg
    KIMG0764.jpg
    55.3 KB · Views: 129
OP
N

NUTTSGT

Super Moderator
Staff member
Joined
Sep 14, 2009
Messages
50,884
Location
Northern Central Ohio
So I came home yesterday and started with the man door first. I had to cut the door way in. But I had to move about a dozen sheets of plywood stacked in front.

I think I did alright hitting the opening. The right side is off I bit but I think the bow is from the blocking I put in.

attachment.php


attachment.php


The concrete is off from 1/4-3/8" of an inch. I was pretty happy about that.

attachment.php
 

Attachments

  • KIMG0771.jpg
    KIMG0771.jpg
    54.5 KB · Views: 343
  • KIMG0770.jpg
    KIMG0770.jpg
    48.7 KB · Views: 337
  • KIMG0769.jpg
    KIMG0769.jpg
    51.2 KB · Views: 337
Last edited:
OP
N

NUTTSGT

Super Moderator
Staff member
Joined
Sep 14, 2009
Messages
50,884
Location
Northern Central Ohio
Next up was cutting the concrete stem wall out. I had to open the overhead door and still a ton of dust in the air. I tried to cover some stuff up but the grinder, well I, made a huge mess. I didn't wear a dust make and should have.

You can see the edge sticking out under the threshold of the cut concrete.

attachment.php


Man door in. The lock set is temporarily installed. I put the dead bolt one way and the door lock facing the other. I merely wanted to get it and locked for the night.


attachment.php
 

Attachments

  • KIMG0774.jpg
    KIMG0774.jpg
    40.5 KB · Views: 335
  • KIMG0773.jpg
    KIMG0773.jpg
    58 KB · Views: 337
OP
N

NUTTSGT

Super Moderator
Staff member
Joined
Sep 14, 2009
Messages
50,884
Location
Northern Central Ohio
After I cut all the concrete, I had a mess to clean up, broken concrete, dust and more. I had to move 20 some sheets of plywood that was stacked in front of the door. That is all stacked in the center of the addition on the floor.

So the plan was to make a trip to Menard's this morning for some spray foam and spray around some gaps behind/around the door way.

But it figures, I now have an O/H door to put in and got called into work a shift of O/T. We have a guy tat tested positive and another that was going to get a test today then there was already one guy on vacation so we needed some coverage.

As much as I wanted to put my door in today, I chose to work, keeping the the staff shortage filled and putting some extra $$ in my pocket. Even nicer is the fact of paying off the dump trailer this past Saturday and all costs for the garage addition have been taken care of. That's a nice sigh of relief.
 
To avoid these ads, REGISTER NOW!
Top Bottom