To avoid these ads, REGISTER NOW!

Garage Renovation Progress

slickgt1

Well-known member
Joined
Oct 11, 2010
Messages
1,674
Hi all. Been a lurker for a while, but started my garage reno couple of weeks ago. Here is whats happening so far. I'm in NYC, and Garage is 19 x 22.5

I have tenants living right above it. House is about 90 Years old. My floor has been renovated. The tenants floor only cosmetically.

I figured I would open up the ceiling, put insulation into the joists, and start from there.

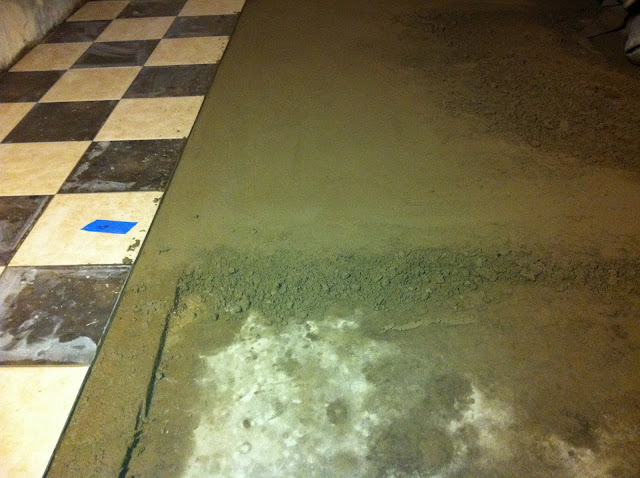
My garage floor is also pitched in every direction except for the correct one. When I pull a wet car in, forget about it, the water goes everywhere around the car, nothing stays under the car.

So the Pics. I will get some daylight ones as soon as I can. It is just too cold right now to open it up and feeze my *** off.

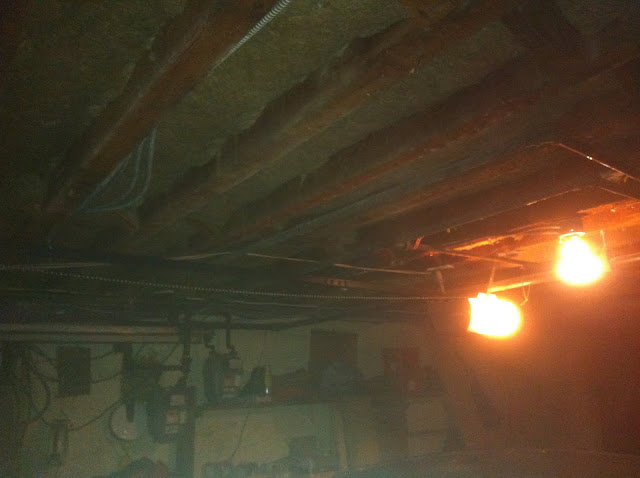
This is with ceiling metal removed.
IMG_0952.jpg


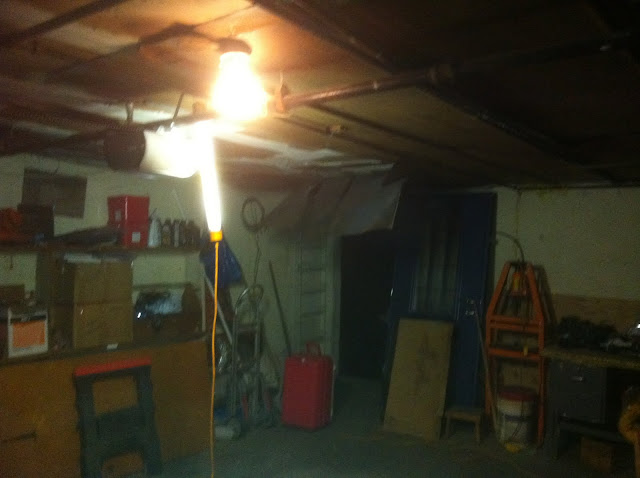
Note the Nasty Sheetrock, and the amount of protrusions coming from the ceiling. Now imagine how great it was to remove the metal around all that.
http://lh3.ggpht.com/_QNfKvhLbojE/TUBCOE2mY2I/AAAAAAAAA_w/MHNsyTav-HE/s640/IMG_0953.jpg

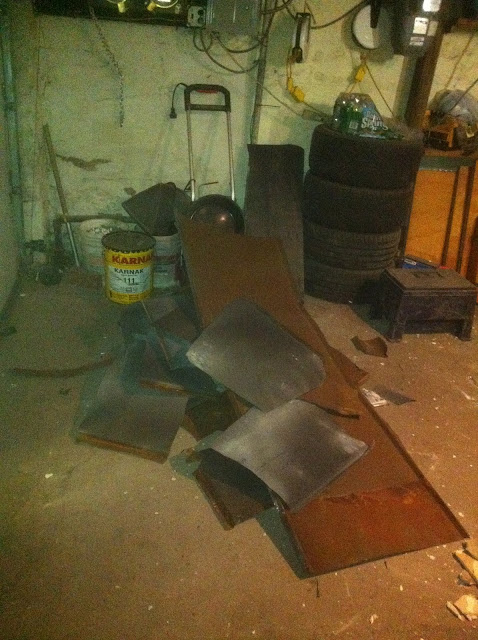
The damn metal. This is only 1/5 of the metal that was on the ceiling.
IMG_0954.jpg


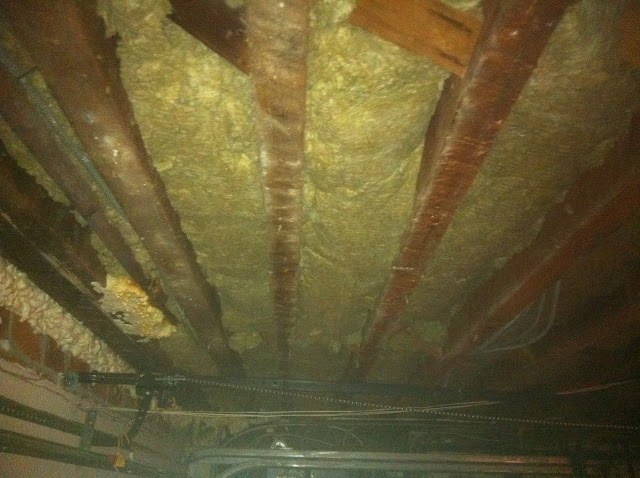
All metal gone, most of the insulation in.
IMG_0968.jpg


Roxul Insulation closup. This stuff is great. Cuts with a giant bread knife, does not need any fasteners, does not itch, fire proof, and a whole bunch of other nice qualities.
IMG_0969-1.JPG


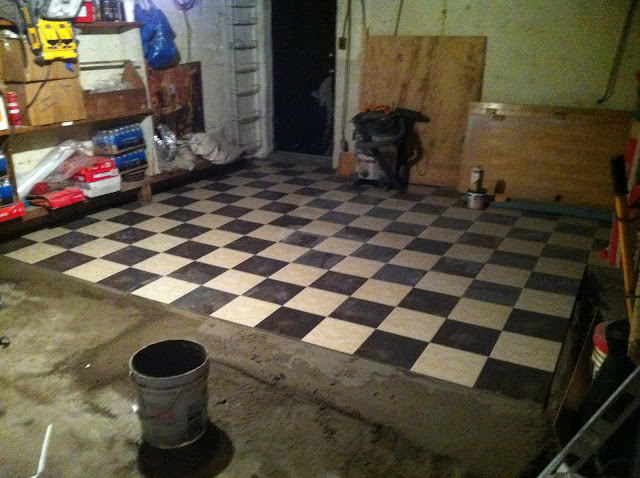
****-ton of tiles sitting inside.
IMG_0970.jpg


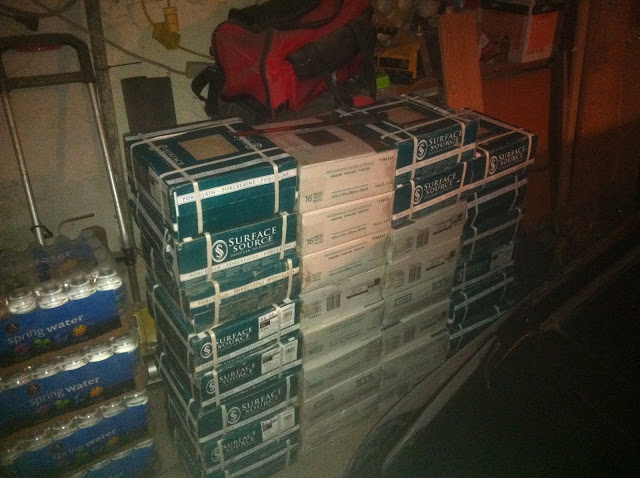
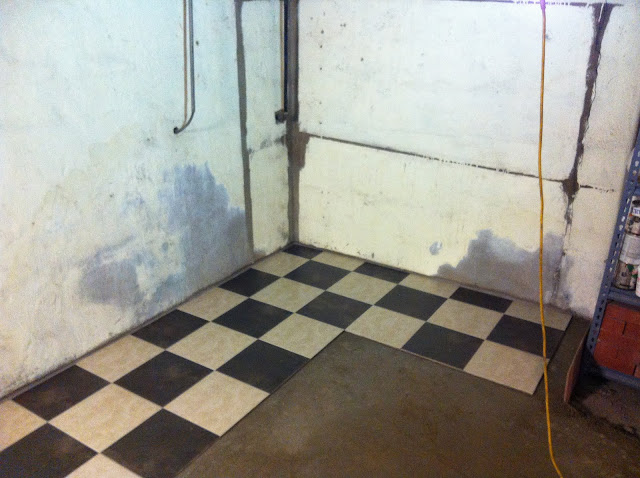
Read it PEI 5, at Lowes, @ $0.96 sq-ft. Yea. I cannot find this online. Just go to store.
IMG_0971-1.JPG


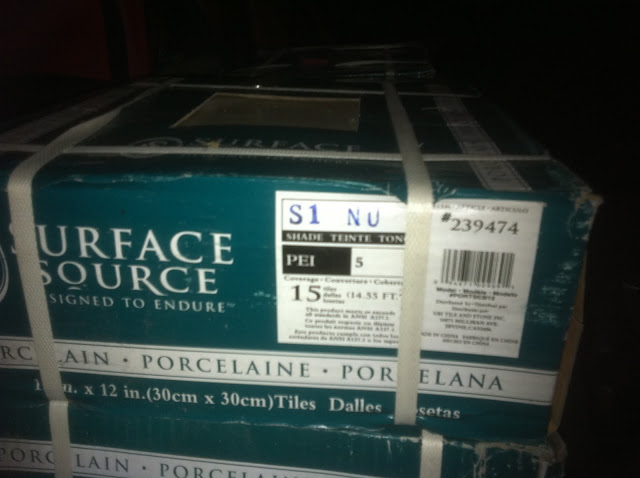
The white cases is PEI 4, Black, and $1.12 per sq-ft

TILE SPECS
IMG_2701.jpg


IMG_2702.jpg


IMG_2703.jpg


IMG_2704.jpg


IMG_2705.jpg


IMG_2706.jpg
 
Last edited:
To avoid these ads, REGISTER NOW!
OP
S

slickgt1

Well-known member
Joined
Oct 11, 2010
Messages
1,674
So, more work done. Did the rough electrical for the lights, insulation is done. Started the floor.

Blue tape is center of garage. Yes that is concrete that the tile guys is laying under the tile to level out my workbench / shelf areas, and correcting the pitch where the car is. Yay, no more lakes under my shelves.
IMG_0982.jpg


Epoxy grouted this section yesterday. Need to finish certain areas so that I can put the table and other **** on here to clear up space everywhere.
IMG_0985.jpg
 
OP
S

slickgt1

Well-known member
Joined
Oct 11, 2010
Messages
1,674
Yesterday progress. Remember this is after work. Finished at about 2:30am. **** I'm tired today. 30% of garage is done though.

IMG_0990.jpg
 
OP
S

slickgt1

Well-known member
Joined
Oct 11, 2010
Messages
1,674
Ok so I did some more work. Hopefully I will be done with the floor this weekend. Epoxy grout is killing me too. I must have spent $100 so far on 4 sets. Gotta be a cheaper place than Lowes.

Ok, so did some more work on Tuesday.
Copy%20of%20IMG_0990.jpg


This is toward the front of the Garage. This section of the slab had a crack in it. It seemed solid, but was worrying me. So drilled/hammered 40 holes, about 5 to 8 inch wide, dug out 2' deep. Put in re-bar with cement back in. It didn't move before, much, until the car went over it, deff not going to move now.

IMG_0992.jpg


Yesterday was a good day too. Couldn't get more done. Got a crazy headache, prolly since I've been coming from work, and then working till midnight on this.

This one is facing the garage door.

IMG_0994.jpg


Facing the back. I have **** now at the back of the garage, so you can't really see all the way to the back wall in this one.

Copy%20of%20IMG_0993.jpg
 
Last edited:

bchee

Well-known member
Joined
Aug 20, 2007
Messages
6,148
Location
Texas
Nice progress. What are your plans for the lights? Still looks pretty dark in there.
I'm guessing in NYC not many people have garages (that's what I've seen on TV).
 
OP
S

slickgt1

Well-known member
Joined
Oct 11, 2010
Messages
1,674
Yea I can't put up the new fixtures because I need to put up sheetrock. Can't put up sheetrock because working on floor. Also can't put up sheetrock because I have a 2.5" gas pipe running across half the ceiling. So need to move that up into the joists. Then I can put on the lights. I have 4 temp lights right now. And the pigtails for the new lights have painted bulbs in them. Yea i know, I should clean them. Soo much work still.

I have 4, 2' dual bulb florescent going in. 2, 6" ones, and one 10' one. I will have a lot of lights.

No not many people I know have garages that they can park in. I feel lucky.
 
OP
S

slickgt1

Well-known member
Joined
Oct 11, 2010
Messages
1,674
Ok so I've been busy this weekend. Had to move those 4 shelves from the walls on the right, so that I could do the floor there.

IMG_1010.jpg


IMG_1002.jpg


Area by the garage door is now done as well.
IMG_1006.jpg


Opened the garage door, yay, warm day. You can see all those shelves taking up the middle of the floor temporarily. And yes, I have a lot of tires. lol.

IMG_1011.jpg
 

Jack Olsen

Super Moderator
Staff member
Joined
Mar 22, 2009
Messages
6,678
Location
Los Angeles
Very nice. That tile's going to make a huge difference in how much you like working down there.

Looking forward to more progress pictures.
 
OP
S

slickgt1

Well-known member
Joined
Oct 11, 2010
Messages
1,674
Thanks for the kind words. Hopefully I will get it to the state of your garage Jack.

So here are more pics. These are from Monday through Tuesday. I couldn't do much on Sunday as I made the mud job too wet on Saturday, and din't want to walk around on it too much. Plus I was exhausted from the Saturday.

This is facing the Garage Door. The little hallway on the left is a side entrance to the garage from the front. Made this last year so that I don't have to open the main door every time in need a screwdriver.

The white cover on the floor is the sewer access. Going to pimp this are out tonight. Made the cover out of treated ply, and the PVC door/window trim. HardiBacker going on top of that, then tile.

IMG_1017.jpg


IMG_1018.jpg


Closeup of hallway exit.

IMG_1019.jpg


One more for today. Garage door on right.

IMG_1020.jpg
 
OP
S

slickgt1

Well-known member
Joined
Oct 11, 2010
Messages
1,674
Ok so I've been at it some more with the buddies. This was one slow, pain in the *** area. Really took a long time to get it all sort of wrapped up.

This is the sewer access hole. There will be a tiled cover here.
IMG_1024.jpg


Wide shot of that area. The hallway is done. This was a pain too. The walls in the hallway are all stucco, and non of it is straight. All the damn perimeter tile had to be scribed and cut our with a grinder.

IMG_1021.jpg


Closeup of the step. Proud of this.
IMG_1026.jpg


IMG_1023.jpg


IMG_1022.jpg
 

BLUBAYOU

Well-known member
Joined
Mar 25, 2008
Messages
163
Nice job on the tile.

Something to note, I looked for and ALMOST bought this tile on the Lowe's site a few days ago after seeing one of your posts about it. They can be found by searching the item number (239474).

As I was shopping, the price kept changing (up, of course). Checking nearby stores showed a range in price from $.78 ea to $1.02 each, and they continued to fluctuate to the point where I took screen-shots of the low prices just in case. When I had the tiles in the checkout at $.78 it went up to $.98 on me and I got frustrated and canceled the purchase (fluctuation would have cost me $120 for 600 sq ft!!!!). It seemed as though the fluctuations changed with page views, almost like they changed the price based on how much activity it is seeing. I'll have to keep an eye on that in the future to see if it is true or if I just happened to be looking at an item while they were adjusting prices in the db.

I have since found a local tile retailer selling overstock non-slip through body (no glaze) porcelain in a few colors for just under $1.00 ea. I'll probably go this route since the non-slip is important to me living in the northeast (wet/snowy tires often in the garage).

From what I understand PEI rating only applies to the surface glazing. I don't believe it correlates to the break strength of the tile itself, but in this case you should be in good shape since it is porcelain anyway.
 
OP
S

slickgt1

Well-known member
Joined
Oct 11, 2010
Messages
1,674
Well I am in Brooklyn NY. So northeast as well. The tiles are strong as sin, you can feel it. The black one is actually way more tough than the white, this is really felt when cutting it with a grinder.

So far can't complain about strength. I have those 4 shelves with about 600 - 700 lbs of **** on each. Figure each shelf leg is 1" angle, so at about ~150lbs per leg, per tile, the tiles are holding up. And I am estimating the weight, as it took 4 guys to move each without taking anything off.

Already used my floor jack on it as well. Love how quiet and easy it rolls around now. Everything is holding up great. Also when I ring the tiles (tap on the tile, then tap on the original slab) no sound difference. The tile is officially one with the floor. lol. Can't wait to sheetrock the shelf area tomorrow and get all those shelves out of the center.

Thanks for the comments.
 
OP
S

slickgt1

Well-known member
Joined
Oct 11, 2010
Messages
1,674
Wait till you see the sewer hole on Monday. I love the little details, that is the stuff that puts a smile on my face, and callouses on my hands, lol.
 

BLUBAYOU

Well-known member
Joined
Mar 25, 2008
Messages
163
my comments on the tile were more for the viewers of the thread. Being PEI 5 for the glazing and porcelain bodied, I'm sure your tile will be plenty strong! My previous post is probably more relevant in your other thread about the tile find, I suppose.

Moving on, the detail in the tile work is terrific. The little things add up in making a space look good!
 
OP
S

slickgt1

Well-known member
Joined
Oct 11, 2010
Messages
1,674
Ok was just about to post more pics, but my Iphone died, and I left the charger in the garage lol.

Soo for tomorrow. Thanks for the compliments guys.
 
To avoid these ads, REGISTER NOW!
OP
S

slickgt1

Well-known member
Joined
Oct 11, 2010
Messages
1,674
Ok so the floor is 99.7% done. I have to lay the 4 tiles over the sever hole, and 3 tiles by the meters.

Framed, squared, metal edge installed.
IMG_1028.jpg


Made a box for the Steam drain Pipe. This will be behind my shelves (sometime later I will build cabinets to replace the shelves). But this is my little hidden area where I will store plywood, and other sheet goods.
IMG_1033.jpg


Started on the Sheetrock already. Boy was this area a biotch. The pipes and all that stuff in the way. Shelves going back in today. I hope I have the energy for this tonight.
IMG_1034.jpg
 

51rider

Well-known member
Joined
Dec 21, 2009
Messages
502
Location
London, England.
Nice job on the tiling-I sure do understand the effort. I have been doing the bathroom for ages and had to cut loads. I bought a tile bridge saw with a diamond blade-best £200 I spent on a tool by far.
Looking forward to seeing this one progress.:thumbup:
 
OP
S

slickgt1

Well-known member
Joined
Oct 11, 2010
Messages
1,674
look at post 10. First and second pic, you will see the cutter I mostly used for the perimeter. You put the tile in, score it with the blade in the handle, press down on the handle and you get a quick straight cut/break every time.

Grinder for all the odd cuts. I wouldn't even be able to use the wet saw on cuts that were so twisted.

This was not easy I have to say. Not looking forward to ever doing this again.

Thanks for the comments.
 

Sriracha Me

Member
Joined
Jan 30, 2011
Messages
23
Hey Slick,

Nice progress. What neighborhood are you located in? The garage is attached to your house on the rear it seems. What other plans do you have for it?

I have a similar size garage clustered with a lot of tools and materials. I'm hoping i can design it soon and start a build thread over the summer time.
 
OP
S

slickgt1

Well-known member
Joined
Oct 11, 2010
Messages
1,674
My garage is weird. I'm in the city, NYC. It is unique because it's a 2 car garage, which is really hard to get in this area. Most garages around here, you can't even park a car, if you even find a house with a garage. My backyard is smaller than my garage, lol.

My house is attached on both sides (City living for you), garage is under the house. The door in the back is for a little, how would you call it, square between houses. It doesn't go anywhere, and the only purpose of that square is so that the house has windows on the inside/between houses. I'll take a pic to show you what I mean.

I'm going to do a lot to this thing. I have the slot boards already, plumber is starting on Saturday to move all the huge gas pipes out from the middle of the ceiling. This will give me more height in the garage. I will then sheetrock the rest of it, and should be done by next weekend with the ceiling, I hope.

Then I'm going to put a sink in it, gonna tap into the laundry supply and drain from the basement.

Sometime down the line, I will replace all my shelves with built cabinets, (I help my father in law build kitchens) so it should look pimp when done. It will still have to hold my car, and function as a work shop (auto / carpentry) when needed.

I have a lot of tools, a lot, both auto and construction, so need to make space for that first. Once that is done, I will slow down a bit, and design all the finishing details. I'm really winging it right now as far as design, trying not to spend too much, almost $3,000 in it already. At least I know the layout I need, I have been working on that for the past 2 years. Moving **** from one wall to the other till I liked the setup.

I will post pics soon, thanks for the comments.
 

bchee

Well-known member
Joined
Aug 20, 2007
Messages
6,148
Location
Texas
Keep up the good work. I would be proud of that step too - looks good.
 
OP
S

slickgt1

Well-known member
Joined
Oct 11, 2010
Messages
1,674
Thanks everyone for the compliments. Means a lot.

Ok so here are the updates.

Floor is done 99.9%. I have the sewer hole cover to grout, and 3 tiles that I could not get to before. I did not take a pic of the sewer hole because it is still drying, and I have to seat it in the hole. Pitch with the rest of the floor issue.

So the million pound shelves are back in place. Million LBS because I did not unload anything to move it back in place. Two buddies and I managed to get them back in place. Still looks like a war-zone, but no worries, I am dealing with it slowly. You can see my Slatwall is against the shelves. Scored 6 panels from my office for free. Two colors, but I was going to paint everything anyway. Yea baby.
IMG_1044.jpg


Sheetrock pile waiting to get hung after the plumber finishes moving my pipes out of the center. If you really look, you can see 3 pipes running across the entire garage, under the joists. WTF. Why couldn't they run these between the joists initially is beyond me. Plumber is a buddy, so having him redo a lot of stuff for $250 per 12 hour day. 2 day affair. I think its a nice deal.
IMG_1046.jpg

Anyone want to buy some Lexus IS350 staggered wheels? LOL

Pulled all the nails out of the ceiling. This pic is just for perspective. The shelves are on the left, and that step from above is also on the left.
IMG_1048.jpg


Hopefully we will finish the ceiling plumbing sometime mid Sunday, so I will have time to finish running the electrical, and hopefully, but probably not, some sheetrock. Can't wait to get the car back in and test the tile.
 
OP
S

slickgt1

Well-known member
Joined
Oct 11, 2010
Messages
1,674
Ok soo more progress pics.

Floor is 100% done. Decided to throw a surprise for the wifey and did a little section 30sq-ft of tile at the entrance. Pics tomorrow, floor was still covered today so that grout can fully cure. Plumbing is done too. I would post pics, but I don't even know how to describe it, and doubt that anyone will see it. The point is that the area where the car is, is now at over 8'. I'll get some general ones so that you can see pipes, and no pipes.

So on to the pics.

The sewer hole. Sorry messy. But I finished it at 8pm yesterday. No energy to clean it.
IMG_1079.jpg

The Cover. Made a template for the hole out of ply. Made sure that fit all the way in. Made the border in the hole out of PVC trim material. PVC for obvious reasons. Put same PVC on top of plywood, screwed and PL Premium. Hardibacker on top of that, again PL and Deckscrews. Tile with metal edge on top of that. Damn, so happy with how it turned out.
IMG_1078.jpg

THE ***
IMG_1073.jpg

THE *** FROM FAR AWAY
IMG_1080.jpg

Now to finish the electrical stuffs, and I'm good to go on the sheetrock.
 
OP
S

slickgt1

Well-known member
Joined
Oct 11, 2010
Messages
1,674
and yes, the floor goes up by the white tile on top of the lid. I made the floor pitched up significantly around the perimeter of the garage door opening. I used to have all the water drain to my shelves. No more. So happy you can't imagine.
 
OP
S

slickgt1

Well-known member
Joined
Oct 11, 2010
Messages
1,674
I made a new thread in the electrical sub-forum. But if anyone can answer this here, please do.

How many fluorescent lights can I put on a 20 amp breaker, 12-2 Bx? Thanks in advance.
 
OP
S

slickgt1

Well-known member
Joined
Oct 11, 2010
Messages
1,674
Sorry not many updates. Have been busy with buying baby stuff, and running all the BX for the outlets and lights. Almost 500' of Bx.

Quick question here. How high do you guys recommend outlets above the workbench and why?

I placed the bottom of the outlets 6" above the workbench. So bench is at 34", outlets at 40". I think this is good as whatever is on the table won't automatically block the outlets. Let me know what you think. Thanks.
 

BLUBAYOU

Well-known member
Joined
Mar 25, 2008
Messages
163
I did my outlets at 48" all the way around the garage, including those in the bench area.
 
OP
S

slickgt1

Well-known member
Joined
Oct 11, 2010
Messages
1,674
Thank you very much. Yea I was thinking I should maybe move mine up as well before its too late. Thanks.
 
OP
S

slickgt1

Well-known member
Joined
Oct 11, 2010
Messages
1,674
Can anyone also suggest where I can get a 24" L x 18" sink. Something like a slop sink, but I would prefer a cheap metal sink. Cheap is key here. thanks all in advance.
 
OP
S

slickgt1

Well-known member
Joined
Oct 11, 2010
Messages
1,674
Thanks all for the kind words. So finally got this stupid Iphone to connect to the PC.

On to the pics.

It took a while to get here because I had to finish running close to 600' of Bx. So 6 circuits, and 10 sore fingers later got to putting up the sheetrock. 5/8" turned out to be no joke. Had to recruit father-in-law's workers to help me out. Each sheet weigh a too much for me to maneuver in there by myself. I did two, and though I would have a heart-attack doing the next one. All I had to do is pay their daily salary, which came out to $280 for two guys, one day. Not cheap, but I took the two best drywall guys he had. Sheetrock and taped everything by 4pm. Would have taken me a week by myself.

Looking toward garage door. Lights are off because those bulbs were killing the pic.
IMG_1105.jpg


Looking toward the back of the garage. See all that Bx there. My workbench is in that area. What to do, what to do with all those wires?
IMG_1106.jpg


Wires gone. Used scrap 3/4 ply, to make furring strips. PL Premium Adhesive, and tapcon into the wall. Slat wall screwed 16 on center into that ply, PL Premium as well. I feel bad for whoever will need to take that off. Sheetrock below and above the slat. Brown wall the Slat is glued and tapcon into the wall, same for sheetrock.
IMG_1111.jpg


Yes, I will sand and paint all the slat walls to match. Scored this for free from the office building. Can't argue with free.
IMG_1112.jpg


Facing garage door again.
IMG_1113.jpg


Going to finish the slats today. Run a couple of Bx for my tenants, close up ceiling all the way, and start throwing **** out tonight. Hopefully will have the painting started by Sunday.

Can anyone recommend a GREAT, THE BEST primer. I need one that I can paint everything with. Slats, plumbing, sheetrock everything. I need to white wash the whole deal before proceeding with the build. Thanks all in advance.
 
Last edited:

PeteMoore

Well-known member
Joined
Jan 25, 2011
Messages
453
Location
N.Ireland
Awesome dude

Whats your total costs so far?

Looks like i am going to have to do my garage now the workshop has fallen through
 
To avoid these ads, REGISTER NOW!
Top Bottom