wyowrx
Well-known member
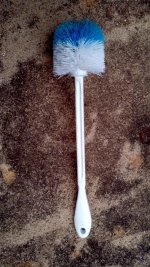
Here is my rag setup. It is a one handed operation.

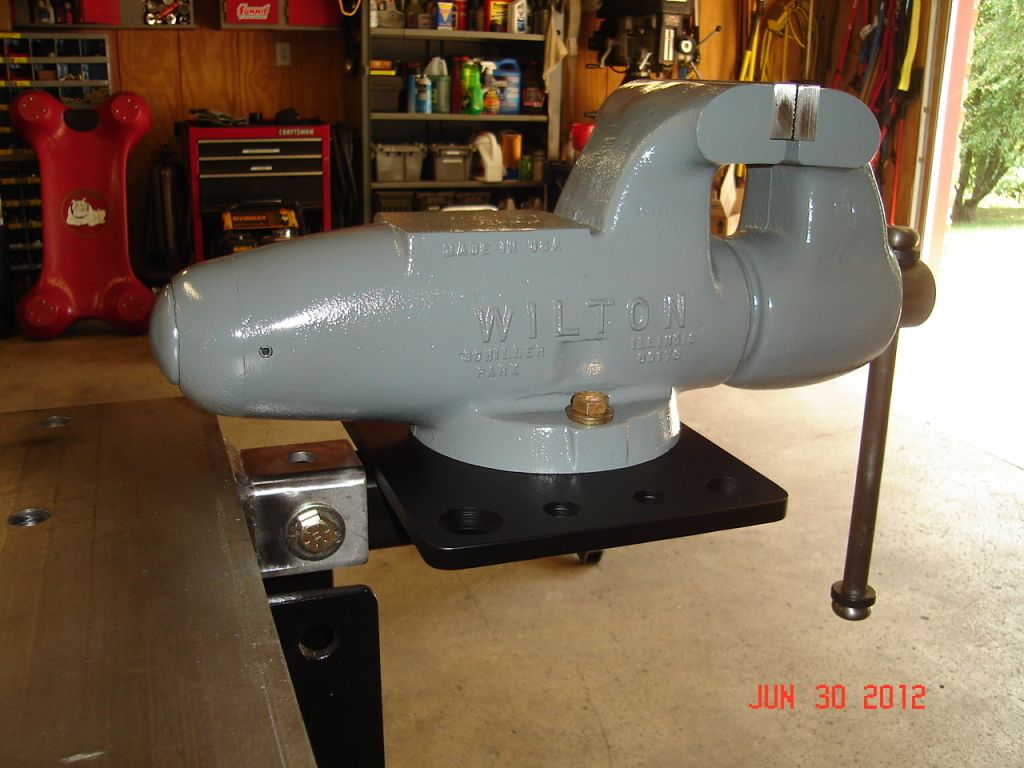
Nice! I like the hitch receiver mounted vise too. No one's mentioned that yet.
Last edited:

Here is my rag setup. It is a one handed operation.
Tool Clean Up Formula - this was suggested to me by a guy who runs a pawn shop.
Mix 1/2 ATF with 1/2 of WD40. It makes a pink colored cleaning solution called "pimp juice".
I used the cheapest ATF I could find and bought some WD40 on sale.
I was doubtful but it worked great. I used a small brass wire brush, an old tooth brush and compressed air to clean up some quality tools I bought at garage sales.
I found this mixture worked well. No nasty fumes and it was easy on my hands.
The tools cleaned up very well.
I mix it as I need it. So far, so good.
Anyone else heard of this? Or a suggestion for an alternative?
'Ed's Red' Bore Cleaner
''Ed's Red'' Bore Cleaner... Home-Mix Really Works
By C.E. ''Ed'' Harris
Updated & Revised 9-29-95.
Four years ago I mixed my first "Ed's Red" or "ER" bore cleaner and
hundreds of users have told me that they think this home-mixed cleaner
is more effective than commercial products. I urge you to mix some and
give it a fair trial, compared to whatever you have been using.
Competitive shooters, gun clubs and police departments who use a gallon
or more of rifle bore cleaner annually can save by mixing their own, and
they will give up nothing in safety or effectiveness.
This cleaner has an action very similar to standard military issue rifle
bore cleaner, such as Mil-C-372B. Users report it is more effective than
Hoppe's for removing plastic fouling in shotgun bores, or caked carbon
fouling in semi-automatic rifles or pistols, or in removing leading in
revolvers. It is not as effective as Sweets 7.62, Hoppe's Bench Rest
Nine or Shooter's Choice for fast removal of heavy copper fouling in
rifle bores. However, because "ER" is more effective in removing caked
carbon and abrasive primer residues than other cleaners, metal fouling
is greatly reduced when "ER" is used on a continuing basis.
I originally came up with this mix because I am an active high power
rifle competitive shooter and hand loading experimenter who uses a lot
of rifle bore cleaner. I was not satisfied with the performance and high
price of commercial products. I knew there was no technical reason why
an effective firearm bore cleaner couldn't be mixed using common
hardware store ingredients. The result is inexpensive, effective,
provides good corrosion protection and adequate residual lubrication so
that routine "oiling" after cleaning is rarely necessary, except for
long-term storage of over 1 year, or harsh service environments, such as
salt water exposure.
This formula is based on proven principles and incorporates two polar
and two nonpolar solvents. It is adapted from the one in Hatcher's
Notebook for "Frankford Arsenal Cleaner No.18," but substituting
equivalent modern materials. I had the help of an organic chemist in
doing this and we knew there would be no "surprises." The original
Hatcher formula called for equal parts of acetone, turpentine, Pratts
Astral Oil and sperm oil, and optionally 200 grams of anhydrous lanolin
added per liter. Some discussion of the ingredients is helpful to
understand the properties of the cleaner and how it works.
Pratts Astral oil was nothing more than acid free, deodorized kerosene.
I recommend "K1" kerosene of the type normally sold for use in indoor
space heaters. Some users have reported successful substitution of
civilian aviation grade kerosene such as Turbo-A. I am reluctant to
"recommend" substitution of aviation grade kerosene, because the effects
upon firearm components of the additives required in aviation fuels are
unknown. Some "jet- fuels" are gasoline/kerosene blends and absolutely
should not be used, because of their increased flammability.
An inexpensive, effective substitute for sperm oil is Dexron (II, IIe or
III) automatic transmission fluid. Prior to about 1950 that most ATF's
were sperm oil based, but during WWII a synthetic was developed for use
in precision instruments. With the great demand for automatic
transmission autos after WWII, sperm oil was no longer practical to
produce ATF in the quantity demanded, so the synthetic material became
the basis for the Dexron fluids we know today. The additives in ATFs
which include organometallic antioxidants and surfactants, make it
highly suitable for inclusion in an all-purpose
cleaner-lubricant-preservative.
Hatcher's original Frankford Arsenal No. 18 formula used gum spirits of
turpentine. Because turpentine is expensive today, and is also an
"aromatic" solvent, which is highly flammable, I chose not to use it.
Safer and cheaper is "aliphatic mineral spirits," a petroleum based
"safety solvent" used for thinning oil based paints and also widely used
as an automotive parts cleaner. It is commonly sold under the names
"odorless mineral spirits," "Stoddard Solvent" or "Varsol".
Acetone is included in "ER" to provide an aggressive, fast-acting
solvent for caked powder residues. Because acetone is an aromatic,
organic solvent, it is recommended that users leave it out if the
cleaner will be used in enclosed spaces lacking forced air ventilation.
The acetone in ER will evaporate, liberating volatile organic compounds
(VOCs) into the atmosphere unless containers are kept tightly closed
when not in use. The cleaner is still effective without the acetone, but
it is not as "fast-acting."
There isn't anything in Ed's Red which chemically dissolves copper
fouling in rifle bores, but it does a better job removing on carbon and
primer residue than anything else which is safe and commonly available.
Numerous users have told me, that exclusive use of "ER" reduces copper
deposits, because it removes the old impacted powder fouling which is
left by other cleaners, which reduces the abrasion and adhesion of
jacket metal to the bore surface, leaving a cleaner surface condition
which reduces subsequent fouling. Experience seems to indicate that "ER"
will actually remove metal fouling it if you let it "soak," so the
surfactants will do the job, though you have to be patient.
Addition of the lanolin to ER bore cleaner mix is entirely optional. The
cleaner works quite well and gives adequate corrosion protection and
lubrication for most users without it. Incorporating the lanolin makes
the cleaner easier on the hands, and increases lubricity and film
strength, and improves corrosion protection if weapons will be routinely
exposed to salt air, water spray, industrial or urban corrosive
atmospheres, or if you intend to use the cleaner as a protectant for
long term storage of over 1 year.
If you use other protective films for adverse use or long term storage
you can leave the lanolin out and save about $8 per gallon. At current
retail prices you can buy all the ingredients to mix ER, without the
lanolin for about $10 per gallon. I urge you to mix some yourself. I am
confident it will work as well for you as it does for me and hundreds of
users who got the "recipe" on the Fidonet Firearms Echo.
CONTENTS: Ed's Red Bore Cleaner
1 part Dexron II, IIe or III ATF, GM Spec. D-20265 or later.
1 part Kerosene - deodorized, K1
1 part Aliphatic Mineral Spirits, Fed. Spec. TT-T-2981F, CAS
#64741-49-9, or may substitute "Stoddard Solvent", CAS #8052-41-3, or
equivalent, (aka "Varsol")
1 part Acetone, CAS #67-64-1.
(Optional up to 1 lb. of Lanolin, Anhydrous, USP per gallon, OK to
substitute Lanolin, Modified, Topical Lubricant, from the drug store)
MIXING INSTRUCTIONS FOR "ER" BORE CLEANER:
Mix outdoors, in good ventilation. Use a clean 1 gallon metal,
chemical-resistant, heavy gage PET or PVC plastic container. NFPA
approved plastic gasoline storage containers are also OK. Do NOT use
HDPE, which is permeable, because the acetone will eventually evaporate.
The acetone in ER will also attack HDPE, causing the container to
collapse, making a heck of a mess!
Add the ATF first. Use the empty container to measure the other
components, so that it is thoroughly rinsed. If you incorporate the
lanolin into the mixture, melt this carefully in a double boiler, taking
precautions against fire. Pour the melted lanolin it into a larger
container, rinsing the lanolin container with the bore cleaner mix, and
stirring until it is all dissolved.
I recommend diverting a small quantity, up to 4 ozs. per quart of the
50-50 ATF/kerosene mix for optional use as an "ER-compatible" gun oil.
This can be done without impairing the effectiveness of the remaining
mix.
LABEL AND NECESSARY SAFETY WARNINGS:
RIFLE BORE CLEANER CAUTION: FLAMMABLE MIXTURE
HARMFUL IF SWALLOWED. KEEP OUT OF REACH OF CHILDREN
1. Flammable mixture. Keep away from heat, sparks or flame.
2. FIRST AID, If swallowed DO NOT induce vomiting, call physician
immediately. In case of eye contact immediately flush thoroughly with
water and call a physician. For skin contact wash thoroughly.
3. Use with adequate ventilation. Avoid breathing vapors or spray mist.
It is a violation of Federal law to use this product in a manner
inconsistent with its labelling. Reports have associated repeated and
prolonged occupational overexposure to solvents with permanent brain and
nervous system damage. If using in closed armory vaults lacking forced
air ventilation wear respiratory protection meeting NIOSH TC23C or
equivalent. Keep container tightly closed when not in use.
This "Recipe" is placed in the public domain, and may be freely
distributed provided that it is done so in its entirely with all current
revisions, instructions and safety warnings included herein, and that
proper attribution is given to the author.
In Home Mix We Trust, Regards, Ed
Nice! I like the hitch receiver mounted vise too. No one's mentioned that yet.


How would one go about mounting a receiver to a DIY wood work bench? I suppose, take the female part of the receiver and put a flat plate on it... then reinforce the heck out of that with more wood so it has leverage at the edges of the flat stock to keep the receiver from rolling over.


Yes, just more reinforced.
I don't think more reinforcement is required. The neighbor came over and used the vice pictured to beat on a piece of pipe. He ended up breaking the base.

I'd rather have it overkill than end up breaking the bench. But good to know that it has been working out well for you. I hadn't thought about putting it on the end of the bench and was going to try and retrofit it in the middle. I might use that idea, thanks.
The nice thing about my setup is that if it doesn't work for you just take a couple bolts out and nobody really knows that you tried it.
Note: If the bench starts to "walk" you can always bolt the bench down or add weight to it on the back side.
Good luck. Shoot us a picture of what you end up with.
No worries about my bench walking. It's about 16 feet long and screwed to the wall (the wall is made out of 2x4 studs with 1/2" OSB on the front). The side of the bench is only made out of 2x4 "wrapped around" 2x4 legs with a shelf in the middle to keep the legs properly spread.
Based on the slots, is your mounting plate from an engine stand?
I'll try to commit to this and buy the receiver to give it a shot and post back in a week or two.
I picked up the receiver and mounting plate from HF (did I really type that... watch out for the flamers). The mounting plate was already built and all I had to do was mount the vice. I got a second one for the other end of the bench and put my bench grinder on it.
Notes:
1. The bolt on the side was an addition. I drilled and tapped it (3/8-16?). That way it doesn't wander as much when I use the vice.
2. I started to put a bolt through one wall of the receiver tube into the leg and found out that the receiver hitch would hit it. You'll have to make a bracket to hold the front bolt. I ended up drilling and tapping a second (3/8-16?) hole into the receiver hitch there.
Link for the tube: http://www.harborfreight.com/18-inch-long-2-inch-standard-receiver-tube-97093.html
Link for the plate: http://www.harborfreight.com/hitch-mount-vise-plate-66260.html
The only real problem that I have with the mount plate is that it has sharp corners. Once in a while I will catch it when I walk around the bench.
Awesome, I did not know they sold the plate already made. I'll have to check it out.

Always trying to remember where I put the chuck key to my drill press bad case of CRS, VIOLA!!... find a small magnet from a speaker and set it on top of the drill press, the key will always be in reach and will stick to the drill press assuming the cover box is steel
I picked up the receiver and mounting plate from HF (did I really type that... watch out for the flamers). The mounting plate was already built and all I had to do was mount the vice. I got a second one for the other end of the bench and put my bench grinder on it.
Notes:
1. The bolt on the side was an addition. I drilled and tapped it (3/8-16?). That way it doesn't wander as much when I use the vice.
2. I started to put a bolt through one wall of the receiver tube into the leg and found out that the receiver hitch would hit it. You'll have to make a bracket to hold the front bolt. I ended up drilling and tapping a second (3/8-16?) hole into the receiver hitch there.
Link for the tube: http://www.harborfreight.com/18-inch-long-2-inch-standard-receiver-tube-97093.html
Link for the plate: http://www.harborfreight.com/hitch-mount-vise-plate-66260.html
The only real problem that I have with the mount plate is that it has sharp corners. Once in a while I will catch it when I walk around the bench.
Someone on here made one.
I did not know they made the plates either. I built one for a vise about 20 years ago, not for use on a work bench but to use on the back of my truck. I guess I should have pattened it then.
My buddys motto is...... If something is free take it, you can always throw it away later.
Always trying to remember where I put the chuck key to my drill press bad case of CRS, VIOLA!!... find a small magnet from a speaker and set it on top of the drill press, the key will always be in reach and will stick to the drill press assuming the cover box is steel
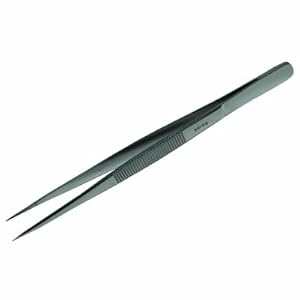
Just watch out by doing that. In doing so the chuck key is magnetized, if you happen to set it down and have any minute steel shavings or slivers they will stick to the chuck key. Some of those are hard to dig out with small tweezers.
Don't take me wrong, I'm not saying it's a bad idea, as a matter of fact it's a great idea. I'm just saying to watch for any slivers.
And with that, it's a good idea to keep a good pair of strong magnifying glasses and pick up a pair of real pointed tweezers in your toolbox. You don't need the goggle type of magnifiers, but go to a place like WallyWorld in the Pharmacy section and get a strong pair that looks like glasses.
I have a few pairs of tweezers like these and they are great for picking out really small steel slivers.
Always trying to remember where I put the chuck key to my drill press bad case of CRS, VIOLA!!... find a small magnet from a speaker and set it on top of the drill press, the key will always be in reach and will stick to the drill press assuming the cover box is steel
Don't weld in your underwear.
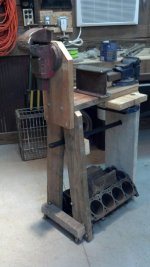
to take this one step further and not need the wood base plate these make for a nice glue in bottom stop on the piece of pipe just screw up where every you want some wire tiescheap waste pipe makes a nice cable tie holder when you're bored and have spare waste pipe lying around!!

to take this one step further and not need the wood base plate these make for a nice glue in bottom stop on the piece of pipe just screw up where every you want some wire ties
http://www.homedepot.com/h_d1/N-5yc...&langId=-1&keyword=test+cap+pvc&storeId=10051
You can always just drill a hole in the belt cover of your drill press and put the chuck key in it
Doug
Measure the back of your box fan (everyone has one in the garage RIGHT) and next time you go to the big box store buy a furnace filter that size. Turn the fan on and set the filter on the back side. The air flow will hold it in place and it will reduce the free flowing particulate matter from the air. When it gets nasty just throw it away.
You can always just drill a hole in the belt cover of your drill press and put the chuck key in it
Doug
I pop rivetted a 3/4" conduit saddle onto the belt cover of my little drill press to put the chuck key into. Discovered I liked it so I did the same for the keys on my small bench top lathe. Will probably do the same when I finally get off my backside and get my larger Hercus running.
Nice! I like the hitch receiver mounted vise too. No one's mentioned that yet.

do they still make those retractable keychains like the high school janitors used to wear on their belts? i think that would be a good way to store lathe/drill chuck keys so theyre always where you need them and never left in the chuck. i do know truckstops have those cb microphone holders that are retractable also. just an idea i havent got around to trying yet.
do they still make those retractable keychains like the high school janitors used to wear on their belts? i think that would be a good way to store lathe/drill chuck keys so theyre always where you need them and never left in the chuck. i do know truckstops have those cb microphone holders that are retractable also. just an idea i havent got around to trying yet.


I use a small rare earth magnet to hold my chuck key to the head of my drill press, no problems at all doing this. When I pull the chuck key off, the magnet stays on the head.
Best part its fast easy and no modifications required.