NotStock
Well-known member
I decided to build a trailer.
I decided this partly because it is hilariously easy to register a trailer where I live (all they asked was "what color is it?"), partly because I've always wanted to build one, and partly because I don't really like the ones available for me to buy from costco/home depot/canadian tire.
I left out cost savings because, lets face it, there really aren't any savings to be had in building a trailer. It is just as expensive to build as to buy (in my limited experience).
I suppose there are cost savings to be had if you cut corners. On any given day on my drive home from work I see a trailer that I don't want to be behind. I don't like that these contraptions are on the road, but they are a byproduct of the ease of getting them on the road.
I call it Garbage Express. I call it that because I CAN'T WAIT to make my first run to the dump with it. It is going to be really liberating to purge my shed/back yard/basement of stuff that has accumulated over the last year of renos.
ANYWAY.
The build:
The frame :
3x3x3/16 angle outer frame
I picked this angle because it has a bending value similar to the C channel I wanted to use, but is only 3/16 wall. This way, with an inside and outside pass, my little lincoln 180 can stick it together.
The cross members are the common 2x2x3/16 angle
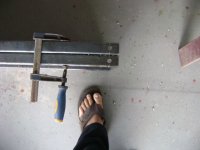
Here is what I stuck together

I used coped joints at the corners because I don't have a chop saw, but I do have a portaband. (This is due to my HATRED of grinder dust and the great lengths I've gone to in order to avoid it).

After the welds. Maybe someone can critique them. I'm open to suggestions.
Coped joint:

Cross member:

Finished product

The ratchet strap was used to tweak it into square after tacking. You can see my fenders and axle in the pics as well.
The fenders I'm happy with. The axle, not so much. I think the rear hangers are too far back. I don't like the angle and I'm thinking I'm going to have to slide the rear hangers forward. They are installed based on the manufacturer's spacing recommendation, but the hanger angle doesn't look right to me.

I'd appreciate input and criticism.
Tomorrow is figure out fender mounting and buy the remaining steel for cross members and hitch.
I decided this partly because it is hilariously easy to register a trailer where I live (all they asked was "what color is it?"), partly because I've always wanted to build one, and partly because I don't really like the ones available for me to buy from costco/home depot/canadian tire.
I left out cost savings because, lets face it, there really aren't any savings to be had in building a trailer. It is just as expensive to build as to buy (in my limited experience).
I suppose there are cost savings to be had if you cut corners. On any given day on my drive home from work I see a trailer that I don't want to be behind. I don't like that these contraptions are on the road, but they are a byproduct of the ease of getting them on the road.
I call it Garbage Express. I call it that because I CAN'T WAIT to make my first run to the dump with it. It is going to be really liberating to purge my shed/back yard/basement of stuff that has accumulated over the last year of renos.
ANYWAY.
The build:
The frame :
3x3x3/16 angle outer frame
I picked this angle because it has a bending value similar to the C channel I wanted to use, but is only 3/16 wall. This way, with an inside and outside pass, my little lincoln 180 can stick it together.
The cross members are the common 2x2x3/16 angle
Here is what I stuck together

I used coped joints at the corners because I don't have a chop saw, but I do have a portaband. (This is due to my HATRED of grinder dust and the great lengths I've gone to in order to avoid it).

After the welds. Maybe someone can critique them. I'm open to suggestions.
Coped joint:

Cross member:

Finished product

The ratchet strap was used to tweak it into square after tacking. You can see my fenders and axle in the pics as well.
The fenders I'm happy with. The axle, not so much. I think the rear hangers are too far back. I don't like the angle and I'm thinking I'm going to have to slide the rear hangers forward. They are installed based on the manufacturer's spacing recommendation, but the hanger angle doesn't look right to me.

I'd appreciate input and criticism.
Tomorrow is figure out fender mounting and buy the remaining steel for cross members and hitch.