To avoid these ads, REGISTER NOW!

Between 265 & 485 SQ/FT German flatpack home and garage build UK

Workspaces sized between 265 and 485 squarefeet.

samb

Well-known member
Joined
Apr 15, 2011
Messages
123
Location
UK
Hello all, long-time fan here that has had very little to contribute to this forum. I joined GJ over 9 years ago, when I was a sprightly 23 year old and a long way off of owning anything worth a thread :)

I'm not sure whether people want to see the house and garage build, it's an unusual way of building over here, with most houses nowadays being bricks and mortar. I'll include the start of the build here and see how it’s received.
I found some land up for sale that was going to be sold to developers hoping to put several houses there.

With my intention of building just one house for myself (not resale) I was the better choice I like to think. Planning went in before purchase, fully expecting it to be opposed as there were none in the area similar and gardens/yards were only allowed to be split vertically and not horizontally.
Amazingly, the Council had no issues and the planning went straight through!

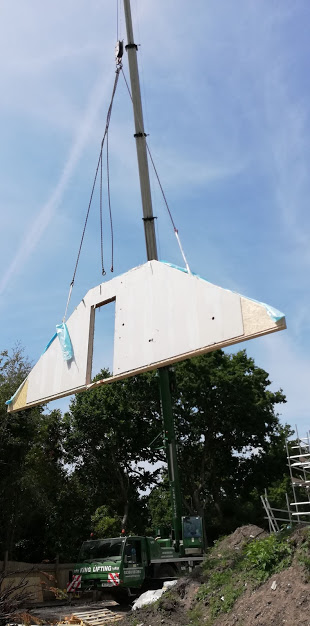
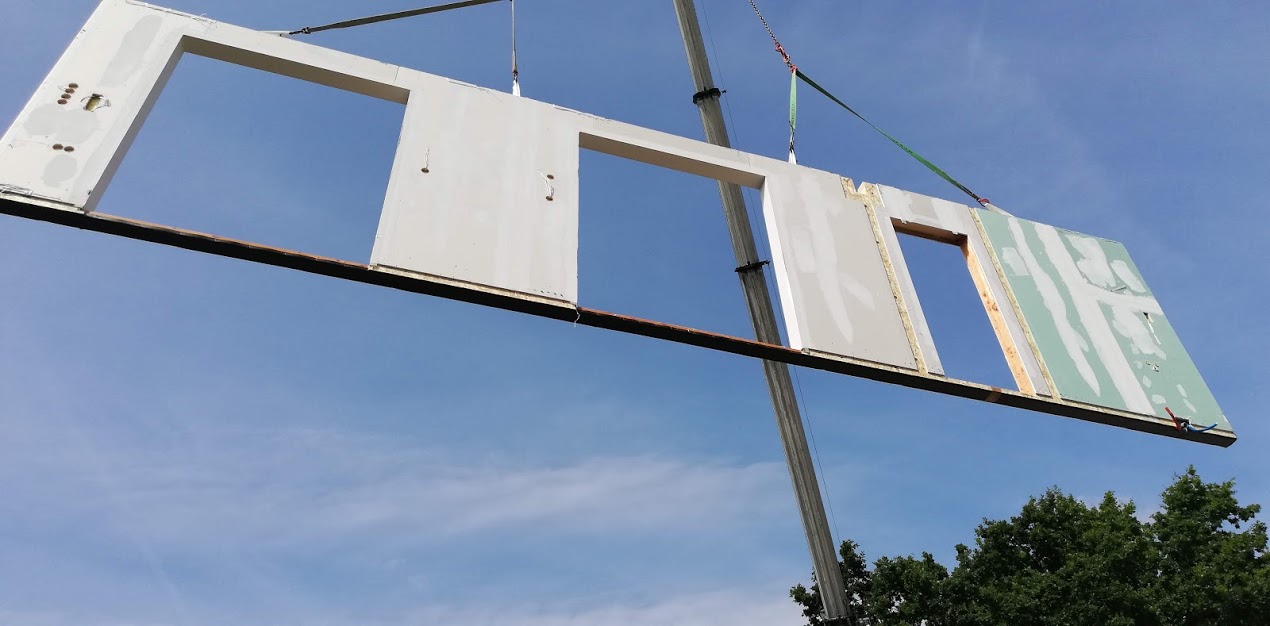
So... I bought the land with the intention of putting a German style flat pack home there.

I chose this particular manufacturer as watched endless house programmes and was impressed by the quality and the fact they never went over budget/time span on every show I watched!

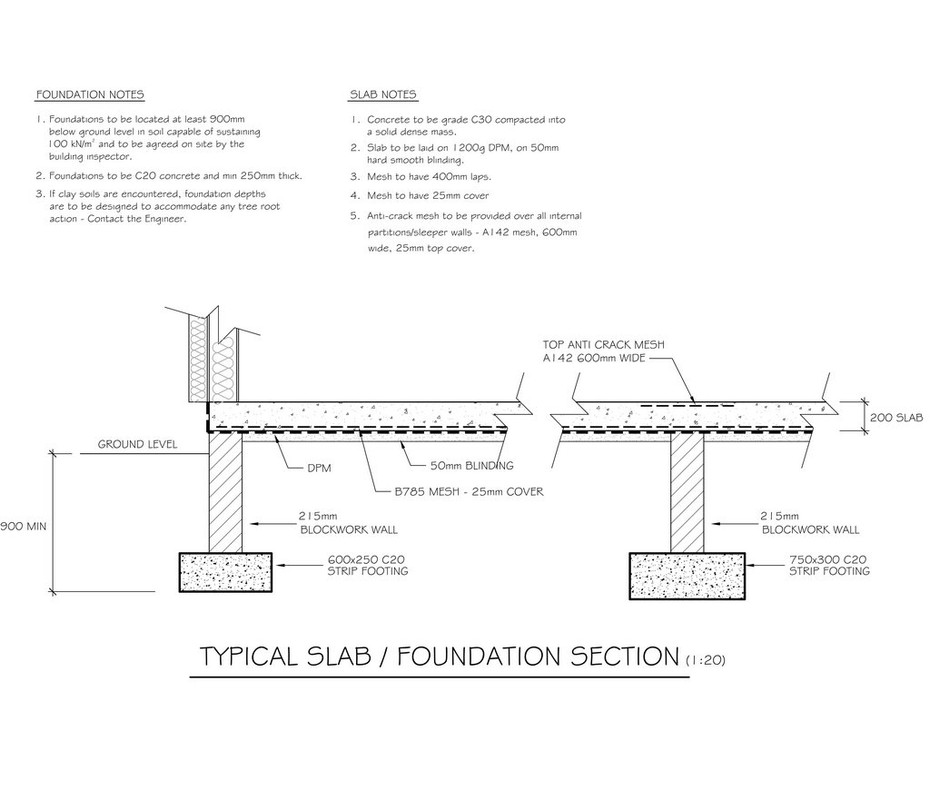
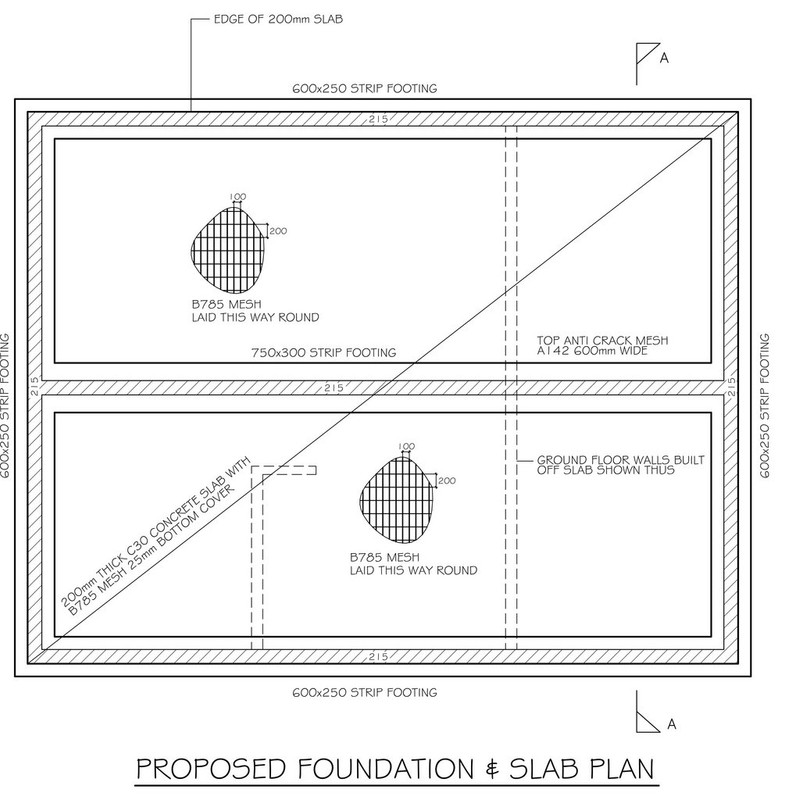
Within the plans I always wanted a garage to go with the house, so when I did the slab for the house I also did a 5.5x4.5m garage slab.
I would not have been able to have a garage with planning permission at the time, so went within the confines of 'permitted developments' which effectively allow people to build a garage/shed/summer house that is under 2.5m high, 30m2 without the need for planning or building regs.

A timber garage met the criteria whilst not breaking the bank. a perfect first garage for me! I do wish I'd gone slightly wider though...!

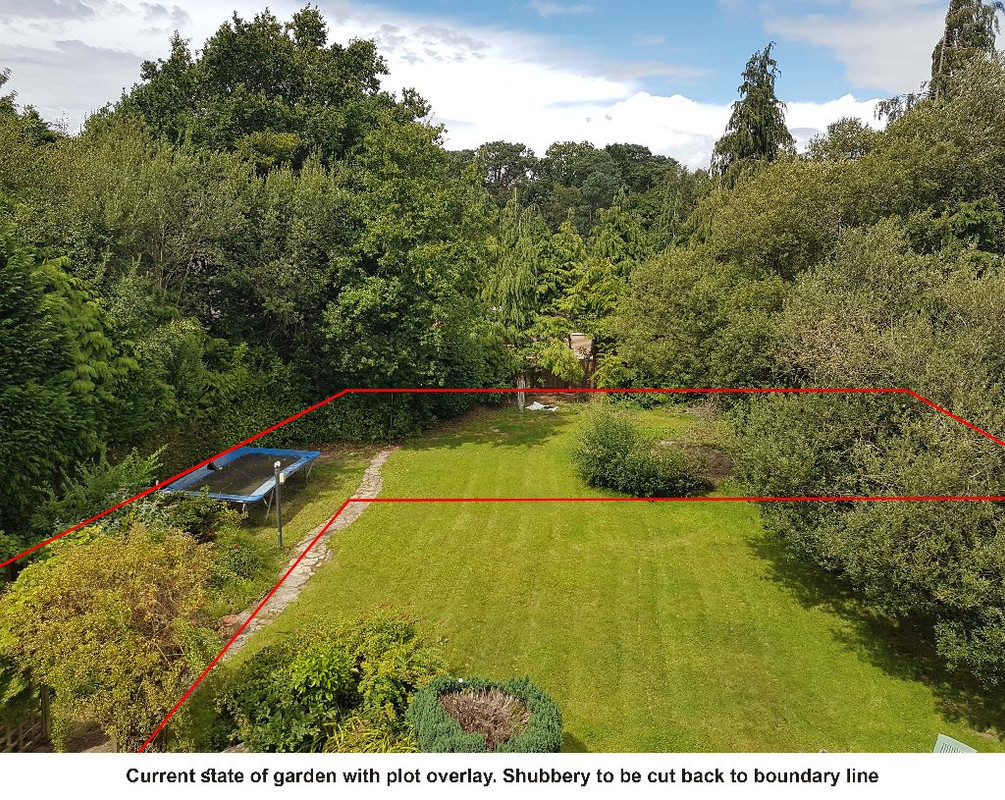
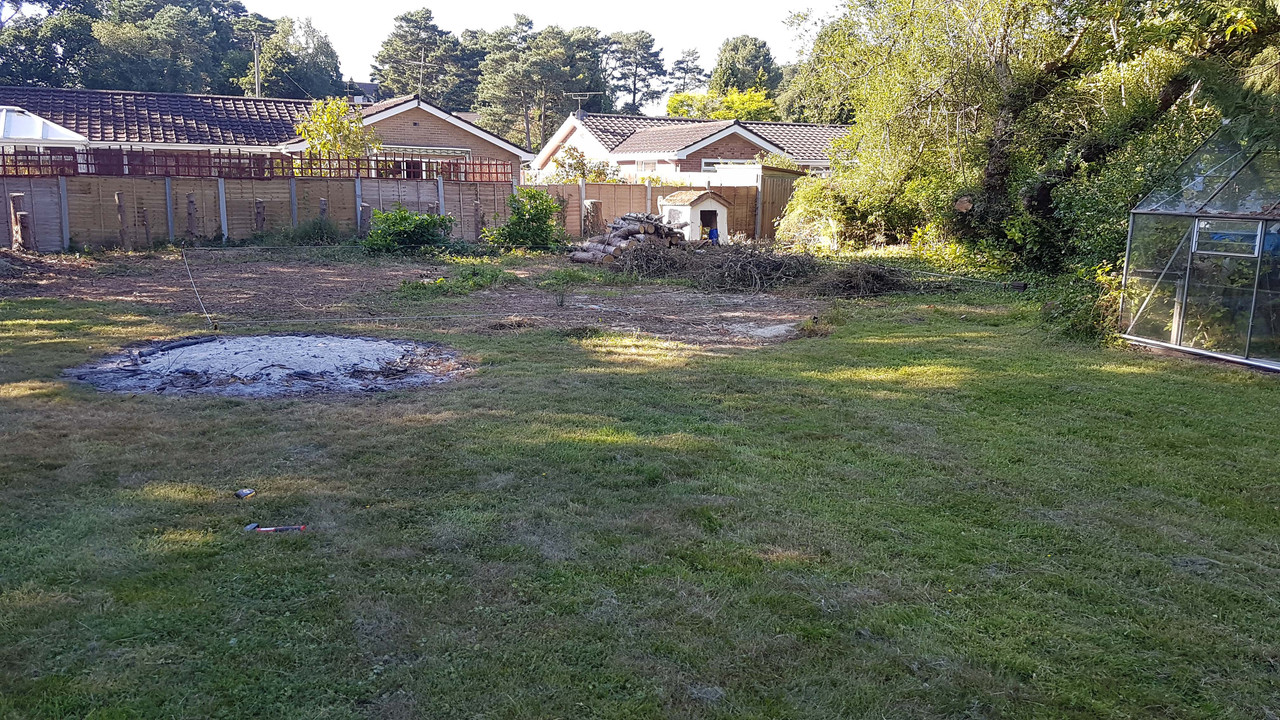
So it started with this... a plot of land that had many trees on it. All work done by myself to keep costs down over the course of a year. Many fires ensued!


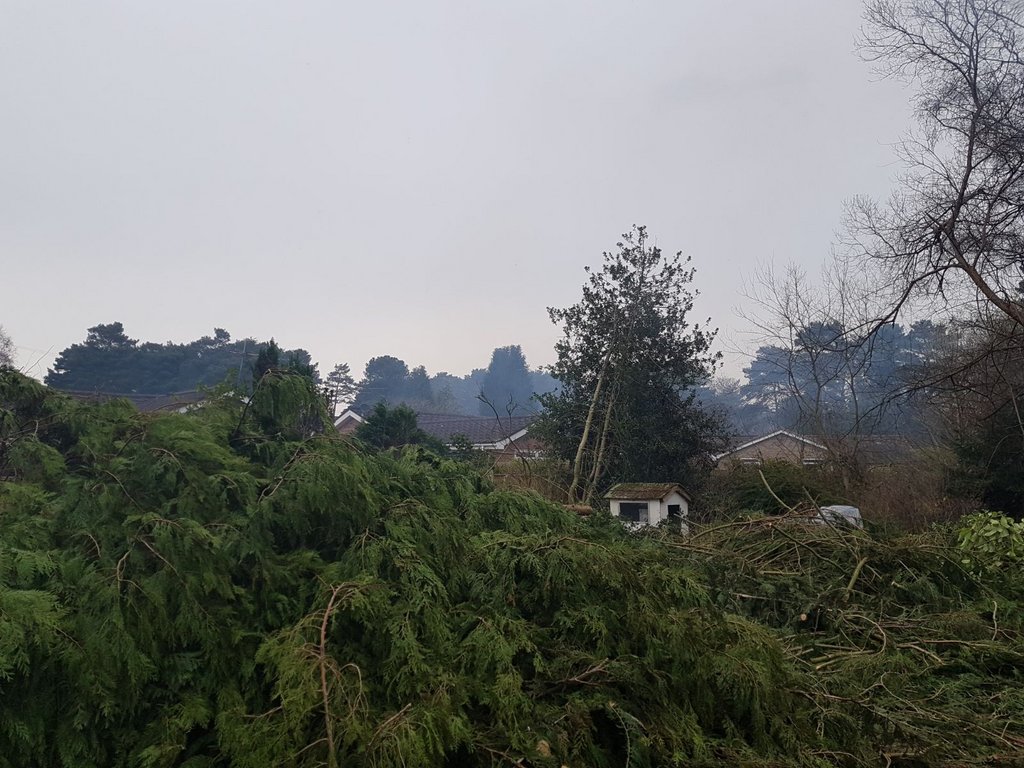
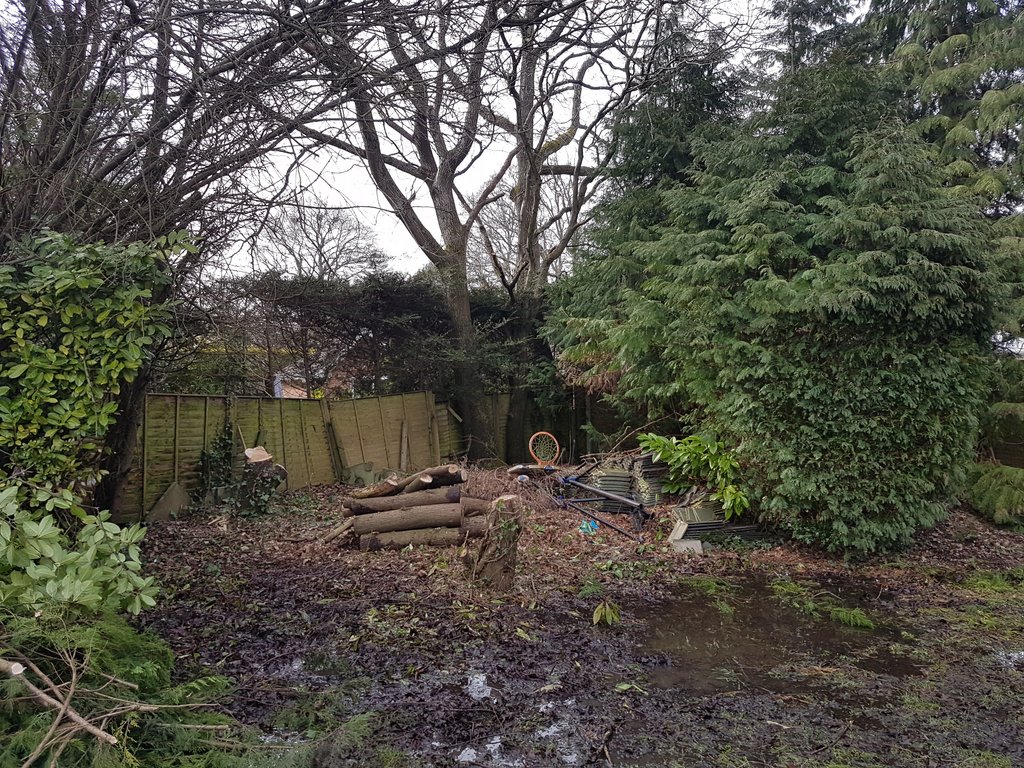
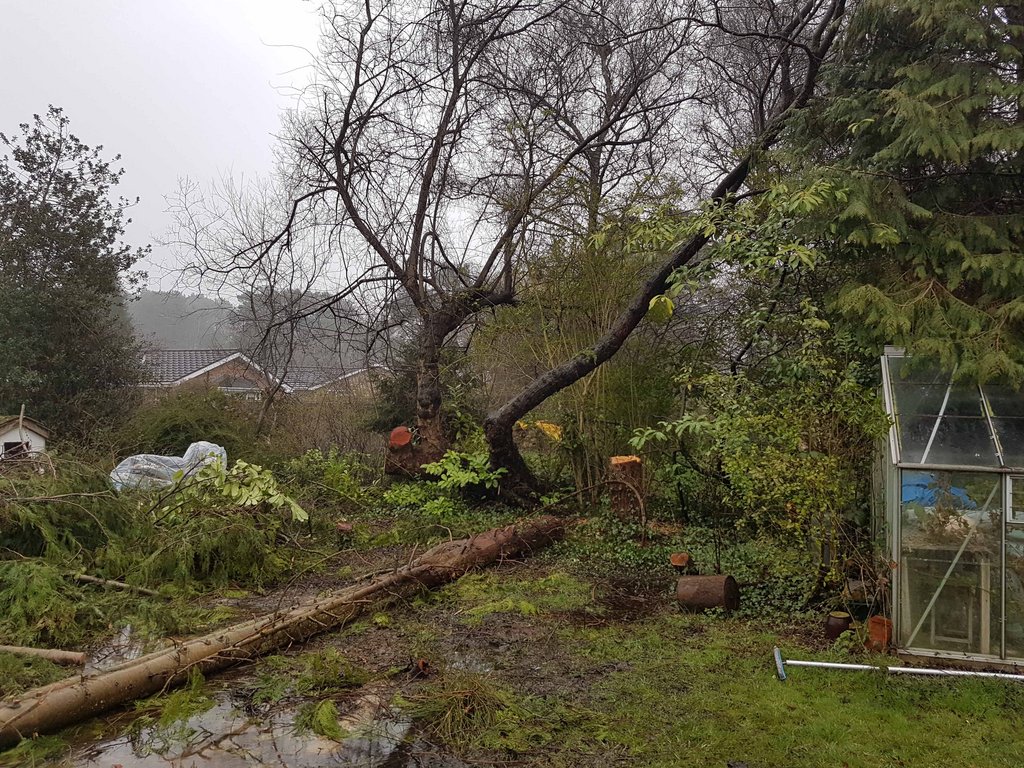
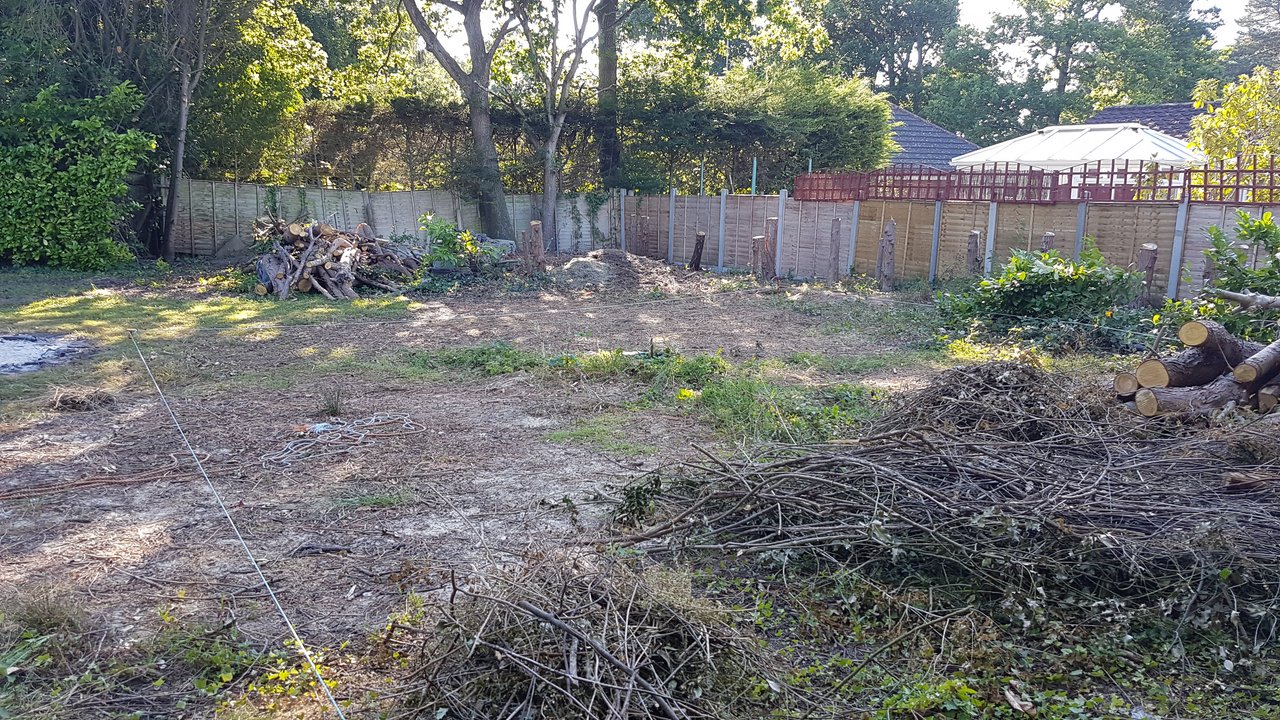
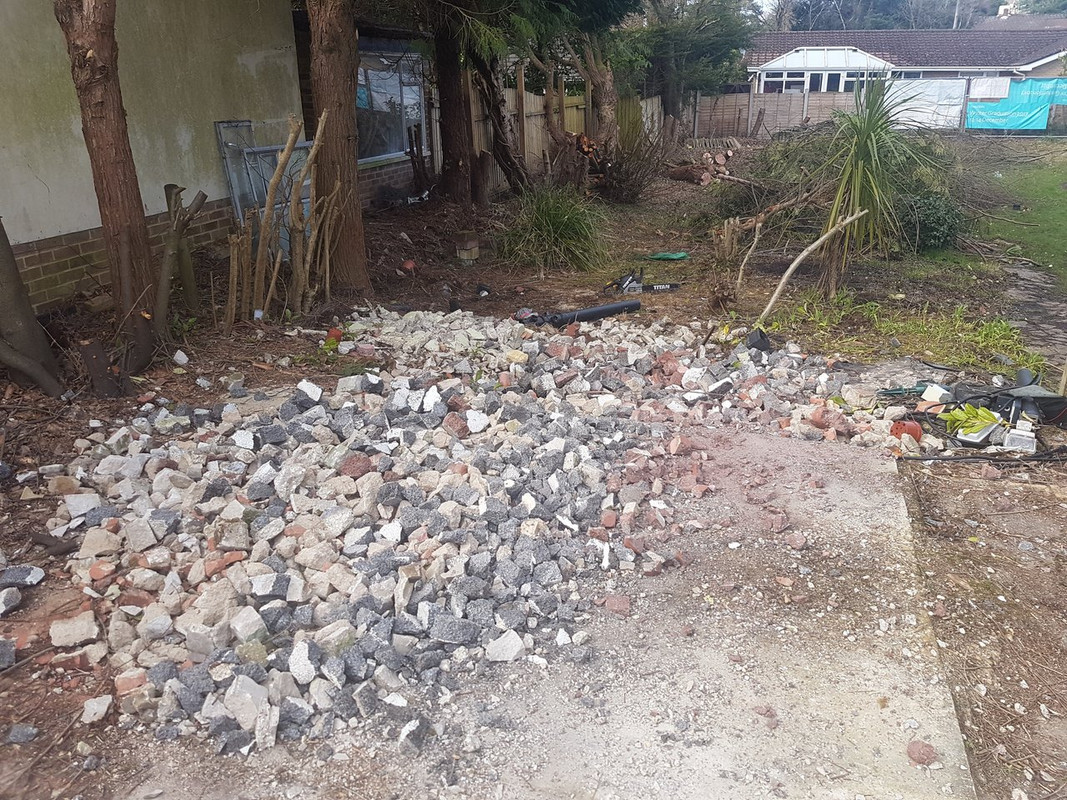
Once the trees starting coming down and the constant rain, it wasn't such a nice view. Looks like a tank has rolled through it. The smoke just add the the effect...


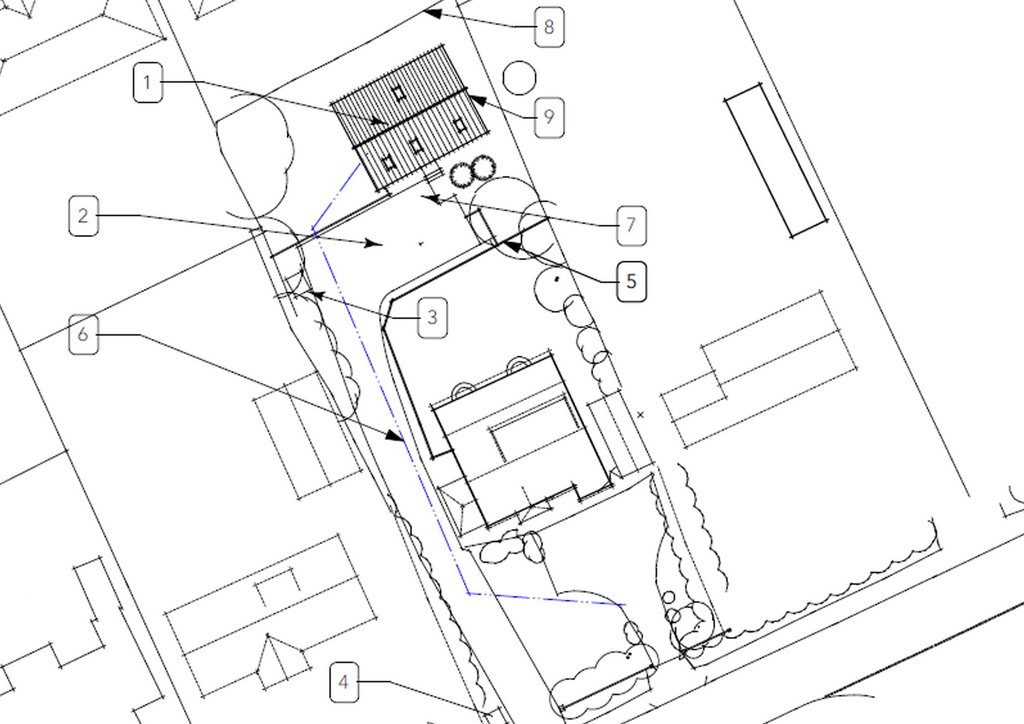
Here you can see a string outline of the house and where the house will lay:


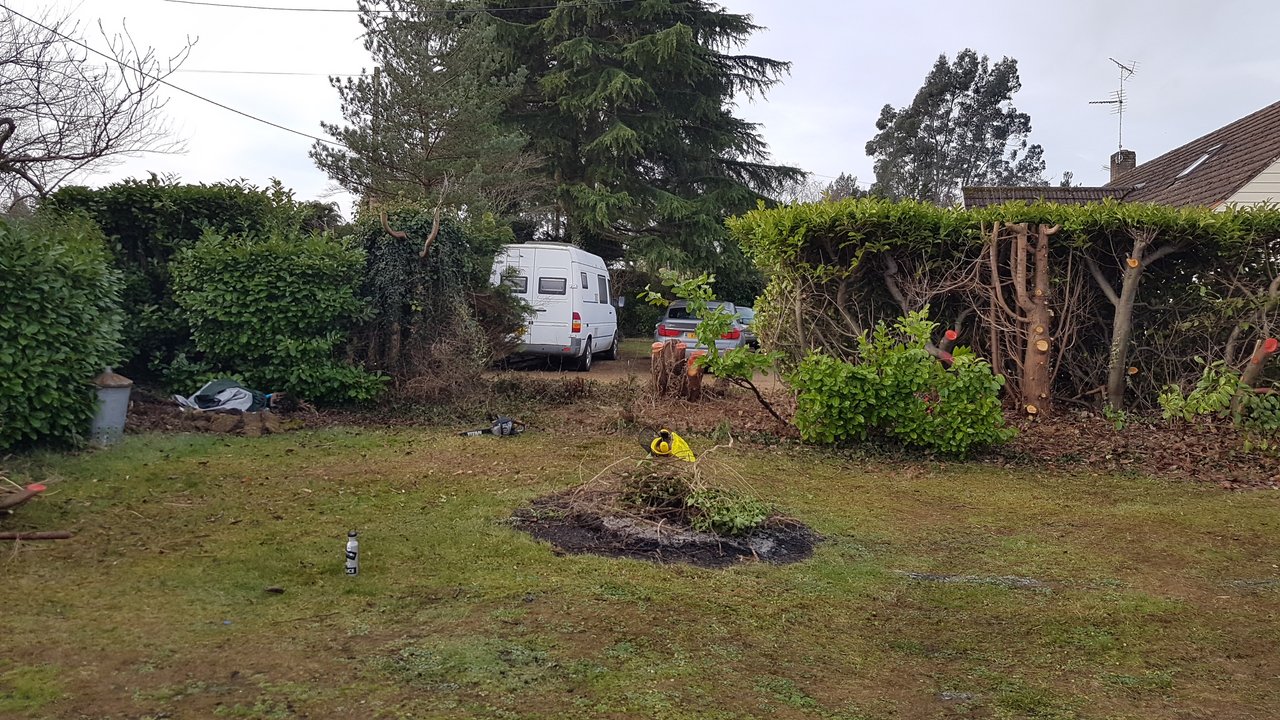
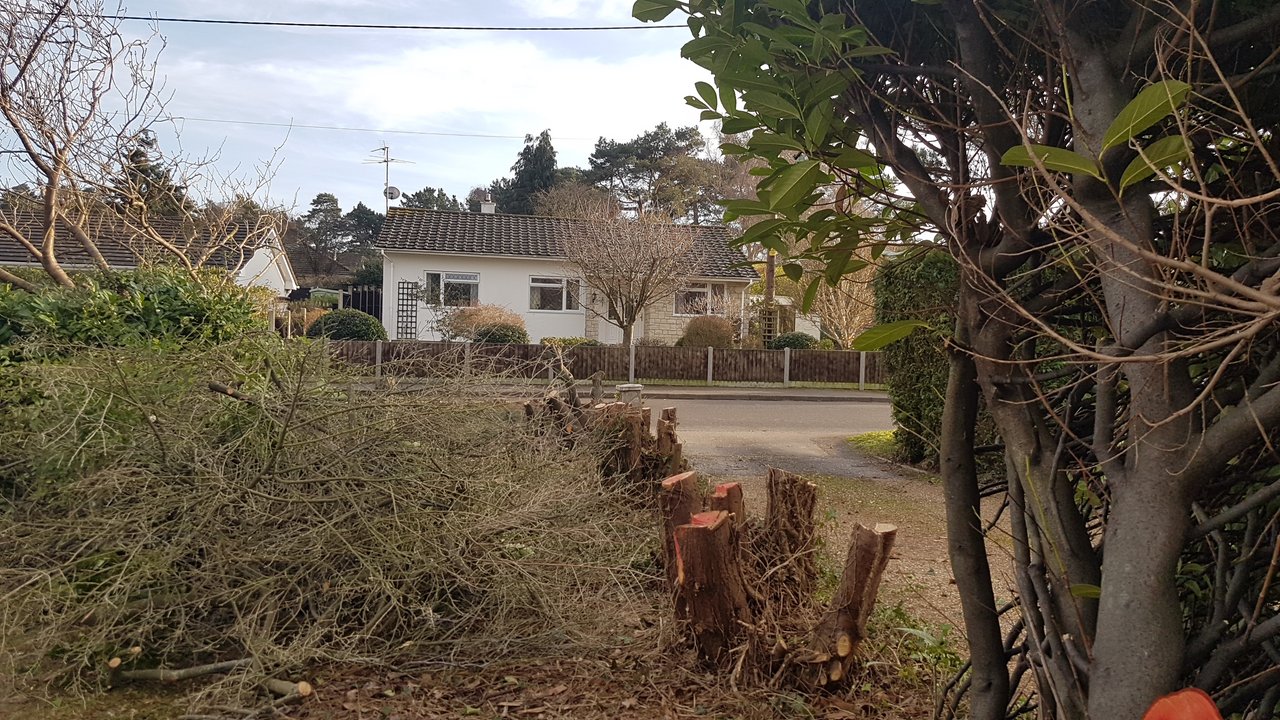
I also had to create space for a driveway to be cut in. This stretched over 60m, as house would obviously sit behind a row of houses on the road. I also had to remove trees nearest to the road by over 8m to allow for lorries/trucks and a large crane to be reversed from road side down this stretch of road, given the distance from the road it was the only option.


Sledgehammer says goodbye to a coal bunker that was in the way!


And the cutting in begins...
 
Last edited:
To avoid these ads, REGISTER NOW!
OP
S

samb

Well-known member
Joined
Apr 15, 2011
Messages
123
Location
UK
My postimg account shows these images as tiny so I'll add them and see if it's all gone wrong.

Drive-cut-in-1.jpg

Drive-cut-in-2.jpg

The cutting in process included utilities being ran to the road for everything. The driveway being the obvious choice to facilitate this.

Waste water required a vortex pump to force the waste up a slight incline. This actually was a more cost effective method than cutting in a direct gravity fed path.

Drive-cut-in-2-5.jpg

Drive-cut-in-3.jpg

Drive-cut-in-4.jpg

Drive-cut-in-5.jpg

If the photos come out tiny, I'll rethink before uploading more of the story!
 
Last edited:

wasfast

Well-known member
Joined
Apr 10, 2014
Messages
874
Location
San Diego CA
That was a serious amount of work. People coming up to the property on the road would say "all he's got done is a driveway? What has he been doing?":) Super job!
 

Brian R

Well-known member
Joined
Dec 1, 2009
Messages
591
Location
Chestertown, MD
I'm not sure whether people want to see the house and garage build, it's an unusual way of building over here, with most houses nowadays being bricks and mortar. I'll include the start of the build here and see how it’s received.
I found some land up for sale that was going to be sold to developers hoping to put several houses there.


No, we love seeing foreign building methods and appreciate more when someone buys land and improves it. And then to see you doing the work yourself, well done! Can't wait to follow along.
 

Terrick down Under

Well-known member
Joined
Jul 2, 2015
Messages
1,904
Location
Royalla, NSW, Aust.
Yes, keep posting. Love to see how people build in different regions of the world. I am using Thermacell concrete form to build our underground house...I think you would call them Mago blocks.
 

Geoff289

Well-known member
Joined
Nov 10, 2013
Messages
1,224
Location
Melbourne, Australia
I'm not sure whether people want to see the house and garage build, it's an unusual way of building over here, with most houses nowadays being bricks and mortar. I'll include the start of the build here and see how it’s received.
I found some land up for sale that was going to be sold to developers hoping to put several houses there.

Welcome aboard. Please keep the house build stuff coming. I for one will follow it with great interest.
 

GrantT

Active member
Joined
Jan 11, 2013
Messages
44
Location
Northumberland, UK
Looking forward to seeing this one, we also live in an 'alternative' style build up in Northumberland (a Finnish log home) and are in progress with a Permitted Development garage
 
OP
S

samb

Well-known member
Joined
Apr 15, 2011
Messages
123
Location
UK
Thanks guys, off to work a night shift now but will contine the story over the coming days
 

1949 caddyman

Well-known member
Joined
Oct 5, 2010
Messages
1,778
Location
Arizona
I think it translates to a pre fab home with very high quality.
 

Attachments

  • 304DF2CC-09EB-4AF7-BDC7-FD86E8295856.jpg
    304DF2CC-09EB-4AF7-BDC7-FD86E8295856.jpg
    19 KB · Views: 168
OP
S

samb

Well-known member
Joined
Apr 15, 2011
Messages
123
Location
UK
Thanks all, I'll keep the updates coming. There are 'flat pack' German Homes such as Huf-Haus that are a lot more expensive than mine! I chose to go with a company called Danwood, still very high quality components but a different league from HH. Maybe if I were to use an analogy: mine would be a VW, Huf-haus would be a Bentley.

To explain the build to someone that has not seen one before, there are various options but I chose the 'turnkey' option. This means that from the moment they are happy with your slab, they'll do everything.

Before you put a deposit of 5% down, you go to a showroom a few hours away and choose between hundreds of options, maybe thousands. Everything is customisable... tiles, heating packages, front doors, colour schemes, internal doors, flooring, plug sockets (where you want them all to go as well) shower packages, bathroom fittings...everything! You options are like a new car, you can get carried away.

You don't however get a kitchen, too customisable for them, so I'll be fitting my own.

I did however go with a few options, because why not! Once they leave, your house is ready to move in. but that is still a long way from where I am currently in the story and there's a lot of hard labour before that happens...

So, there was a real issue with standing water, I was facing a particularly bad time of year with rain, but I still needed to find a way of getting rid of the sitting water. The land is nowhere near flood plains but was definitely lower than the houses closer to the road and therefore suffered from surface water badly.
I considered soakaways but knew they would be ineffective and not really take care of the problem. (Pic angle from neighbours house)

flooding.jpg

It literally kept me up at night thinking how I would get rid of the water, I knew the house would be fine as it sits on a 300mm concrete slab for that exact reason, but I didn't want to get out my car in winter and stand in an inch of water either.

This is where good neighbours come into play, I was just chatting away with one when they mentioned that the house at the end (a much newer close from the mid 90's had been made by the council to install mains water run off sewers to most back gardens) and he said potentially it might go all the way to my boundary...

I had to find it! I asked this neighbour if I could have a look in his garden for manholes and found 2 manholes leading from the road directly towards my fenceline.

Flooding-3.jpg

Some VERY careful digging later... holy ****, it even goes into my property line!

flooding-2.jpg

This literally drained all the water from my site within an hour! This would effectively handle all of the runoffs from the house, a drain being put in to do the same would have been literally impossible as I'm surrounded by established properties. So, this find not only saved me thousands, it was also a gift I could never have had! I've repaid the favour already to the kind neighbour!

Onwards...

I went to over the hard-core with over 30cm of type 1 to make sure it could take the weight of the laden lorries on site. This will then be finished off with gravel at a later date.

Fencing-3-1.jpg

You can also see some more of the fencing I am putting in on every boundary at this stage, a massive job but not something I would want to pay someone else to do.
(PS: I didn't do that shoddy bit of fencing next to the neighbours wood shed!)

Drive-cut-in-5-5.jpg

This photo was taken just before I took all of the roots taken away from site. The plot was pretty clear by this point of most of the trees, the foundation work could begin. It looks like a real mess, view from neighbours house.

Foundation-1.jpg

The next stage was to build the foundations for the house and garage.

The plans from the company are VERY exacting, there is not one or two feeds for water waste in this house- to make the house quick and easy to build on site, the house lines up exactly with corresponding points on the slab. This means that all of the SVP's have to be in exact locations within a few mm.

These SVP's will then line up exactly with the corresponding outlets in each room, the majority of which are in the left hand corner for the technical room and downstairs bathroom, etc.

The overall slab tolerance also had to be within 15mm across the entire slab. Considering UK building regs normally allow for a 25mm tolerance that was worrying.

Feet for rebar floatation not yet fitted but were prior to concreting.

Foundation-4.jpg

20190617-185946.jpg

Foundation-10.jpg

Foundation-6.jpg

A load more cutting on the eastern side too in order to put more fencing down this side and allow the boundary to be clearly seen.You can just about see the draw line that my fencing will follow!

Foundation-7.jpg

I also had a garage slab made at the same time, this was nowhere near as heavy duty but still went to 150mm with rebar reinforcement. (Reinforcement added after photo taken- don't worry its there!)
I also ran utilities ducting to the garage slab ready for the hook up at a later date.

Foundation-5.jpg

Garage-2.jpg

Garage-1.jpg

The vortex pump was also sunk into the ground, this does not hold waste like a conventional pump, it goes in to the pump housing from the house and then straight up to the road by forced induction. Very neat bit of kit and well worth the $2800 or so.

20190508-130829.jpg

So this is what I was left with awaiting sign off from the house building firm. They had to come over from their base in Poland just to tick a few boxes off (Their HQ is effectively a City in itself that handles design and manufacture and shipments in house for all around the world- very impressive.)

Still no fencing done between my plot and the original landowner, this is on my list but I was juggling a massive to do list around fulltime work. That massive mound of dirt will find a home around the site.

Foundation-9.jpg

I won't go into the utilities too much, but I do want to moan! I had huge issues with getting both the telecom lineand electric line to the house. telecom simply refused to push the line down the driveway saying it couldn't be done with a bend at the end by the house. I ended up using a carrier bag knotted onto the telecome line and used a powerful wet/dry vacuum cleaner to **** it through.

Likewise, electric told me they that they couldn't use the ducting they'd supplied as it was too small for the mains line they'd be running...(they supplied the damnthing in the first place based on their own reports!)
I had to dig up the whole driveway to get a bigger bore ducting installed and then refill by hand as no heavy machinery was still rented by this point as I thought I was done. I eventually got money back from them 6 months later for the inconvenience but refilling it with a shovel nigh on killed me!
 
Last edited:
OP
S

samb

Well-known member
Joined
Apr 15, 2011
Messages
123
Location
UK
To follow, the next stage will be the house build.
 
Last edited:

Markoos

Well-known member
Joined
Jun 6, 2016
Messages
113
Location
South East England
Very clean building site I must say, and it looks like you know what you doing.
I would not leave that tree by the garage however, the roots will crack the slab sooner or later...
Nice progress, waiting for more.
Good luck +1
M.
 
OP
S

samb

Well-known member
Joined
Apr 15, 2011
Messages
123
Location
UK
I would not leave that tree by the garage however, the roots will crack the slab sooner or later...
M.

Do you know, I haven't really put much thought into it. That would be annoying, although it depends how far down the line, are we talking 10 years? I do like the oak tree as I cut so many trees down, I wanted to keep something. Placement of the garage was my fault, I wanted to get it to the limits of my boundary so it didn't take up too much space on a relatively small plot.
 
OP
S

samb

Well-known member
Joined
Apr 15, 2011
Messages
123
Location
UK
Before the house goes up, here's a clearer break down of the slab used as well as the floor plan.

The finalised design put my house on the right side of the plot, not the plan initially but I'll explain why below. The drive/garden also changed to suit planning regs and what would work best overall.


Initially the house was to be on the left side of the plot but because a neighbour to the left has tree preservation orders in their garden (oak trees) I had to move the house atleast 5m away from their treeline.

Initially this irritated me as my oak tree did not have a similar TPO and I thought it was the best layout- however now I am glad that it happened, the house works better where it ended up going.

So I flipped the internal layout so that the kitchen would get sun throughout the day, as would the living area which has no inner partition doors- meaning natural light flooding through the house. The office/downstairs bedroom would be the only room besides the technical room that would not get as much sunlight as the other rooms.


The foundations did not need piling as I thought they might, I'd heard horror stories of people further down the road hitting nothing but clay but luckily all I had was sand.

Still quite heavy duty foundations for what is in effect a very light house.


To avoid these ads, REGISTER NOW!
OP
S

samb

Well-known member
Joined
Apr 15, 2011
Messages
123
Location
UK
I still had a long list of things to do with the land, fencing etc but this could wait. In the last post I mentioned how accurate of a slab Danwood required, the tolerances were insane but we managed to get it within 4mm across 11 metres. Something Danwood state is one of the best they have seen, which was a relief.

The scaffolding goes up on the Sunday before the build commences. (courtesy of the Danwood, its all in the one fixed cost agreement)

IMG-20190707-WA0000.jpg

So at 0700 hours on the exact day that they promised it would arrive, the lorries and crane descended on my quiet road.

IMG-20190708-115309.jpg

IMG-20190708-134533.jpg

IMG-20190708-120111.jpg

IMG-20190708-115527.jpg

IMG-20190708-103025.jpg

As you can see in the above picture, the walls are already prewired ready to receive the plugs. I chose where I wanted everything weeks before but there is no going back!

At the end of day 1 it was water tight, windows and doors were fitted and the roof sealed. How it was left after just one day on site: insane!:confused:
The house is an eco home, so that outer walls are timber framed and then coated in 1250mm of dense foam on the outside of all the structural support, every windows is triple glazed as well so bills should be very low for heating.
The walls are well over a foot thick so its quite substantial.

Danwood-1-5.jpg

During the first week, a lot of the work took place inside with another team working on the roof tiling/guttering etc. Bear in mind the whole process take 1 month, they allow 6 weeks but my team of 9 Polish and German Builders were staying over in hotels near to here whilst the house was being built.

Mine was done in 4 weeks. 0530 hours they started and often didn't finish until around 2000 hours... that's some work ethic!

I also never saw a worker take a meal break, they must have but not downed tools like my Countrymen would for a good hour atleast. Always in high vis with a blue hard hat, they did look pretty professional.

20190713-182547.jpg

20190715-184127.jpg

Danwood-2.jpg

Danwood-3.jpg

And a first look inside. It's a 3 bedroom, 3 bath. 147m2 house. Nothing grand about it but perfect for me. Very dark and dingy at present...

Living room area dead ahead with downstairs office to right.

Danwood-6.jpg

Kitchen area:
Danwood-7.jpg

One of the upstairs bedrooms:

Danwood-5.jpg

Upstairs bathroom:

Danwood-4.jpg

And a rendering of how it will look from the outside, minus the cladding.

Danwood-1-5.jpg
 

Markoos

Well-known member
Joined
Jun 6, 2016
Messages
113
Location
South East England
''At the end of day 1 it was water tight, windows and doors were fitted and the roof sealed. How it was left after just one day on site: insane!''

''Insane'' just about describes it, I am very happy for you, it is one very good-looking house. What type of heating have you chosen?
M.
 
OP
S

samb

Well-known member
Joined
Apr 15, 2011
Messages
123
Location
UK
I went with the combi boiler package, which included a Vaillant ecotec plus 938 combi boiler, quick boil tank etc.


IMG-20200618-212739.jpg

The copper work is fantastic, shame its all hidden behind foam. Likewise I had a nose in the electrical box and was suitably impressed by the workmanship.

IMG-20200618-212520.jpg

The home also has a Zehnder ComfoAir Q, mechanical ventilation system- every room has provided with its own air filtration as all of the internal doors have large rubber seals and lips to make sure they are totally sealed off, making the need for air circulation really important and ultra quiet in the house even if someone is watching a film loud in another part of the house.

IMG-20200618-212822.jpg

IMG-20200618-212340.jpg

The Zehnder also knows when there is more moisture in the air and will compensate, meaning that you don;t need to ever worry about opening the window in the bathroom when showering, it will work out the air has changed slightly and keep it totally clear. Clever stuff, not something that is in most homes over here in the UK, even AC is very rare in a home as our weather doesn't really justify it eh. The Stateside guys probably have something even more sophisticated than this.
 

theoldwizard1

Well-known member
Joined
Feb 22, 2011
Messages
43,138
Location
SE MI


As you can see in the above picture, the walls are already prewired ready to receive the plugs. I chose where I wanted everything weeks before but there is no going back!

Now I understand the term "flat pack" ! I have not seen anything like this in the US. We have "modular" homes, where one half will arrive on wheels and then it is bolted to the second half. These have gotten much better in recent years but you are still limited to single story and a rectangular foot print.

I would curious to see how electrical and plumbing connections are made between wall panels.
 

M-technik-3

Well-known member
Joined
Feb 16, 2008
Messages
1,786
Location
Western Mass
There are some newer companies here in the northeast that are building homes in this manner. They are pricey vs stick building but that I believe comes out in the wash.

OP very nice place you have going there it's always interesting to see how other countries build their houses.
 

theoldwizard1

Well-known member
Joined
Feb 22, 2011
Messages
43,138
Location
SE MI
There are some newer companies here in the northeast that are building homes in this manner. They are pricey vs stick building but that I believe comes out in the wash.
SIPs (structural insulated panels) are not cheap, but you save a ton on labor and can get a home dried-in within a few days.
 
OP
S

samb

Well-known member
Joined
Apr 15, 2011
Messages
123
Location
UK
Onwards…!

I hired a mini digger and then ordered circa 25 tonnes of gravel, it might have been too much as at first I was practically wading to go and do the bins. It’s much better now I’ve gone through it with a spade and wheelbarrow about 100 times.

Drive-cut-in-6.jpg

The house built, all services connected besides internet at this stage and me properly moved in!

20190909-215700.jpg

Even though the property is for me (not to be sold on), UK councils have some really annoying legislation to do with building reg sign offs. Mine stated that I HAD to have a disabled ramp and not steps… I assume just in case I were to sell, it would save them money in having to fit out the house.

I pondered the ramp for some time, before deciding to play the system by building a ramp out of decking so I could easily remove it afterwards and fit stone steps once I had the build signed off. However, I actually find it very useful and haven’t changed it!

Ramp.jpg

IMG-20200207-072837.jpg

Moving earth around the property still left me with this:

Fencing-3.jpg

I eventually got rid of it by offering it free, using it around the borders and generally getting rid any way I could lawfully do it! This left me with a much better plot for growing grass! The ground runs off so that it will go into the drainage effectively.

IMG-20200329-155945.jpg

I decided to make some decking, a place where the sun sets last and ideal for BBQ's and chilling out. All decked out and ready for some sun! :dunno:
IMG-20200416-124156.jpg

Grass is growing slowly and patchy for first few weeks!

IMG-20200427-131720.jpg

The days were becoming dark by 1600 hrs so little could be done around work for a while. I still kept myself busy inside though.

IMG-20191209-165742.jpg

The house was finished, sort of. Having never owned a house previously, I had very little to fill it! Slowly over a year the house has transformed to be a comfortable home with belongings, art, plants and décor mostly done by the girlfriend to make it less clinical.

This was how it looked around a year ago, the kitchen was fitted by me on my days off as it’s the only part that the house builder will not do, too customisable for them but I was happy to do it, I see myself as reasonably competent with tools but had never fitted a kitchen before. I took my time and found it quite therapeutic, followed the mantra of measure twice cut once!

1.jpg

3.jpg

4.jpg

5.jpg

6.jpg

IMG-20191115-170424.jpg

7.jpg

Just in time for Xmas 2019!

IMG-20191214-182631.jpg
 

CV Joint

Well-known member
Joined
Oct 27, 2010
Messages
52
Location
Texas, Hill Country
This is a fascinating thread. I’m really enjoying learning all about your project. Also, as a fellow R53 owner, I love seeing the ‘03 MINI Cooper S in the photos.
 

Metallitubby

Well-known member
Joined
Aug 12, 2019
Messages
25,630
Location
ATL OTP North
I have not seen anything like this in the US. We have "modular" homes, where one half will arrive on wheels and then it is bolted to the second half. These have gotten much better in recent years but you are still limited to single story and a rectangular foot print.

The house I am building is considered "prefab". We were dried in under three days this past week. My builder has said multiple times that this house is far overbuilt when compared to stick-built here in the southeast. Also, there is nothing "cheap" about this way of building.

https://www.deltechomes.com/renew-collection/solar-farmhouse/
 
OP
S

samb

Well-known member
Joined
Apr 15, 2011
Messages
123
Location
UK
Jut an update, the garage slab was done at the same time as the house. Now a year down the line it was looking a bit scummy. I looked at all sorts of cleaners but decided on cheap thick bleach, it worked a treat.

Before:

garage-3.jpg

Garage-4.jpg

After that I washed it off twice, allowed it to dry and sealed it twice over with some excellent concrete sealant from Amazon.

In the meantime the grass grew perfectly, the soil wasn't the greatest so I was really pleased with how it came up. I must have gone through it with a sieve 3 or 4 times over to get all of the glass and stones that were in there.

I also bought my very first lawn mower! I love it, I don't need petrol as there is not much grass to worry about. It runs on 2x20v batteries, has a 3 year warranty and the reviews were excellent.

IMG-20200615-141831.jpg

In other news, the timber garage build started. No issues thus far. I would have liked to have done this myself but the 10 year warranty was only in place if the company built it themselves. I have a trade account there so it sort of worked out with 'free' fitting costs.

IMG-20200416-095402.jpg

IMG-20200416-104954.jpg

IMG-20200416-154531.jpg

As with anything timber, sealing and waterproofing were of the utmost importance. I was told to use Sadolin Supadec 7 year paint, it's more expensive than most but flexes with age and with the wood likely to dry out it made sense. It took a few coats to look good but overall I am happy with how it came out externally.

IMG-20200424-180440.jpg

I also worked on putting in bordering around the side to seperate the gravel driveway from the soon to be grass area.

IMG-20200615-173711.jpg

IMG-20200615-173653.jpg

Next up is the internal work for the garage, throughout the first few months of C19, it was used as a gym around worklife. Besides scoring some very cheap 2nd hand Gloss white Ikea cabinets for the wall and wiring up the electric and lighting I haven't done too much. I made sure to make sure the wiring can handle the possiblity of charging an EV in the future.

IMG-20200608-173410.jpg

IMG-20200522-183830.jpg

Still a lot to do on the land but it is getting there. Next up will likely be a foldable and wall mounted work bench at the rear of the garage. The gym equipment is now tucked away to allow me to work on cars/bikes easier.

I want to put in PVC tiles, racedeck style but am concerned about them trapping moisture which could then affect the wood. Any ideas?
 
OP
S

samb

Well-known member
Joined
Apr 15, 2011
Messages
123
Location
UK
Small updates going into winter, I want to get the garage to be a more usable space so will be building worktop surfaces along the left side. Handily, I was able to obtain oak worktops from a house that had some flood damage where the ceiling had collapsed. The oak was written off as a loss, so worked out great.

IMG-20201022-162240.jpg

So far I have made the corner piece, I wanted it high, its sort of 'bar height' so I can easily work whilst standing.

I did also buy some heavy duty hinge joints so that the piece laying on the floor can be folded flat to the wall when not in use to the left of the current surface, although the hinges are rated to 200kg each, it still worries me that all of the weight would be on the hinge and one part of the wall only. I may make some fold out legs for this as and when.

In other news, I have painted the shed and touched up the garage (!)

IMG-20201017-163301.jpg

IMG-20200909-194804.jpg

And generally finished off some of the landscaping.

IMG-20200919-150143.jpg
 
Last edited:
OP
S

samb

Well-known member
Joined
Apr 15, 2011
Messages
123
Location
UK
Thanks, looks like it from that angle but its a F11 530D, remapped to 310bhp & 650ft/lb torque though so its a great daily driver.
 
To avoid these ads, REGISTER NOW!
Top Bottom