To avoid these ads, REGISTER NOW!

Grandad's Vise

8man

Well-known member
Joined
Oct 16, 2013
Messages
630
Location
Bryan, Texas
My Granddad brought this vise home in the 40's according to my Dad. Dad was in high school when he brought this vice home. When Granddad passed Dad found this vice on the ground under a lean too at Granddad's house. Dad brought it home and put in on the ground in his 40 x 100 pole barn. It stayed on the ground there since 1980. I am planning my own shop and Dad said "Granddad's old vise would be great in there." Well we went out and looked for it.


This was it when I picked up from Dad's. As you can see the handle has rusted off of it from sitting in the mud for 40 plus years.

So I soaked it in diesel for 3 weeks.


Then I clamped it to a 2 x12 and took a couple of hammers, some vice grips, a large crescent wrench and a stilson and broke it down.


I got it apart and I cleaned it up and this is what I found


I got it apart and it works! Even after over 40 years of rust. However, I still don't know what it is. Athol Mfg?

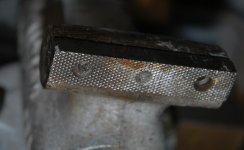
I would LOVE to have this vice in my new shop, I would put it the new house as a center piece, but the wife of 35 years might object to that. However, there is one problem - it needs jaw pads. One of the jaw pads is in pretty good shape, but the other one not so much. The screws that held it on rusted off and the pad is gone.

DOES ANYONE know where/how to get pads for this? I would really appreciate any help on this as I plan to use it in my new hobby - re-building old cars. My Granddad and my Dad would both smile knowing I was using it.

So any help would be appreciated.
 
To avoid these ads, REGISTER NOW!

TMcCay

Well-known member
Joined
Jun 5, 2011
Messages
1,059
Location
SW. Oklahoma
Nice vise with some great memories. Hope you can get some jaws made and put it to good use. This vise belongs in the vise thread and you will probably find your answer there.
 

Stuart in MN

Well-known member
Joined
Sep 8, 2005
Messages
23,179
Location
Minneapolis
Athol was a very good brand, I believe they became part of Starrett in the 1920s or so. I have an Athol vise myself. There's plenty of information here on the board about them, do a search on the name.

Never seen a vise handle rust away before, that's pretty impressive. :)
 
OP
8

8man

Well-known member
Joined
Oct 16, 2013
Messages
630
Location
Bryan, Texas
I've got one knob and about 3" of the handle left. If you know someone who can make a handle or the jaws please let me know.
 

AV tinker er

Well-known member
Joined
Nov 28, 2012
Messages
851
Location
SoCal
As stated above KMScott is a user who makes, I thought primarily Wilton vise parts, but I would think yours couldn't be much different. Nice vise, with the work you've put into it, that thing with be around for your grandkids. Something to be proud of.

Sitting here
 

KMScott

Well-known member
Joined
Feb 14, 2012
Messages
4,643
Location
Daufuskie Island, South Carolina
Hi Bill, I might have your jaw faces in stock. Look at this site and see if any of the Starrett jaws are even close to your dimensions. If any are close and all I would have to do is slot the screw holes then you will be in luck. I have not made jaws for the Athol's yet only because I have not had the opportunity but have found that Starrett who took over Athol kept the jaws kind of standard. I have made handles for my vises but there is someone here tat has been helping members with handles. Let me know if they can help you, if not I can build one for you.
Kevin

http://www.benchvisejaws.com/
 

zkling

Well-known member
Joined
Jan 23, 2007
Messages
16,939
Nice vise with cool history. Hope it brings you fond memories during use. :beer:
 

oldldh

Well-known member
Joined
May 22, 2012
Messages
3,700
Location
Fairhope, AL
Tell me Larry, what drugs should I take for memory loss. Will that Shingle medicine help.


Well, the Shingles medicine ain't helping me...it has "Settled" in my right eye...


By the way, as one gets older, one can't remember things like one used to, however, it doesn't matter, because if you can't remember it, you've already forgotten it...and if you've already forgotten it, who's to say you ever knew it???


Understand???


Now what were we talking about???
 

Outlawmws

Well-known member
Joined
Aug 9, 2011
Messages
39,328
Location
The Badlands
Oh that was that big old Craftsman vise you recently got cheap, and how you had sold it to me and were about to ship it. Does that jog your memory?
 
OP
8

8man

Well-known member
Joined
Oct 16, 2013
Messages
630
Location
Bryan, Texas
Thanks guys, this really helps. I'm ordering the handle today! I still have to get the one jaw pad off, it is soaking in diesel now to see if I can get the screws holding it in out without breaking them and having to do drill and tap thing. If I can get it off, I'll look at the site with the jaws for replacement if not I'll talk to the member who makes them.

Thanks again!
 
OP
8

8man

Well-known member
Joined
Oct 16, 2013
Messages
630
Location
Bryan, Texas


Look what the postman delivered today!! Thanks Kevin.

Now if I can just get the one remaining jaw off, Kevin has also offered to make some new jaws. So it's been soaking in diesel for a week, and next weekend I'll see if I can get it off and send it to have some new friends made!
 
To avoid these ads, REGISTER NOW!

kazlx

Well-known member
Joined
Oct 30, 2012
Messages
2,851
Location
Tustin, CA
They are not tapped. They are reamed to 0.625. I've actually thought about interlacing some smaller tapped holes.
 
OP
8

8man

Well-known member
Joined
Oct 16, 2013
Messages
630
Location
Bryan, Texas
X2 on the table. What thickness sheet is that? Also, what are the dimensions of the plate? The legs, 6"?

Is that the original color of the Athol? I was curious what to paint and what color.
 

kazlx

Well-known member
Joined
Oct 30, 2012
Messages
2,851
Location
Tustin, CA
The table is an odd size since it was cut from another table I used from a CL buy. I think it's like 40x70 if I remember right. It's 5/8" thick, blanchard ground. The legs are 5x5s. All the frame tubing is .250 wall. I have a build thread on here.

Nor sure what the original color is on the vise. I just picked out a machine grey and used that when I rebuilt it. My buddy from work gave me the vise that was sitting in a place they cleaned out for his mother in law.

http://garagejournal.com/forum/showthread.php?t=174371
 
OP
8

8man

Well-known member
Joined
Oct 16, 2013
Messages
630
Location
Bryan, Texas
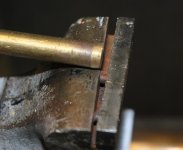
Ok, I'm having trouble getting the two screws out of the jaw pad to get the one remaining jaw pad off. I've soaked it in diesel for 5 weeks now and I've broken one impact screwdriver bit trying to get them out. I'm using a hand held old Craftsman hammer actuated impact tool with a flat screwdriver bit to try and break them loose. I have not tried heat yet.

Any thoughts on getting those two stubborn screws out?

Thanks.
 

Fretters

Well-known member
Joined
Jan 25, 2014
Messages
4,217
Location
South Yorkshire, England
They're countersunk flat head screws? Sometimes you just have to bite the bullet and drill the heads off, (I usually work upwards in bit size to a bit which is slightly larger in diameter than the screw shank, drilling to just the depth of the head), then get the protruding shank out by whatever means when the insert is off, though the shanks usually are less stuck/rusted than the heads. :D
 

lilredex

Well-known member
Joined
Apr 29, 2006
Messages
5,956
Location
Toronto
Put it back together and use a hex screw driver bit. Snug up the vise jaws on it and turn the bit with a wrench.........that is if there is anything left of that screw head.


Edit: You can also try a center punch on those. Go into the outside edge of the screw slot with the center punch at about 45* and tap away.

We used that method to remove similar screws holding the front plate on old 6 cyl. inline GM blocks. Rarely did we have to drill it out.
 
Last edited:

zkling

Well-known member
Joined
Jan 23, 2007
Messages
16,939
What I usually do for stubborn screws is set a nut over top and put a small weld on the ID of nut attaching it to the screw/bolt. Then use a wrench or socket to remove the assembly. Of course the screw is a total loss with this method. You could drill the head and hope that the stud is long enough to grab like Fretters mentioned, but if the stud isn't long enough to grab you are then really up a creek. Lilredex's idea sounds good for vises.
 

Davefr

Well-known member
Joined
Jan 7, 2010
Messages
11,849
Location
OR
They're countersunk flat head screws? Sometimes you just have to bite the bullet and drill the heads off, (I usually work upwards in bit size to a bit which is slightly larger in diameter than the screw shank, drilling to just the depth of the head), then get the protruding shank out by whatever means when the insert is off, though the shanks usually are less stuck/rusted than the heads. :D


^^^+1.
I did exactly what Fretters suggested a while back on a Wilton and it worked out well.

The remaining stub was surprisingly easy to remove.

I chose hex head cap screws as the replacements. No more slotted or phillips!!!
 
Last edited:

Alexbn921

Well-known member
Joined
Aug 22, 2013
Messages
579
Location
East Bay Nor Cal
I had to drill out the heads on my Dunlap. I was unable to remove treads so I carefully drilled out the hole taking great care to not get off center. Start with a small bit and work your way up until there is almost nothing of the screw remaining. If you are careful the treads can be saved. I still taped mine after. As others have stated use hex bolts as replacements. Good Luck
 

Outlawmws

Well-known member
Joined
Aug 9, 2011
Messages
39,328
Location
The Badlands
Ok, I'm having trouble getting the two screws out of the jaw pad to get the one remaining jaw pad off. I've soaked it in diesel for 5 weeks now and I've broken one impact screwdriver bit trying to get them out. I'm using a hand held old Craftsman hammer actuated impact tool with a flat screwdriver bit to try and break them loose. I have not tried heat yet.

Any thoughts on getting those two stubborn screws out?

Thanks.

You answered your own question! :beer:
 

KMScott

Well-known member
Joined
Feb 14, 2012
Messages
4,643
Location
Daufuskie Island, South Carolina
Removing damaged screws.

I know, I know, having access to a Bridgeport and angle plate sure makes it easy to fix issues like this. But it can be done by hand, just clamp everything down real tight and get comfortable. Autopts needed help with this early 40's Wilton 930 vise and after 60 years the # 10 screws were pretty stuck. Only one came out with a hand impact. If doing by hand you would be surprise how close you can eye ball the center of the screw. I am familier with the dimensions of these jaws so for me it was fairly easy to find center.

Knowing what size screw the vise maker uses also is a must. This early Wilton has a 10:32 screw and the tap drill size is a # 21 drill bit. So that would be my max size of drill bit to use. On autopts vise I used a #22 drill bit a couple thousands under the tap drill size.

Having a ridged setup is key, so you can spot the center and drill with a center drill, even using a hand drill I would still use a center drill for the first step. Then drill the screw out. Because I can locate accurately I can drill real close to the tap drill size. By hand maybe using a carbide burr after drilling a smaller hole, I would need a magnifier to see when I grind up to the threads.

Once you get the jaws off there is a good chance to pick out enough of the screw to see three or more threads and then can tap out the rest of the threaded hole, the tap will cut the bolt if you can get the hole close to the tap drill size or see the points of the threads. Some pieces will be at the bottom after running the tap and you can pick and blow out the rest. So, with the right equipment it isn't that hard but if doing by hand just take your time and be focused. I hope I wasn't to long winded.
 

Attachments

  • Fixing stripped screws (3).jpg
    Fixing stripped screws (3).jpg
    89.5 KB · Views: 34
  • Fixing stripped screws (8).jpg
    Fixing stripped screws (8).jpg
    123 KB · Views: 35
  • Fixing stripped screws (9).jpg
    Fixing stripped screws (9).jpg
    110.2 KB · Views: 30
  • Fixing stripped screws (10).jpg
    Fixing stripped screws (10).jpg
    123.8 KB · Views: 33
  • Fixing stripped screws (11).jpg
    Fixing stripped screws (11).jpg
    129.6 KB · Views: 31
  • Fixing stripped screws (12).jpg
    Fixing stripped screws (12).jpg
    94 KB · Views: 32
  • Fixing stripped screws (13).jpg
    Fixing stripped screws (13).jpg
    89.2 KB · Views: 30
OP
8

8man

Well-known member
Joined
Oct 16, 2013
Messages
630
Location
Bryan, Texas
Well, I guess I got lucky because I wasn't looking forward to drilling and tapping to get that jaw pad off. However, after 2 hours of hammering on that impact screw driver with the new heavy duty bit, I got both screws out.

HEAT! That was the answer. I used the cutting torch and heated up the jaw pad and by putting the heat on it, I heated up everything else I guess. I would heat it about 1 minute, then hammer away for about 10 minutes. Then I'd let it cool down, soak it in PB and start over with the hammering without heat.

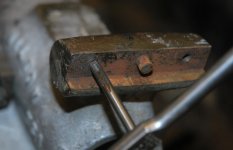
I repeated this process using the heat three times per side. Here is the result


While the screws look pretty good, the slot in the heads is twisted a bit. I put them back in the holes to keep from loosing them until I get new pads.

Now, if I could just find someone to make new jaw pads using the one I have as the template.

Also, the pin in the back of the pad is of a lighter weight material. When I got the screws out of this pad I still had to use a hammer and chisel to get the pad off due to the pin in back. So I looked at the other side and realized I had to get the pin out there. Drill a small hole, then a larger one, 4 bits up and I used a screw puller to start it moving and it came right out.
 
Last edited:
OP
8

8man

Well-known member
Joined
Oct 16, 2013
Messages
630
Location
Bryan, Texas
Next question is whether to use the grinders with wire wheel attachments to work it into shape to paint or put it in the blast cabinet and hit it with the blaster.

Also, paint it or did they come with some other finish? If paint, does anyone have an idea of the original color?

Thanks.
 

Outlawmws

Well-known member
Joined
Aug 9, 2011
Messages
39,328
Location
The Badlands
Personally I prefer the fine wire wheel before the Blast cabinet, as I hate the "Blast Cabinet Patina" - You can always tell. but my first choice for something I want as original as possible that has heavy rust and no or insignificant original paint, is the E-tank.

Talk to Senor Scott from the post above yours on the jaws: He may even have them in stock
 
OP
8

8man

Well-known member
Joined
Oct 16, 2013
Messages
630
Location
Bryan, Texas
Well, after talking to Kevin Scott, Vise Master, I decided that I really needed to tear it down into its components.

The first thing was to get the base plate screw out. The Athol 624 has a slotted screw head on the base plate screw. It also has a screw that holds it tight, IF I HAD ONLY KNOWN THAT FIRST!!

I welded a nut on to the base plate screw, and used the impact gun to get it out. I galled the threads on the last 1/3 of the screw, but I got the base plate off.

Then it was time to drive the pin out that held the vise nut in the stationary jaw. That was pretty easy.

Then I noticed the screw in the side of the vise. It angled down into the working area, and there it was, inside the threads for the base plate screw. I galled the threads getting the base plate screw out because the set screw holding it in wasn't released.

Here are the pictures of the fully disassembled Athol 624.


Everything looks like it will clean up pretty well. I've been working on the base plate screw with a small triangular file, trying to get it to "re-thread into the base". I have it almost there when I thought I should get a tap and die and try to make it work properly. I will look for the tap and die this week, if not available I'll go back to the file.

Other than that, Kevin is making jaws if anybody wants jaws and I am going to use the electrolysis bath next weekend to see how it treats rust. I'm hoping it kills rust, because I HATE RUST! (those who know me from another site know this already!)

After an electrolysis bath, I'll polish it up and start painting it.

NOW, if I only knew what color to paint it!
 

Outlawmws

Well-known member
Joined
Aug 9, 2011
Messages
39,328
Location
The Badlands
The E tank doesn't just "kill" rust: it removes it! it's not a "treatment" for rust to nullify it (the way a rust killing paint is supposed to), its a cure for existing rust.
 
OP
8

8man

Well-known member
Joined
Oct 16, 2013
Messages
630
Location
Bryan, Texas
Well I'll bet some of you thought I'd forgotten about the vise. NOPE!

I used 2 different angle grinders with two different wire wheels, a dremmel tool with a wire wheel and a small cup brush, a file and finally a DA sander to clean that thing up. Here is my bench grinder that I used on some of the parts, the smaller ones that would fit.


A close up of the name plate


Is this what is called a "box" grinder? I'm not sure how old it is, I got if from the same old guy who gave me my other old vise. It is a Wilton Scout, and probably not worth anything, and since it didn't come from my Granddad, it doesn't have the same sentimental value, but here it is. I've started cleaning it up too.


I have been working on Granddad's Vise. I have been working on all the parts, and after I got all the parts cleaned up there was one part that still bothered me. I'm not a machinist, so I couldn't just build a new handle out of some stock piece of metal. So I had to build one using what I have in my shop, which isn't much!

Here is the lockdown nut handle. In the same picture is the old carriage head bolt that came from an old gate that had been run over. Yes, it's bent, but I cut the straightest piece of it I could find to work with.


I did some welding on the flat end of that handle, cut off the worst of the rusted out round piece, welded the section from the bolt in and worked on the welds with a grinder, or two, some sand paper and I think it is going to look like it belongs on the vise.


I have primed all of the parts, and was going to paint them tomorrow, but it's Father's Day, so not tomorrow.

Congratulations to all of you father's. I hope you enjoyed your children as much as I did. I lost my son when he was 11 to an 8 year fight with cancer. It was the best time of my life, and the worst.

I talked to my Dad today and told him I almost have Granddad's vise ready. I'm going to give it to my Dad with the understanding that I get it back someday, just not too soon I hope.

Enjoy your Father's Day!
 
OP
8

8man

Well-known member
Joined
Oct 16, 2013
Messages
630
Location
Bryan, Texas
Well, the wait is over, Grandad's Vise is back in action!


The pictures may not be the best, but you get the idea. You can see what the rust did to it. Also, you can see that it was "well used" in it's day.

As promised I offered it to Dad, who immediately asked me if it was mounted to my work bench yet, then he laughed and said "I don't think you have a work bench that will hold it!" He's right, I need to build a metal work bench to do it justice.

Thanks to all who looked and a special thanks to Kevin Scott who provided some very important parts and vise wisdom.
 
To avoid these ads, REGISTER NOW!
Top Bottom