Griznant
Member
Intro:
After lurking for quite awhile, and only posting an intro, I've decided to finally start a thread detailing my barn/garage progress, and my various little related projects.
I'm a gearhead through and through, and as a result I've accumulated numerous car projects. The primary problem I have is that I always see things that have "potential" and this results in me adding even more projects to my never-ending list. It also means I need more tools, and more space to store things, which brings me to the crux of this post: the development of my car "compound" since it goes far beyond one garage, and will encompass a good portion of my 2-acre rural homestead.
I live with my wife of 15 years and our two sons, ages 4 and 1. It's due to those boys that my actual "project time" is limited by the amount of daddy-time I want to spend.")
So, here's the property courtesy of Google maps, circa summer of 2012:

As you can see, I've already built a few things in this pic, but I'll go into more detail later. The house, the deck, and the pool were already in place when we bought the place in 2009. I moved the playhouse onto the property in January of 2010 and built the barn in November of 2011.
We moved from our first house of 10 years where I had renovated the house (1950 build), built a 30x40 garage and a 30x40x10 pole barn. I had everything fairly organized with room to spare, but with our family outgrowing the house itself and a horrible school system, we moved here in the fall of 2009. The house was built in 2006, and we bought it on a short sale, so we got a pretty decent deal even though dealing with the bank on this type of thing is fun in itself.
The upside is a house that is far larger than what we had, has room for the boys and guests, is new construction, and Edwardsburg's blue-ribbon school system. Plus, it was 40 miles closer to my work, and 20 miles closer for my wife. Bonus!
When we moved I stored a few cars on site, and kept everything else at two rented storage units in town, and at a friend's barn. It sucked having everything so spread out and not being able to truly unpack and organize. After two years we had finally developed a good plan moving forward on what we wanted, and kicked off a local Amish crew to build the pole barn. I built all the things at my last house, but with work and the two boys (one being a newborn) I didn't have time to tackle this one in a timely fashion.
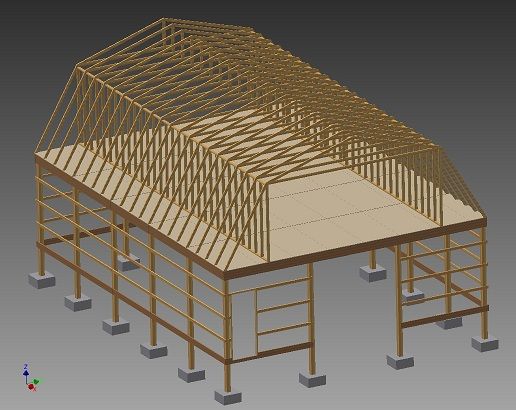
So, for $14k I hired the Amish to build me a 30x40x12 with a concrete floor and a simple 10x10 sliding door in one corner.
Pole Barn Build
I go to work at 6:30am, so the knock on my door at 6:00am was a bit startling. The delivery driver of the lumber truck was there and dropping off all the framing materials. So, I tell him where to drop the stuff and finish getting ready for work. I head out into the yard a little while later to find the lumber guy's 1-ton pick-up/trailer buried up to the axles in my yard thanks to the two days of rain we had had prior. Ugh.
After hooking up my Pathfinder to the front of the pick-up, I managed to move him another 40-feet before there was just no way I was getting him any further. The Pathfinder (or NPF as we call it) is a V8 beast that is a true workhorse and crawled through the mud without any problems of its own.
At that moment, the Amish crew showed up. Now, Amish craftsmen are pretty common in my neck of the woods, but it's always interesting to see how they manage to work in a modern world, while still holding true to their church's rules/limits.
The Amish crew arrived in a Duramax Chevy crew-cab dually towing a gooseneck trailer with a tracked Bobcat. Two Amish men and two Mexican helpers, who drove the truck. Atlee, the owner/builder of the construction company, came over, talked to me briefly about the situation with the stuck lumber truck, and said "We'll get this taken care of shortly." They then went to work.
I'll be honest, I've never seen ANYONE work the way these guys do. Without any obvious communication, and aided by small LED head-lights over top of their wide-brimmed hats (it was still before 7am on a drizzling November morning), the two Amish guys immediately set to work with the Mexican helpers following their lead to the letter. One set up the transit, poles, and stringlines to lay out the building while two others got to work unloading tools and assisting the layout work. Atlee fired up the Bobcat and got it off the trailer. With an uncanny display of skill (given that a Bobcat is a "modern" piece of equipment), he swapped the bucket for forks, and unloaded all the lumber from the stuck truck's trailer, carefully setting it on the worksite. He then went around to the back of the lumber trailer and gently pushed on it while the driver of the truck got back on the gas. POP, the truck was free and he basically scooted it all the way back up and out of the yard. He then set to sorting the lumber out with the bobcat and organizing it on the rain-soaked lawn.
I then went to work.
When I came back 10 hours later, this is what I had waiting:
Four guys, in the rain, in less than 10 hours had this done. Ok.
So, the next day, they were at it again, climbing all over the frame in the dark with only their LED headlamps leading the way. They had to finish another job in the afternoon so they only put in 4 hours (keep in mind, they had to drive 1-hour to be on site at my place to begin with).
This was after 4-hours of work:

Roof is done and all prep-work for concrete is done.
So, the weekend is now here and my eldest and I check out the work:

Alex thinks it looks great, so we are ready for Monday and work to re-commence.
Another day goes by and this is what I had:

This time I actually caught them finishing up with the concrete. I paid them the remainder of the contract, and they were done that night. Total: 2.5 days for four guys and a bobcat. I call that being Johnny-On-The-Spot if I've ever seen it.
There was one major casualty in all this: My yard.

This is what two concrete trucks did to my already ravaged yard. Ok, I can deal with this, but those ruts are 24" deep in places. Thankfully I've got a great neighbor, Ross, who came over with his 4-wheel-drive tractor and box blade and leveled it all out for me. He's one of those guys who has tons of "toys" and loves to do stuff like this just because he can. I was all for it.
So, here's a few more shots of the finished product:
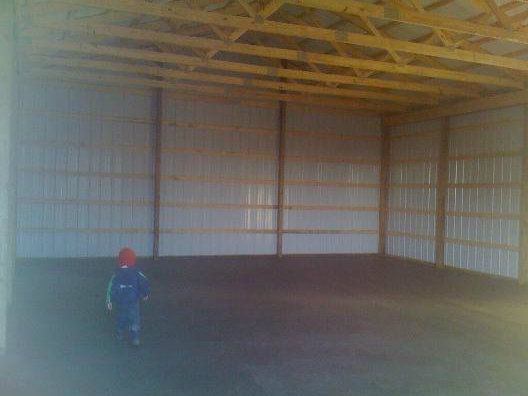

The moisture on the floor is due to the temperature swings, and not still-wet concrete.

The barn has been up for over a year now, and it is perfect. No weird defects, no mistakes, nothing has leaked, come loose, etc. The price was right, the work was spot-on, and fast. If you live in Northern Indiana/SW Michigan, I suggest you look up AERS construction, they are the real deal!
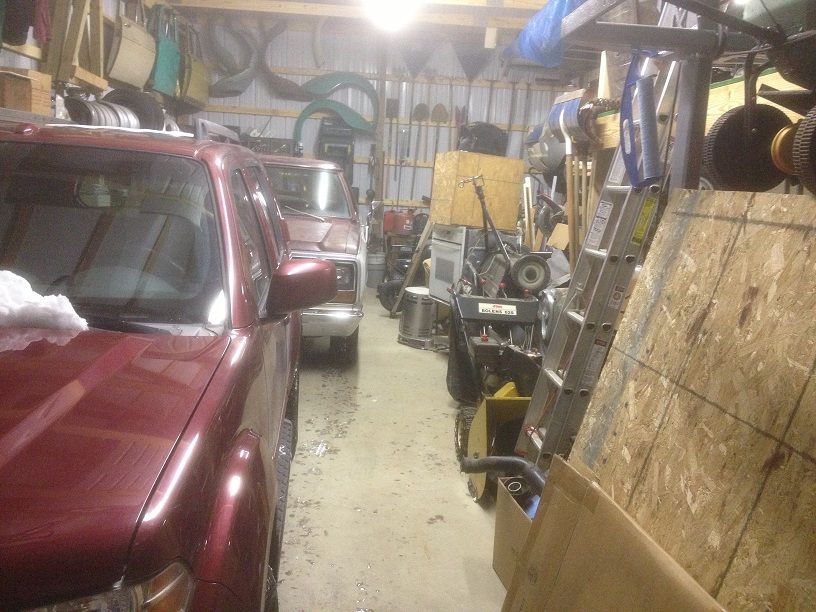
Now comes the fun part: organizing.
After lurking for quite awhile, and only posting an intro, I've decided to finally start a thread detailing my barn/garage progress, and my various little related projects.
I'm a gearhead through and through, and as a result I've accumulated numerous car projects. The primary problem I have is that I always see things that have "potential" and this results in me adding even more projects to my never-ending list. It also means I need more tools, and more space to store things, which brings me to the crux of this post: the development of my car "compound" since it goes far beyond one garage, and will encompass a good portion of my 2-acre rural homestead.
I live with my wife of 15 years and our two sons, ages 4 and 1. It's due to those boys that my actual "project time" is limited by the amount of daddy-time I want to spend.
So, here's the property courtesy of Google maps, circa summer of 2012:
As you can see, I've already built a few things in this pic, but I'll go into more detail later. The house, the deck, and the pool were already in place when we bought the place in 2009. I moved the playhouse onto the property in January of 2010 and built the barn in November of 2011.
We moved from our first house of 10 years where I had renovated the house (1950 build), built a 30x40 garage and a 30x40x10 pole barn. I had everything fairly organized with room to spare, but with our family outgrowing the house itself and a horrible school system, we moved here in the fall of 2009. The house was built in 2006, and we bought it on a short sale, so we got a pretty decent deal even though dealing with the bank on this type of thing is fun in itself.
The upside is a house that is far larger than what we had, has room for the boys and guests, is new construction, and Edwardsburg's blue-ribbon school system. Plus, it was 40 miles closer to my work, and 20 miles closer for my wife. Bonus!
When we moved I stored a few cars on site, and kept everything else at two rented storage units in town, and at a friend's barn. It sucked having everything so spread out and not being able to truly unpack and organize. After two years we had finally developed a good plan moving forward on what we wanted, and kicked off a local Amish crew to build the pole barn. I built all the things at my last house, but with work and the two boys (one being a newborn) I didn't have time to tackle this one in a timely fashion.
So, for $14k I hired the Amish to build me a 30x40x12 with a concrete floor and a simple 10x10 sliding door in one corner.
Pole Barn Build
I go to work at 6:30am, so the knock on my door at 6:00am was a bit startling. The delivery driver of the lumber truck was there and dropping off all the framing materials. So, I tell him where to drop the stuff and finish getting ready for work. I head out into the yard a little while later to find the lumber guy's 1-ton pick-up/trailer buried up to the axles in my yard thanks to the two days of rain we had had prior. Ugh.
After hooking up my Pathfinder to the front of the pick-up, I managed to move him another 40-feet before there was just no way I was getting him any further. The Pathfinder (or NPF as we call it) is a V8 beast that is a true workhorse and crawled through the mud without any problems of its own.
At that moment, the Amish crew showed up. Now, Amish craftsmen are pretty common in my neck of the woods, but it's always interesting to see how they manage to work in a modern world, while still holding true to their church's rules/limits.
The Amish crew arrived in a Duramax Chevy crew-cab dually towing a gooseneck trailer with a tracked Bobcat. Two Amish men and two Mexican helpers, who drove the truck. Atlee, the owner/builder of the construction company, came over, talked to me briefly about the situation with the stuck lumber truck, and said "We'll get this taken care of shortly." They then went to work.
I'll be honest, I've never seen ANYONE work the way these guys do. Without any obvious communication, and aided by small LED head-lights over top of their wide-brimmed hats (it was still before 7am on a drizzling November morning), the two Amish guys immediately set to work with the Mexican helpers following their lead to the letter. One set up the transit, poles, and stringlines to lay out the building while two others got to work unloading tools and assisting the layout work. Atlee fired up the Bobcat and got it off the trailer. With an uncanny display of skill (given that a Bobcat is a "modern" piece of equipment), he swapped the bucket for forks, and unloaded all the lumber from the stuck truck's trailer, carefully setting it on the worksite. He then went around to the back of the lumber trailer and gently pushed on it while the driver of the truck got back on the gas. POP, the truck was free and he basically scooted it all the way back up and out of the yard. He then set to sorting the lumber out with the bobcat and organizing it on the rain-soaked lawn.
I then went to work.
When I came back 10 hours later, this is what I had waiting:
Four guys, in the rain, in less than 10 hours had this done. Ok.
So, the next day, they were at it again, climbing all over the frame in the dark with only their LED headlamps leading the way. They had to finish another job in the afternoon so they only put in 4 hours (keep in mind, they had to drive 1-hour to be on site at my place to begin with).
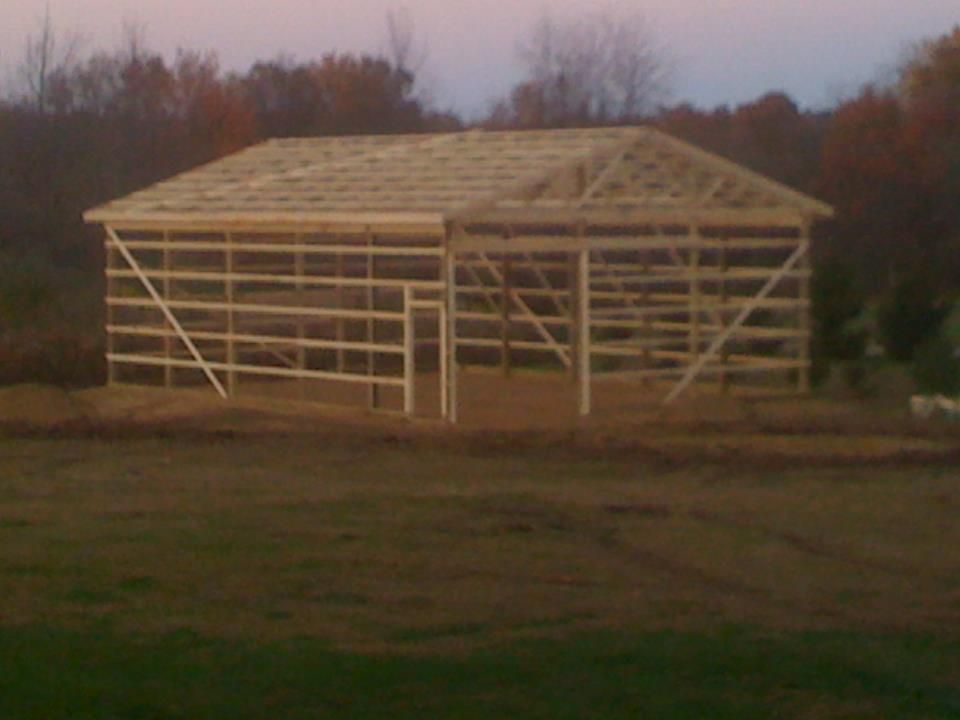
This was after 4-hours of work:
Roof is done and all prep-work for concrete is done.
So, the weekend is now here and my eldest and I check out the work:
Alex thinks it looks great, so we are ready for Monday and work to re-commence.
Another day goes by and this is what I had:
This time I actually caught them finishing up with the concrete. I paid them the remainder of the contract, and they were done that night. Total: 2.5 days for four guys and a bobcat. I call that being Johnny-On-The-Spot if I've ever seen it.
There was one major casualty in all this: My yard.
This is what two concrete trucks did to my already ravaged yard. Ok, I can deal with this, but those ruts are 24" deep in places. Thankfully I've got a great neighbor, Ross, who came over with his 4-wheel-drive tractor and box blade and leveled it all out for me. He's one of those guys who has tons of "toys" and loves to do stuff like this just because he can. I was all for it.
So, here's a few more shots of the finished product:
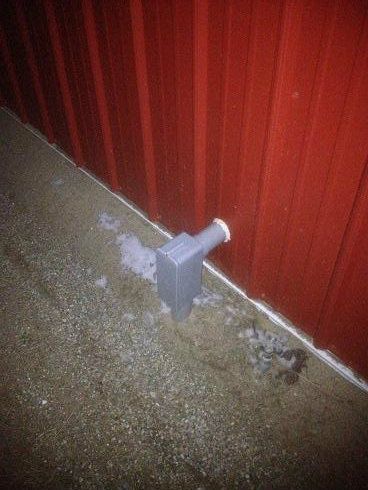
The moisture on the floor is due to the temperature swings, and not still-wet concrete.
The barn has been up for over a year now, and it is perfect. No weird defects, no mistakes, nothing has leaked, come loose, etc. The price was right, the work was spot-on, and fast. If you live in Northern Indiana/SW Michigan, I suggest you look up AERS construction, they are the real deal!
Now comes the fun part: organizing.