To avoid these ads, REGISTER NOW!

Hack's Shack

hackster

Active member
Joined
Aug 9, 2011
Messages
30
Like most others on here I stumbed onto this website one night looking for some shelving ideas for my cluttered and poorly organized two car garage.........

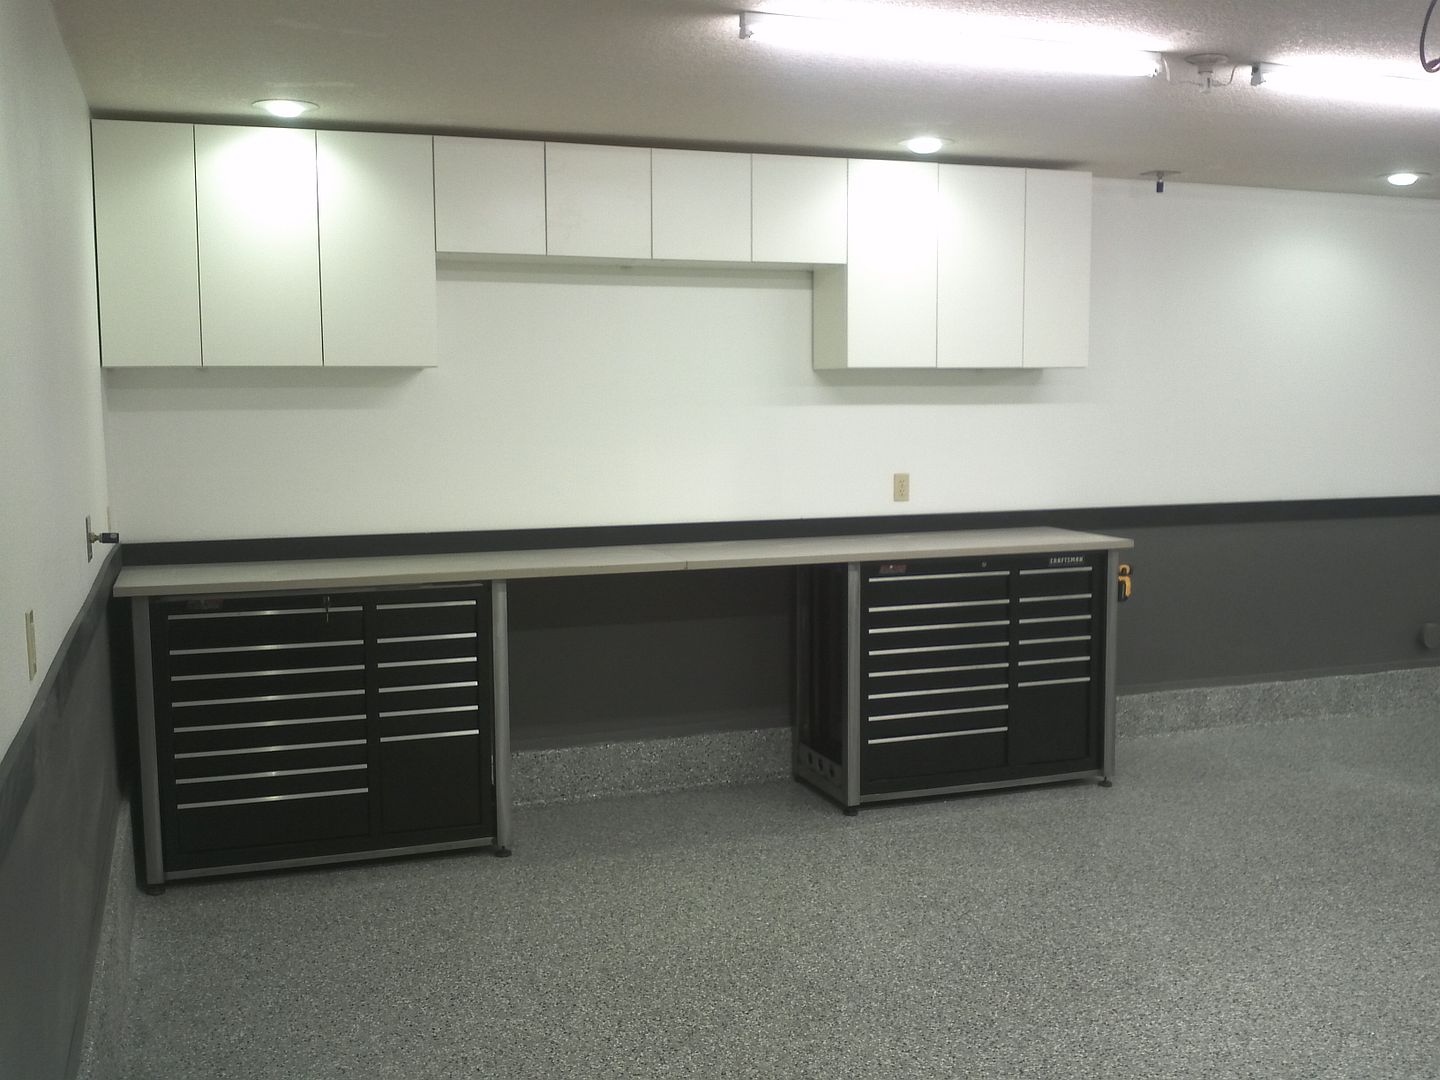
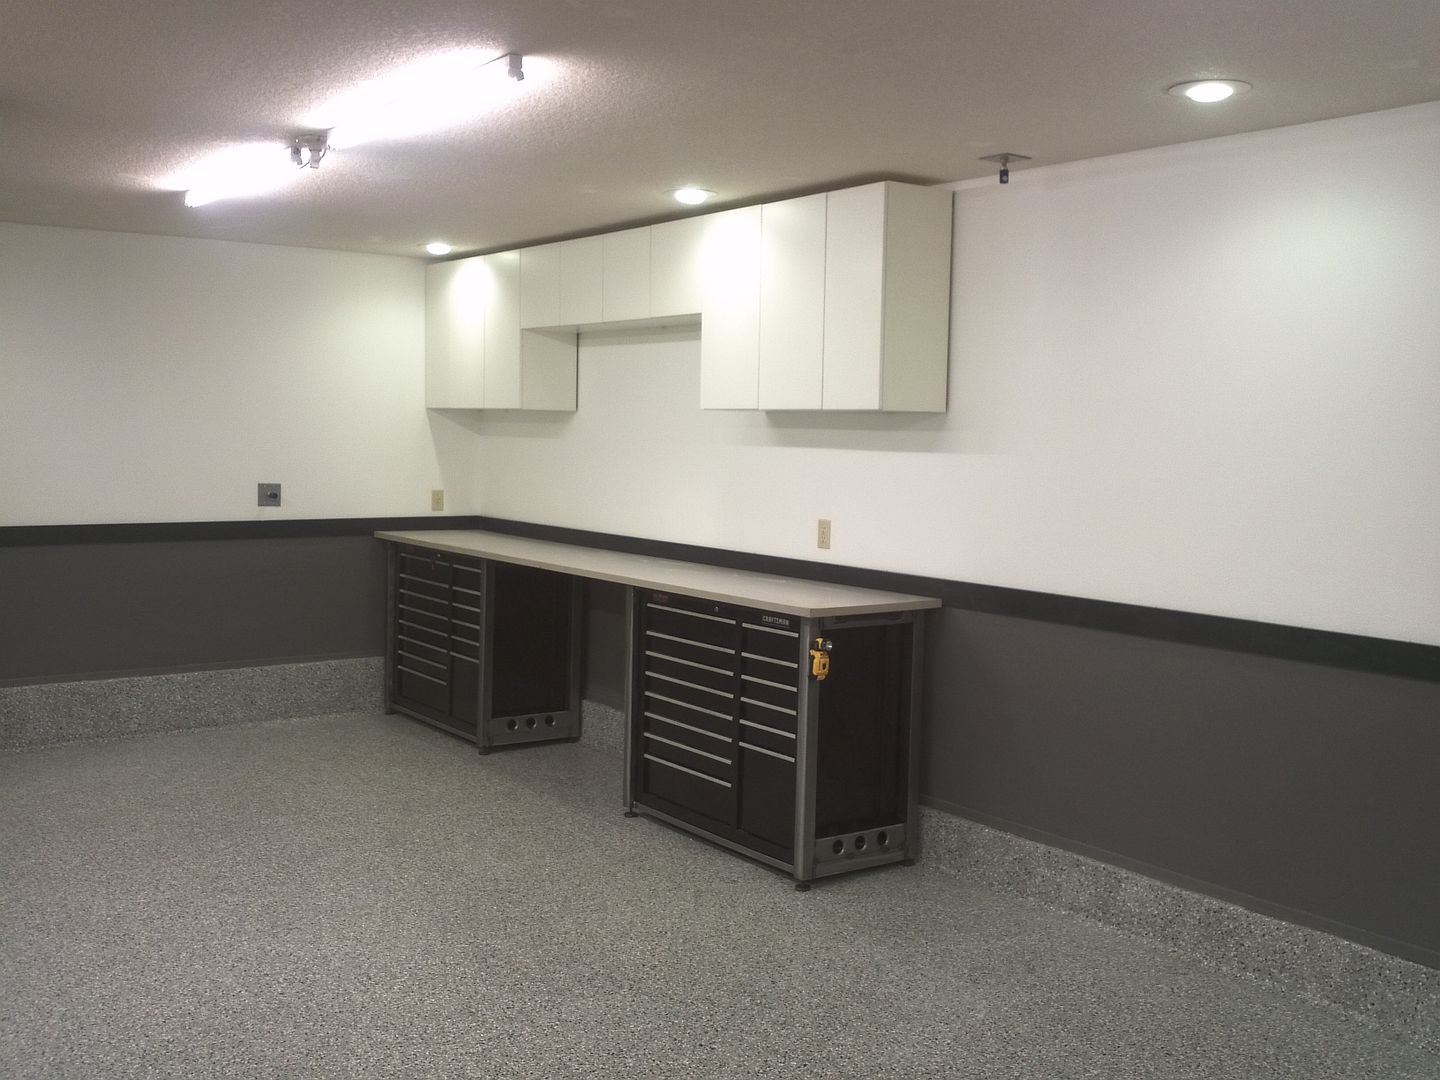
After countless hours of reading on the forum I spent even more time organizing my little two car garage, some paint on the walls, turned into some trim and some additional cabinets, then more lighting.

We have been looking for a new home in our neighborhood for years......it has to have a shop and two bathrooms.

I was riding home from work one day and a new for sale sign appeared just a few blocks away. (I bike to work everyday) I cruised up the street and ill be damned it was one of the homes that have on my hit list. Big smile on my face I couldnt wait to tell the boss and see what she said.

Did the tour, made an offer and got the house. We signed on it two days before our wedding and it closed while we were in Maui on on honeymoon.

WOOOOOOOOOTTTT!!!

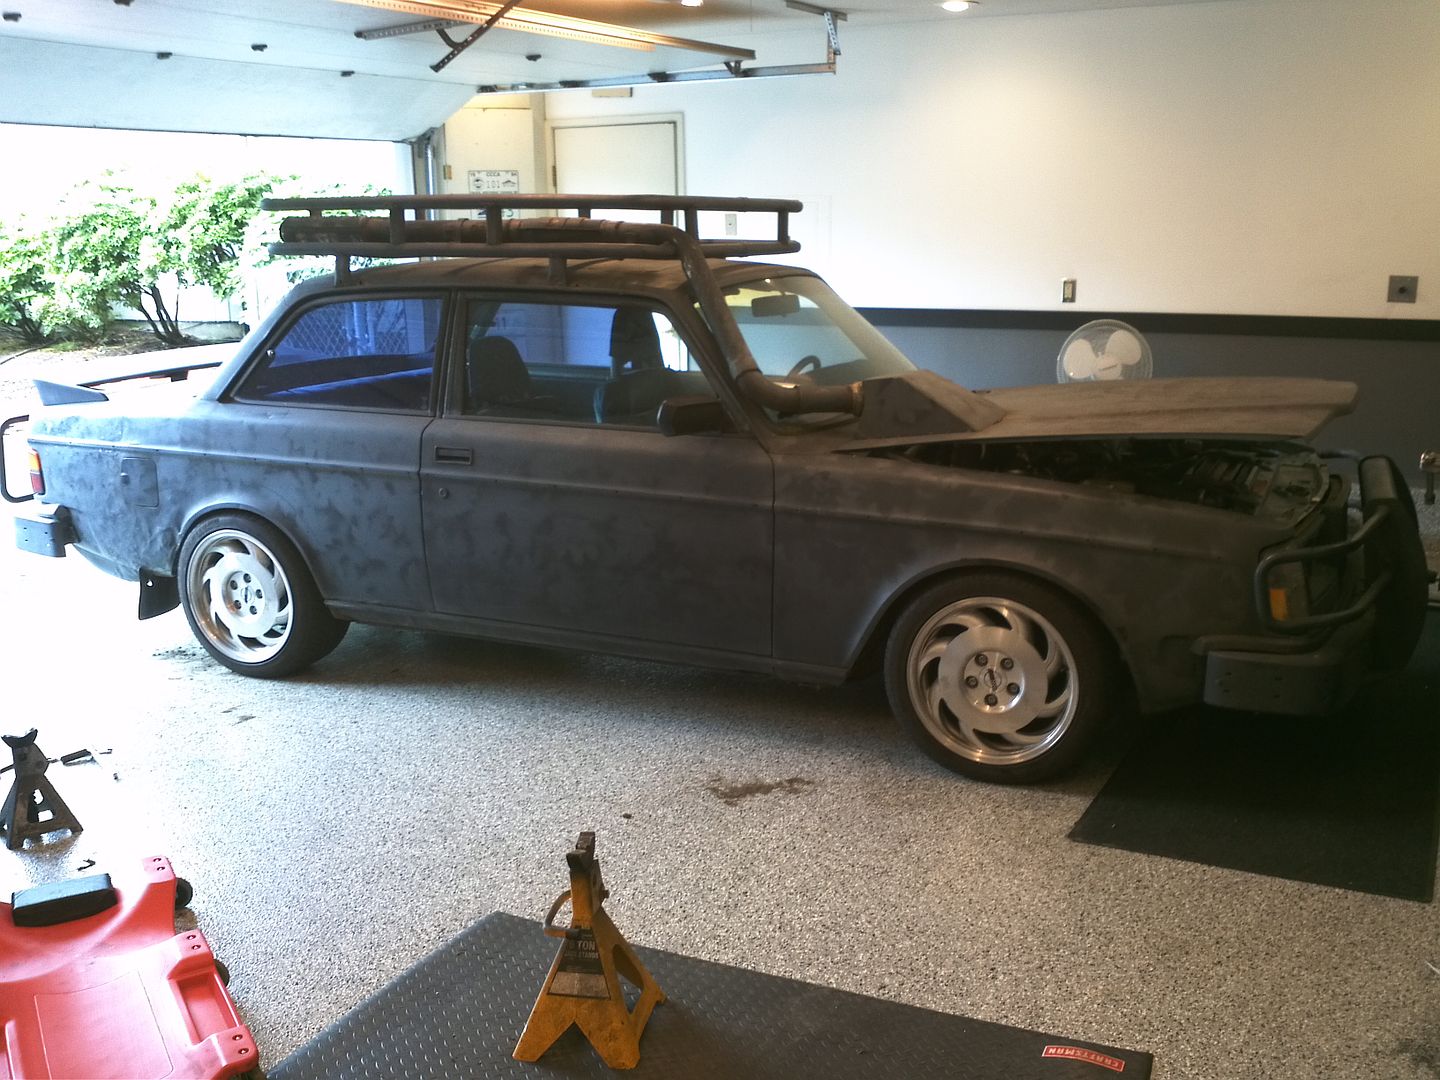
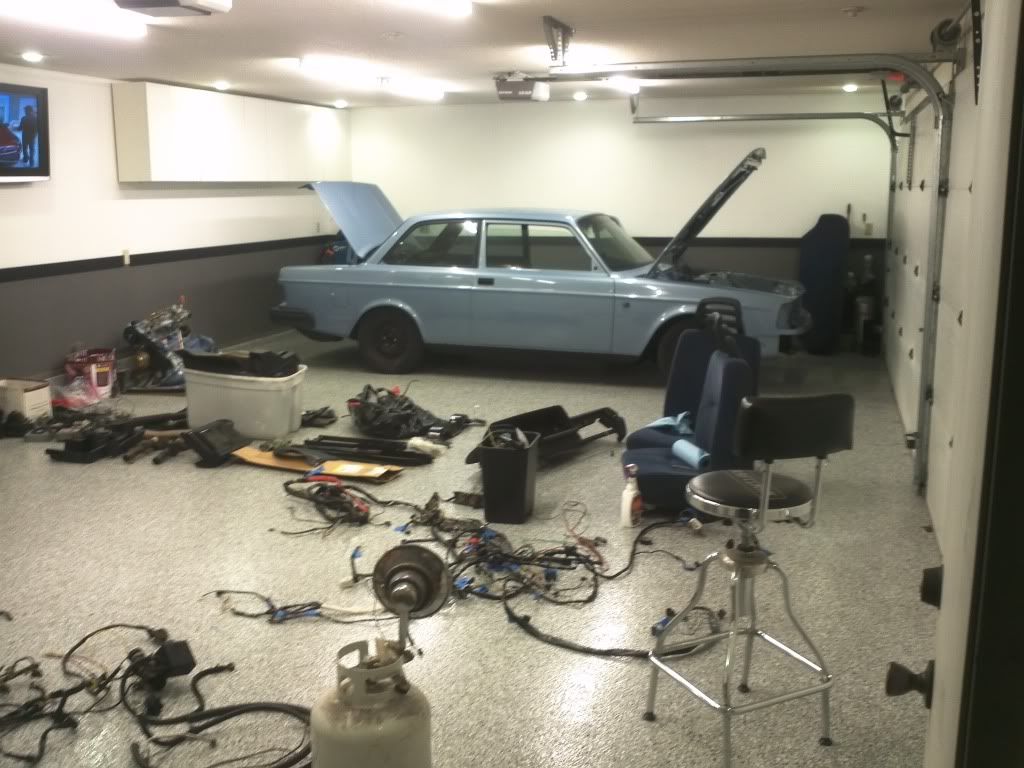
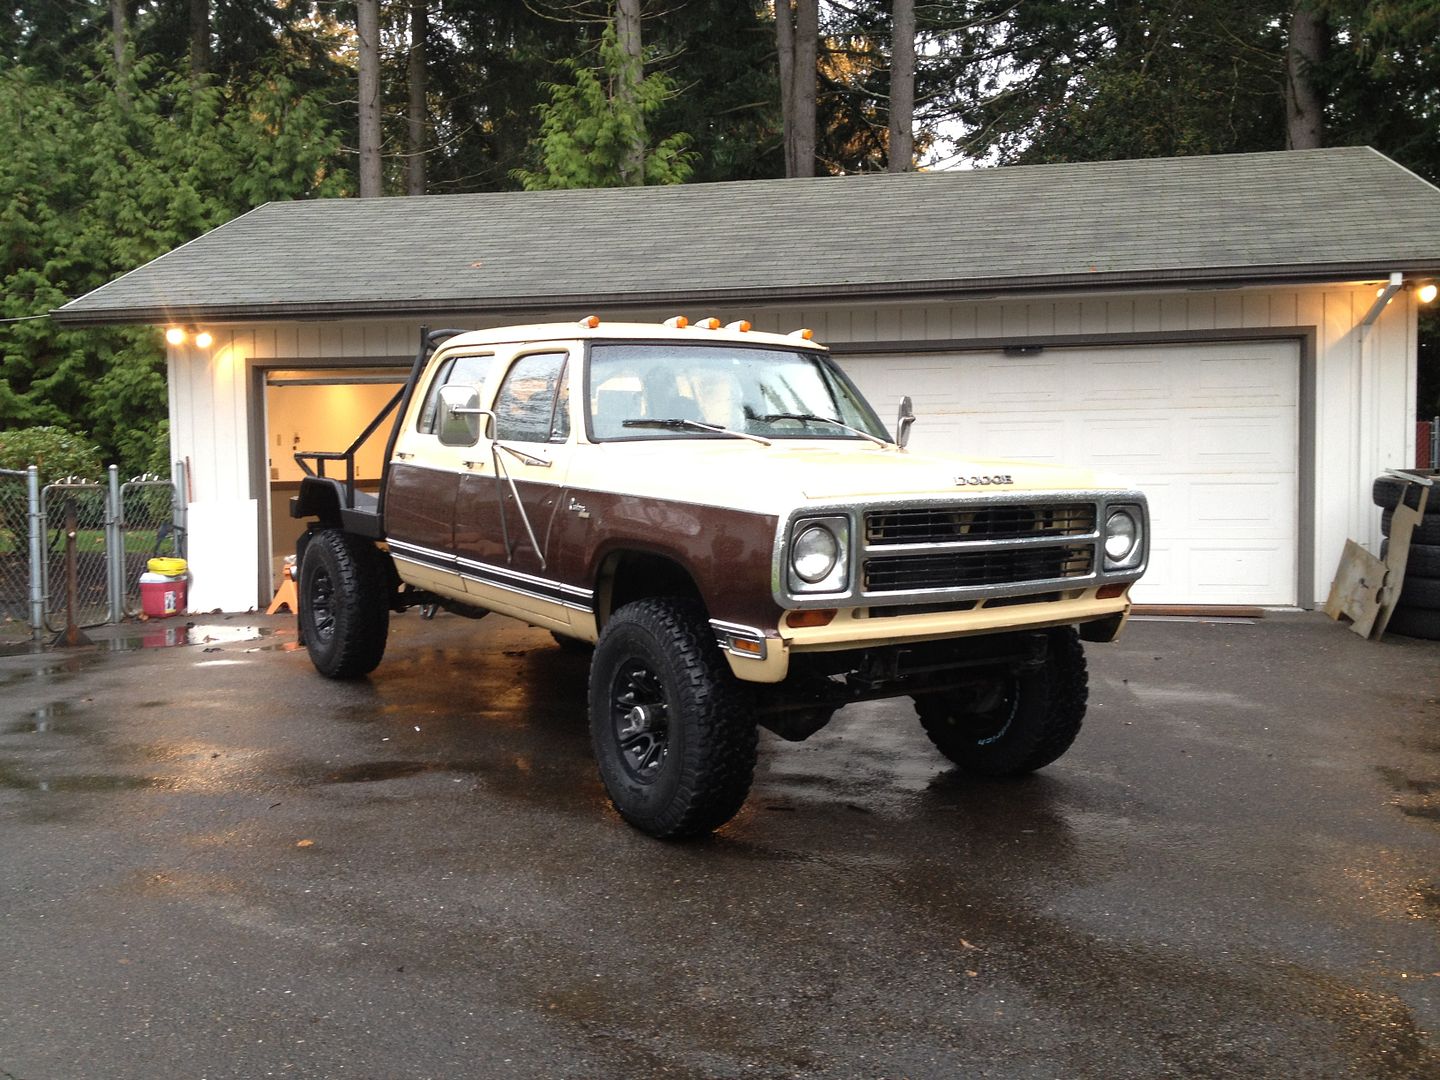
Fast forward to Monday the 13th and were back from vacation. Instantly I am over at the new place to gut the garage and start on it. It got the same trim as the shop in case your wondering.


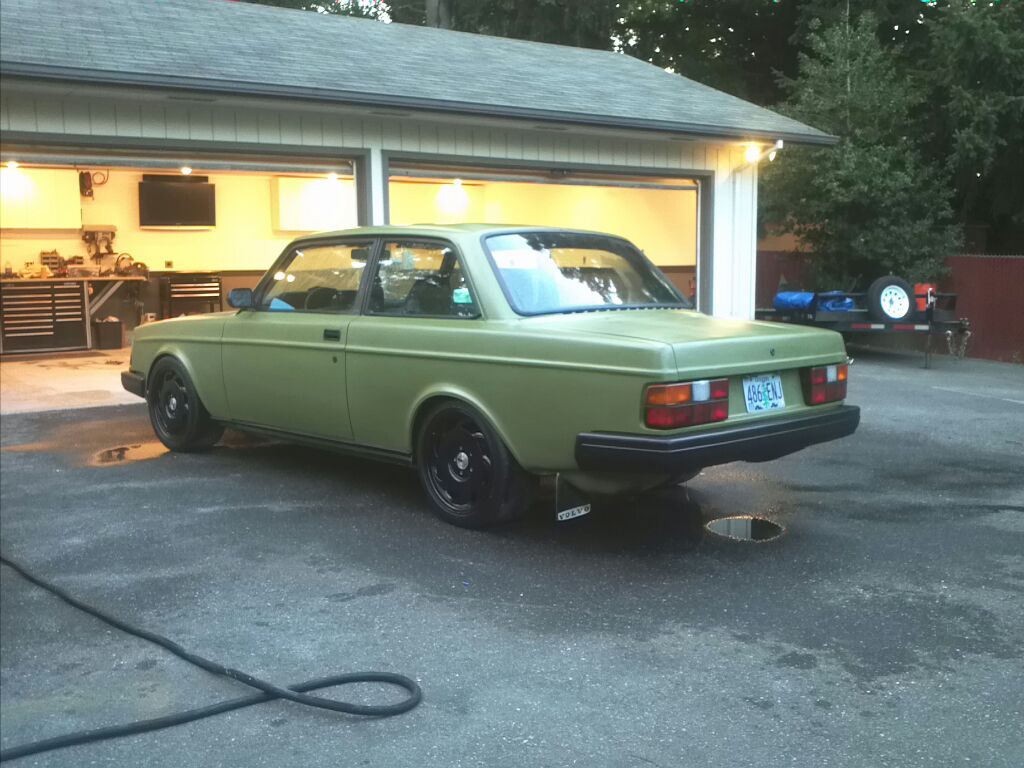
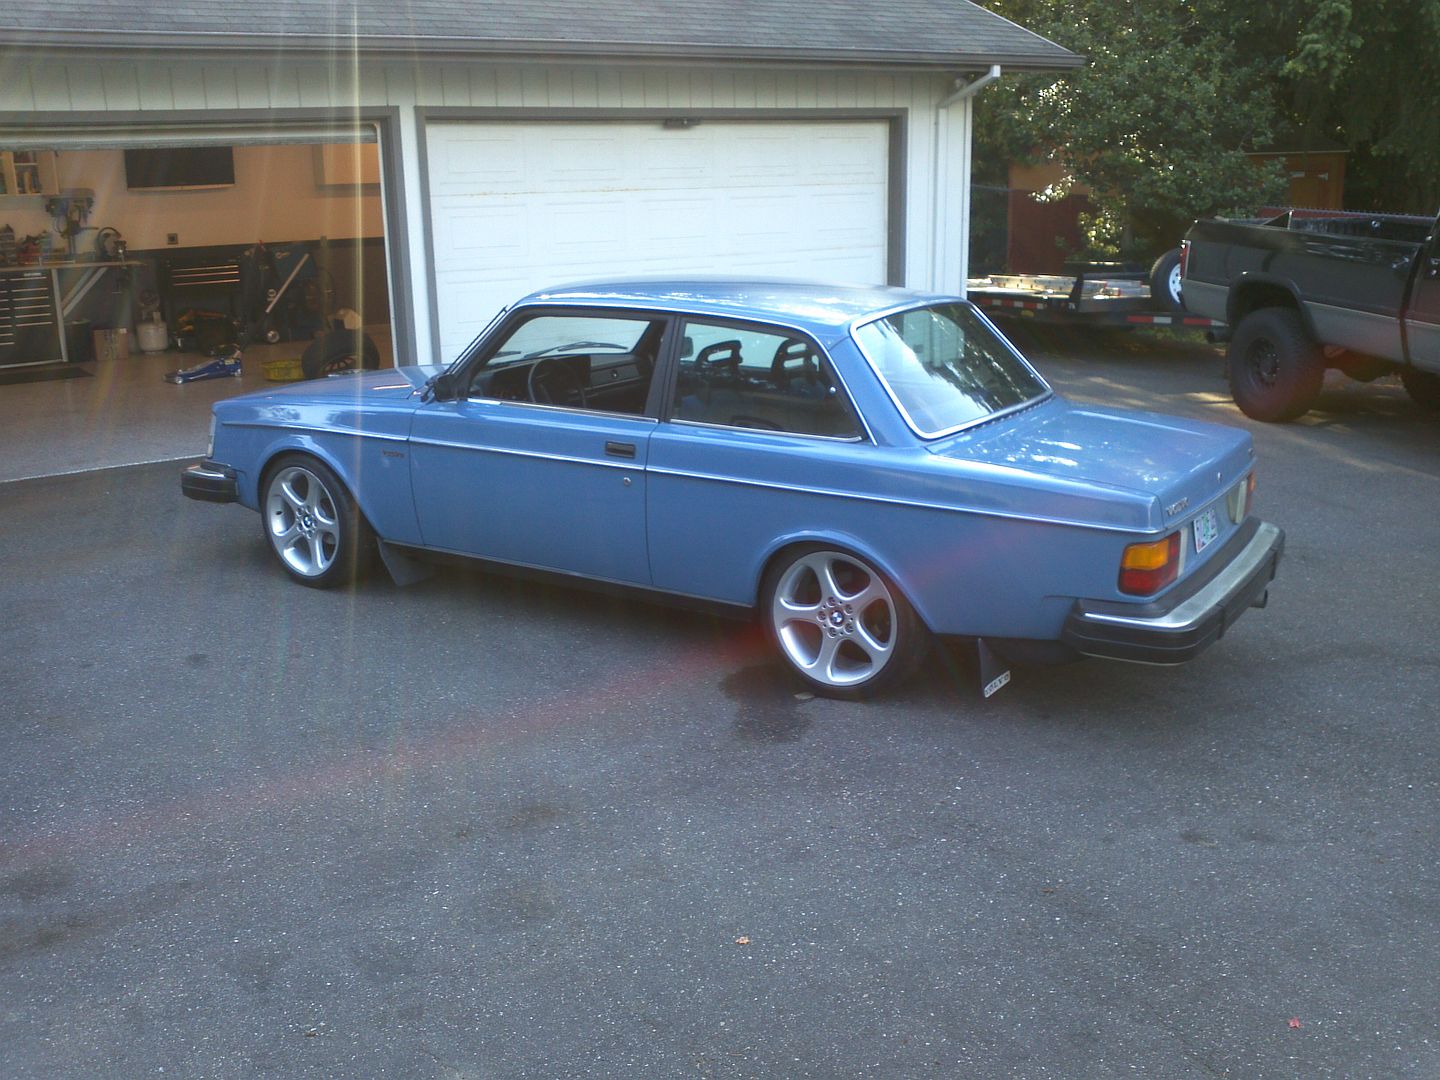
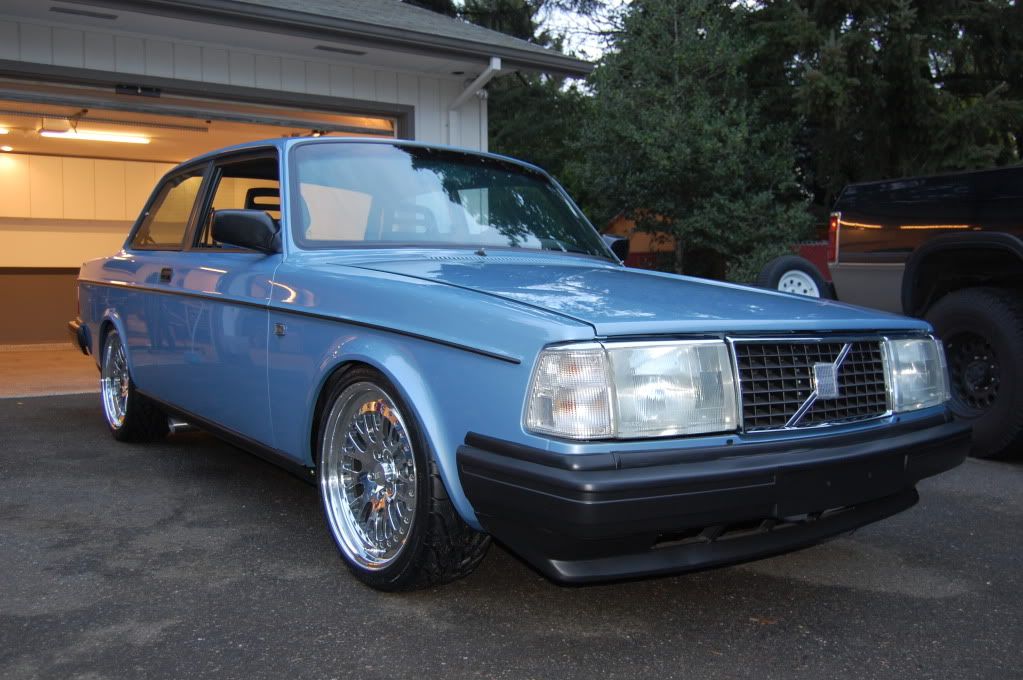
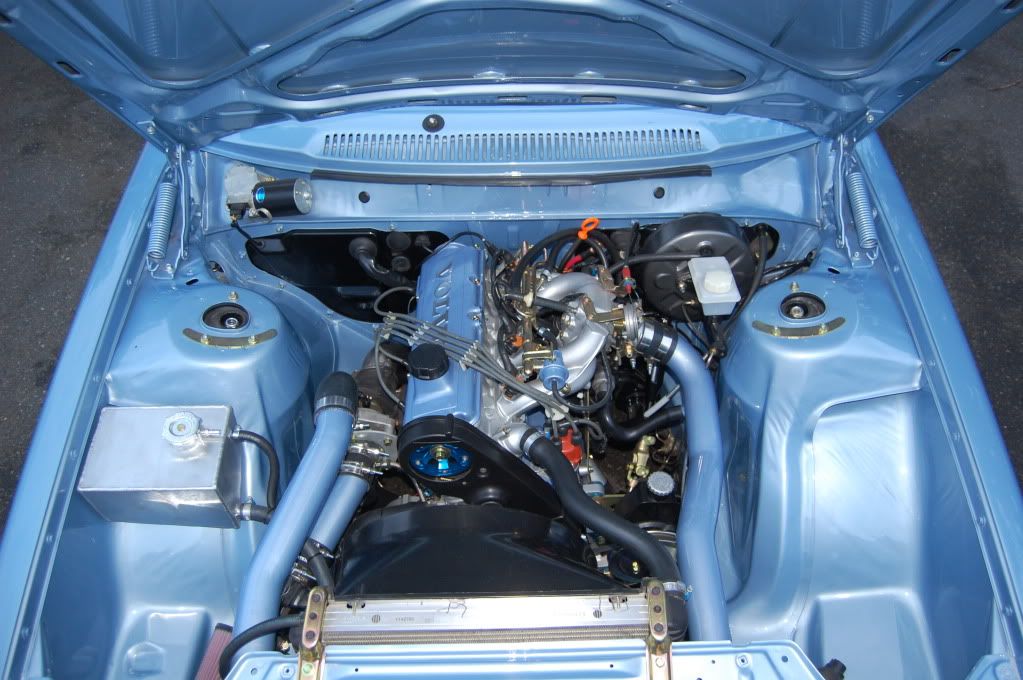
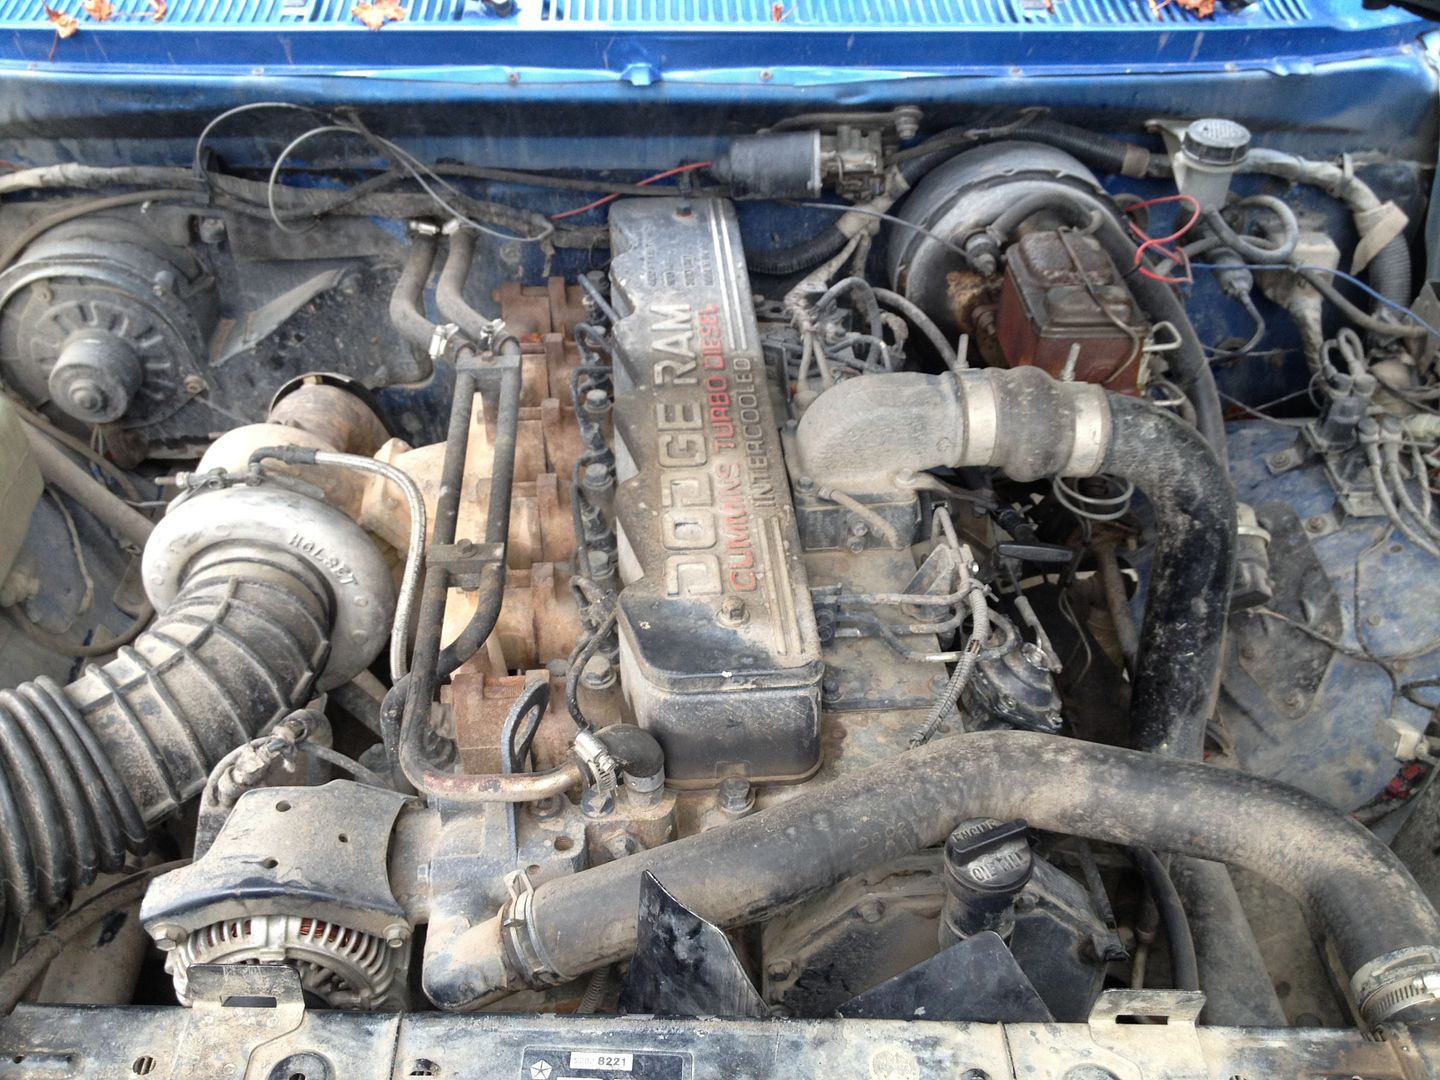
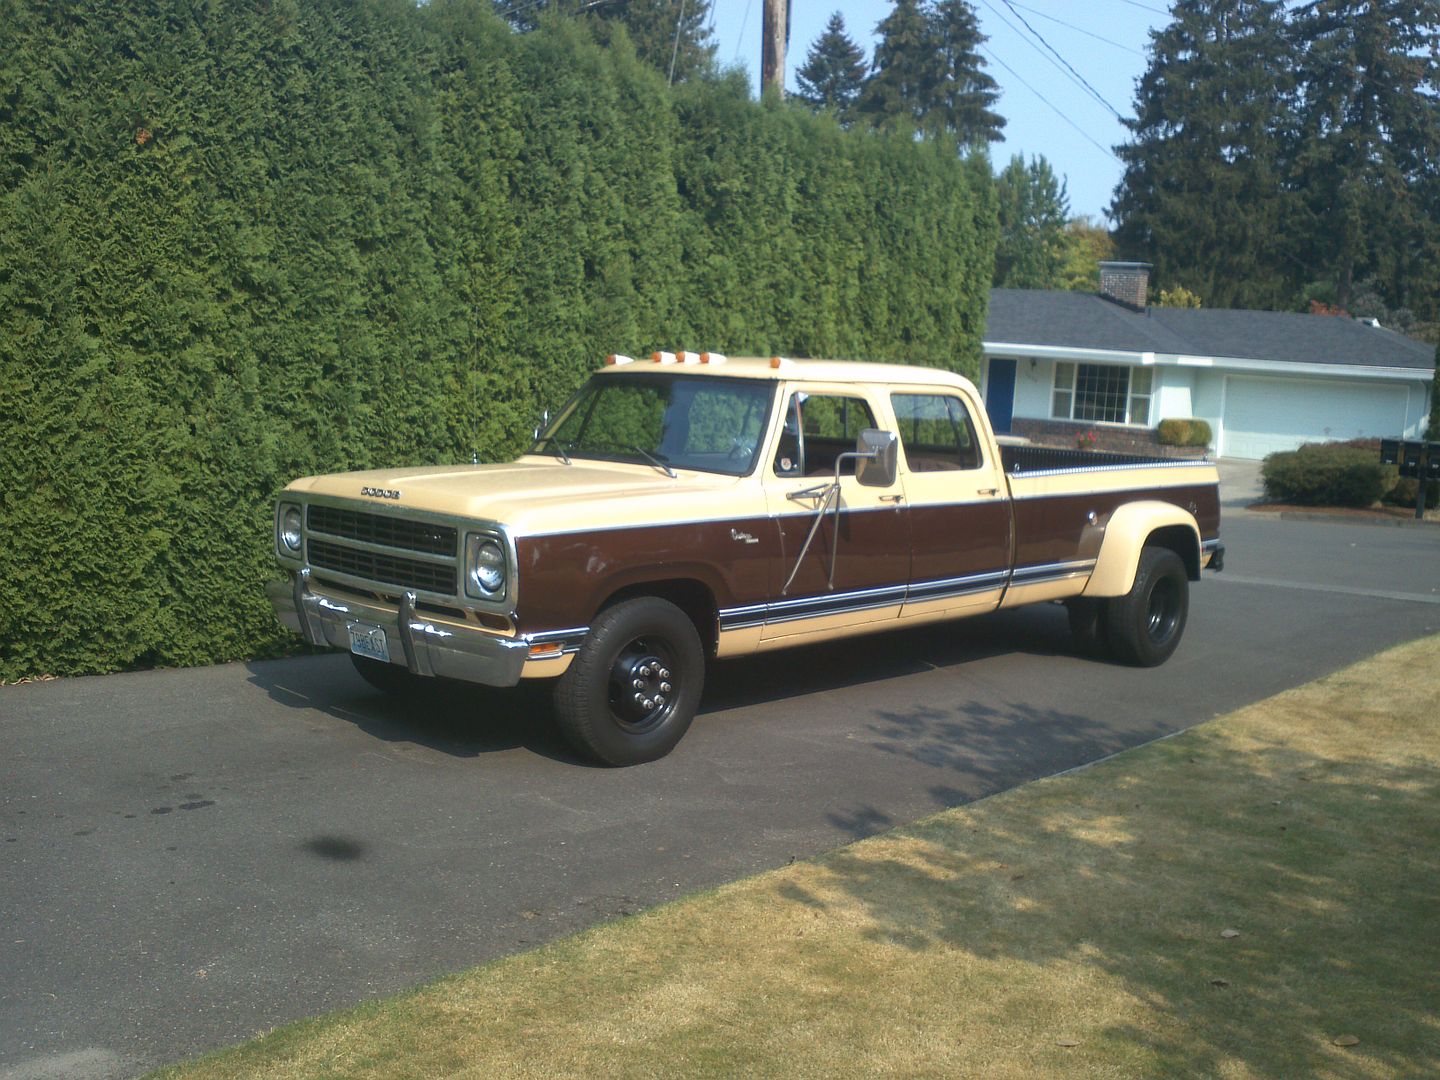
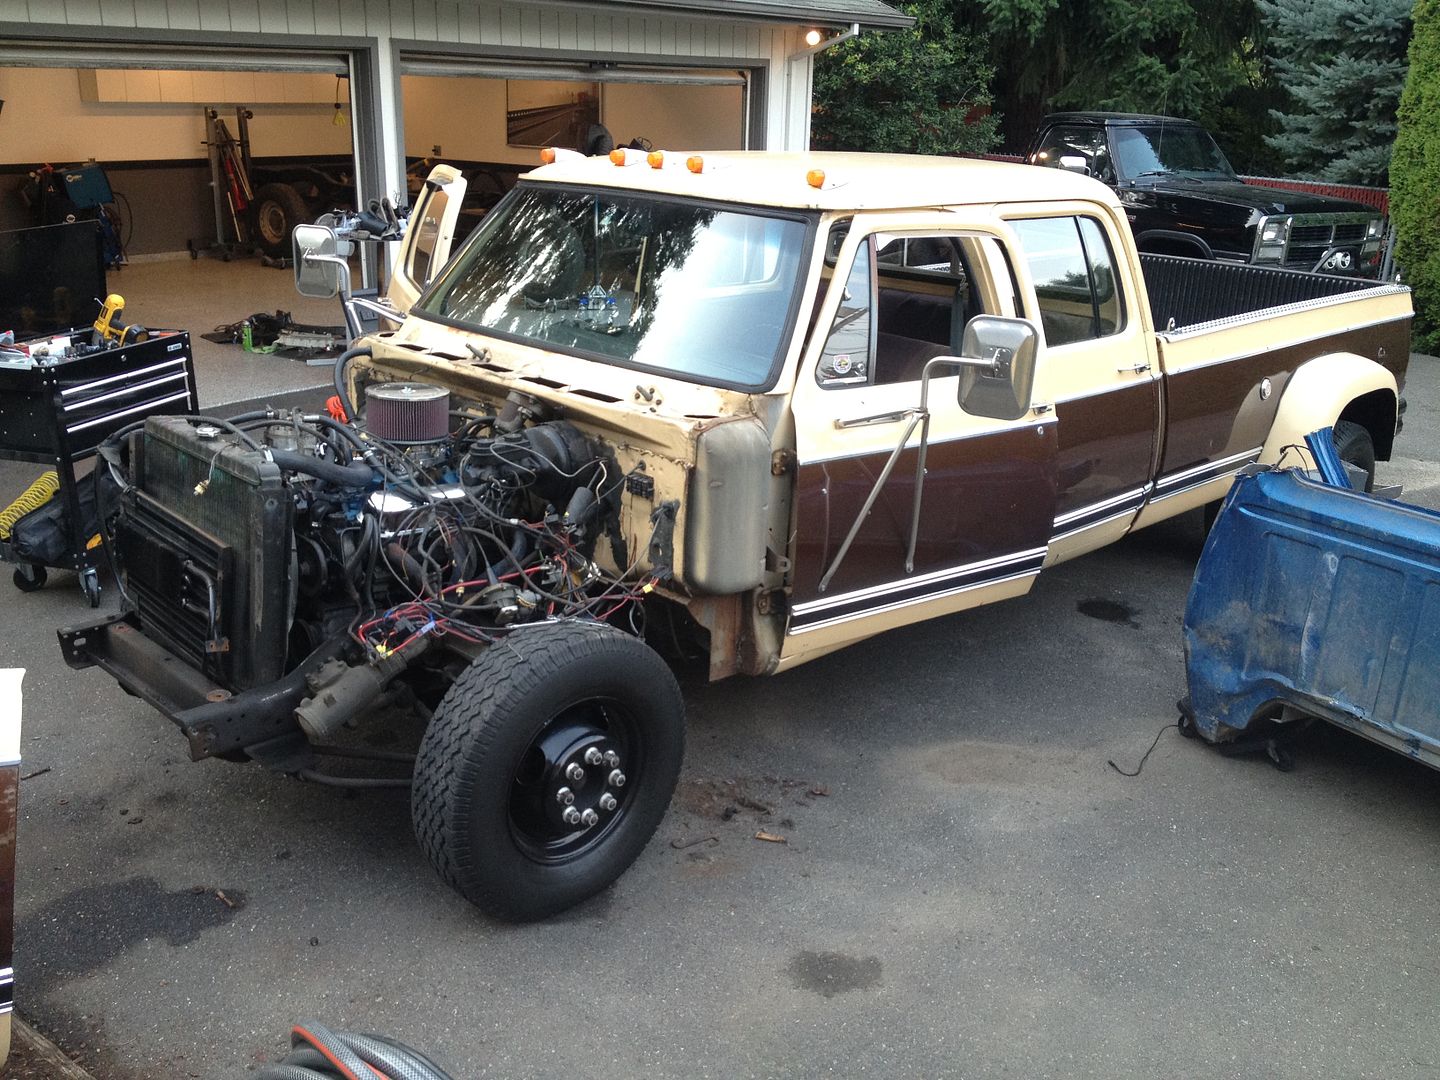
So the previous owner was a car collector and not too much of a mechanic. The shop has 9 screw in light bulbs none of which worked when we bought the house.

Shop is 20 deep x 34 wide with two 14 foot doors and 8' ceilings. It is sheetrocked aready, but in need of some repairs so that is where I started.

C3942ED6-orig.jpg


E00C0188-orig.jpg


2A2BC059-orig.jpg


8ED25A28-orig-1.jpg
 
To avoid these ads, REGISTER NOW!
OP
H

hackster

Active member
Joined
Aug 9, 2011
Messages
30
So that is what I started with. I have this vision of what I want the garage too look like in my head. Can lights around the perimiter, two tone with black chairrail moulding, good lighting in the bays and clean storage and uncluttered with things put away where they belong.

So I started with some lighting upgrades. The existing lighting was just screw in bulbs around the perimiter mounted to 4" round boxes flushed in the ceiling. Those had to go so I blew those out, increased the holes and installed 9 flush mount 6" can lights on their own circuit and switch.

2CDF39A2-orig.jpg


A27A5213-orig.jpg


So now I have some lights to work with and I can see what I am doing I went at it getting rid of the mural which was sheetrocked, but not not taped or textured around the outside edge of the painting.

I am no sheetrocker but I got on with it as well as patching the holes in the back wall where the previous owner drove through back wall of the sheetrock.

8E722854-orig.jpg
 

Nighttrain

Well-known member
Joined
Aug 6, 2009
Messages
2,682
Location
Dripping Springs, Tx
Congrats on the new wife and the new garage! Spend more time with one than the other, I won't say which one though. You are keeping that wall paper trim up there aren't you?

You beat me to the your second post. I would keep that car mural. Really looking good!
 
Last edited:
OP
H

hackster

Active member
Joined
Aug 9, 2011
Messages
30
I did not take any photos of the finished sanding or the texturing......I was so ready to get some paint on the walls at that point.

I knew I was going to be painting the walls top white, bottom grey and black down the middle so I measured everything, gave it some hash marks on the wall and go to painting. I had rented a torpedo heater to get the garage temps up as it was freezing the morning I was sheetrocking and there is no heat in the garage.

When I started painting I had the temps up near 100 to get everything to dry.

Two coats of white, two coats of grey.

C7A686FE-orig.jpg


C671BECC-orig.jpg


I was pretty excited for the night and needed some rest. This work was all completed in a weekend up to this point.

Monday night wwould be trim night and I needed a bit of help hanging the 16' chair rail moulding.

Two coats of black paint on the moulding and me and my helper had it up on the walls after work.

8DF9CD8A-orig.jpg


AE536CAE-orig.jpg


797EC512-orig.jpg


Here is what it looks like from the front.
 
OP
H

hackster

Active member
Joined
Aug 9, 2011
Messages
30
At this point I feel like I have a room that I can work with. I do a lot of fabrication and automotive work in my shops and this is going to be no different. So my plan is to make the left side of the garage a work area with a workbench in it and two tool cabinets as bases for the bench. The other side of the garage will get high cabinets only. I have been known to work on some bigger cars and trucks and will need the extra two feet of space with the short depth of the garage.

I would love to be able to buy some really high end shop cabinets but it just is not in the cards for me. I have had very, very good luck with Ikea cabinets in my current shop so off to Ikea we go and I came home with a bunch of boxes. Me and a buddy built all the cabinets in an evening and hung a few of them after work. Here is what the garage looks like as of right now. The opening in the middle will house a large monitor/ tv for entertainment purposes and I really hope to have the internet and use this for diagrams and other internet uses.

97E28BBA-orig.jpg


0C4BB11A-orig.jpg


B5955AB9-orig.jpg


E9F43DEB-orig.jpg


Sean
 
OP
H

hackster

Active member
Joined
Aug 9, 2011
Messages
30
I was at a bit of a stopping point, but the floor guy will be onsite on monday morning to start on the full broadcast epoxy garage floors. :bounce:

So I had to move onto things outside of the garage. I knew that I wanted to do the cabinets as bases for the work bench and wanted to get rid of the casters. When I saw Steveo's harbor freight post the deal was sealed. I had existing 40" grip latch ballbearing craftsman botom box so I picked up a new one from Sears this week at a steal of a deal.

Started on the housings for the box Friday (Day after the big bird feed) and didnt take too many photos but made some great progress. There are two of these benches that will be tied together in the middle after they are in place. I am really torn on whether I should leave them the raw metal finish like they are in this photo or if I should paint them.......I could use a few opinions on the subject if anyone wants to chime in.

Steel cut up and ready to get my weld on!!!

E66B2EF0-orig.jpg


46619ECC-orig.jpg


I am really happy with them, they are both finished up. Bench height turned out at 38.5" tall right at the base of my chair rail moulding.

I also knew that the air compressor was going to get relocated out to the back of the shop and it needed a dog house. So Me and a buddy screwed around on Saturday and built this. It was actually a really fun project, easy and turned out great. It's t 111 siding, insulated and has closeable vents on both ends. Sheeted the roof and shingled it to match the house and shop. I need a few feet to lift it off the slab just a little bit. It is insulated as well.

I can't wait to get the floors done and move into the house. We are waiting for the new carpets in the house to show up before we can move in.

Still on the to do list is a little bit of electrical work, floors in garage, run air lines in shop and move all my stuff in!!!!

More updates to follow tomorrow and thanks to everyone on here for the great ideas, most everything I am doing stemmed from reading this very site.

Sean
 
OP
H

hackster

Active member
Joined
Aug 9, 2011
Messages
30
Thanks guys.

Jack,

Your garage got me thinking about organization about a year ago. I like everything you have done in your shop but to be honest the two things I like best are the sink area with the curves and the drop down welding table Just awesome use of the space. I plan on building a very similar fab table for my shop.

Sean
 

PSE driver

Active member
Joined
Oct 24, 2011
Messages
30
Looks really nice! Gonna have a nice shop/garage there! I'm sure there will be lots more projects that will get done in there.

As far as the work benches go, i'd like to see that painted. Maybe the same grey on the walls.

The only thing I can really critique or inquire on is the one blank receptacle cover that caused you to have a break in your chair railing. With all the drywall work you did, why not have raised it up to the height of the other receptacles?
 
OP
H

hackster

Active member
Joined
Aug 9, 2011
Messages
30
PSE...... Tell me about it.

Have you ever just forgot to do something? Yep, I forgot to do it. No other reason even though I think I am going to run a piece of small trim over the top and attach it to the blank wall plate to make it go away.

Sean
 

PSE driver

Active member
Joined
Oct 24, 2011
Messages
30
PSE...... Tell me about it.

Have you ever just forgot to do something? Yep, I forgot to do it. No other reason even though I think I am going to run a piece of small trim over the top and attach it to the blank wall plate to make it go away.

Sean

Ah, you'll probably find something to put in front of it. It's not a major eye soar or anything.
 

blatterjr

Well-known member
Joined
Nov 21, 2011
Messages
157
I envy the amount of space you have... looking good. Remember to take photos as you go. :thumbup:
 
OP
H

hackster

Active member
Joined
Aug 9, 2011
Messages
30
Well I've made a bit of progress but the floor has been a lot slower than I thought it would go. That being said its finally done and curing now. I hope to be able to move the workbench in late tomorrow or first thing on Monday.


7148B2B7-orig.jpg


1E0EE32D-orig.jpg


First one is how it is now with two coats of clear. Second one is them doing the foundation walls and getting ready for the clear.

Had some spare time this week so I made a couple of little gussets for the base cabinets for the workbench. Added a little snap to the boxes and i got to play with some new tools.

97BD63A8-orig.jpg


B93EFFC8-orig.jpg


I spent the day today running a main trunk for the airlines. Ran a 3/4 main line from the compressor up the exteriorwall into the attic area. Then headed over towards the middle of the building with the three quarter. Ran a tee then headed lengthwise. Put in three tee's and ran them straight up bringing my take offs from the top of the pipe to mitigate moisture in the lines. I am running 1/2" dot tubing with shark bite style fittings from the main down the wall cavity to the outlet of the air line.

All in all I am pretty happy with how the pipe turned out. Its out of the way and should be more than enough capacity for me.

16ED73C3-orig.jpg


E1BFFBF1-orig.jpg


B12C06DD-orig.jpg
 

Kevin54

MEMBER EMERITUS
Joined
Jan 12, 2005
Messages
29,341
Location
Urbana, Ohio
7148B2B7-orig.jpg


Everything looks great so far, and that is a good size garage to have. Any outside pics of it?

I have a question on the above pic....why is the curb lower on the right hand side back wall? It looks to me like there was an opening there at one time. Maybe a secondary garage door opening to the rear? I know that is where the mural was but are you sure he drove through the back wall where he ruined the sheetrock and replaced it, or he used it to drive through into the backyard? That might be why it wasn't finished off inside.
 
OP
H

hackster

Active member
Joined
Aug 9, 2011
Messages
30
There is nothing behind the garage right there. There is only about eight feet to the back fence. The foundation steps up again at the corner and i am guessing that it is to flow with the lot.as the lot slopes down towards the north part of the lot.

There may be a possibility that that could have been a plan to open up that wall but this was never the case in the past.

Sean
 
To avoid these ads, REGISTER NOW!
OP
H

hackster

Active member
Joined
Aug 9, 2011
Messages
30
Here are some photos from this weekends progress. Air lines are all in. I think they turned out well and all lines are hidden. The chucks stick out from the wall but are not too intrusive.

Work bench idea turned out great and is a total ripoff from Steevo....thanks man!

Its very strong and stable. I need to Fab up the metal top for the bench still but this will have to do for now.

F1021B6B-orig.jpg


A7D3398B-orig.jpg


F2D9FB17-orig.jpg


Should be able to get some tools in this week!
:bounce:

Sean
 

PSE driver

Active member
Joined
Oct 24, 2011
Messages
30
Very Nice! Very Professional. The floor is beutiful as are the work benches and tool boxes.
 

Mavawreck

Well-known member
Joined
Jan 30, 2011
Messages
1,835
Location
Durham NC
Looks awesome! I followed the link from over on Turbobricks but I've read the thread before. Love your 242, it is the same color as my 244.
 

wilb1976

Well-known member
Joined
Mar 7, 2010
Messages
146
Location
Maui
Great looking garage so far. I really like your work bench and congrats on the new home.
 

64dragnwagon

Well-known member
Joined
Sep 3, 2006
Messages
461
Location
Northeastern Tennessee
Great job! It is amazing what some fresh paint and trim will do to transform a space. The only thing I would have done differently is keep the mural. Was it wallpaper or hand painted?
 

couchmechanic

Well-known member
Joined
Jul 29, 2011
Messages
104
Location
Bakersfield
Man, nice detail on everything! The cabinets, paint, and especially the workbenches and tollboxes. Can't wait to see more.
 

synik

Well-known member
Joined
Jan 5, 2010
Messages
192
Love it! Looks to be a great area to work with. :)

Thanks for sharing. :thumbup: Keep us updated.
 

Curt_pnw

Well-known member
Joined
Mar 27, 2009
Messages
223
Location
Edmonds, Wa
I followed the link over from Turbobricks as well. haha
Wow! I love your workbench, those gussets top it off. So awesome. Nicely done.
 
OP
H

hackster

Active member
Joined
Aug 9, 2011
Messages
30
Well.....been a bit busy the last almost year or so with lots of time both at work and out in the shop. Cranking out some pretty cool cars this last year out of this little garage. Not a lot compared to most of the crazy huge garages.

I am pretty happy with everything but decided this weekend with project plans falling through that I needed to do some work on the old workbench.

The mount for the fridge is total overkill and I am not too sure how I like it but I really dig the shelves under the cabinet, it seems to do a good job of keeping stuff off of the bench top.

B02EAC67.jpg


CD634913.jpg


553CC92D.jpg


CD323B42.jpg


As you can see, I moved into the garage...there is a lot of tools in there, most of them neatly tucked out of sight to make as much use of the small space as I could.

Here are a few of the projects I have been working on over the last ten months.

BE3C47A8-orig.jpg


Engine before

AC08A2FB.jpg


After Body

17BB8B3B-orig.jpg


After Engine

BCC0FFA7.jpg


Daily Driver....not quite when I got it, Ill see if I can find an earlier photo of it.

EC75C1F4.jpg


38EA35AE-orig.jpg


After or really close to current...

A5777F8B-orig.jpg


CC619B61-orig.jpg


C03DA3C4-orig.jpg


The show car when I first got it.

D50C9664-orig.jpg


D374AC18-orig.jpg


After

DSC_0066.jpg


DSC_0071.jpg


The show car was the first project, then the ls swap blue car while I was waiting for the CCW's to be built then the green car.

This is the current project and is almost finished up.

Started with this....

4B9F1159_zps05080607.jpg


2812FB60_zpsf223fb7e.jpg


and this.....

F42B4F4E-orig.jpg


54E609AC.jpg


I built this out of the two rigs...

5B526CB2.jpg


ACD978C5.jpg


D572EE96.jpg


Dodge never built a crew cab first gen with a cummins in it, so I did :) We are planning on doing a lot of camping, dirtbiking and expedition type travel with this.

All the work on all of these cars was done by me in the shop.


The real point of this post though, is where do you all store your engine hoist when not using them? Mine breaks down and stows in a corner, but it is huge and would be great to get it out of the way.

Sean
 
To avoid these ads, REGISTER NOW!
Top Bottom