
stonesg
Well-known member
So I bought the latest version of the HF 1000lb motorcycle lift and I'm pretty satisfied.
I just bought a house and between those usual expenses and setting up the garage, there's just no budget for one of the nicer lifts. That said, I'm pleasantly surprised with how well this is going to work. It's not got the convenience of being able to raise and lower quickly for access to different parts higher or lower on a bike but not having to work on anything sitting on the ground is worth it.
This version of the lift is slightly different from others I've seen in that the raise and lower levers are in a different location due to the ram controls being different. They've moved them to the rear of the lift. The older versions also had both levers attached by hollow square tubing over a square metal axle so that you could remove them quickly if you wanted to. This was a good thing because the levers are a trip hazard when attached.
Here's what they look like as bought:

The rear lever is the lowering control. it's on a round shaft and locked with a 6x1 bolt into a drilled recess on the shaft:
Here's how far it sticks out:
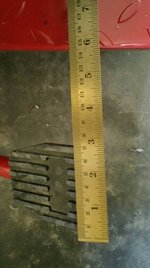

It'd be a royal PITA to have to unbolt it every time to keep from kicking it while working on the bike. The raising lever is still on a square shaft so it can be removed and stored under the lift while you are not using it.

As you can see, there's plenty of shaft and arm. I took the shaft off and cut both the shaft and the lever arm back a few inches. The only wrinkle was that they had reamed the inside of the arm to fit the shaft so I had to grind a little to reduce the diameter of the shaft so it would fit in the shortened lever arm.

I had the grand idea to drill and tap the shaft to accept a 6x1 cap screw but being impatient I used a drill that was to small so THIS happened:

Lesson learned. Lucky me there was more shaft available so I just drilled another hole with a larger bit and it was just enough of an interference that the cap screw cut it's own threads when I put it on.
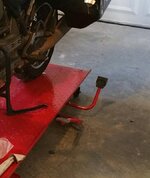
Here's the finished mod. The lever just clears the rear wheel and while it's mostly under the lift when lowering it does not interfere while coming down.

Now the lever can stay attached and its' not the trip hazard it was.
I just bought a house and between those usual expenses and setting up the garage, there's just no budget for one of the nicer lifts. That said, I'm pleasantly surprised with how well this is going to work. It's not got the convenience of being able to raise and lower quickly for access to different parts higher or lower on a bike but not having to work on anything sitting on the ground is worth it.
This version of the lift is slightly different from others I've seen in that the raise and lower levers are in a different location due to the ram controls being different. They've moved them to the rear of the lift. The older versions also had both levers attached by hollow square tubing over a square metal axle so that you could remove them quickly if you wanted to. This was a good thing because the levers are a trip hazard when attached.
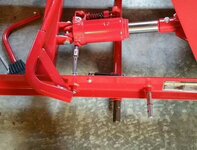
Here's what they look like as bought:
The rear lever is the lowering control. it's on a round shaft and locked with a 6x1 bolt into a drilled recess on the shaft:
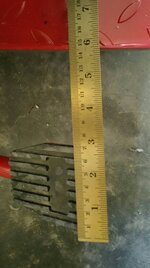
Here's how far it sticks out:
It'd be a royal PITA to have to unbolt it every time to keep from kicking it while working on the bike. The raising lever is still on a square shaft so it can be removed and stored under the lift while you are not using it.
As you can see, there's plenty of shaft and arm. I took the shaft off and cut both the shaft and the lever arm back a few inches. The only wrinkle was that they had reamed the inside of the arm to fit the shaft so I had to grind a little to reduce the diameter of the shaft so it would fit in the shortened lever arm.
I had the grand idea to drill and tap the shaft to accept a 6x1 cap screw but being impatient I used a drill that was to small so THIS happened:
Lesson learned. Lucky me there was more shaft available so I just drilled another hole with a larger bit and it was just enough of an interference that the cap screw cut it's own threads when I put it on.
Here's the finished mod. The lever just clears the rear wheel and while it's mostly under the lift when lowering it does not interfere while coming down.
Now the lever can stay attached and its' not the trip hazard it was.
Attachments
-
 41b0cae27e839d29f99a45afa5891cb9.jpg47.2 KB · Views: 2
 -
 bbc0fb6fcc7f14b7327de066fc768871.jpg57.9 KB · Views: 1
 -
 dd9ad847ac3e0415de14317ec343a4d7.jpg39.6 KB · Views: 1
 -
 2e954113c3f1aa89ad04adedc8f34f85.jpg31.5 KB · Views: 1
 -
 087f3276928e88b48e23c95a8a364c0d.jpg50.4 KB · Views: 1
 -
 a7300f22e2ca046097df91c6925645bb.jpg73.6 KB · Views: 0
 -
 ebc3e63525a8a2614fbfd28b00cea514.jpg108.6 KB · Views: 1