To avoid these ads, REGISTER NOW!

Above 1200 Sq/FT Hay barn conversion to auto shop - 30x40 pole barn project

Wokspaces above 1200 squarefeet.
OP
B

Bob2112

Well-known member
Joined
Aug 2, 2016
Messages
105
Location
Columbia, TN
Re: 30x40 Pole Barn Project

5/13/18 - After working on the yard with my wife for a couple nights, I was back at it. I didn't get started until later than usual, and putting up insulation is a chore, so I only got two pieces done. When I get back home, I'll get two more up and that will be half the insulation for the ceiling done! Here's a picture of the batts up on top of the metal panels.

5.13.18.jpg
 
To avoid these ads, REGISTER NOW!
OP
B

Bob2112

Well-known member
Joined
Aug 2, 2016
Messages
105
Location
Columbia, TN
5/19/18 - Back home and back to work. Put up two more batts of insulation finishing off a roll. Down to 5 rolls of the 9" left.

5/20/18, 5/21/18 - Sunday didn't get to do a lot due to double duty on yard work. We have a rental waiting for tenants, so two yards to mow at the moment. But I did get out there for a bit, by the end of Monday night, I had plastic up for the next run of four ceiling panels.

5/22/18 - Worked pretty diligently tonight and put up the full run of four panels. Using two pairs of vise-grips now to keep the panels lined up while putting in the screws. Lesson learned and I should have been using those since the beginning.

5/23-26/18 - Spent these four nights doing some cutting and putting up some smaller panel pieces around the door. Also put up a couple of the center strip of light. Not wired yet, but they are up and now I can move things over to that side of the shop since I won't need to work under that part of the ceiling anymore.

5.27.18.jpg

Partly wrapped door, 1st half of center light strip, and more ceiling panels completed.
 
OP
B

Bob2112

Well-known member
Joined
Aug 2, 2016
Messages
105
Location
Columbia, TN
5/27/18 - Did some cleaning and moved the Mustang over to the finished side of the shop.

5/28/18 - More moving and cleaning. Got my tools, and work table/scaffold moved.

5/29/18 - 6/3/18 - No interesting pictures to see, but I spent these nights working on rerouting some of the old wire runs, and also bringing the new runs back to the switches near the fuse box. My ceiling fans have these monster transformer type switches that look like they are from the 60's but they work so I figured I'd use them. I also combined an outlet and light switch into a single 2-gang set up to save some vertical space.

6.03.18.jpg

Not much to see, other than some new switches on the right.
 
OP
B

Bob2112

Well-known member
Joined
Aug 2, 2016
Messages
105
Location
Columbia, TN
Looking good! Nice carport for additional "cold" storage too

Thanks! And yes, the carport space is great for things that I can store outside. Once I get the shop done, I'll be pulling the good parts off the Monte Carlo and moving the carcass out to the carport. It already is nice since it keep the worst of the weather and the summer sun off my tractor, truck and trailer.
 
OP
B

Bob2112

Well-known member
Joined
Aug 2, 2016
Messages
105
Location
Columbia, TN
6/4/18 - Installed a 50 Amp RV outlet on the outside of the shop and ran the 6 gauge wire through a grommet back to near the fuse box. I have three polaris connectors that I'll use to junction that wire so I can have an indoor outlet as well that I will run to the center of the long wall for a welder plugin. The RV outlet outside can also be re-purposed for an outdoor housed air compressor in the future.

6/5/18 - After over a week of messing with electrical stuff, it was nice to finally get back to insulation work. Put up a batt on the last portion of the north-east facing wall.

6/6/18 - Used a smaller piece of plastic to partly cover the section of wall insulated yesterday. I'll finish up that bottom section later on. The important part at the moment was to get enough done that I could put up the last of the J channel for the ceiling on the two door walls.

6.06.18.jpg
 
Last edited:
OP
B

Bob2112

Well-known member
Joined
Aug 2, 2016
Messages
105
Location
Columbia, TN
6/7/18 - Put up plastic and j channel on the other door wall and got the plastic ready on the ceiling for another run of ceiling panels.

6/8/18 - Put up three ceiling panels.

6/9/18 - Put up the last panel of the run I started last night. That is seven rows out of ten competed. Also, wired up the center light strip. There is still one more four foot light to add to the center strip, but it was exciting to see all three rows of lights turned on.

6.09.18.jpg

Let there be light!

6/10/18 - Leaving for Denver tomorrow, so I didn't do much this night, but I did manage to get the wire pulled down for the two remaining lights that will be in the ceiling fan rows. Other than hanging those lights, all the ceiling wiring is done now!
 
OP
B

Bob2112

Well-known member
Joined
Aug 2, 2016
Messages
105
Location
Columbia, TN
Hi all! Back in Denver so I have some time to update this 'journal'.

6/16 - 6/17/18 - Did some moving and cleaning. Also started putting up the last row of plastic before I hang another row of ceiling panels.

6/18/18 - Didn't have much time in the shop this night or the next. Put up two ceiling panels.

6/19/18 - Two more ceiling panels finishing a row.

6/20/18 - Put up the final light in my center row.

6.20.18.jpg
 
OP
B

Bob2112

Well-known member
Joined
Aug 2, 2016
Messages
105
Location
Columbia, TN
6/22 - 6/24/18 - I forgot to take pictures, but over the course of these nights I put up insulation on a wall panel, added the wood cross beams and added some wood framing around the interior side of the man door so that the metal panels would lay flat. I also sealed the openings in that door framing and the surrounding wood with some expanding foam. I trimmed it later, but in the picture below it was untrimmed.

6.24.18.jpg


6/25 - 6/26/18 - Put up another wall panel of insulation and the cross beams for that panel. Also did some tidying up on the fusebox, finished attaching the 40 amp and 50 amp circuits and doing the split for the 50 amp run. One goes to the exterior RV outlet, another goes to an internal outlet that I can use for a future welder.
 
OP
B

Bob2112

Well-known member
Joined
Aug 2, 2016
Messages
105
Location
Columbia, TN
My mom and aunt were in town for a couple days, and then my brother-in-law arrived which meant little progress for a few day until the holiday - but it wasn't zero progress!

7/1/18 - By night of July 1 I had managed to finish up the fuse box and put some framing around it. It will still need 2x4s flat screwed to make the depth match for the wall panel, but I did screw these together in a way that I can remove each side separately in case I need to work on a circuit in the future.

7.1.18.jpg


7/2/18 - Put up insulation on the fuse box panel. Will wait to add cross beams until the panel to the left is finished to make it easier to keep the beams level. I used a lot of scrap pieces of insulation on this section. I think when all is said and done I will have two unopened rolls of insulation I can store or sell.

7/4/18 - Taking advantage of the day off, I begged pardon from the visitors and went out and cut a hole in the wall. A hole for a window that is! This is a 63x23 side sliding window which fits nicely between the big beams of the barn so I don't have to cut into them at all. The window has an integrated J channel, so I bent out the left side of the opening so I could slide the window in and utilize the channel to trim over the siding. Once in place, I bent the left portion back into place and screwed it into the framing. In this picture, you can see the open left side and the lack of framing.

7.4.18.jpg


From the outside:

7.4.18-2.jpg


7/5/18 - Next I built a frame on the inside both to support the window and then added 2x6s to bring the depth out to match the rest of the wall so the wall panel will screw into this frame flat. It will still need some 1x2s screwed in, but I'll get that later. I also sealed up the inside with more great stuff expanding foam. I will run some sealing caulk around the outside where the metal meets the vinyl jchannel. We had a heavy rain and I was able to confirm very little moisture got in even without the exterior caulking in place. Any water that does get in will drip down to a small space between the concrete shop floor and the exterior wall that reaches dirt. So the water does have a way to exit if it does get in.

7.5.18.jpg


I should mention the window was for four purposes:
1) So my wife can tell if I'm out there - the window faces our house so she can see if the lights are on.
2) It is in the corner where I will have the main workbench, so the extra natural light will be helpful.
3) It will be used as a place where I can get a wireless signal from my house to the inside of the shop. Since the steel walls block the signal really well, the window provides a nice spot to link up.
4) Extra ventilation. The existing windows are on the same wall as one of the doors, so now I'll have three of the four walls with air movement.
 
Last edited:
OP
B

Bob2112

Well-known member
Joined
Aug 2, 2016
Messages
105
Location
Columbia, TN
7/5/18 continued - Added insulation to the last wall section (the one with the window).

7/6/18 - Added wood beams to window and fuse box wall sections. Just needs plastic and it is ready to panel! Well, that and the ceiling to be done, j-channel installed, and maybe a couple other details. You can see the fuse box below with the 2x4s mentioned earlier.

7.6.18-2.jpg


7.6.18.jpg


7/7/18 - Put up a supporting piece of wood on the knee brace that is needed due to the cutout in the ceiling panels on this row that has the knee braces in it.

7/8/18 - Since this is nearly the last row of ceiling panels (there one more partial row about 15" wide) I had to devise a different way of getting the insulation batt up there. So, with a bit of work, I managed to get the insulation on top of the plastic, lift that up with the dryall lift under the plastic, and then stapled up the plastic a bit more thoroughly than usual. Then, with the plastic holding the insulation up, I installed the metal panel.

This particular panel is one of the two worst ones to do. Since it has a cut out on one end, and j-channel on the other, it has to have a bit of a larger cutout than needed so it can go up and then slide back into the channel. Of course, I want the cutout as small as possible so I have less to wrap later and also just so it is attaching closer to the truss/knee brace. I had bring it back down once to trim a little more off and it is such a bother to get up there since you have to go in at an angle to get it above the knee brace. Ugh! But, in the end, I got it up there and the next three are much much easier to do. But, alas, leaving to Denver on the 9th, so this will be it for a few days.

7.8.18.jpg
 
OP
B

Bob2112

Well-known member
Joined
Aug 2, 2016
Messages
105
Location
Columbia, TN
FYI - If anyone is doing a similar project, I have two unopened rolls of insulation left over and I've posted them for sale in the classified section.
 
OP
B

Bob2112

Well-known member
Joined
Aug 2, 2016
Messages
105
Location
Columbia, TN
7/13/18 - Got back home and got to work again. Put up the insulation for the next section.

7/14/18 - Put up the metal panel on the section I insulated the prior night.

7/15/18 - Another section of insulation put up.

7/16/18 - Got a lot done this evening. Finished up the last section of insulation and put up metal on the one from last night and tonight. So at last I am all done with the insulation on the ceiling!

7/17/18 - Put up my last two lights. Shop is fully illuminate now - pictures don't do justice to how bright it is in there and it will get even better once the rest of the wall panels are up. One thing to consider is all my work is done at night, and all the pictures you see are with no flash, just the shop lights.

7.17.18.jpg
 
Last edited:
OP
B

Bob2112

Well-known member
Joined
Aug 2, 2016
Messages
105
Location
Columbia, TN
7/18/18 - Another productive evening as I cut and installed the last four ceiling panels. Each of these was easy to put up, once cut. I used the shears this time to reduce the amount of cleanup. Each panel was about 18" wide, but since they were smaller and didn't have to wrap the knee braces, they went up pretty quickly. The ceiling is now completely finished!

7/19/18 - Put up plastic and stapled the top half in place. Left the bottom loose, since I'll need to attached outlets and such as I go with the wall panels. I also cut a panel for above the sliding door, plus cut another panel that goes around the left side of that same door.

Ceiling done and plastic up.
7.19.18.jpg
 
Last edited:
OP
B

Bob2112

Well-known member
Joined
Aug 2, 2016
Messages
105
Location
Columbia, TN
7/20/18 - Got out to the shop late, so not much done other than finishing some plastic work and disassembling the fan controls to get ready to cut the holes in the metal panel that will go over them.

7/21/18 - Managed to get the outlet openings cut and the panel up.

7/22/18 - Reassembled the fan controls and put the cover on the outlet. This one isn't as perfect as I would like since it was close to a rib in the panel, but I don't think it looks terrible. I also put up another panel. The full panels with no cuts seem so easy! Back to Denver tomorrow, so another break in the action.

7.22.18.jpg


Closer look at the outlet/light switch and ceiling fan controls.

7.22.18.2.jpg
 
OP
B

Bob2112

Well-known member
Joined
Aug 2, 2016
Messages
105
Location
Columbia, TN
Hi all - back in Denver again for a couple nights, so I have some time to update this journey. Was home for three weeks so made a lot of progress.

7/27/18 - Cut & installed the last sheet on the northeast wall. I did a much better job of cutting this piece to match the slope of the wall, but the real test will be when I put up the next panel that creates the corner.

7/28/18 - With the northeast wall finished, I relocated all my scrap pieces to be leaning up against that wall. Therefore, I was able to finish the last little bit of framing and insulation around the double window on the southwest wall. I also managed to get the plastic up on this section.

7/29/18 - Cut and installed some j-channel around the double window. Also put up a cut piece around the large southwest door. Unfortunately there is a tiny sliver of metal that I need to put into the j-channel. If the panel had been an inch further to the right, it would have made things a lot easier.

7/30/18 - Put up cut pieces of paneling around, above and below the double window.

7/31/18 - Spent a about three hours in the shop tonight as I was determined to finish the southwest wall. I put a piece of j-channel on the top of the door, but didn't bother with the side since that panel will be flush to the post. Had to do some interesting cuts as you can see in the picture below, but another wall is done!

7.31.18.jpg
 
Last edited:
OP
B

Bob2112

Well-known member
Joined
Aug 2, 2016
Messages
105
Location
Columbia, TN
8/1/18 - A new month and the end is in sight. Started in the corner by the fusebox (northeast) and put up a couple wall panels.

8/2/18 - Installed a couple outlets near the sliding window and finished stapling the plastic for the next few panels. Also put up the j-channel around the sliding window.

8/3/18 - A couple more panels up and with the slider window trimmed, I had enough j-channel left to trim the fusebox access opening as well.

8/4/18 - 8/7/18 - Some slow nights as I fiddled with cuts for outlets, and worked on the odd shaped pieces that had to fit around the window on the bottom and the knee braces on the top. In the end I used overlapping panels to make it work. A seem can be seen in the picture below, but once I get a little paint on it, it won't show up very much.

8/8/18 - Continued with panels above and below the sliding window.

8/9/18 - Installed another outlet and more panels to cover it. The window is done and next up is spot of several outlets.

8.9.18.jpg
 
OP
B

Bob2112

Well-known member
Joined
Aug 2, 2016
Messages
105
Location
Columbia, TN
8/10/18 - Installed three outlets. One is a quad outlet of 20A rated outlets on a dedicated circuit. Another is one of the original duplex outlets and then also was a 240 for 30 amps that is on a circuit with a mirrored outlet on the other side of the shop for a lift. That way if I move the lift to either side, I have a connection for it. In the picture below you can also see a covered outlet to the right, and that is a 50amp 240v circuit for a future welder.

8.10.18.jpg


8/11/18 - Continued putting up panels.

8/12/18 - More panels up.

8/13/18 - A happy day as the last metal wall panel went up! I consider this the official finish of the structural portion of the build. The rest is all cosmetics. Speaking of, here is a picture of the trimmed fuse box opening.

8.13.18.jpg
 
Last edited:
To avoid these ads, REGISTER NOW!
OP
B

Bob2112

Well-known member
Joined
Aug 2, 2016
Messages
105
Location
Columbia, TN
8/14/18 - Trying not to slow down when the end is so near, I got back to work by sanding down all the wood I planned to paint. Not multiple steps and all that, just a hit with some 80 grit to take off the splinters and some of the rougher areas. The knee braces especially needed a bit of sanding to get the old bird **** off. Then I spent the night putting paintable acrylic caulk with silicon added in all the lower wood gaps of the window framing. Since I needed multiple layers of wood to match the depth of the wall panels, and I didn't take the time to square the edges of that wood (I'm not building furniture after all) the gaps were too big for wood filler, but paintable caulk will stay flexible enough to do the trick.

8/15/18 - Primed/sealed all the wood I planned to paint. This took longer than I had expected and after I tossed my brush and roller in the water, I realized I had forgot the knee braces!
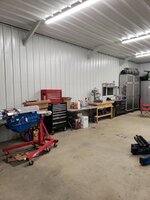
8/16/18 - Due to my premature brush cleaning, I went out around lunch time and quickly primed the knee braces so they were ready when it can time to paint in the evening. I may have mentioned before, but I had some paint matched to a piece of scrap metal. Tonight, another late night, I painted all the windows, fuse box opening, knee braces, the man door area and the one side of the wood framing around the large doors. Anywhere there is exposed wood. The large doors will get finished after I move the cars back to the side of the shop I'm currently working on.
8.16.2018.jpg


Trim around right side of large door, window and man door all caulked and painted. The color match looks good in my opinion, blends right in. Compare this to the pic in post #57 and you'll see the difference.
 
OP
B

Bob2112

Well-known member
Joined
Aug 2, 2016
Messages
105
Location
Columbia, TN
8/17 - 8/18/18 - Spend these two night moving my tools and worktable into its permanent home in the corner by the fusebox. Also disassembled the drywall lift and took that plus several things like the table saw and such down to the main garage since I am finished with the wood working in the shop now.

8/19/18 - Back to some metal work, I wrapped the wall side of the three knee braces I have access to. Next I'll do the ceiling, but I had to pack up and head to Denver. The picture below shows the wrapped wall openings around the knee braces and also shows how the slider window and knee braces look painted. It's getting there!

8.19.18.jpg
 

Dividing Creek

Well-known member
Joined
Nov 17, 2011
Messages
188
Location
Central Virginia
Very clean. Amazing transformation. I have been working out of a 1950 cinderblock dairy barn for the past 8 yrs and keep telling myself when things slow down I'll do some work to the building and make it a more useable space. Hasnt happened for me, hats off to you.
 
Last edited:
OP
B

Bob2112

Well-known member
Joined
Aug 2, 2016
Messages
105
Location
Columbia, TN
Thanks, guys! When I get home I'm going to get some pictures from the same angles as some of my pictures from before I started to post a couple before & afters. I'm keeping my open for some PEI 5 porcelain tile, and once I get some that will be the next 'major' project. Until then, it will be buying tools (big ones, lift, welder, compressor) and working on stuff (finally!). I think another 7-10 nights of the cosmetic stuff and I should be about done for now.
 
OP
B

Bob2112

Well-known member
Joined
Aug 2, 2016
Messages
105
Location
Columbia, TN
Here's a pretty decent before and after comparison. The only thing missing from this before picture is the door being closed and the original asphalt floor. Before was taken Sept 8, 2016 and the after was taken tonight, Aug 24, 2018.
 

Attachments

  • 8.24.18.jpg
    8.24.18.jpg
    81.5 KB · Views: 126
  • 9.8.16.jpg
    9.8.16.jpg
    149.3 KB · Views: 113

Bears Fan

Well-known member
Joined
Jan 26, 2012
Messages
3,448
Location
Indiana
Just found your build, Looks great! :beer: Are you tired of going up and down the ladder yet to finish off the ceiling :wtf:
 
OP
B

Bob2112

Well-known member
Joined
Aug 2, 2016
Messages
105
Location
Columbia, TN
Nice work, Bob! You've transformed your space for sure. Looking forward to what else you plan to do with your space.

Thanks!

Future tasks include: 4 post lift, some hard air lines and a large compressor, nice welder and tile floor. Need some taller shelves and some tool organization as well. I'm going to get some work done on the cars before I work on floor, but that will give me time to see if I can score a good deal on the tile.
 
Last edited:
OP
B

Bob2112

Well-known member
Joined
Aug 2, 2016
Messages
105
Location
Columbia, TN
Very nice job with the building! You're obviously a patient man. How is the insulation working with the minisplits?
Any plans for security bars for the windows

It's great - the insulation alone makes it stay cool most of the day. Typically I'm out there for a couple hours at night and the min-split takes about an hour to get it down to 68-70 from say 80 degrees. That seems pretty good to me given it is a little less than 13,200 cubic feet of volume.

Once it is down to temp, it runs on the slowest setting and keeps it plenty cool. This is night time though, I haven't tried it during the day but I think it will be just fine because when I go out there during the day is it usually about ten degrees cooler than the outside air.

Security bars, yes, I'll rig something up eventually. Pretty quite out here in rural TN, but it would be silly to not add some protection once more and more valuable stuff is sitting inside.
 
Last edited:
OP
B

Bob2112

Well-known member
Joined
Aug 2, 2016
Messages
105
Location
Columbia, TN
Just found your build, Looks great! :beer: Are you tired of going up and down the ladder yet to finish off the ceiling :wtf:

Ha! Yes, I can do without climbing a ladder for a while. Still got a few more short trips up and down to finish off the little details, but I was really happy to get that last ceiling panel up!
 
OP
B

Bob2112

Well-known member
Joined
Aug 2, 2016
Messages
105
Location
Columbia, TN
8/24/18 - 9/9/18 - Not a lot of progress to report. Some of our kids were visiting us over the Labor Day week which meant several nights of no work at all. But hanging out in downtown Nashville and going to our local county fair with the grand baby are well worth the delay. By the time I had finished my last night before heading to Denver this week, I had managed to get all the last half of the shop's wood primed, the knee braces wrapped with metal, and caulking put up on all the gaps that remained. When I get back home, all I have to do is one more coat of paint and that will be it!

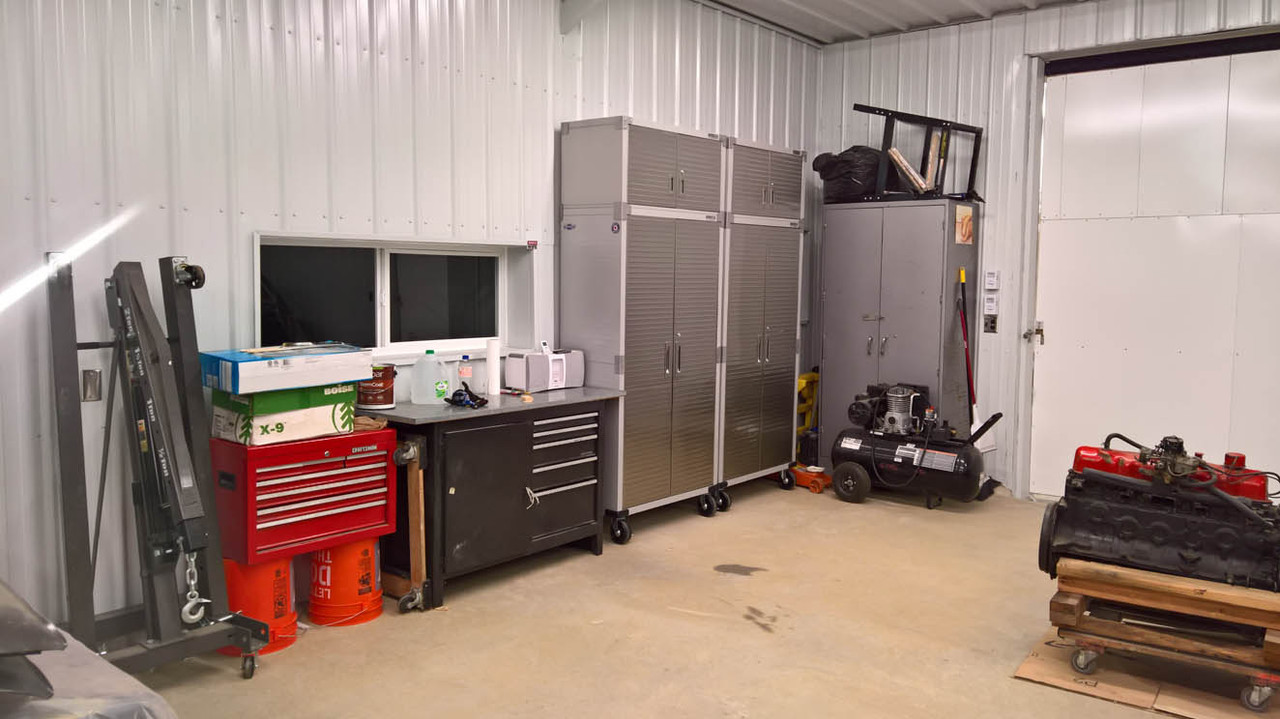
On to other things, I've decided to buy some UltraHD Seville Cabinets. I'll get one or two of the rolling 3' wide, 6' tall ones with an 18" stacker that mounts to the top. Plus I'll get one of their workbenches that are 6' wide and on nice big wheels too. Then I can move my non-wheel cabinet and workbench down to the garage under the house. I figure with all the body work I plan to do, enclosed cabinets will be good to help keep dust off the tools and other stuff I plan to have stored in the shop.
 
OP
B

Bob2112

Well-known member
Joined
Aug 2, 2016
Messages
105
Location
Columbia, TN
A few days ago I finished up the final caulking and paint touch ups. The last couple nights I've been turn wrenches on metal again, dismantling an engine donor car to be specific. Nice to not be on a ladder for a change!

Here's another before and after comparison.
 

Attachments

  • July 2016.jpg
    July 2016.jpg
    126.6 KB · Views: 70
  • 9.15.18.jpg
    9.15.18.jpg
    116.3 KB · Views: 82
OP
B

Bob2112

Well-known member
Joined
Aug 2, 2016
Messages
105
Location
Columbia, TN
After some suggestions in another thread about cabinets, I decided to get a pair of the Seville Ultra HD cabinets. Since I have the extra height, I also order a pair of stackers to put on top of them. Eventually I may get another on and replace my old metal cabinet, but for now that would be more for cosmetics rather than function. I do want to get a nice rolling tool box so that I can keep that close to where I am working. But at least now I have no open shelving anymore which will be nice when I start getting back to the body work (and sanding).

10-4-18.jpg
 
OP
B

Bob2112

Well-known member
Joined
Aug 2, 2016
Messages
105
Location
Columbia, TN
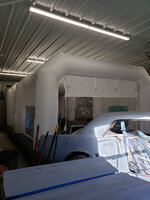
Hi guys! It's been a while and we've been using the shop extensively. It was large enough to fit a 15x20 foot inflatable paintbooth in it which I used to paint my wife's Mustang.

booth2.jpg

The car turned out pretty good overall!

plates_and_wheels.jpg

baby.jpg

Next up, some new additions to the shop!
 
OP
B

Bob2112

Well-known member
Joined
Aug 2, 2016
Messages
105
Location
Columbia, TN
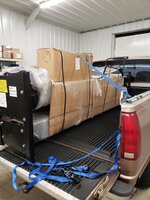
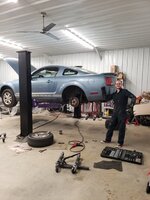
Around December of 2022, I finally pulled the trigger on the lift and it showed up a week or so later. I got the Triumph C7000 lift because of the fact that I could move it anytime the post(s) were in the way. One post is pretty close to the exterior wall anyway, so it probably won't be in the way much. But the other is more towards the center of the shop and would be in the way for larger vehicles trying to pull straight through, or when we paint cars and need to blow up the booth.

Here it is when I first got home from the shipping dock.

20221207_171812.jpg

After installing the anchors, the rest was pretty easy. Here's the first test lift on Jan 16, 2023. Worked great! I did modify the pigtail since the include one was too small for the current draw. I used an RV plug so I could use the larger 30 amp style RV plug.

20230116_141359.jpg

And later in March, here's my son doing a job for pay on a coworkers brakes.

20230307_205212.jpg

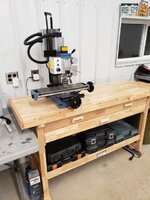
And last but not least, we also now have a mini-mill in da house! This will be helpful with some fabrication I'm doing as I install a custom multi-port EFI system onto the Mustang 200 straight six.

20230514_221343.jpg

20230514_221329.jpg
 
Last edited:
To avoid these ads, REGISTER NOW!
Top Bottom