Farrier
Well-known member
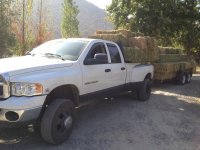
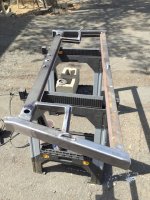
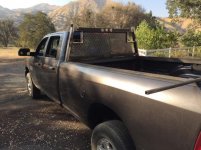
I've built a rack for virtually every truck I've ever owned, so when I bought a new 3500 Ram in January, I've been chomping at the bit to get one built. I build them heavy to protect the cab/window because I'm regularly hauling a ton of hay in the back. I often have 20' sticks of PVC or lumber thrown over the rack also.
It consists of:
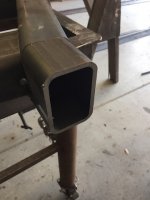
- 3x3x.250 angle
- 3x2x.250 tube,
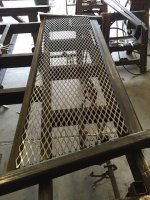
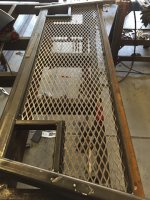
- 3/4-9 flat rolled expanded
- 1" solid rod and various parts and pieces.
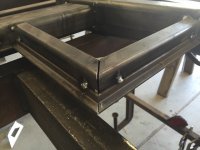
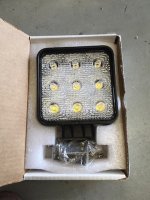
I'll also be adding brake/turn/markers/ and backup lights. This has been a challenge though because most trailer lights are either 2" round or 6x2" oval. The gaskets that hold these lights are just too tall for a 3" face. I ended up finding some 1-1/4" and 3/4" round LED's from Maxxima.com that will finish nicely on a 3" face. For the backup/work lights, I bought some square 24w LED's from Superbriteleds.com and I'll build a frame for those to mount in. I really wanted to pony up the money for some Rigid lights but I just get myself to spend $400 on lights.
I started on this weeks back but I got bogged down with other projects, so it's only been the few days that I could dedicate any time to it.
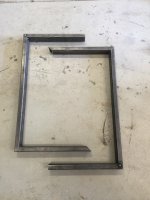
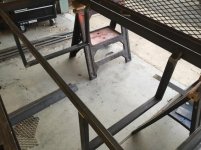
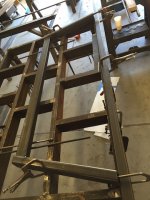
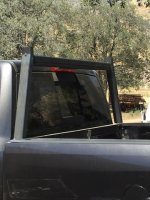
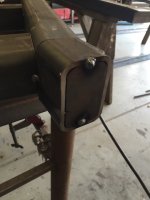
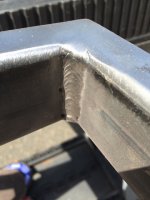
First I cut and tacked together the 3x3" angle. The rack and 1" round will mount to this. The angle runs on top of the bed rails across the width of the bed and the full length of the bed in sort of a U shape. It really strengthens the top bed rail and protects it from **** that I accidentally drop.
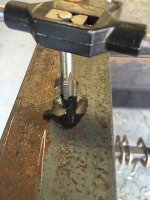
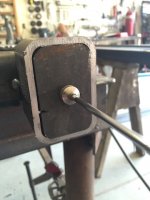
I try really hard to hide fasteners so I tend to drill/tap a lot. To mount the angle, I tapped 1/2-13 holes, cut the bolts to length and then welded them in place, completely hiding the fastener.
It consists of:
- 3x3x.250 angle
- 3x2x.250 tube,
- 3/4-9 flat rolled expanded
- 1" solid rod and various parts and pieces.
I'll also be adding brake/turn/markers/ and backup lights. This has been a challenge though because most trailer lights are either 2" round or 6x2" oval. The gaskets that hold these lights are just too tall for a 3" face. I ended up finding some 1-1/4" and 3/4" round LED's from Maxxima.com that will finish nicely on a 3" face. For the backup/work lights, I bought some square 24w LED's from Superbriteleds.com and I'll build a frame for those to mount in. I really wanted to pony up the money for some Rigid lights but I just get myself to spend $400 on lights.
I started on this weeks back but I got bogged down with other projects, so it's only been the few days that I could dedicate any time to it.
First I cut and tacked together the 3x3" angle. The rack and 1" round will mount to this. The angle runs on top of the bed rails across the width of the bed and the full length of the bed in sort of a U shape. It really strengthens the top bed rail and protects it from **** that I accidentally drop.
I try really hard to hide fasteners so I tend to drill/tap a lot. To mount the angle, I tapped 1/2-13 holes, cut the bolts to length and then welded them in place, completely hiding the fastener.


") but I didn't double check one measurement and cut pieces and inch short of it mark. It's not visible once the chest is loaded so I made a spacer to make for the difference. Not sure If I'm going to keep it that way or cut it apart and start over yet.....
but I didn't double check one measurement and cut pieces and inch short of it mark. It's not visible once the chest is loaded so I made a spacer to make for the difference. Not sure If I'm going to keep it that way or cut it apart and start over yet.....