

pancho400cid
Well-known member
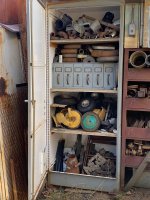
I have a large old electrical enclosure in my garage that serves as a work surface (mostly to support bench grinders) and storage. Photo is below - pardon the mess - I'm workin' on it!

To increase the storage space and utility of the enclosure, I plan to build two large drawers with heavy duty slides to mount inside it and hold:
Power Tools - top drawer
Jackstands/jack-related items - bottom drawer
The drawers will be as wide, deep and high (two equal height drawers), as the enclosure will allow. I plan on 3/4 plywood front, back and sides, and a 3/8 plywood bottom. I'm thinking I'll use pocket screws for the "box" and putting them on the sides so they are at least a little bit hidden. These will be crude drawers for garage storage. Looks aren't too important, but I want them to look "decent". I'll probably paint them grey.
The rough plan for the drawers is sketched below (best I could do on my lunch hour):

I'm no woodworker. I plan to buy a lower-tier Kreg pocket screw fixture for the corner joints, and a Kreg Accu-Cut saw track to help me make better-than-freehand cuts.
There seems to be a lot of debate about gluing the bottoms into the dados. I want these to be very strong. I'm planning on gluing since it's all-plywood construction. Will I regret doing so?
I own a router, and will buy any needed bit. Any input on making the dados correctly / accurately would be welcome. My current plan is to clamp a level across the drawer sides as a guide.
Any other tips, comments, etc. are welcome. I plan to get as far as I can this coming weekend. Thanks!
...
To increase the storage space and utility of the enclosure, I plan to build two large drawers with heavy duty slides to mount inside it and hold:
Power Tools - top drawer
Jackstands/jack-related items - bottom drawer
The drawers will be as wide, deep and high (two equal height drawers), as the enclosure will allow. I plan on 3/4 plywood front, back and sides, and a 3/8 plywood bottom. I'm thinking I'll use pocket screws for the "box" and putting them on the sides so they are at least a little bit hidden. These will be crude drawers for garage storage. Looks aren't too important, but I want them to look "decent". I'll probably paint them grey.
The rough plan for the drawers is sketched below (best I could do on my lunch hour):
I'm no woodworker. I plan to buy a lower-tier Kreg pocket screw fixture for the corner joints, and a Kreg Accu-Cut saw track to help me make better-than-freehand cuts.
There seems to be a lot of debate about gluing the bottoms into the dados. I want these to be very strong. I'm planning on gluing since it's all-plywood construction. Will I regret doing so?
I own a router, and will buy any needed bit. Any input on making the dados correctly / accurately would be welcome. My current plan is to clamp a level across the drawer sides as a guide.
Any other tips, comments, etc. are welcome. I plan to get as far as I can this coming weekend. Thanks!
...
Last edited:


 OK, maybe machine cut dovetails.


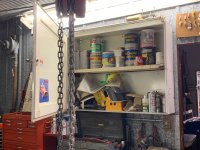


 ( I have also been accused of putting items on almost any horizontal surface.)