To avoid these ads, REGISTER NOW!

Help me elevate my garage organization and layout!

8Line

Well-known member
Joined
Jan 26, 2023
Messages
64
Location
South Side of Houston
Hi all,
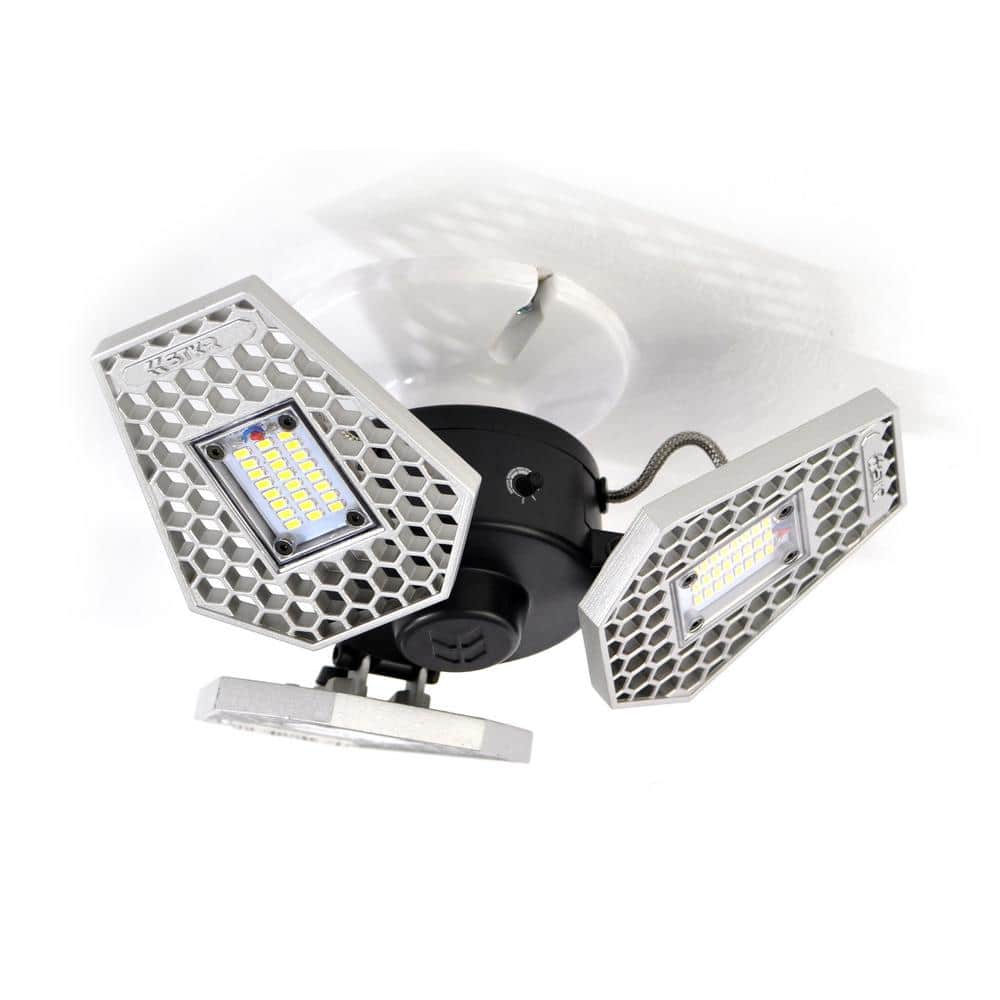
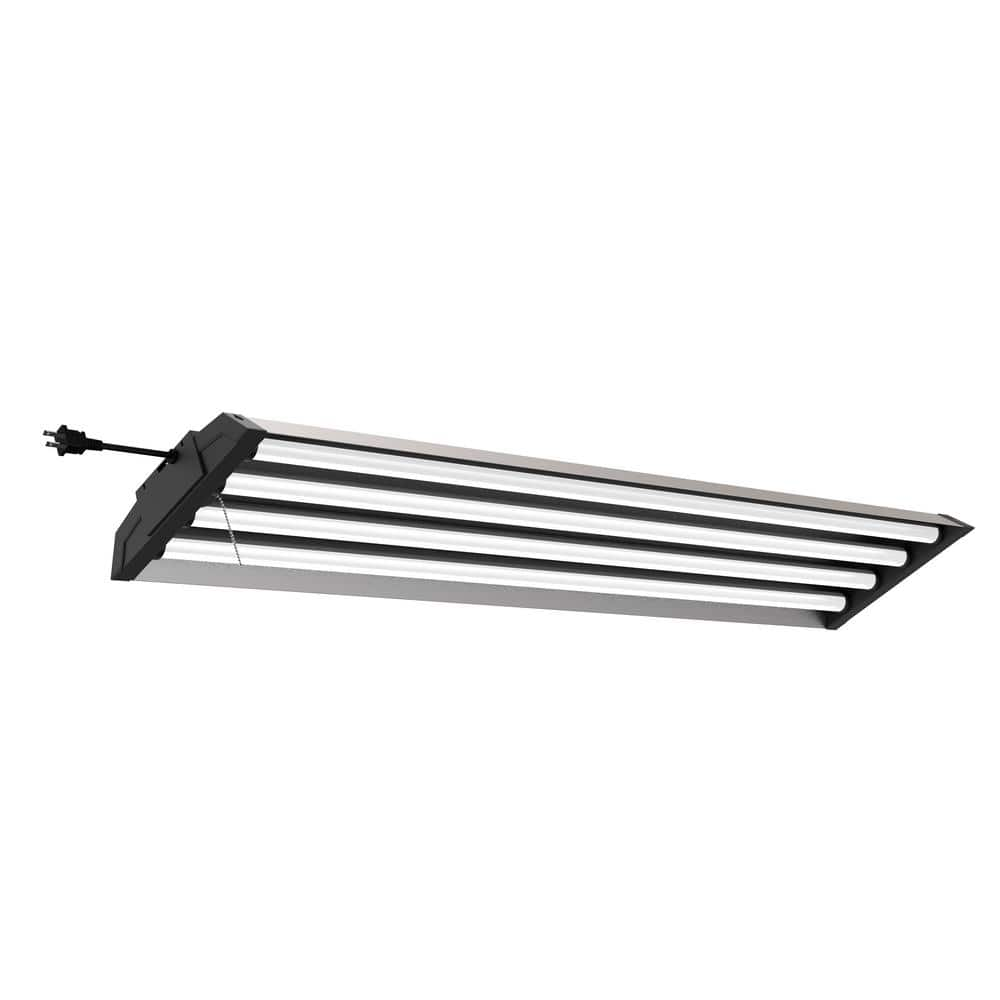
I'm hoping to maximize the space I will have at me new house. I plan to paint the walls, install nicer (brighter) lighting, and install mats on complete floor. I've never had this type of floorplan before so keen to suggestions on how to best arrange everything. I'm a handy individual, work on all my cars, and use tools as designed (and not designed) to get the job done. Eventually I would like to upgrade the workbench.

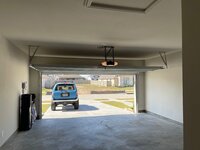
Attached is the floorplan, with dimensions to the nearest foot. Garage door and Man door are in green and my initial thinking of where to put the larger items. Roof height is around 10ft.

The major contenders are a Harbor Freight 48"Wx24"D work bench, a 36"Wx18"Dx70"T set of shelving, a 36"Wx24"D.36"T deep freezer. I currently have overhead storage above the garage but will not have this luxury at the new house so there will be some storage bin management required, just not sure on the footprint yet and if those items will be stored in the attic. We will also be installing a water softener in the near future so need to consider that as well.

I will have two cars in the garage, a 2017 Toyota Rav4 and a super awesome 1996 4Runner. (can you guess which car is mine!? :bounce:

Happy to be a part of this group, happy to learn!
thanks,
8Line
 

Attachments

  • Garage floor plan.PNG
    Garage floor plan.PNG
    20.1 KB · Views: 224
Last edited:
To avoid these ads, REGISTER NOW!

rd65

Well-known member
Joined
Sep 29, 2017
Messages
2,756
Location
Granite Falls, WA
You didnt say how high your ceiling is, mine are 10'. I installed this shelf (on the right) for bin storage. I believe it is 16' long, the wall side is fastened to the wall and the front is hung with chain mounted through 2x4's that were hung between the trusses. It is a pole building so along the side the space between the trusses is only about 4', you can see the beams along the back wall.
IMG_20180919_193058096OverheadStorage.jpg
 
OP
8

8Line

Well-known member
Joined
Jan 26, 2023
Messages
64
Location
South Side of Houston
You didnt say how high your ceiling is, mine are 10'. I installed this shelf (on the right) for bin storage. I believe it is 16' long, the wall side is fastened to the wall and the front is hung with chain mounted through 2x4's that were hung between the trusses. It is a pole building so along the side the space between the trusses is only about 4', you can see the beams along the back wall.
thats a great idea! thanks. I see the beams you mentioned.
 
OP
8

8Line

Well-known member
Joined
Jan 26, 2023
Messages
64
Location
South Side of Houston
I also forgot to mention that the new build home is required by code, to come equipped with wind/storm shutters/boards that can be affixed to the first-floor windows. In reality we will probably never use them but the builder is required to provide them as part of the home.

So I have about 20 sheets of plywood in the garage of various sizes, all pre-drilled to mate up to the anchor points on the house around each of the windows. They take up a lot of space so will need to figure something out (thinking above the garage doors? theres not too much room there anyway so laying them flat might just be perfect.)
 

CraigStu

Well-known member
Joined
May 22, 2014
Messages
4,026
Location
Blacksburg, Va
Just be careful of the weight. Most homes have garage trusses that are not spec'd for storage. Millions of us store stuff up there anyway. But the weight of sheets of plywood can ad up quickly. Two houses ago we had shelves like rd65's and they worked very well. Also on one wall I grabbed 6 kitchen cabinets on sale and screwed them to the wall in two rows of 3. Bottom was far enough off the wall to put plastic totes like rd65's under them. They were about 15inches wide so only stuck out from the wall about 3 inches more than the cabinets. I also left about 6 inches gap between the lower cabinets and uppers. That turned out be real nice for storing long skinny stuff.
 
OP
8

8Line

Well-known member
Joined
Jan 26, 2023
Messages
64
Location
South Side of Houston
Just be careful of the weight. Most homes have garage trusses that are not spec'd for storage. Millions of us store stuff up there anyway. But the weight of sheets of plywood can ad up quickly. Two houses ago we had shelves like rd65's and they worked very well. Also on one wall I grabbed 6 kitchen cabinets on sale and screwed them to the wall in two rows of 3. Bottom was far enough off the wall to put plastic totes like rd65's under them. They were about 15inches wide so only stuck out from the wall about 3 inches more than the cabinets. I also left about 6 inches gap between the lower cabinets and uppers. That turned out be real nice for storing long skinny stuff.
interesting. I do have direct access to the space above the garage (pictures will come as soon as we move in). so maybe able to turn that into storage for items used once/year.

thanks!
 
OP
8

8Line

Well-known member
Joined
Jan 26, 2023
Messages
64
Location
South Side of Houston
After talking with an engineer buddy of mine he said use the workspace as a workspace! meaning don't cut the already narrow (9ft wide) 3rd car location even more narrow! Instead use the back wall for bin and material storage as well as my shelving system I already own. I also added the vehicles to occupy space.
 

Attachments

  • Garage floor plan.PNG
    Garage floor plan.PNG
    20.1 KB · Views: 161

bb29510

Well-known member
Joined
Dec 27, 2022
Messages
1,216
garage layout, open floor plan, push everything in and slam door
 
OP
8

8Line

Well-known member
Joined
Jan 26, 2023
Messages
64
Location
South Side of Houston
Our neighbor happens to be our best friends and they have a near identical garage floorplan as we do. So had the chance to take a look at the lighting, and its definitely in need for upgrade! I'm not an electrical engineer, I'm Mechanical, but understand enough that I don't mess with it too much haha.

Currently there are 4in single bulbs, two of them, overhead in the work area. They don't provide enough lighting and figure two 4ft shop lights would be perfect replacements. I would prefer if they utilized the bulb outlet that's already there. Is there any insight to what kind of lights will plug in to the socket the single bulbs currently use?
 

Attachments

  • Garage floor plan.PNG
    Garage floor plan.PNG
    21 KB · Views: 144

Mike65

Well-known member
Joined
Mar 7, 2007
Messages
3,048
Location
Horse Pasture, Va.
We put up a 24'x25' garage last year we use to store my 69 Mustang & my wife's 2006 Vulcan motorcycle. I put the workbench, tool box, air compressor, the welder, & a roller cart across the back of the garage & have some storage shelves on each side. We installed 4 LED screw in lights in the ceiling outlets, & 2 on each side 4' LED shop lights. The LED lights make the garage very bright inside. These are the style screw in lights we used.
These are the style light we used on the sides.
100_1933.JPG
 
OP
8

8Line

Well-known member
Joined
Jan 26, 2023
Messages
64
Location
South Side of Houston
We put up a 24'x25' garage last year we use to store my 69 Mustang & my wife's 2006 Vulcan motorcycle. I put the workbench, tool box, air compressor, the welder, & a roller cart across the back of the garage & have some storage shelves on each side. We installed 4 LED screw in lights in the ceiling outlets, & 2 on each side 4' LED shop lights. The LED lights make the garage very bright inside. These are the style screw in lights we used.
These are the style light we used on the sides.
100_1933.JPG
First off, lets see that mustang!

I did see those LED style lights, my only gripe with them is they are a single point (mostly) light source. Meaning if I stand between it and what i'm working on i'll cast a mighty shadow. So looking for something like the 4ft lights to spread out the light source, but have a wire that screws into the light plug thats already installed in the ceiling, something like these
Light adapter
 

stubbsrodandcustom

Well-known member
Joined
Aug 30, 2012
Messages
70
I would get a 72" harbor freight us general tool box and shove it all the way to the back and use that top as a workbench if you want. Then do overhead cabinets or bin storage above that, if you do cabinets you can get lights under to help etc. You can have workbench on the right wall in that third car area, this will give you ability to store under it and above, A horizontal compressor will work well under a bench. Lighting is all another quest, but trying to get a good layout for you, I would put outlets everywhere in that back area also to keep it a designated workspace. I knew a guy who had a garage like that and he had all his boxes and bench back there and kept his drivers in the spots yours are, it also gave him floor room to pull a motor or trans if needed and room for a engine stand etc. By the deep freeze you may look into getting a cabinet above that, and possibly a narrow one beside it to help get more storage. Ikea has some cheap cabinets that you have to assemble but mine are 10 years old and still work great.
 

Theruse

Well-known member
Joined
Aug 12, 2012
Messages
341
Location
Maryland
A few electrical suggestions. In my new 25x25 I used three of LED tri lights above the work area and another three near the rear (front/rear separately switched) . I also installed three outlets on the ceiling for drop down corded worklight and for me 240v for my lift on either side ( so I can move lift left or right. On the workbench wall, I would recommend as many two outlets as possible every 4' with the left side of the outlet on one circuit and the right side on another circuit all about 12 inches above the workbench height. Also, one or two outlets below the workbench for items like shop vacs, etc. If you plan on using a welder or another 240v device include a few there as well. I see you have a compressor. I have a switch near my side entrance door to turn the compressor on/off. Not sure of your ceiling height, but a ceiling fan helps if you don't have A/C or heat in the garage. BTW, Costco sells two LED tri-lights for $29.99. I wound up buying more for my basement workshop and utility room.
 

nadogail

Well-known member
Joined
Jan 23, 2009
Messages
31,940
Location
Coronado, CA
It is much easier to delete or simply unscrew excess lighting than it is to add more lighting that was calculated to be "good enough". but wasn't.
 

stubbsrodandcustom

Well-known member
Joined
Aug 30, 2012
Messages
70
Man don't mess with T8 fixtures. t5 for real fluorescents is a huge improvement in light, I got rid of my 8' quad t5 due to having the monster LEDs in and it was as much light as my led 8' put out so very good piece for sure. If you have the extra $ the 8' led linkable. I have 16' of light on each side of my garage just wiring into existing wiring.

You can remove the fixtures from the boxes get a block plate with a hole in it for wiring penetration and not do plug in lighting here and make it clean all working off the light switch if your not worried about making lighting zones. Personally the plug in lighting looks cheap to me, and normally anyone who does it changes it out to hardwired for more lighting. You have alot of length for sure on that one side, you could split with one 8' in the work area, and then 3 more 8' in vehicle area. One on the right, 1 in middle between the rides, and other on the left. The two close to wall space them about 2' off to keep lighting good, or Mount them on a angle at roof line for max lighting usage on the sides if you plan on ever doing any detail work. Here is how bright my garage is, 8.5' celing, so I went with diffused lights to help spread the love. Side note, normally the rafters run side to side in our garages due to construction, so running romex above the drywall is super easy if not insulated for lighting additions.

My fixtures here were 80 a piece when I got them, They are 2 4' in one fixture.

I guess my question is what is the main goals for your shop? little of everything? How good are your eyes? Some folks need light, some are good with minimal.
 

Attachments

  • garage4.jpg
    garage4.jpg
    874.5 KB · Views: 131
  • garage13.jpg
    garage13.jpg
    862.9 KB · Views: 129
To avoid these ads, REGISTER NOW!
OP
8

8Line

Well-known member
Joined
Jan 26, 2023
Messages
64
Location
South Side of Houston
I like the title. How high do you want to go?
I'm looking for above average, but not production quality. I tinker and love working in my current garage.

Man don't mess with T8 fixtures. t5 for real fluorescents is a huge improvement in light, I got rid of my 8' quad t5 due to having the monster LEDs in and it was as much light as my led 8' put out so very good piece for sure. If you have the extra $ the 8' led linkable. I have 16' of light on each side of my garage just wiring into existing wiring.

You can remove the fixtures from the boxes get a block plate with a hole in it for wiring penetration and not do plug in lighting here and make it clean all working off the light switch if your not worried about making lighting zones. Personally the plug in lighting looks cheap to me, and normally anyone who does it changes it out to hardwired for more lighting. You have alot of length for sure on that one side, you could split with one 8' in the work area, and then 3 more 8' in vehicle area. One on the right, 1 in middle between the rides, and other on the left. The two close to wall space them about 2' off to keep lighting good, or Mount them on a angle at roof line for max lighting usage on the sides if you plan on ever doing any detail work. Here is how bright my garage is, 8.5' celing, so I went with diffused lights to help spread the love. Side note, normally the rafters run side to side in our garages due to construction, so running romex above the drywall is super easy if not insulated for lighting additions.

My fixtures here were 80 a piece when I got them, They are 2 4' in one fixture.

I guess my question is what is the main goals for your shop? little of everything? How good are your eyes? Some folks need light, some are good with minimal.

T5 vs T8....something new for me to google!
I'm very open to LED lights, the ones that snap to each other seem interesting. and bit more customizable.
Eyes are good. I just dont want to cast a shadow in front of me.
 
OP
8

8Line

Well-known member
Joined
Jan 26, 2023
Messages
64
Location
South Side of Houston
SOOOO, was back at the new house this weekend to unload our cars of a few boxes, and looked at the ceiling again. I only have two lights for the ENTIRE garage! photos attached. This has to change once we are moved in and may change which fixtures I elect to install. maybe back to something that clips together...?

One light over the third spot/work area, and one light next to the garage door opener. I've also added the above garage attic access door and light switch to my little diagram (lights are little yellow circles, attic switch is orange square). Running the power shouldn't be difficult given the easily accessible and broad space above the garage but would like to avoid as many holes in the ceiling as possible.
 

Attachments

  • Capture.PNG
    Capture.PNG
    20.8 KB · Views: 133
  • IMG_9451.jpg
    IMG_9451.jpg
    365 KB · Views: 116
  • IMG_9452.jpg
    IMG_9452.jpg
    292.3 KB · Views: 149
OP
8

8Line

Well-known member
Joined
Jan 26, 2023
Messages
64
Location
South Side of Houston
I would consider running 3 lights parallel with the vehicles instead two over the top of them
something like this then.

The garage door does come up and would block any lights above it. I do also plan to add storage racks above the garage door too so that would prohibit lights above the garage door in general. (also need to consider pulling bins off the storage racks and being certain I wont hit any lights when doing so...)


1676303262567.png
 
Last edited:
OP
8

8Line

Well-known member
Joined
Jan 26, 2023
Messages
64
Location
South Side of Houston

stubbsrodandcustom

Well-known member
Joined
Aug 30, 2012
Messages
70
On the front portion I would do the two 4foot end to end to cut down on wiring or do a single 8 ft there. Te 3 over the vehicles, I would spread the outside 2 a bit further outside to get a better shower of light on engine bays etc.
 

CraigStu

Well-known member
Joined
May 22, 2014
Messages
4,026
Location
Blacksburg, Va
One other thing to think about is which way the trusses run. If no insulation in the ceiling it is pretty easy to run a supply wire along the top of the drywall between the trusses. The 4 foot LED lights in my garage have a small maybe 2 inch hole in the drywall to run the wire through and the lights are held up w/ some kind of molly screw into the drywall. They are so light that nearly any of the plastic expanding things will work.
The nice thing about LEDs is the low current draw. Your existing wiring can probably be used to add 3-4-5 LED lights onto each of the bulbs you already have installed.
 
OP
8

8Line

Well-known member
Joined
Jan 26, 2023
Messages
64
Location
South Side of Houston
On the front portion I would do the two 4foot end to end to cut down on wiring or do a single 8 ft there. Te 3 over the vehicles, I would spread the outside 2 a bit further outside to get a better shower of light on engine bays etc.
I have installed underhood automatic lighting on my 4runner :cool:. turns on when I open the hood. Its a full string of LEDs under the hood and lights it all up. its magical! I'll find a pic later.

but certainly want to maximize the lighting I have. possibly even go to four lights next to the garage door.
 
OP
8

8Line

Well-known member
Joined
Jan 26, 2023
Messages
64
Location
South Side of Houston
One other thing to think about is which way the trusses run. If no insulation in the ceiling it is pretty easy to run a supply wire along the top of the drywall between the trusses. The 4 foot LED lights in my garage have a small maybe 2 inch hole in the drywall to run the wire through and the lights are held up w/ some kind of molly screw into the drywall. They are so light that nearly any of the plastic expanding things will work.
The nice thing about LEDs is the low current draw. Your existing wiring can probably be used to add 3-4-5 LED lights onto each of the bulbs you already have installed.
I do have access up there quite easily. and didnt know I could put more LEDs in series, thats very good to know. thanks!
 

gahrajmahal

Well-known member
Joined
Dec 12, 2008
Messages
2,527
Location
Cincinnati, Ohio
Our home has an attached two car garage and two cars in residence indoors year round. We do not have the luxury additional space you have on the one side (lucky you!). Don’t get too hung up on permanently installed lighting. Over the years you live there your layout will evolve as your interests change. When I want to work on something, ie. Brake job, everything in our garage is on wheels so it can be easily moved out of the way, into the driveway if needed, to give space to work indoors, or more often, tools move outdoors to work in the driveway.

Nice cart your motorcycle is mounted on!

One nice feature we made is to have all shovels, brooms wall mounted right by the garage door opening so we aren’t banging on the cars retrieving them from in front of the cars or leaning against the wall somewhere.
 
OP
8

8Line

Well-known member
Joined
Jan 26, 2023
Messages
64
Location
South Side of Houston
Hi all! i'm back and ready for action! the move into the new house was a mess. boxes in all teh wrong rooms and they unpacked a bunch of stuff we didnt need unpacked....so not that that is sorted. I have made my way into the garage. first thing first is the overhead storage racks I pulled from the old house.

I have a question about the lag screws that go into the wall. They measure 2-1/2" in length, and the shaft is 1/4" (not the thread width). pic below. Should I use a pilot hole for these? if so what size would yall recommend?

IMG_9603.jpg

Hoping to get the first rack up this weekend. thanks!
 

LeeG

Well-known member
Joined
Nov 29, 2012
Messages
1,525
Location
Phoenix, AZ
Hi all! i'm back and ready for action! the move into the new house was a mess. boxes in all teh wrong rooms and they unpacked a bunch of stuff we didnt need unpacked....so not that that is sorted. I have made my way into the garage. first thing first is the overhead storage racks I pulled from the old house.

I have a question about the lag screws that go into the wall. They measure 2-1/2" in length, and the shaft is 1/4" (not the thread width). pic below. Should I use a pilot hole for these? if so what size would yall recommend?

IMG_9603.jpg

Hoping to get the first rack up this weekend. thanks!
First of all, don't use those. Get a Spax or GRK construction lag screw instead.
If you have to use that style of lag, pre drill, then apply some bar soap or wax to the threads as you drive them in. Don't over drive them as they will snap, then you are probably not going to be able to use that location again. Drill the pilot about 5/32 or so.

You don't need pilot holes with the Spax or GRK screws. Use them if you can.

Lee
 
OP
8

8Line

Well-known member
Joined
Jan 26, 2023
Messages
64
Location
South Side of Houston
First of all, don't use those. Get a Spax or GRK construction lag screw instead.
If you have to use that style of lag, pre drill, then apply some bar soap or wax to the threads as you drive them in. Don't over drive them as they will snap, then you are probably not going to be able to use that location again. Drill the pilot about 5/32 or so.

You don't need pilot holes with the Spax or GRK screws. Use them if you can.

Lee

Hmm, interesting. figured these more stout lags would have been the more load bearing method.
Would the Spax or GRK screws manage the load appropriately?
The design of this rack, uses two of these lags per bracket, 4 brackets per rack. 3 of the brackets are wall mounted and the 4th is mounted to the ceiling.

thanks!
 

LeeG

Well-known member
Joined
Nov 29, 2012
Messages
1,525
Location
Phoenix, AZ
Hmm, interesting. figured these more stout lags would have been the more load bearing method.
Would the Spax or GRK screws manage the load appropriately?
The design of this rack, uses two of these lags per bracket, 4 brackets per rack. 3 of the brackets are wall mounted and the 4th is mounted to the ceiling.

thanks!

These are made with a much better grade of steel than the standard lag screws - think Grade 5 vs Grade 2. I don't think I've ever snapped off a GRK or Spax lag. You should be able to swap them 1:1 with the current screws and still be stronger.
 
OP
8

8Line

Well-known member
Joined
Jan 26, 2023
Messages
64
Location
South Side of Houston

These are made with a much better grade of steel than the standard lag screws - think Grade 5 vs Grade 2. I don't think I've ever snapped off a GRK or Spax lag. You should be able to swap them 1:1 with the current screws and still be stronger.
much appreciated! i'll pick some up at home depot today. stick with the same length as the lag screw? they were 2.5" long
 
OP
8

8Line

Well-known member
Joined
Jan 26, 2023
Messages
64
Location
South Side of Houston
I usually go 3”. 1/4” for the bracket 5/8” for drywall, then rest into the stud.
ah this is good info. now I know for future how to look at screw length.

These brackets are 1/16" thick at the wall mount. They do have maybe a 3/8" hole for the screws though. Think washers would be recommended? or just start the screw through the bracket, then rest the bracket down on to hte screw and then screw it in all the way?

I ended up stopping at home depot yesterday and picked up these. They did not have SPAX or GPK on the shelf.
1678890109665.png
 
OP
8

8Line

Well-known member
Joined
Jan 26, 2023
Messages
64
Location
South Side of Houston
Well, its been a while. Have been dealing with sprinkler system and alarm system issues for a while now but managed to install one celing rack above the garage door. I'll try and catch some photos when I do the second one.

Also managed to move the 30 plywood sheets the builders left for us out of the 3rd car bay of the garage and slide my workbench and shelving in. before and after pics below. Where is the bench is makes the bay seem very skinny. I measured it out and will probably move it against the back wall to the right of the shelving up against that wall outlet and then roll my little art cart to the right of the bench. Just have to move about 90 bricks, car jack, jack stands, snowboard, rug, weedeater and all my vehicle tools out of the way first haha. Then it all needs to be unpacked! (I'm defining the term slow-and-steady on this one...)

ImageImage
 
To avoid these ads, REGISTER NOW!
Top Bottom