To avoid these ads, REGISTER NOW!

Help removing garage door spring

LSVLance

Well-known member
Joined
Jul 17, 2010
Messages
298
Location
Peoria, AZ
So I am going to do a little remodel project on the back of my outbuilding and part of it requires the removal of my 10' x 10' garage door and tracks. The door has the wall mounted spring that helps to raise the door. (can't remember what they are called officially).

Can anyone give any helpful tips or tricks to use when removing said spring?

This is the best picture I have handy of the door in question

Outbuildingbeforefoama-1.jpg


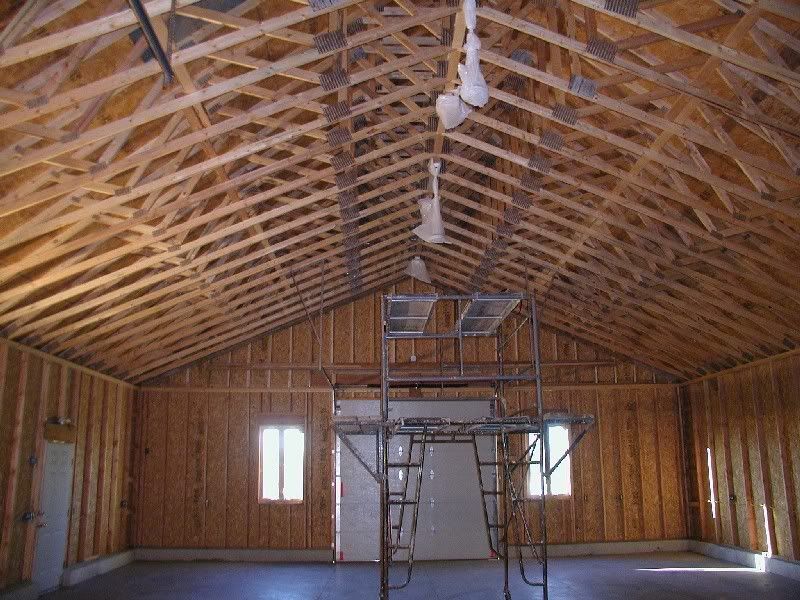
I am probably going to sell the door, tracks, spring and opener so I'd like to dismantle it without destroying it (or killing myself) if possible.

Thanks in advance for any help you can give.
 
To avoid these ads, REGISTER NOW!
OP
L

LSVLance

Well-known member
Joined
Jul 17, 2010
Messages
298
Location
Peoria, AZ
I just found this video on you tube


I think that gives me a general idea...need to look at the spring itself closer to see exactly what kind of stock I'll need for the bars to use when loosening the springs.
 

samert111

Well-known member
Joined
Feb 28, 2010
Messages
185
Location
Rockford, Mi
These are called Torsion Springs and can hurt you bad if you do not know what you are doing.

I use 2 long (18"-24") 3/8' ratchet extensions to unwind the springs. The round aluminum spring holder on the outer end of the springs has 2 set screws that keep it from spinning on the shaft and 4 holes 90 degrees apart for the ratchet extensions to go into for winding and unwinding it.

First open the door all the way so the spring is un-wound and take a pc of white chalk and draw a straight line the length of the springs. Then close and latch the door and count the number of chalk lines wound around the spring and write that down. It should be the same number for both springs give or take a 1/4 turn. The original installer may have used the chalk method when he installed them since they usually know approx. how many winds it takes for each size door.

Take a pair of Vice Grips and clamp it on the spring shaft with the handle up and against the wall or door header. This will keep the shaft from rotating and the lift cables from unwinding off the drums once you unwind the springs.

Take a permanent marker and draw line on the spring holder down onto the shaft so when you rewind it you get it back exactly where it was once your # of chalk lines is reached.

While standing off to one side or the other of the spring holder on your ladder, put one of the extensions in the spring holder hole at approx. 6 o’clock. When the set screws are loosened, both of the spring holders are going to want to rotate clockwise when looking at them from the left side of the door as shown in your photo.

While pulling out slightly on the extension, loosen the 2 set screws and you will feel the spring start to pull the end of the extension towards the door. Let the door stop the extension and then put the other ratchet extension in the hole at the 3 o’clock position and lift slightly to pull the 1st extension away from the door, remove it and allow the spring to rotate until the 2nd extension rests against the door. Repeat this process until the spring is completely un-wound. Work in 1/4 turn increments until you feel comfortable with what you’re doing and the spring get's looser. Repeat process on the other spring. Reverse process to wind them back up.

If you need to remove the cable drums from the shaft, make a line on the drum hub down onto the shaft for alignment when you put it all back together.

Good Luck and remember to stand to one side or the other while unwinding and rewinding the springs. If you slip and the spring lets loose you might bust a knuckle but at least you will still have all your teeth.

On edit: I've seen some newer style torsion spring setups that are completely different so everything I've written above may not apply if you have one of the newer style setups.
 
Last edited:
OP
L

LSVLance

Well-known member
Joined
Jul 17, 2010
Messages
298
Location
Peoria, AZ
Thank you so much, that helps a ton.

I can see how making the marks will certainly help the re-installation of the door at it's new home.

I'll have to look tonight to see what tool I need to turn the spring holder. Hopefully a 3/8s extension will work as I have plenty of those.

And I promise to be careful. I remember the noise made when a spring broke on a garage door at my Dad's house one night... We thought the whole garage had blown up.

Thanks again.
Lance
 

Falcon67

Well-known member
Joined
Jun 11, 2009
Messages
18,371
Location
Merkel, TX
The instructions that came with my Clopay door require 1/2" cold roll steel bars 18" long. You will want to find and read the manual for your door, but I'll bet 1/2" is the bar size. You will have to catch one hole in the spring winder with a bar, loosen the (usually two) set screws and unwind with the bar moving down 1/4 turn at a time. Your manual will tell you how many turns on each side were required to balance the door - look for that to get an idea. 10x10 probably 6-9 turns per side. Count so you can put it back like it was. Be damn careful - one bar in, turn down, insert other bar, hold, remove first bar, turn down, repeat. Be on a steady footing and do NOT let go. There is a TREMENDOUS amount of energy stored in those springs. Make sure you are ready because once you get a couple of turns off, you will not be able to move your door. Based on what it took to do my door (16x7, 7 3/4 turns per side) I would not use a 3/8 extension bar - it's too light. If it slips out, you could be really sorry.

Also - the springs are unique to each side, so once the tension is off I'd remove the bar, mount, pulleys and springs as an assembly.
 
Last edited:

samert111

Well-known member
Joined
Feb 28, 2010
Messages
185
Location
Rockford, Mi
I just looked at your garage build thread and see your building was put up in 2001 so your setup should be the same as mine and the instructions I wrote should apply.

Nice setup you have there.

I've just finished insulating, put up a steel ceiling, OSB on the walls and starting to paint the walls but a 2 post lift is the next big ticket item on my list to get.

What model lift did you go with?

I really would like a Bendpak but they are about $1K more than the Atlas models. Is that from Greg Smith Sales?
 

58Yeoman

Well-known member
Joined
Oct 1, 2010
Messages
8,999
Location
Central IL
I built a Menard's garage back in '99, and the torsion spring that came with my door had an attachment where you would connect a reversible drill. The spring already had a white line painted on it, and you would wind up the spring with the drill until you had the right amount of white lines on the spring. Later, when i had to do work on the door, I just repeated the procedure. You might want to check to see if your new door spring is set up that way. Way more safer than using bars.
 

srmofo

Well-known member
Joined
Oct 15, 2009
Messages
6,161
Location
SW ohio
Personally I would skip the extensions and go buy some rod stock. My springs have 1/2, 9/16 holes alternating. If you have the original instructions they usually give you a estimated numberof turns. Some springs also come with a line on them un wound and you can count the marks. although if you are not planning on re installing then just un wind them slowly and cal it a day.
 

Zeke

Well-known member
Joined
Aug 13, 2009
Messages
17,176
Location
Long Beach CA, the sewer by the sea.
Using something that doesn't fit the holes really well like rebar is how people get hurt. If you make a mess of those holes and don't seat the bar all the way down each time, you should make sure your life insurance policy is up to date.

Seriously. There are several deaths each year attributed to this.
 

upndown

Well-known member
Joined
Dec 5, 2010
Messages
3,107
Location
Desert Hills/Peeples Valley AZ.
I wouldn't use rebar!!! wrong dia.& soft steel = recipe for disaster. good step ladder, 7/16 wrench,clean dry hands..no gloves, your good to go. see if you can get bar into bottom hole and rest against top section of door,loosen set screws,tension will be against lower bar. grab lower bar,insert 2nd bar in hole above and lift slightly bottom bar will slip out, lower 2nd bar to top section.. repeat till spring is limp...rule of thumb is 1 turn per foot height of door. good luck!!!
 
OP
L

LSVLance

Well-known member
Joined
Jul 17, 2010
Messages
298
Location
Peoria, AZ
I just looked at your garage build thread and see your building was put up in 2001 so your setup should be the same as mine and the instructions I wrote should apply.

Nice setup you have there.

I've just finished insulating, put up a steel ceiling, OSB on the walls and starting to paint the walls but a 2 post lift is the next big ticket item on my list to get.

What model lift did you go with?

I really would like a Bendpak but they are about $1K more than the Atlas models. Is that from Greg Smith Sales?


Thanks for the instructions and advice. Thanks to everyone for the advice and help.

I feel both ready to take this on myself...and scared to...at the same time. But it has to be done.


My lift is an Atlas OH-10X from Greg Smith Equipment

http://www.gregsmithequipment.com/Atlas-OH-10X-EXTRA-WIDE-EXTRA-TALL

I'm very happy with it.
 
OP
L

LSVLance

Well-known member
Joined
Jul 17, 2010
Messages
298
Location
Peoria, AZ
I am busy planning the rest of my project so I'm not ready to dive into this just yet, I need to be ready to plug the 10 x 10 hole once I start disassembling the door.

Will probably be starting in the next 2 weeks or so though.

One other question? What is an insulated aluminum 10 x 10 door, the hardware, and a 1\2 hp opener worth as far as resale value. The door is in perfect shape, it's hardly ever even been used (hence my plan to take it out). I've even got a remote for the opener.

I need to recoup a little bit of cash from it to help[ fund the new project. Any ideas what I should ask?

Thanks for all the help,
Lance
 

Shadowdog500

Well-known member
Joined
Dec 7, 2009
Messages
9,850
Location
Down the shore
Find out what size bars (diameter and length) are needed for your door. The cable on my 14'x14 door became bird nested last year and, even though i installed my residential garage door, there was no way I was going to mess with the springs that hold up an 800lb door while on a ladder 14' up in the air. The guy from the door company brought much longer bars and the torque was so high near the end that he had to take breaks after each bar.

Be safe,

Chris
 

samert111

Well-known member
Joined
Feb 28, 2010
Messages
185
Location
Rockford, Mi
One other question? What is an insulated aluminum 10 x 10 door, the hardware, and a 1\2 hp opener worth as far as resale value. The door is in perfect shape, it's hardly ever even been used (hence my plan to take it out). I've even got a remote for the opener.

I need to recoup a little bit of cash from it to help[ fund the new project. Any ideas what I should ask?

I sold my insulated 10 x 12 Wayne Dalton door (no opener) for $450 on Craigslist. It was 12 years old in perfect shape but too small for the new RV. New it cost $1200. Was asking $650 then redused it to $500 and settled for $450.
 
To avoid these ads, REGISTER NOW!

Kevin54

MEMBER EMERITUS
Joined
Jan 12, 2005
Messages
29,341
Location
Urbana, Ohio
You have an advantage, you can get above the spring without working under it. As everyone stated, use common sense and you'll be fine. Put the bar in the hole, add tension, slowly loosen the square head bolt on the hub and slowly let the bar go down against the header and stop. Put the next bar in and remove first bar.

If you are going to put another style of door on, why not just let the installers do it all?
 
OP
L

LSVLance

Well-known member
Joined
Jul 17, 2010
Messages
298
Location
Peoria, AZ
Very good read...thanks for posting the link.

I feel much more comfortable about doing this now. I've also decided to acquire and use the proper 1\2" steel rods as winding bars and to tape them to make sure they are fully seated every time.
 

p_mori7

Well-known member
Joined
Mar 23, 2010
Messages
3,340
Location
Montreal, QC., Canada
I tried the long ratchet extentions when installing my door...DANGEROUS.

I tried the rebar...DANGEROUS.

I went to the hardware store and bought some 1/2" round stock, 18" long...PERFECT.

There is a lot of pent-up energy in that spring...BE VERY CAREFUL.

A door like that with all the trimmings would sell easily for $750 up here.
 

Kevin54

MEMBER EMERITUS
Joined
Jan 12, 2005
Messages
29,341
Location
Urbana, Ohio
I am busy planning the rest of my project so I'm not ready to dive into this just yet, I need to be ready to plug the 10 x 10 hole once I start disassembling the door.

Will probably be starting in the next 2 weeks or so though.

One other question? What is an insulated aluminum 10 x 10 door, the hardware, and a 1\2 hp opener worth as far as resale value. The door is in perfect shape, it's hardly ever even been used (hence my plan to take it out). I've even got a remote for the opener.

I need to recoup a little bit of cash from it to help[ fund the new project. Any ideas what I should ask?

Thanks for all the help,
Lance

In my area, you can easily get $500 for the door and opener IF the door is insulated, which it looks like it is. $400-$450 if not insulated.

Maybe knock $50 off the price and sell it for $450 if the buyer removes it himself. Just a thought.
 
OP
L

LSVLance

Well-known member
Joined
Jul 17, 2010
Messages
298
Location
Peoria, AZ
Probably not the best place to list it, but what the heck... Iv'e got it on my local craigslist and will put it up on a few other forums I frequent as well. IF you or anyone you know is looking for a nice 10x10 insulated garage door with all the trimmings, let me know.

I'm changing up the back of my outbuilding and this means my garage door has to go. Its about 10 years old but has hardly ever been used (hence why it's going away). It comes with everything needed to re-install in your opening including the tracks, torsion spring setup and even a LiftMaster 1\2 hp opener.


I haven't started my project yet, so it hasn't been removed. I need to time the removal carefully as I'll need to be able to frame back in the hole left at the same time, but I thought I'd go ahead and list it for sale now and see if anyone is interested in the door.


If everything else goes to plan, it should be ready to come out in a week or two. Anyway, here is some pictures of it.


The opener will work from remote, but one won't come with it. The door sensors and wall switch will come with it though (minus the wire).


Please respond via email if you are interested in this door so we can work out the details. lbt at attglobal dot net


I'm looking to get $1000 for everything but am negotiable (willingness to help remove said door when the time comes for partial payment also an idea).


Thanks,

Lance
 
OP
L

LSVLance

Well-known member
Joined
Jul 17, 2010
Messages
298
Location
Peoria, AZ
Removal of the spring actually went very well, along with the removal of the rest of the door. Thanks to everyone for all of the help.

I really think having the 2 half inch steel rods with tape on them to mark that they were fully seated every quarter turn really helped.
 

gmein

Active member
Joined
Dec 27, 2011
Messages
42
Location
Californias Central Valley
Use any tool that will help. There is a lot of energy in the spring as has been pointed out. I do these all the time. I use Vise Grips, pipe wrenches of various sizes, rod stock to push/pull casting in either direction. Do not work fast here, at ten feet off the ground you are already compromised, your safety is of the utmost importance. Kind of like airing up your bicycle tire at the gas station with out a guage or knowledge ????? Watch out for your, head, eyes, front teeth and fingers.. My friend, a 40 year veteran of over the road truck driving just came back from a trip to the mid west. A rubber snubber broke while tarping some drill stem. His head was black and blue and minus two front teeth, just a little rubber snubber with a helluva lot of energy! Careful
 

jstroede

Well-known member
Joined
Oct 28, 2010
Messages
1,082
Location
Kansas City
I used to work for the company that made that door. Unfortunately they are no longer in business. It is a 1 3/8" thick insulated door with polystyrene insulation. There is something very wrong with that installation though. Where the operator is mounted to the door, there is absolutely nothing behind it structurally to attach to. Basically that operator is screwed to a piece of 27 gauge steel. That door must have been sprung pretty well or it would have ripped it off long ago. That should be addressed before any reinstallation for sure.

John
 
OP
L

LSVLance

Well-known member
Joined
Jul 17, 2010
Messages
298
Location
Peoria, AZ
It was actually though bolted to the door, not screwed...but you are right about it being sprung correctly. The nuts on the bolts holding the operator to the door were barely finger tight yet it went up and down just a smooth as soil up until the day we took it down.

What was the name of that company? Raynor? I'm trying to remember and that's the only name that comes to mind.

If you know of anyone in town looking for a 10x10 door, it's still for sale.

Thanks,
Lance
 

jstroede

Well-known member
Joined
Oct 28, 2010
Messages
1,082
Location
Kansas City
Ankmar Door was the manufacturer, located down off of 635 and Kansas Ave.

I have no clue why the installed it that way. There is no reason or really a desire to thru-bolt a steel garage door like that. There is nothing in there to tighten it against, so that is why it was just finger tight.

John
 
OP
L

LSVLance

Well-known member
Joined
Jul 17, 2010
Messages
298
Location
Peoria, AZ
Just curious then...how should the operator have been attached to this style of door?

I've got the same type of door on the front of my shop and it is attached in the same manner.
 

calven

Well-known member
Joined
Sep 18, 2011
Messages
54
Location
Indiana
Just curious then...how should the operator have been attached to this style of door?

I've got the same type of door on the front of my shop and it is attached in the same manner.


You definitely want to use a "adjustable operator reinforcement bracket" . It creates a solid foundation for the operator arm to connect to the door. Without that bracket you run the risk of damaging the top section of the door by putting too much stress in a small area. This bracket basically spreads the weight load across a larger area. They cost $15-$20 on the internet.

The springs do most of the lifting of a garage door (80-90%). As long as they are installed correctly and the "J" arm is set at the right angle you should have no problems. It is still always a good idea to use a rebracket on the top section along with a strut that goes across the entire width of the door at the very top...

$1000 is very high for a used 10x10. You may want to consider something a little lower :)
 
Last edited:
OP
L

LSVLance

Well-known member
Joined
Jul 17, 2010
Messages
298
Location
Peoria, AZ
Thanks for the advice on the attachment method, I'll check that out.

I've dropped the price to $800 and that includes the operator. Any idea on what the operator would be worth all on it's own?
 

kevinb70

New member
Joined
Jun 26, 2011
Messages
3
I have no experiance and just installed one last month using this site:(I made my own bars)
http://www.truetex.com/garage.htm

Used this site as well, right after I bought this house a couple years ago. Good read.

For those of you searching the forums: for about $6 you can get a 36" 1/2" solid steel rod from HD (#725664). They had it 2 years ago and still carry it as of 2012...

Used 2 bathroom scales to weigh the doors at rest without the spring, and using the spreadsheets, figured how many winds each spring needed to balance out the dead weight on each side. Got it pretty much spot on!

As the spring broke, I also had to straighten the rails, and was happy the chain drive opener was demolished as I put in a quiet belt drive

Rule 1: Be Careful!
 
Last edited:
To avoid these ads, REGISTER NOW!
Top Bottom