

All because the woman didn't like the color.
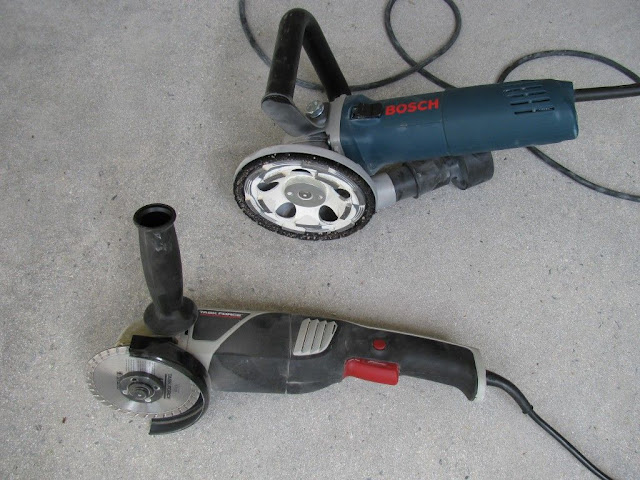
It took probably 35 hours of grinding to get the old stuff up. The Bosch 1773 concrete grinder was the workhorse of the operation. It was abused and kept on going. There wasn't anything tough about it except for the calices on my knees. An angle grinder with a concrete blade helped get around the bull nosed edges.
Out with the old.

Grinders.
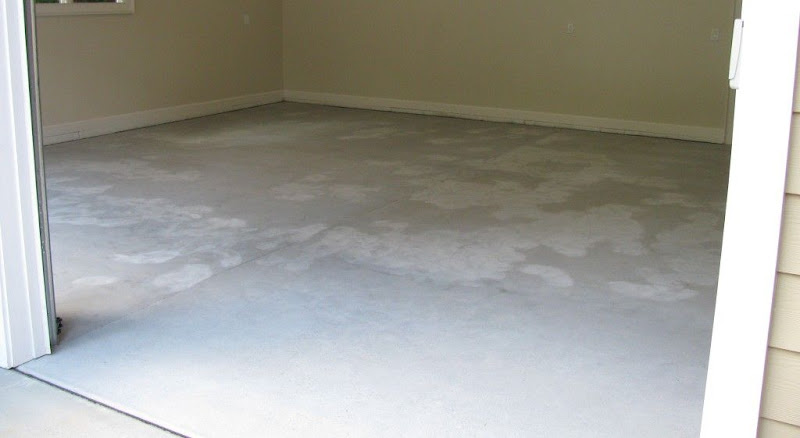
Next up was etching. Probably wasn't necessary but I wanted the surface as rough as possible. After a trip to the big box I came home with one of those environmentally safe etchers. Probably was a waste of time as I dragged out the grinder again to get a few spots. Muriatic acid is nasty but at least it gets the job done.
Rough and ready.
Lighter spots are where I went back with the grinder.
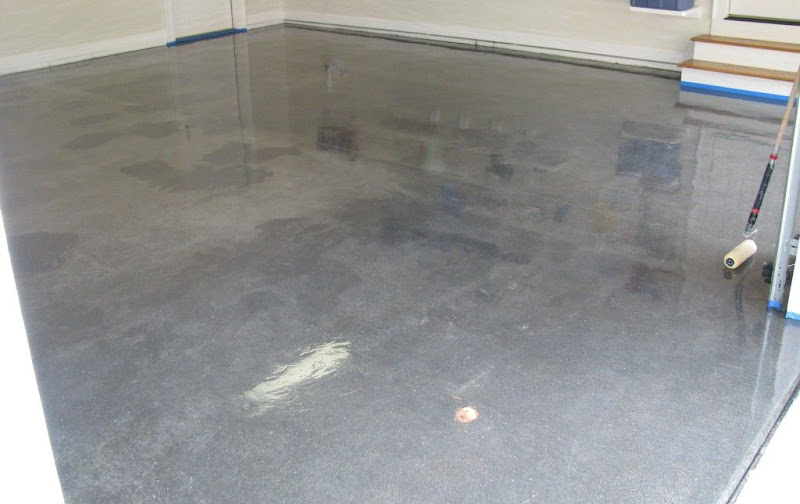
Timing was perfect. Fred at AlphaGarage got me the material Friday as promised. Friday night it was a wild night in the garage with the wife laying down a coat of BondTite 1101. It was nice to do it standing for once. I mixed and dumped while she did the spreading and rolling.
The goods. Met the driver at the end of the road.

Spreading the BondTite.
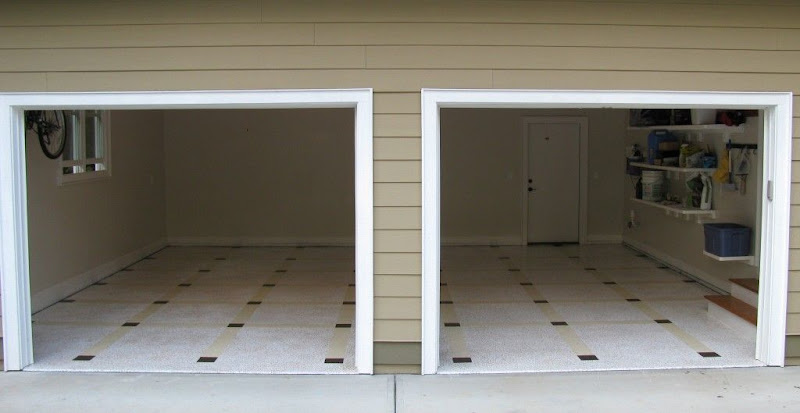
Done.
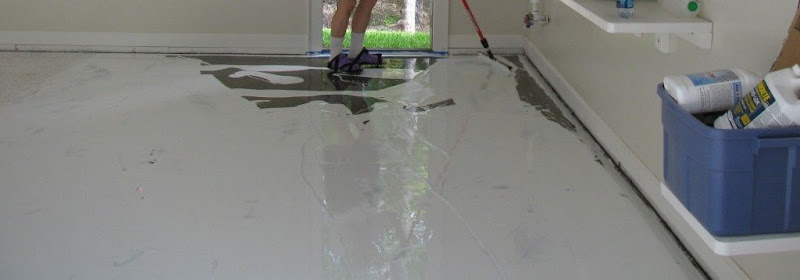
Bright and early Saturday it was time for more together time putting down the base coat of LiquaTile 1184. This stuff is thick. Grab some peanut butter and bread cause this stuff is fluffernutter thick. Was pretty easy to put down. Dump, spread, roll. Forget the high heels and put spiked shoes on because it is DecoFlake time. It was so cute, she looked like Tinkerbell spreading fairy dust. They do not make you fly though.
Ummm, fluffernutter.
Spreading the LiquaTile.
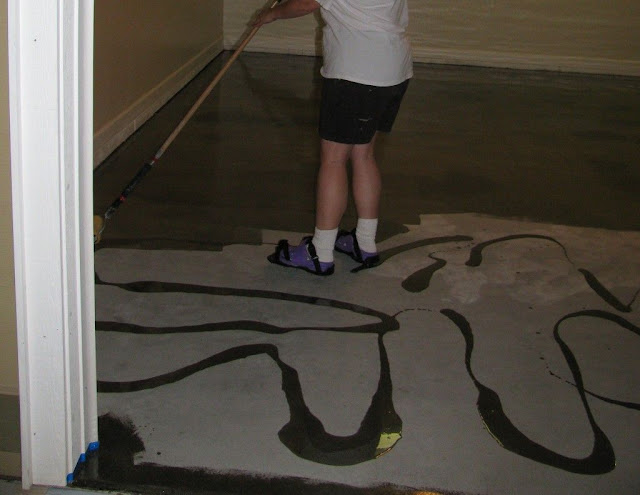
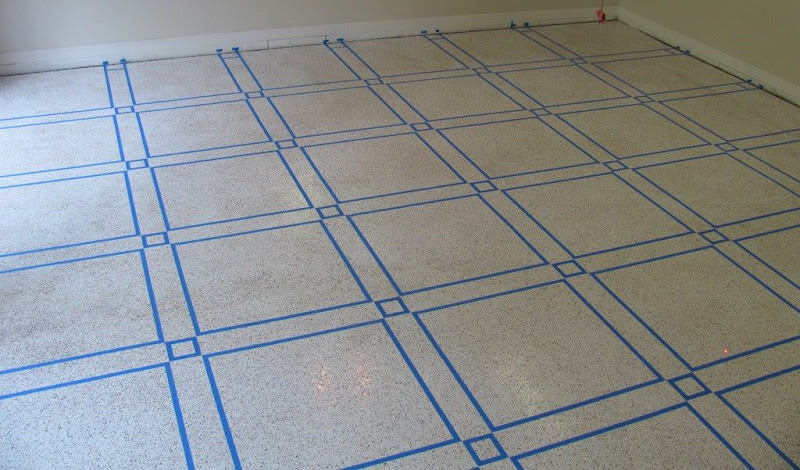
Hands and knees time again, it’s taping time! Of course the Mrs. didn’t want a solid color. We’re going for a pattern with 3. I says “get your checkbook and you got it”. After about 15 different patterns we came up with a grid/checker board looking thing. Wasn’t too bad to tape off. Start from the center and work out. Lots of tape and a “LASER” to get the lines straight made it go pretty quick. Would have been faster if it wasn’t 1 in the morning.
That's what 5 rolls of one inch tape looks like.
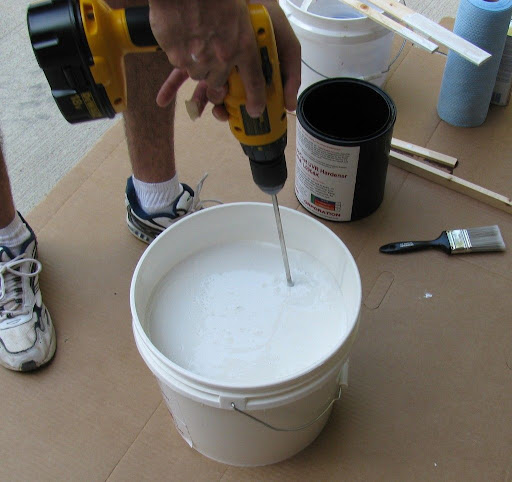
****-a-doodle-doo, it’s Sunday morning. Read the paper and have coffee, not today. We’re mixing up the Sand Beige LiquaTile. This time it was a bit trickier to dump just the right amount between the tape. After the dumping, I got the brush since the roller was already being used. Here I split it into two batches not knowing how long it would take to trim it all out. Good thing because the already thick LiquaTile gets tough to spread when it starts to set. In the back of my noggin I was half expecting it to wick under the tape. No surprise it did, the DecoFlakes don’t make a great surface for the tape to stick to. No biggie, the colors are close enough where it isn’t really noticeable. And there are a few pounds of DecoFlakes left to help mask the ooze.
Sand Beige stripes.

After a few beers and a sandwich -- no football here -- it is time to tape off 50 little squares. That green frog tape stuff was worthless for this. I gave it a try to see if it would help stop the wicking with its “PaintBlock” technology. ****, it didn’t stick at all. By square 30 it was already peeling up. Plan B was to dry brush around the tape the fill in the squares after the LiquaTile was nice and gooey. It was a scramble to finish before it kicked but we got it. This method worked like a champ. Perfect edges around. Time for a beer.
Another roll.
Done.

Not done for the day yet. The white base has cured longer than 24 hours. It has to be prepped for the EnduraShield 2254. A scotchbrite pad and an orbital sander made short order of this task. Time for bed.
Monday morning we get up before the rooster does for a great breakfast. No bacon and eggs today, it is EnduraShield and SuperGrip 850. It was by far the easiest step. The SuperGrip made a real nice suede like texture to break up the gloss. Grammy won’t be falling in my garage. Off to work.
EnduraShield and SuperGrip on the left, plain on the right.
It wasn’t the color that started the project but a **** epoxy that was peeling up terrible. It was so bad the dog found it amusing to tear at it. The Wolverine product was far better than anything I’ve used before. From what I’ve read it will be the last for this 575 square feet.
It took probably 35 hours of grinding to get the old stuff up. The Bosch 1773 concrete grinder was the workhorse of the operation. It was abused and kept on going. There wasn't anything tough about it except for the calices on my knees. An angle grinder with a concrete blade helped get around the bull nosed edges.
Out with the old.
Grinders.
Next up was etching. Probably wasn't necessary but I wanted the surface as rough as possible. After a trip to the big box I came home with one of those environmentally safe etchers. Probably was a waste of time as I dragged out the grinder again to get a few spots. Muriatic acid is nasty but at least it gets the job done.
Rough and ready.
Lighter spots are where I went back with the grinder.
Timing was perfect. Fred at AlphaGarage got me the material Friday as promised. Friday night it was a wild night in the garage with the wife laying down a coat of BondTite 1101. It was nice to do it standing for once. I mixed and dumped while she did the spreading and rolling.
The goods. Met the driver at the end of the road.
Spreading the BondTite.
Done.
Bright and early Saturday it was time for more together time putting down the base coat of LiquaTile 1184. This stuff is thick. Grab some peanut butter and bread cause this stuff is fluffernutter thick. Was pretty easy to put down. Dump, spread, roll. Forget the high heels and put spiked shoes on because it is DecoFlake time. It was so cute, she looked like Tinkerbell spreading fairy dust. They do not make you fly though.
Ummm, fluffernutter.
Spreading the LiquaTile.
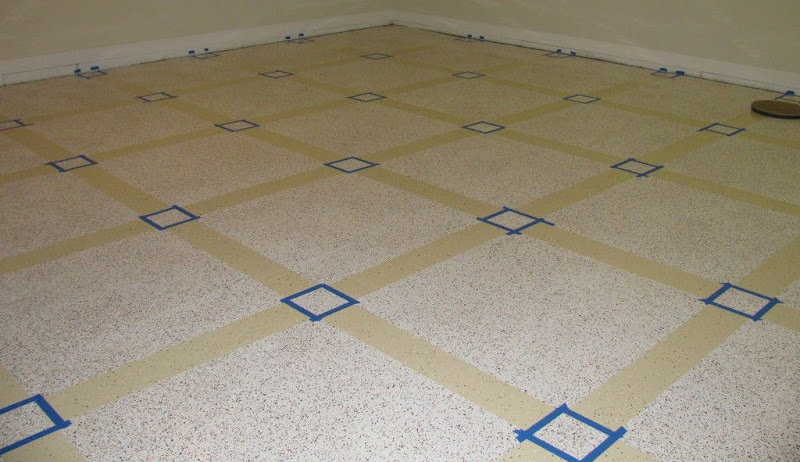
Hands and knees time again, it’s taping time! Of course the Mrs. didn’t want a solid color. We’re going for a pattern with 3. I says “get your checkbook and you got it”. After about 15 different patterns we came up with a grid/checker board looking thing. Wasn’t too bad to tape off. Start from the center and work out. Lots of tape and a “LASER” to get the lines straight made it go pretty quick. Would have been faster if it wasn’t 1 in the morning.
That's what 5 rolls of one inch tape looks like.
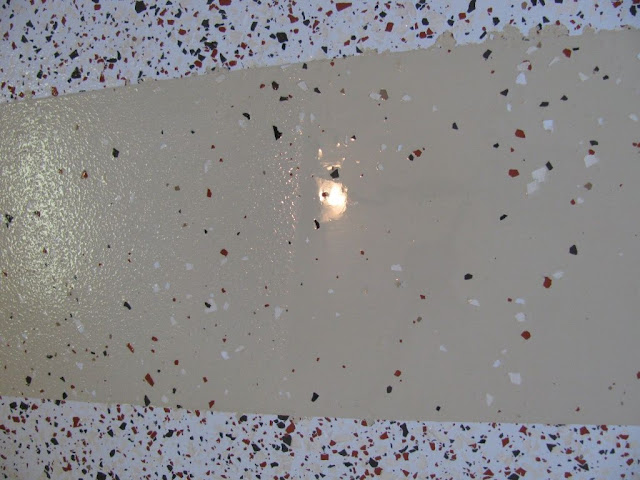
****-a-doodle-doo, it’s Sunday morning. Read the paper and have coffee, not today. We’re mixing up the Sand Beige LiquaTile. This time it was a bit trickier to dump just the right amount between the tape. After the dumping, I got the brush since the roller was already being used. Here I split it into two batches not knowing how long it would take to trim it all out. Good thing because the already thick LiquaTile gets tough to spread when it starts to set. In the back of my noggin I was half expecting it to wick under the tape. No surprise it did, the DecoFlakes don’t make a great surface for the tape to stick to. No biggie, the colors are close enough where it isn’t really noticeable. And there are a few pounds of DecoFlakes left to help mask the ooze.
Sand Beige stripes.
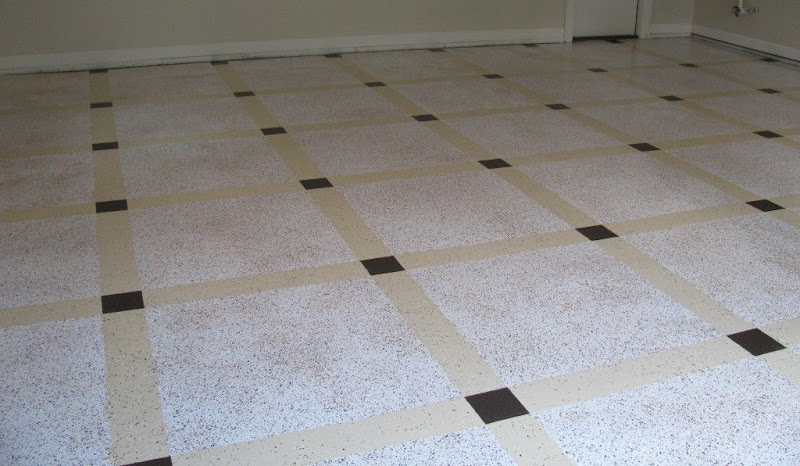
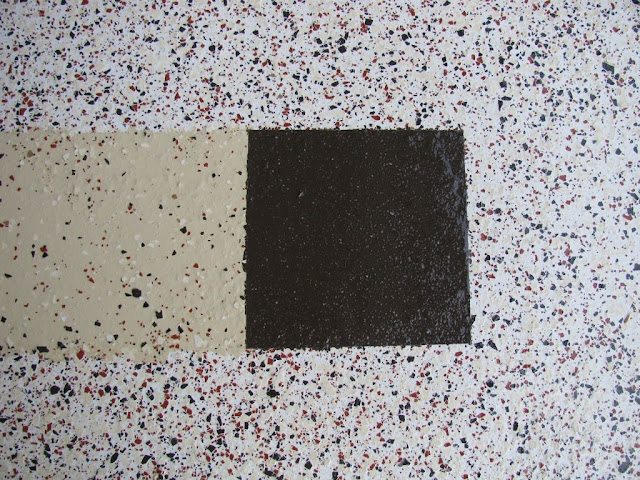
After a few beers and a sandwich -- no football here -- it is time to tape off 50 little squares. That green frog tape stuff was worthless for this. I gave it a try to see if it would help stop the wicking with its “PaintBlock” technology. ****, it didn’t stick at all. By square 30 it was already peeling up. Plan B was to dry brush around the tape the fill in the squares after the LiquaTile was nice and gooey. It was a scramble to finish before it kicked but we got it. This method worked like a champ. Perfect edges around. Time for a beer.
Another roll.
Done.
Not done for the day yet. The white base has cured longer than 24 hours. It has to be prepped for the EnduraShield 2254. A scotchbrite pad and an orbital sander made short order of this task. Time for bed.
Monday morning we get up before the rooster does for a great breakfast. No bacon and eggs today, it is EnduraShield and SuperGrip 850. It was by far the easiest step. The SuperGrip made a real nice suede like texture to break up the gloss. Grammy won’t be falling in my garage. Off to work.
EnduraShield and SuperGrip on the left, plain on the right.
It wasn’t the color that started the project but a **** epoxy that was peeling up terrible. It was so bad the dog found it amusing to tear at it. The Wolverine product was far better than anything I’ve used before. From what I’ve read it will be the last for this 575 square feet.
")


