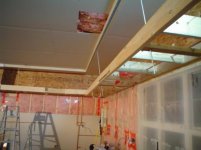
To avoid these ads, REGISTER NOW!

Hit ByThunder's 24 X 24 Palace (to me)

To avoid these ads, REGISTER NOW!
OP
H

Hit-By-Thunder

Well-known member
Joined
May 11, 2008
Messages
181
Location
Fort Saskatchewan
Any photos of this? I'm assuming that you added taller blocking to the bottom chord of the trusses to keep a plywood floor from compressing the insulation?

I was thinking of doing something along these lines in my garage, which I'm currently insulating/drywalling.

yes, I did exactly that. I added 2x6's on top of the 2x4 bottom cord of the truss (trusses are 16" on center). The 2x6 is 45" plus 1 1/2 for each end frame, equalling 48" wide long. That way the 4x8 OSB sits on the top of the 2x6 frame. There is no compression of the R28 which is 8.5" thick. The attic is sealed for now til the drywall is up but I will get some pictures, no worries. The floor is 16' long plus 2 shelves that are 24" wide and 16' long. sitting on the uprights of the fink truss ( I have alot, A L O T !!! of hotwheels/diecasts )

If you do need me to take pictures, I can open up the vapor barrier for you :thumbup:

Thanks Dave, but no work done since I pulled the back on Sunday, Tonight I was out there for a little measuring up for the drywall install. You know marking studs, measuring boxes:beer:

Going to rent a drywall lift for the ceiling hopefully soon $34/day at Home Depot


Rob/HBT
 

prae

Member
Joined
Sep 29, 2009
Messages
9
Hey rob, fellow albertan.

been following your build and wanted to congratulate you on a job well done!
 

Teamchevy

Well-known member
Joined
Nov 4, 2009
Messages
139
Location
Peterborough, Ontario
Thanks Dave, but no work done since I pulled the back on Sunday, Tonight I was out there for a little measuring up for the drywall install. You know marking studs, measuring boxes:beer:

Going to rent a drywall lift for the ceiling hopefully soon $34/day at Home Depot


Rob/HBT

Be careful on the back! I know, even using the dry-wall lift I felt it for a couple of days in the lower back :shocking:

Dave
:canada2:
 
OP
H

Hit-By-Thunder

Well-known member
Joined
May 11, 2008
Messages
181
Location
Fort Saskatchewan
Be careful on the back! I know, even using the dry-wall lift I felt it for a couple of days in the lower back :shocking:

Dave
:canada2:

ya Dave, I hear ya, it is still sore:mad: but managing anyhow. Today was my day to start drywall but never rented the lift. Princess Auto has a drywall lift on sale starting Tuesday for $149.99 so Tuesday night I will start. Today, just spent some time out there being sure everything is ready to go. The bracing in the ceiling I beefed up a bit to allow for the overhead storage.

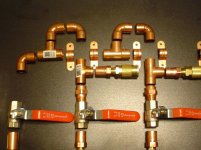
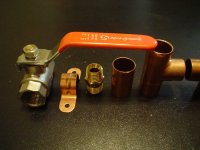
Also went to Home Depot with the kids and picked up some more 1/2" copper fittings and ball valves for the air lines. I thought they sold the 1/2" copper in 8 foot lengths:headscrat. Nope, 12 or 6 or 3 foot lengths. They wont fit in the car, so I'll pick them up another time. $14.98 for the 12 footer out here.
some of the fittings I am using,...
 

Attachments

  • DSC07382.jpg
    DSC07382.jpg
    144.1 KB · Views: 166
  • DSC07385.jpg
    DSC07385.jpg
    145 KB · Views: 107
  • DSC07386.jpg
    DSC07386.jpg
    146 KB · Views: 104
Last edited:

Kevin54

MEMBER EMERITUS
Joined
Jan 12, 2005
Messages
29,341
Location
Urbana, Ohio
attachment.php


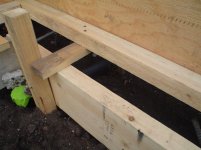
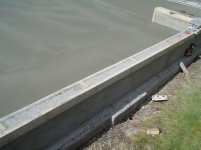
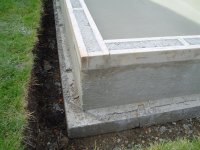
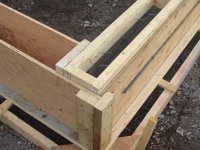
I have a question about the stemwall and footer. Does the boards that are laying across the footer forms (look like 1x2's) and hold the stemwall on top of the footer.....did they stay in the concrete after the forms were taken off? I couldn't tell by the other pics.
 
OP
H

Hit-By-Thunder

Well-known member
Joined
May 11, 2008
Messages
181
Location
Fort Saskatchewan
yes, the 1X2's did stay in the concrete. On the inside they are covered when the 2nd pour, the pad, is done. On the outside, they are below grade.

The 1X2's were nailers for the 2x2 at the bottom of the plywood. The 2 pictures with grass are of another site they did. He asked for me to come look at it to decide if I wanted to hire him and talk to the home owner. The home owner was there and they poured his out front driveway 2 years ago with no issues at all.

Rob/HBT
 

Attachments

  • DSC07188.jpg
    DSC07188.jpg
    131.5 KB · Views: 273
  • DSC07050.jpg
    DSC07050.jpg
    129.1 KB · Views: 360
  • DSC07047.jpg
    DSC07047.jpg
    145.8 KB · Views: 398

e-tek

Well-known member
Joined
Dec 19, 2007
Messages
10,690
Location
Saskatoon, SK
LOVE it Rob!! Love the locale too - sounds EXOTIC!!! ;)

OK, just kidding -- We actually have a Fort Saskatchewan in our backyard:

IMG_2178.JPG
 

scuba0459

Well-known member
Joined
Mar 27, 2010
Messages
114
Location
The Fundy shore off Nova Scotia
Rob

I did my airlines in pex. It will fit in your vehicle. I then used the same kind of pex fitting that you use for a shower head, 1/2" pex to 1/2"fpt and mounted these to some short 2x4's. I know that some people really think you should use 3/4" lines but if you loop the pipe around the hole building you will have something close to 3/4" lines. I have a crimper that uses stainless steel crimps but I rented a crimper from hd and used the black bands to make these crimps. PEX is incredibly easy to work with.

Albert
 

Kevin54

MEMBER EMERITUS
Joined
Jan 12, 2005
Messages
29,341
Location
Urbana, Ohio
yes, the 1X2's did stay in the concrete. On the inside they are covered when the 2nd pour, the pad, is done. On the outside, they are below grade.

The 1X2's were nailers for the 2x2 at the bottom of the plywood. The 2 pictures with grass are of another site they did. He asked for me to come look at it to decide if I wanted to hire him and talk to the home owner. The home owner was there and they poured his out front driveway 2 years ago with no issues at all.

Rob/HBT

Very unique way of doing it. So basically you have a rimjoist and uprights to fasten your sill plate to built right in with the stemwall. I like the idea of doing it that way. The only thing that I would not like is it looks like it is using standard lumber and not treated. Around here with the small piece of wood left exposed, it would be an attractant for termites. I would be afraid they would migrate through the 1x2 up through the upright 2x4 unless the two pieces of wood are staggered from on another to isolate them from getting through. Looks like a very unique way of doing it though and letting the stemwall and footer get poured at one time.:thumbup:
 
OP
H

Hit-By-Thunder

Well-known member
Joined
May 11, 2008
Messages
181
Location
Fort Saskatchewan
ya E-Tek, been through Saskabush before (Western Canada Ford Truck World Meet) Your Fort needs more polution and some stacks. Pretty bad here at times.

Hey Albert, I was thinking of pex, do all kinds of plumbing (Cabinet/Countertop installer and RV tech.) you are right, it is very easy to work with. I do like the copper and the nice plumb lines look very nice and oh so purdy IMHO.

hey Kevin, we have no issues of termintes here :lol: only rot. the 1x2 is seperate from the top of the ladder (2x4's sitting at the top horizontally on the stemwall) it is a very smart way of doing it cause the ladder gets to be perfectly levelled, not all the forms as per say. The ol chap been doing it since Christ was a cowboy. At 73 years old, he could bend over and lay his hands flat on the ground, palms down:bowdown: very limber guy

I am VERY VERY happy :bounce: with the concrete work. The backwall when it was formed, had a slight bow inward. He ran a string along the wall and showed the bow to me, no kidding about 3/16" at the center in a 24' span, he then braced all the walls even though the other 3 were perfect. That is how picky he was. I read horror stories here about how some concrete is 2-3" out of square or whatever. The contractor garrantied me it will be straight, level, plumb,and square.... it will be perfect,...... and, it is. Peter, the contractor running the power trowel has a passion unlike any other about concrete. It was inspiring to watch a pro work magic,.... If you ever read this Peter, which I doubt,....Thank you:bowdown:

ok enough tootin already, I am more than happy with the end result

Rob/HBT
 

Attachments

  • DSC07176.jpg
    DSC07176.jpg
    143.7 KB · Views: 334
  • DSC07185.jpg
    DSC07185.jpg
    142.2 KB · Views: 296
  • DSC07177.jpg
    DSC07177.jpg
    118.8 KB · Views: 372
OP
H

Hit-By-Thunder

Well-known member
Joined
May 11, 2008
Messages
181
Location
Fort Saskatchewan
Thanks Al I was watching your build too as i was planning mine:thumbup:

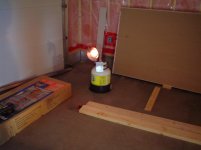
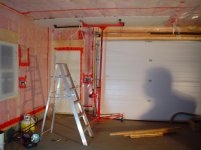
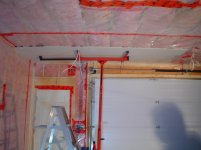
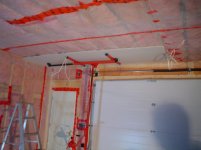
well today I BOUGHT a drywall lift. Pricess Auto has them on sale for 149.99. What a great lift, works smooth raises up to 11 feet, I needed 9'6, and rolls very well on the smoooooth floor. Also bought another little heater, a 14000 BTU radiant one from the same place. works great to keep the garage above freezing.

Well with the lift set up I installed a sheet of 4X12 1/2" drywall, used my dremel tool for the electrical box in the ceiling and poked the wires down for the 16' T8's (2-8's) really had fun putting up the sheet. Holes that I marked out were perfectly centered. All screwed in and can't wait do do more.

My right hand man/buddy said it took too long to install it:lol_hitti I think it would have been faster if he just watched:bounce: but it took 2-1/2 to light the little heater, thanks Brian for showing how:headscrat

Picture time.......
 

Attachments

  • DSC07396.jpg
    DSC07396.jpg
    47.1 KB · Views: 268
  • DSC07394.jpg
    DSC07394.jpg
    79.3 KB · Views: 277
  • DSC07393.jpg
    DSC07393.jpg
    108.9 KB · Views: 303
  • DSC07392.jpg
    DSC07392.jpg
    101.4 KB · Views: 311
  • DSC07391.jpg
    DSC07391.jpg
    93.8 KB · Views: 302
  • DSC07390.jpg
    DSC07390.jpg
    88.9 KB · Views: 326
OP
H

Hit-By-Thunder

Well-known member
Joined
May 11, 2008
Messages
181
Location
Fort Saskatchewan
Thank you for the kind words sure wish I lived at your place,... WOW!!!!

didn't bury cable for the TV but I may go with a dish, just have to take it from the house.

oh yes, there are lots of outlets, and speaker wires are going to be run in the floor of the overhead storage. This garage has been in the works for about 10 years so lots of time for planning. I am going for the smooth uncluttered look but still functionable

Rob/HBT
 
OP
H

Hit-By-Thunder

Well-known member
Joined
May 11, 2008
Messages
181
Location
Fort Saskatchewan
well back is still out, but got all the ceiling done, no mud yet. I even did a 4X12 sheet all by myself.

no pictures right now, Camera is in the kitchen and I am on the couch/Garage Journal thingy and it hurts too much to get up.

Things learned,
1) MAKE SURE first sheet is straight. My vapor barrier in the corner was not tight so the sheet was away from the wall about 3/16"

2) practice using the rotozip, my box cut outs are ok, plates will cover oops's but I am a perfectionist so I am told.

3) put 2x4 blocks under the stretched out out riggers for the lift that way the sheet of 4x12 sits level on the lift.

4) don't make the drywall fit tight to the wall, leave a 1/4" extra on the wall end of the sheet

Rob/HBT

lift for sale used for 4 nights
 

Motown 454

Well-known member
Joined
Sep 25, 2008
Messages
1,359
Coming along Rob. Keep listing what you learn so I can read through them instead of finding out the hard way I hope your back doesn't keep you sidelined too long..
 
To avoid these ads, REGISTER NOW!
OP
H

Hit-By-Thunder

Well-known member
Joined
May 11, 2008
Messages
181
Location
Fort Saskatchewan
Back is coming along I think it is a pinched nerve, the muscle has relaxed but still hard to get the socks on:shocking::shocking: ah well **** it up and continue on

well got out tonight and started the overhead storage. Have to built it before doing the rest of the drywall. The ceiling is all done and 2 pieces are on the wall. I have one wall done for the overhead storage floor framing but want to sink the surround speakers into the floor framing.

The other night it was killing me looking at the 40" LCD and bought the matching surround sound 5.1 "Samsung ct-c653W" sitting on the floor in the house. I opened it all up :drool: I can not wait. The tall speakers will be taken apart and put into the floor framing for the smooth look.

Rob/HBT
 

Attachments

  • 7494.jpg
    7494.jpg
    6.8 KB · Views: 75
  • 01_large_LN40C540.jpg
    01_large_LN40C540.jpg
    10.4 KB · Views: 59
OP
H

Hit-By-Thunder

Well-known member
Joined
May 11, 2008
Messages
181
Location
Fort Saskatchewan
Ya Wayne, its going to be sweet when all done.

all the overhead storage floor framing is done. Drilled all the holes in the framing for the recessed light wiring, the surround sound and the copper air lines. All the airlines are in the framing, now to start all the soldering. Trying to plan 3 steps ahead can be nerve racking at times but all is fun, and pictures coming tomorrow.

Rob/HBT
 

mrstang69

Well-known member
Joined
Feb 16, 2009
Messages
217
Location
South Texas
mind me asking where you got the ford stools? Awesome job on garage bulid.

I also have alot of diecast I want to display but don't know how or what to bulid for them. Can't wait to see you pics to get ideas.:bowdown:
 
OP
H

Hit-By-Thunder

Well-known member
Joined
May 11, 2008
Messages
181
Location
Fort Saskatchewan
Thank you, and as for the stools, I got them from a guy who got them from Ford. He was going to use them in his garage but never got a round to it. I paid $120 for all three.

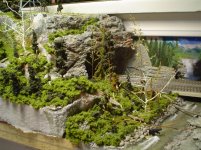
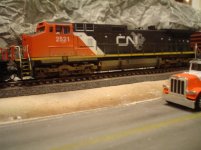
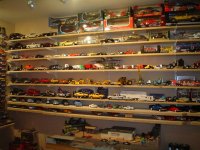
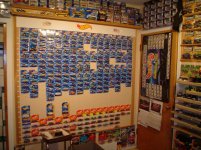
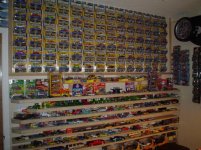
Now as for die-casts, you have no idea how many I have. The woderful wife has let me use one of our spare bedrooms and it is 9X11. I am having a tough time finding room for more. I have one wall for Hotwheels I have the first 120 cars of the 1/64th Bigtime Muscle about 70-80 1/24th bigtime muscle a mustang shelf, an F150 shelf, tell you what here are some pictures, Oh and also have an ho scale model tailroad in there too.

I was thinking of putting all my hotwheels that I collect each year around the floor framed 2x6 of the upper storage, still thinking of it.

so as you can see, if you have a hobby, enjoy to the fullest

Rob/HBT
 

Attachments

  • DSC06320.jpg
    DSC06320.jpg
    153 KB · Views: 540
  • DSC06798.jpg
    DSC06798.jpg
    142.6 KB · Views: 531
  • DSC05952.jpg
    DSC05952.jpg
    112.4 KB · Views: 595
  • DSC06813.jpg
    DSC06813.jpg
    116.8 KB · Views: 558
  • DSC03942.jpg
    DSC03942.jpg
    146.7 KB · Views: 630
  • DSC03939.jpg
    DSC03939.jpg
    153.7 KB · Views: 663
  • DSC04090.jpg
    DSC04090.jpg
    150.6 KB · Views: 696
OP
H

Hit-By-Thunder

Well-known member
Joined
May 11, 2008
Messages
181
Location
Fort Saskatchewan
ok here are some more pictures, I have 2 sheets of 4x12 drywall on one wall but needed to build the overhead storage floor framing first before continuing on. Thanks Scott for all the pictures in your build:thumbup::thumbup:.

Rob/HBT
 

Attachments

  • DSC07399.jpg
    DSC07399.jpg
    142.6 KB · Views: 440
  • DSC07397.jpg
    DSC07397.jpg
    144.8 KB · Views: 514
  • DSC07398.jpg
    DSC07398.jpg
    137.7 KB · Views: 468
Last edited:
OP
H

Hit-By-Thunder

Well-known member
Joined
May 11, 2008
Messages
181
Location
Fort Saskatchewan
also started to run the copper for the airlines

hmmmmmm 2 of 4 pictures again

Rob/HBT
 

Attachments

  • DSC07404.jpg
    DSC07404.jpg
    112.4 KB · Views: 306
  • DSC07403.jpg
    DSC07403.jpg
    117 KB · Views: 341
OP
H

Hit-By-Thunder

Well-known member
Joined
May 11, 2008
Messages
181
Location
Fort Saskatchewan
adding missing pictures

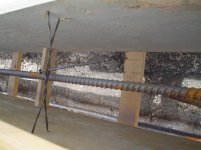
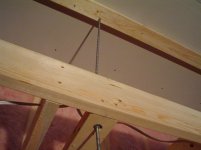
rather than use 2x4's for support, I decided to use 3/8 ready rod (all thread rod) in 2 places. They are spaced about 78" apart. I tested the weight support by jumping up from the floor and grabbing on. No creaking or bounce at all,...... perfect

Rob/HBT oh and changed my avitar and added my thread link
 

Attachments

  • DSC07401.jpg
    DSC07401.jpg
    134.8 KB · Views: 527
  • DSC07402.jpg
    DSC07402.jpg
    133.5 KB · Views: 463
Last edited:

aqr81

Well-known member
Joined
Jul 20, 2010
Messages
1,127
Location
Central Valley, Ca.
Awesome project Rob. Great planning and attention to detail. It is really going to be nice for you. Appreciate the updates adn pics, keep them coming.
 

Teamchevy

Well-known member
Joined
Nov 4, 2009
Messages
139
Location
Peterborough, Ontario
Hi Rob,

Haven't checked in for a bit. Glad the back's feeling better! Looks like things are progressing nicely! Love the Hotwheels collection!

Have Merry Christmas!!

Dave
:canada2:
 

mrstang69

Well-known member
Joined
Feb 16, 2009
Messages
217
Location
South Texas
Thank you, and as for the stools, I got them from a guy who got them from Ford. He was going to use them in his garage but never got a round to it. I paid $120 for all three.

Now as for die-casts, you have no idea how many I have. The woderful wife has let me use one of our spare bedrooms and it is 9X11. I am having a tough time finding room for more. I have one wall for Hotwheels I have the first 120 cars of the 1/64th Bigtime Muscle about 70-80 1/24th bigtime muscle a mustang shelf, an F150 shelf, tell you what here are some pictures, Oh and also have an ho scale model tailroad in there too.

I was thinking of putting all my hotwheels that I collect each year around the floor framed 2x6 of the upper storage, still thinking of it.

so as you can see, if you have a hobby, enjoy to the fullest
Rob/HBT
you do indeed have a wonderful wife. My ex never understood. My current wife is amazed that with all the HOT WHEELS and diecast Mustangs I have That I can go into a store and remember which cars I have, but cant remember to put the toilet seat down! LOL:lol_hitti
 
OP
H

Hit-By-Thunder

Well-known member
Joined
May 11, 2008
Messages
181
Location
Fort Saskatchewan
Yes, Merry Christmas gentlemen, thank you Dave. I have not been to the garage in a few days, with the Christmas holidays and all the hustle and bustle, it went to the back burner.

I have since soldered the copper lines in the storage area floor, changed my drops a bit too. Divided the system to 2 parts incase it springs an air leak I can still use the other side til I fix the leak. Ran the speaker wires tonight, and planned other misc. stuff. I have Friday off so hopefully I can spend the day out there.

It gets tough at times to get out there when the kids are home from school for Christmas break and then wife is off to work. The kids need time with dad too.

weather should be a few degrees below freezing this weekend so maybe more time out there.

Rob/HBT
 
OP
H

Hit-By-Thunder

Well-known member
Joined
May 11, 2008
Messages
181
Location
Fort Saskatchewan
well a little more progress,

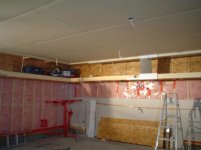
The wall above in the storage area is 95% done just need to put 2 more pieces on the door wall side.

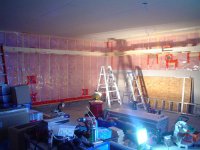
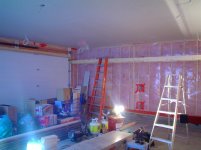
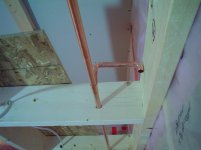
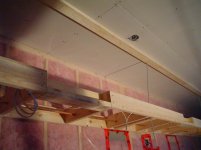
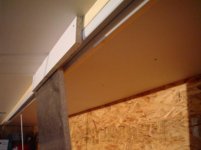
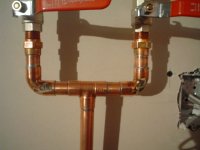
Also all the copper in the floor area is all soldered in. The drop lines are not done yet as I have to wait til the drywall is installed on the bottom of the storage area, ceiling part. The line by the service panel is where the future compressor will be. It is not soldered in, it is just sitting there to get other measurements. You can also see some of the drops sitting temporary for other planning/measurments as well. Tomorrow off to Home Depot for more drywall.

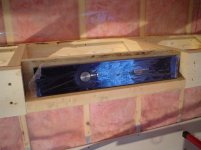
I started to install the tracks on the 2x4's that are lagged/screwed to the ceiling. There is a mocked up door in the storage area too,

opened the ceiling where the attic access will be as well.

there are some tools up on the storage area that I don't need at this time and got them off the floor and out of the way.


so here are some updated pictures for those subscribed and following along
 

Attachments

  • DSC07492.jpg
    DSC07492.jpg
    23.5 KB · Views: 541
  • DSC07488.jpg
    DSC07488.jpg
    30.7 KB · Views: 599
  • DSC07487.jpg
    DSC07487.jpg
    25.9 KB · Views: 577
  • DSC07510.JPG
    DSC07510.JPG
    143.9 KB · Views: 580
  • DSC07485.jpg
    DSC07485.jpg
    31.5 KB · Views: 597
  • DSC07479.jpg
    DSC07479.jpg
    29.2 KB · Views: 647
  • DSC07478.jpg
    DSC07478.jpg
    32.3 KB · Views: 690
OP
H

Hit-By-Thunder

Well-known member
Joined
May 11, 2008
Messages
181
Location
Fort Saskatchewan
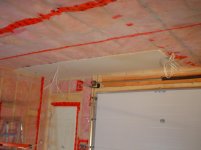
also having a huge moisture problem. I was using the propane heaters in the garage but because it was just about air tight, the moisture had no place to go but stay inside and when it would cool off inside, it froze. I work in the garge in the cold with no heat brrrrrrr. when it is -25C it is like -10C in there, with no heaters running. Lesson learned about moisture with heaters,....yikes

I put a thermometer/barometer in the garage and the house inside was at 50-51% humidity, the garage,..... at 75% right now and still climbing,....frighere are the horror pictures
 

Attachments

  • DSC07502.JPG
    DSC07502.JPG
    145.1 KB · Views: 433
  • DSC07501.jpg
    DSC07501.jpg
    20.1 KB · Views: 562
  • DSC07495.jpg
    DSC07495.jpg
    26.2 KB · Views: 431
  • DSC07484.JPG
    DSC07484.JPG
    143.7 KB · Views: 446
  • DSC07483.jpg
    DSC07483.jpg
    24.5 KB · Views: 459
  • DSC07482.jpg
    DSC07482.jpg
    25.4 KB · Views: 440
  • DSC07498.JPG
    DSC07498.JPG
    139.7 KB · Views: 409

4StarCstms

Well-known member
Joined
Mar 14, 2008
Messages
938
Location
Kentucky
Great Build! Love the Copper Lines, I just did mine, Still gotta pressure test and make sure it's all good!

Model train is pretty sweet too!
 
To avoid these ads, REGISTER NOW!
Top Bottom