To avoid these ads, REGISTER NOW!

home/handmade tools

settintrendz

Member
Joined
Oct 21, 2005
Messages
19
Location
california
I love seeing tools that others have made or improved upon around the shop. so... lets see what you've got. i'll get us started with a few of my own...


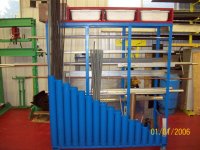
English wheel I built a couple of years ago...

IMG_2683.jpg


IMG_2684.jpg


IMG_2685.jpg


IMG_2686.jpg


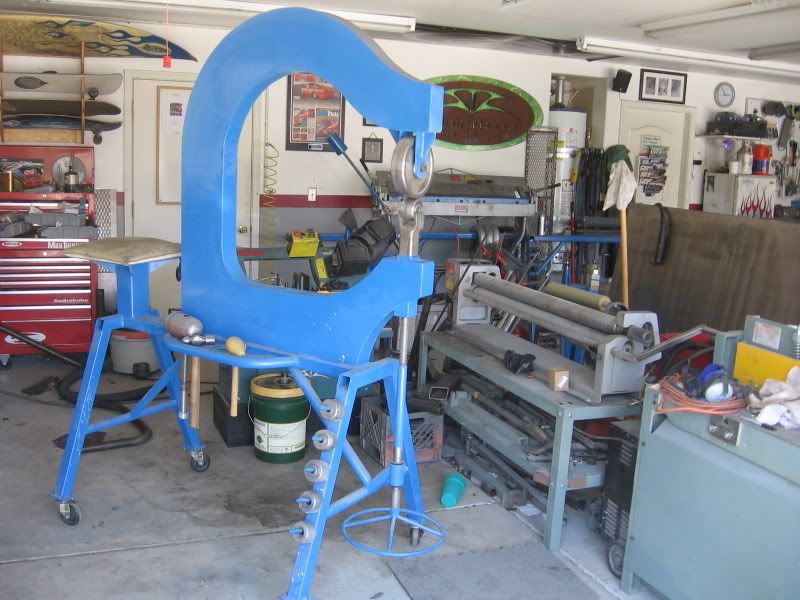
this started as the eastwood shrinker stretcher kit that i had mounted on a pedestal and had to yank on the lever with one hand and hold you work with the other, well... it didn't take too long to figure out that it's next to impossible to hold even a medium sized piece AND work the lever at the same time. so i decided to make a beefier version of the eastwood foot operated stand but brass bushings, hiems, , gas shocks, and heavier gauge steel. she works great now, although my friends say it looks more like an excercize machine than a tool. ha, ha.

IMG_2673.jpg


IMG_2674.jpg


IMG_2675.jpg


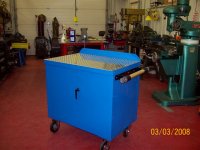
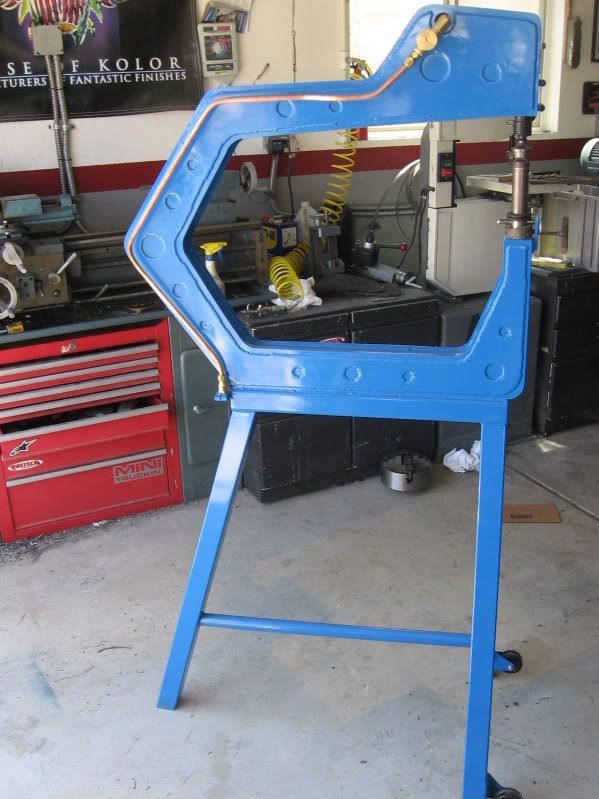
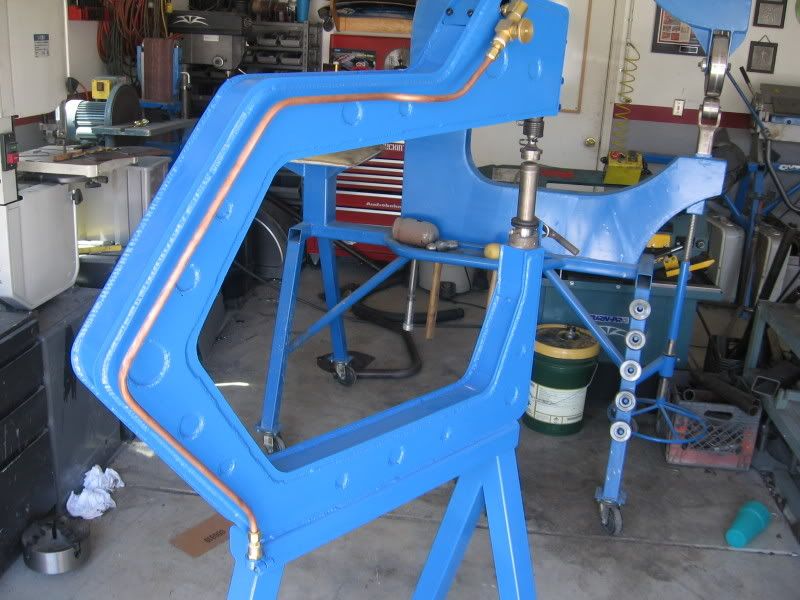
next is my planishing hammer. this also started as en easwood kit. you know, the one with the 2" round tubing bent in a "U" shape. if you youve ever used one of these, you might have noticed how much deflection they have... and you don't want these things flexing, so i built one thats a little more rigid. you might notice that i started to tig weld (see the smaller beads) the whole thing, but soon got really lazy, gave up, and miged it. what a shame. could have been real cool looking.

IMG_2682.jpg


IMG_2687.jpg


IMG_2688.jpg


IMG_2689.jpg


IMG_2690.jpg


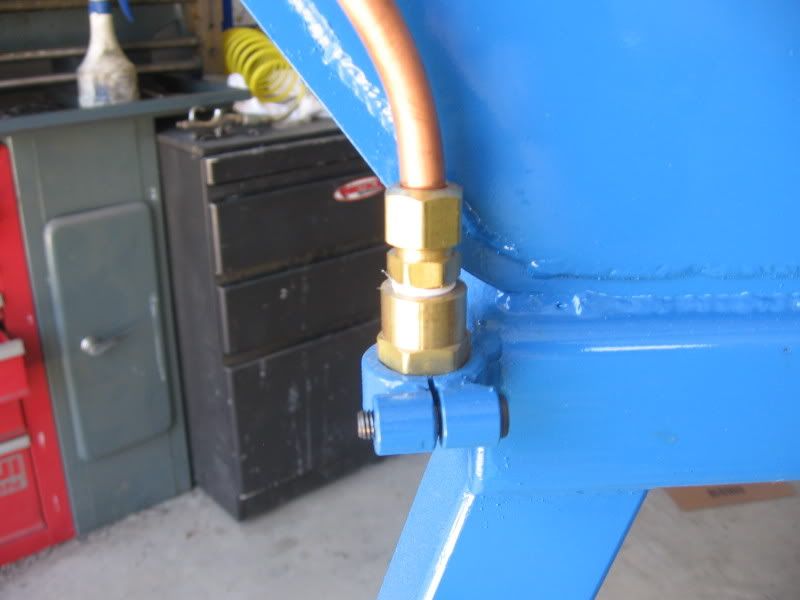
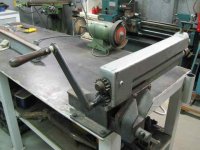
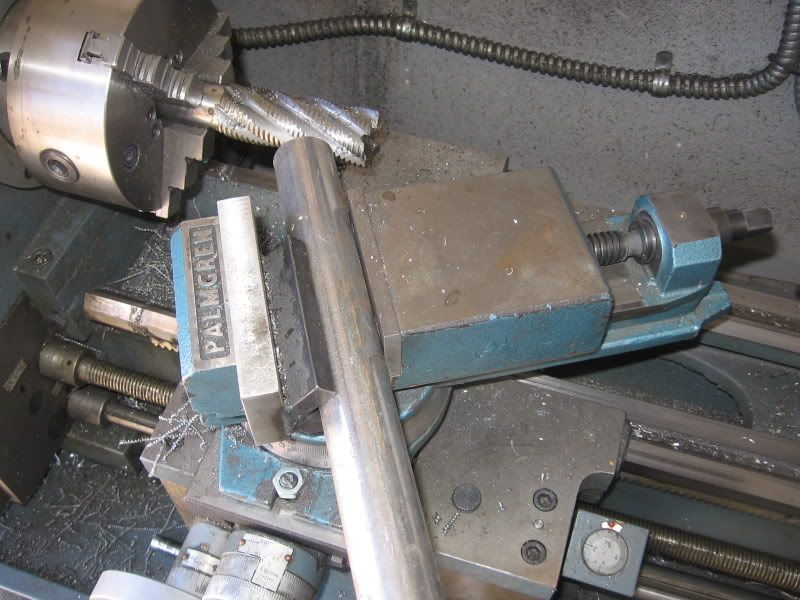
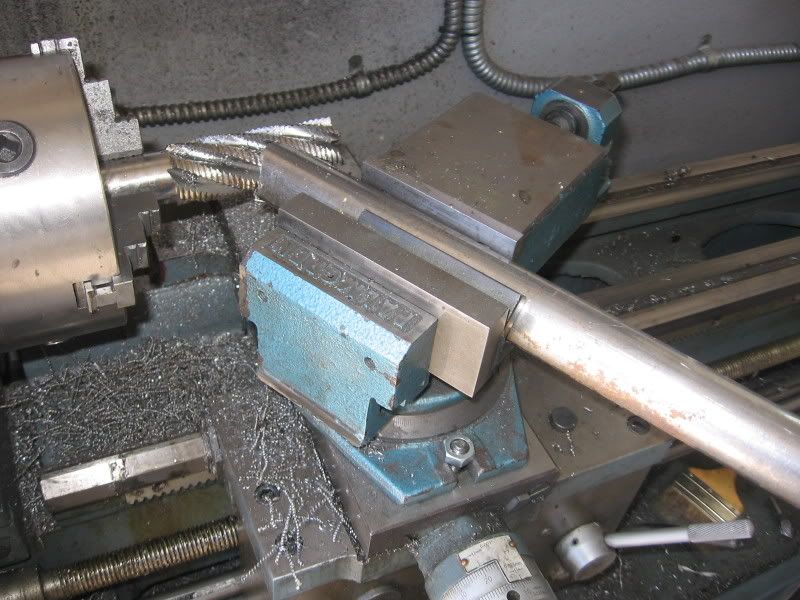
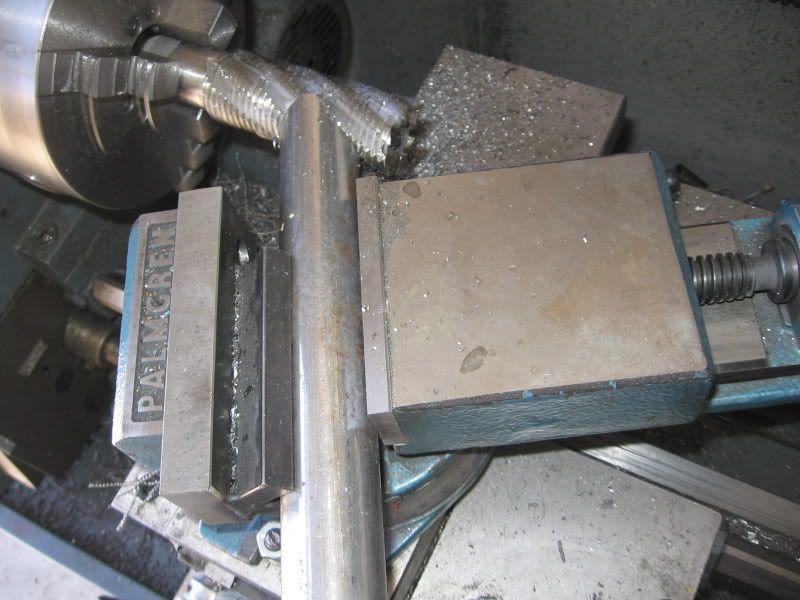
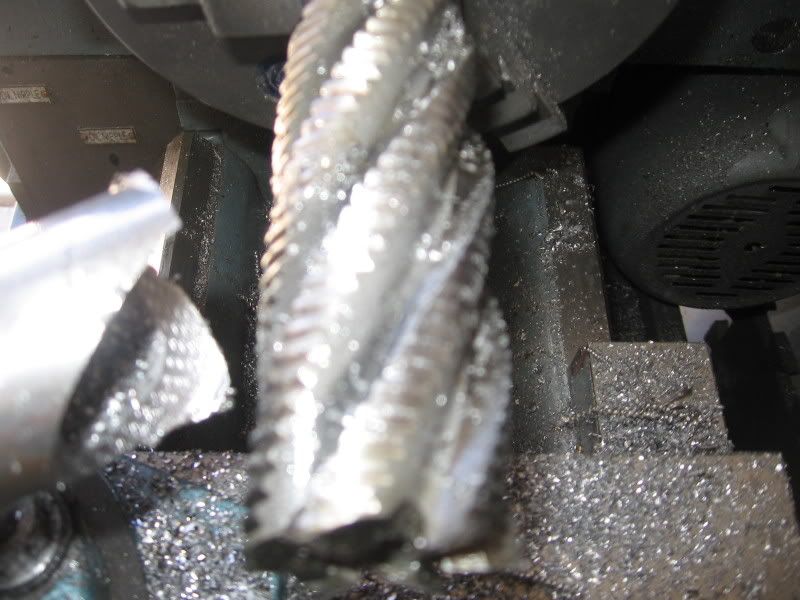
lastly, we've got my method for coping/ notching tubing. all i did was mount a 360 degree swivel vice to the cross slide on my lathe. i then welded a v-block (center with the spindle) to one side of the of the jaws, and there you have it... a self-centering, variable speed, infinite degree tubing notcher. just chuck-up a hole saw or roughing end mill and go to town.

IMG_2691.jpg


IMG_2693.jpg


IMG_2692.jpg


IMG_2694.jpg
 
To avoid these ads, REGISTER NOW!

bmwpower

Super Moderator
Staff member
Joined
Apr 24, 2005
Messages
12,578
Location
NJ
Outstanding!

I can't imagine making something like those. Congrats!
 

jimvannoy

Well-known member
Joined
Oct 30, 2006
Messages
1,263
Location
Mississippi
Very Nice! I think you may be using the cylinder cap as a tool also, right?


I have used them before to form metal. They are kind of thin on top though and will dent if you get too crazy with the hammer.

I like the beater bag mounted behind the wheel. I may need to do something like that.
 

Graham08

Well-known member
Joined
Dec 10, 2007
Messages
713
Location
Iron Station, NC
Nice work! :thumbup: I especially like the shrinker/stretcher setup...I need to make one for mine. Definitely need three hands to operate them with my current setup.
 

kbs2244

Well-known member
Joined
Nov 11, 2006
Messages
14,065
I really like the tube notching idea.
But I want to see more of the PU!
 

gahrajmahal

Well-known member
Joined
Dec 12, 2008
Messages
2,527
Location
Cincinnati, Ohio
Hey, I can't help but notice your nicely lowered F150 in the background. What did you do with the front suspension? & How does it ride. Also... great tools & shop!
 

83diesel

Well-known member
Joined
Feb 9, 2008
Messages
206
Tools look like they were manufactured. Very clean welds and layout. Great work.
 

e-tek

Well-known member
Joined
Dec 19, 2007
Messages
10,690
Location
Saskatoon, SK
All I can say is what has already been said: OUTSTANDING! You obviously have a love/knack for metal work. By the amount of helmets you have, looks like you've been doing this a while!
Hope you show us MUCH more of your work and ideas!!!
 

bugdust

Well-known member
Joined
Dec 2, 2008
Messages
580
Location
Middleburg, FL
Well, my stuff ain't all purty and painted up like them uns but I did makes me a body rotisserie for ol my beetle bug. :bounce:
017-1.jpg

034.jpg
 

senlow

Well-known member
Joined
Apr 26, 2008
Messages
2,228
Location
Wheat Ridge, Colorado
Just can't quite put the finger to it but there is something about the "die formed" edges on this plate. :confused:

Looks like a lot of extra effort.

It's actually pretty easy to do this. A punch and die will form the flare. Check out these links:

http://www.irvansmith.com/scart/punches-hole-flares-c-3_54_55.html

http://www.vansantent.com/sheet_metal_machines/dimple_dies.htm

http://www.vansantent.com/sheet_metal_machines/flare_tools.htm

The punch and die set can easily be made on a lathe. In a pinch, for limited use, they can be made from wood or bondo with a router, and/or a drill press.
 
OP
S

settintrendz

Member
Joined
Oct 21, 2005
Messages
19
Location
california
Just can't quite put the finger to it but there is something about the "die formed" edges on this plate. :confused:

Looks like a lot of extra effort.


Yea... It's really simple. I use the dies quite a bit. Just cut the hole, sandwich it in the dies, and throw it in the press. Adds only a minute or so. Here's the ones I use and a few examples.

dimpledies.jpg


IMG_2974.jpg


IMG_2975.jpg


Finished product...

IMG_2976.jpg


Front clip for a roadster I'm building...

IMG_2714.jpg


As SENLOW said, they are pretty simple to make. Here's a couple sizes I made to flush-mount hardware or dzus fasteners on sheetmetal...

IMG_2921.jpg


IMG_2919.jpg


By the way... thanks for all of the nice things you've had to say about the stuff I've made. I kinda forgot about this post, came back a while later, and was flattered. I've got a bunch more tools I've made/modified, just gotta find the pics somewhere.

Please post pics of yours. I need some more ideas. I'm not as creative as I like to think I am. And BUGDUST, thanks for the pics of your rotisserie. I've gotta make me one of those.
 
To avoid these ads, REGISTER NOW!

Quiksilver

Well-known member
Joined
Jun 22, 2006
Messages
333
Location
Loveland, OH
Settintrendz- The tools look great, I went to your website as well and the fabrication work is phenomenal. How about a full tour of your shop in the Garage Gallery. There is some very impressive work coming out of such a small garage.:thumbup::thumbup:
 
Joined
Dec 16, 2007
Messages
14
Here's a picture of one of my english wheels. I built this one in 2003 and still haven't completely finished it. It gets lots of use though. The guy on the left is me. The guy sitting on the lower arm is Joe from Hoosier Pattern. He made the 11"x6" upper wheel and the 6"x6" lower anvils.

12P1010018.JPG


Here's another. I didn't build this one. It was a gift. I cleaned up the welds and painted it. That's all I can take credit for on it.

33Pa310913.jpg


I'll have to take pictures of more tools I've built as time allows. I tend to build stuff as needed and never take pictures of it. I have several attachments for my english wheels. They're very versatile tools.

Randy Ferguson
www.fergusoncoachbuilding.com
 

DROLDSRX

Member
Joined
Jan 5, 2009
Messages
12
Location
Chicago
Great work!!! tell us more about the electric or should I say elec"trick" roadster on your website.
 

Brad54

Well-known member
Joined
Jun 13, 2006
Messages
4,646
What thickness of material can those bell-mouth dies form? I've often wondered about that.

-Brad
 

e-tek

Well-known member
Joined
Dec 19, 2007
Messages
10,690
Location
Saskatoon, SK
Randy - WOW! Just spent some time on your website -you are indeed an artist with the metals! Very cool shop tools and that front end is a work in itself. Can we see more of the roadster build? That'd be cool.
Thanks for sharing your skills and knowledge.
 

tigmusky

Well-known member
Joined
Dec 22, 2007
Messages
356
Location
forest lake minnesota
settintrendz. nice work!! I love the way you think, always looking to improve on things and always hunting for new ideas.
here few pic's sorry I don't know how to put them on the page:confused:
Daye
 

Attachments

  • daye comp pics 100.jpg
    daye comp pics 100.jpg
    52.2 KB · Views: 442
  • shop press 004.jpg
    shop press 004.jpg
    42.3 KB · Views: 339
  • daye s pix 005.jpg
    daye s pix 005.jpg
    41.3 KB · Views: 356
  • daye s pix 004.jpg
    daye s pix 004.jpg
    43.1 KB · Views: 357
  • daye pic 010.jpg
    daye pic 010.jpg
    67.8 KB · Views: 483
  • Baby books 002.jpg
    Baby books 002.jpg
    51.9 KB · Views: 393
  • daye pic 004.jpg
    daye pic 004.jpg
    47 KB · Views: 443
Joined
Dec 16, 2007
Messages
14
e-tek

Thank you.

What roadster? The 356 Porsche Carrera? If that's the one, the pictures on my site is all I did on that car. The owner is from California and it was being restored in Oregon. I was flown about 2000 miles from Illinois to build the door skin, using the restorers shop and tools (very nice shop!) I then built the shrouding after returning home. Fun little project. It's a very rare piece. It has the aluminum doors, hood and deck lid. Also has the 4 cam engine, etc. Basically a race car, I believe.

Randy Ferguson
www.fergusoncoachbuilding.com
 
Last edited:

e-tek

Well-known member
Joined
Dec 19, 2007
Messages
10,690
Location
Saskatoon, SK
You had a front end on a jig and it said it was for a "roadster project", but maybe it was for the 33 Willys. Went through the site again and couldn't find it. But the vids are cool!
 
OP
S

settintrendz

Member
Joined
Oct 21, 2005
Messages
19
Location
california
tigmusky- great work. you gave me some good ideas i'll have to steal. ha, ha!

randy- what can i say. damn. you are seriously amazing. thank you so much for sharing your knowlege with us. too many people are afraid to share what it took them years to learn. i'm just grateful for the few guys like you that do it so willingly. incredible!
 

Fatbrosracing

Well-known member
Joined
Feb 19, 2009
Messages
72
I made this roller a couple of years ago from plans in an American Rodder Magazine. They used some commercially available parts for gears and such and they were not available here in Oz so I had to improvise a bit. The gears are reverse gears from an automotive gearbox and I made it so that it would take standard size rolls, but I find I make my own a lot. I will adapt a full circle wheel to replace the handle for more control.
 

Attachments

  • IMG_0316.jpg
    IMG_0316.jpg
    25.7 KB · Views: 234
  • IMG_0317.jpg
    IMG_0317.jpg
    29.1 KB · Views: 195

Jim Stabe

Well-known member
Joined
Feb 18, 2009
Messages
801
Location
San Diego, Ca
I made this roller a couple of years ago from plans in an American Rodder Magazine. They used some commercially available parts for gears and such and they were not available here in Oz so I had to improvise a bit. The gears are reverse gears from an automotive gearbox and I made it so that it would take standard size rolls, but I find I make my own a lot. I will adapt a full circle wheel to replace the handle for more control.
Instead of putting a handwheel on it have you considered motorizing? Unless you have a helper it is awkward to try to turn the wheel with an extended arm while guiding the material at the same time. I used a HF winch to power mine with an emergency start pack to provide the 12v. The foot pedal isn't mine but I made one similar to it.
DSCF0597.JPG

foot_switch_with_completed_1.jpg

foot_switch_with_completed_2.jpg

Jim
 

Uncle Buck

Banned
Joined
Mar 7, 2005
Messages
9,120
Location
Kansas
Man, what an impressive thread! I wish I could claim skills that well honed in sheet metal. I am more of a butcher!
 

Fatbrosracing

Well-known member
Joined
Feb 19, 2009
Messages
72
As well as strengthening ribs, the possibilities are huge. I make a lot of my own dies so I can make them to suit a particular body reveal or edge shape. I also have stepping dies and ones that put curves on the edge.
 

nkachur

Well-known member
Joined
Jun 29, 2008
Messages
798
Location
Manitoba Canada
OK, lets see if I have it right... on the rollers it is only the end farthest from the crank that does the work? the pace in between is just a throat to allow larger sheets?
 
To avoid these ads, REGISTER NOW!
Top Bottom