To avoid these ads, REGISTER NOW!

Home made press brakes.

Wildfire1

Well-known member
Joined
May 11, 2010
Messages
86
Location
Newfoundland, Canada
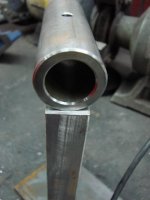
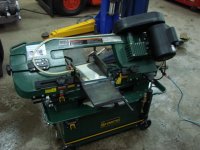
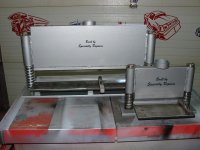
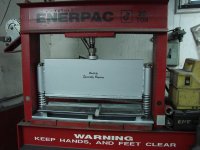
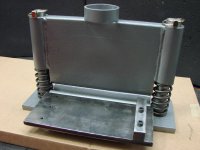
Here are some pics of the brakes I built to help restore the old Toyota fork lift that I did last year. It seems you need to build tools some times to get the job done and that's the way it was with these. These brakes sure came in handy and work well with the home made press that I built a loooong time ago.

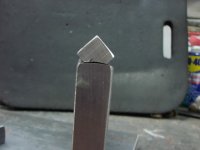
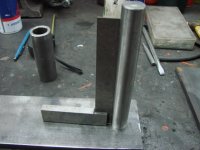
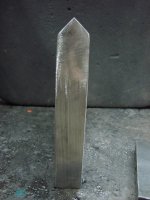
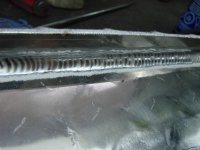
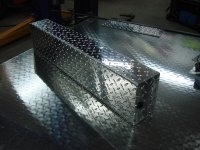
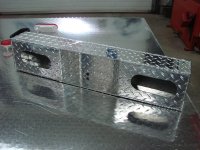
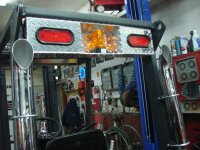
There not ground breaking by any means but they took me two weekends to make all the same. You'll see by the pics I made my own dies and there strong and there used all the time bending some pretty thick steel flat bat. In the photo's there used to bend aluminum pieces that I was making to build a custom light bar for the old fork lift. Enjoy.


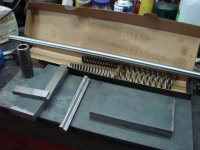
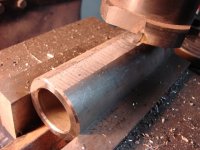
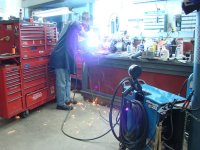
Here's a pictorial account of how I built them.
 

Attachments

  • b1-4.jpg
    b1-4.jpg
    46.8 KB · Views: 149
  • b10-1.jpg
    b10-1.jpg
    25.7 KB · Views: 147
  • b6-1.jpg
    b6-1.jpg
    48.4 KB · Views: 166
  • b9-1.jpg
    b9-1.jpg
    57.5 KB · Views: 153
  • b8-1.jpg
    b8-1.jpg
    23.3 KB · Views: 151
  • b3-3.jpg
    b3-3.jpg
    69 KB · Views: 153
  • b2-4.jpg
    b2-4.jpg
    61.1 KB · Views: 150
To avoid these ads, REGISTER NOW!
OP
W

Wildfire1

Well-known member
Joined
May 11, 2010
Messages
86
Location
Newfoundland, Canada
More pics.
 

Attachments

  • b24.jpg
    b24.jpg
    50 KB · Views: 117
  • b22.jpg
    b22.jpg
    83.1 KB · Views: 116
  • b21.jpg
    b21.jpg
    66.1 KB · Views: 115
  • b19.jpg
    b19.jpg
    110.3 KB · Views: 118
  • b18.jpg
    b18.jpg
    99.5 KB · Views: 124
  • b16.jpg
    b16.jpg
    98.8 KB · Views: 130
  • b11-1.jpg
    b11-1.jpg
    33.5 KB · Views: 129
OP
W

Wildfire1

Well-known member
Joined
May 11, 2010
Messages
86
Location
Newfoundland, Canada
And still more!
 

Attachments

  • b26.jpg
    b26.jpg
    48.4 KB · Views: 144
  • b30.jpg
    b30.jpg
    49.7 KB · Views: 153
  • b31.jpg
    b31.jpg
    61.6 KB · Views: 147
  • big2.jpg
    big2.jpg
    74.9 KB · Views: 196
  • big3.jpg
    big3.jpg
    75.6 KB · Views: 191
  • b33.jpg
    b33.jpg
    63.5 KB · Views: 182
OP
W

Wildfire1

Well-known member
Joined
May 11, 2010
Messages
86
Location
Newfoundland, Canada
This is how they work and what I built them for.

Video of how the light bar and it's lights look at night.


Attachments

  • b1-5.jpg
    b1-5.jpg
    76.9 KB · Views: 175
  • b2-5.jpg
    b2-5.jpg
    65.6 KB · Views: 175
  • b12-1.jpg
    b12-1.jpg
    101.2 KB · Views: 165
  • b8-2.jpg
    b8-2.jpg
    59.3 KB · Views: 164
  • b10-2.jpg
    b10-2.jpg
    96 KB · Views: 160
  • b9-2.jpg
    b9-2.jpg
    93.3 KB · Views: 156
  • b12-2.jpg
    b12-2.jpg
    90 KB · Views: 164
To avoid these ads, REGISTER NOW!

OccupantRJ

Well-known member
Joined
May 15, 2009
Messages
11,128
Location
Eastern North Carolina
Very nice, Wildfire, how bad was it to set up and keep the guide pin alignment during the fabrication, relative to center spacing, heat draw, and parallel alignment? Did you have to hone the bores after welding? The light box and the stacks look great.

RJ
 

Kevin54

MEMBER EMERITUS
Joined
Jan 12, 2005
Messages
29,341
Location
Urbana, Ohio
One question about the punch...did you cut it at 45 degrees each side? If so, the next one you make, cut it at about 42 degrees each side. This will let the metal overform slightly and you can adjust that by how hard you put pressure on it.
 

cnc-me

Well-known member
Joined
Jan 6, 2010
Messages
1,183
Location
MI
Nice job on the brake, and the lightbar.
Are those old motorcycle fork springs?
What sort of cutter are you running in your mill? looks like it could
be a home-made cutter.
 

Photo

Well-known member
Joined
Dec 4, 2007
Messages
165
Location
Canada
Wildfire1 / 4Shorts....

As usual, your workmanship is beautiful.

Please share your welding trailer/welder stands/etc.... here with these guys.

I've been watching you on WeldingWeb for a few years now. Keep up the great work!

Lane (Photo)
 
OP
W

Wildfire1

Well-known member
Joined
May 11, 2010
Messages
86
Location
Newfoundland, Canada
very impressive.

Thanks Larry!

wow, good looking piece. i've done a similar style but nowhere near that complete, and well thought out.

Thanks. They've been a great addition to the shop.

Nicely done! :thumbup:

Good job, I WANT THAT PRESS. That sure is one nice one you got.

Glad you like them. Thanks!

Very nice, Wildfire, how bad was it to set up and keep the guide pin alignment during the fabrication, relative to center spacing, heat draw, and parallel alignment? Did you have to hone the bores after welding? The light box and the stacks look great.

RJ

Great questions. Setting it all up was a bit tricky. There's not much or any slop in the guides. I drilled the holes a little undersized in the base plate and turned the cold rolled shafts down to a press fit and to help keep them square with the plate. I staggered the welds at first and then finished it off. I never had to hone but that may have been the result of just plain luck :bounce: but it all moves very freely and they are very strong. Thanks for your comments.

One question about the punch...did you cut it at 45 degrees each side? If so, the next one you make, cut it at about 42 degrees each side. This will let the metal overform slightly and you can adjust that by how hard you put pressure on it.

I can't remember the actual angles I used but these press' will go a little beyond the 45 degrees if I really keep the power on the press. There are so many ways to make these sort of things. As you know it's only ones mind that's limited to the ideas and way of doing it. I built these while I was right in the middle of my little fork lift project and I considered building these more of a delay than a benefit at the time but they sure have come in handy long after the fork lift was completed. Thanks for your suggestions and comments.

Nice job on the brake, and the lightbar.
Are those old motorcycle fork springs?
What sort of cutter are you running in your mill? looks like it could
be a home-made cutter.

You got a good eye. I had done some suspension changes to my GoldWing and I used the old stock springs for this projects. It pays not to throw everything out. You might see me on the TV show "Hoarders" some day :D.

As for the cutter. I may have used an old tin coated cutter at the time, not really sure but it wasn't home made. Thanks


Wildfire1 / 4Shorts....
As usual, your workmanship is beautiful.
Please share your welding trailer/welder stands/etc.... here with these guys.
I've been watching you on WeldingWeb for a few years now. Keep up the great work!

Lane (Photo)

Thanks Lane for your kind words. Welding web is a great site. I've spent a good bit of time there over the years. I didn't know this place existed until someone emailed me telling me my "Crazy Cart" was mentioned so I clicked on the link and here I am. Man there's no shortage of talent here on this site. Actually some of the best I've ever seen!

I may post some more stuff later on. As I said in the past. I don't want to wear out my welcome :eek::eek:

I've got hundreds of these projects so I can get carried away so I try not to. Really appreciate your comments. Nice to see you over here as well. Thanks. Paul
 
To avoid these ads, REGISTER NOW!
Top Bottom