Ak Jim
Well-known member
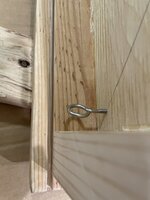
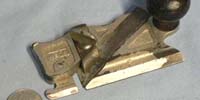
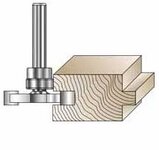
So I made a frame that I’m going to slide a clear piece of plastic in. I measured and thought I was good to go. Assembled the frame and went to test fit the plastic and the slot is too narrow. Yes I should have checked it prior to putting it together but that ship has sailed. Need to remove from one side only, about 1/32” or so. I could glue a piece of sandpaper to a narrow piece of wood and sand like crazy but I have 16 linear feet so I’m wondering if there is a better way. Thx.