When we last left the hapless round broom it was looking for flattery or something.
It can get flatter here, in a broom press or broom vise. A fancy invention patented Sept 10, 1878.
Mine is thought to be from before 1885, because they went from an all wooden handle to a cast iron center with a wooden extension. The Major County Historical Society (Fairview, OK) has a broom press I use there that is the later type, same patent date. You can see in the first picture that mine was rotted off at the bottom from many years in an unsuitable storage location. I cobbled a repair out of oak and poplar. The original is probably birch or maple, which we don't have around here.
Stand the broom up in the vise and close the jaws gently, then pound, slap and work the fibers to get them straight and evenly dispersed across the jaws. Just like you do school children. Then clamp them down. Again...
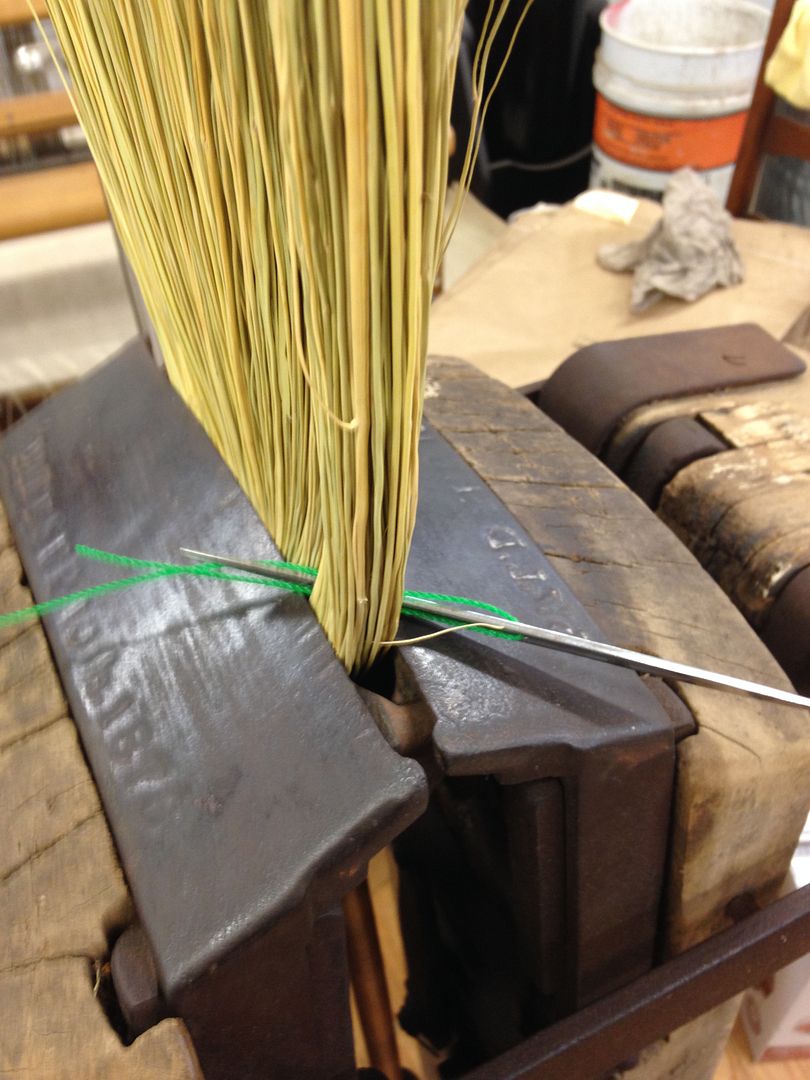
I put a leather thong around the top to hold everything snug, it also helps to avoid breaking a fiber when you are stitching.
Then, if you're me, you have to make your own needle, because we couldn't find Mr. Coburn's. Made out of a high carbon hay rake tine, hand forged in a coal forge, and finished by a fine craftsman to a high luster suitable fro years of service... but I digress.
I use polypropylene twine, made for brooms. Cotton twine is traditional but I kept breaking it. This is the same twine use din commercial brooms on power stitchers. The power stitcher was invented about the turn of the century (back then kids, 1900, not 2000, boy oh boy, you have to explain everything).
Through the corn at an angle
Then twice around and pull
TIGHT (try to break it, this sets the corn density and broom quality)
Then holding the twine firmly, start the first stitch, under both wraps on the side yo go in from (far side in picture, near side to the needle)
Then it gets monotonous. I like old country music to stitch brooms by (on the road again... Out in the west Texas town of El Paso...)
Go in under and come out on top, just like your corporate career, then back under, out on top, still like the job thing. Angle the needle just a little to try to get uniform tight stitches.
Then when you get to the end, one under and over straight across, then under and come out under (like your last job), pull it tight and cut it off, no knot needed.
Then here is the really cool high tech part, loosen the vise, raise a lever two clicks, and voila!, the jaws magically rise to the right height to stitch the next row! Oh WOW!!!!
Now merely lower the handle to reclamp the broom and a stitching we will go
One more layer and and almost perfectly stitched broom.
Either my jaws don't fit well, or something else is out of whack (you never are thankful when something is in whack, WHY??

)
The second row is two clicks up but the bottom two rows are closer together. It may be a little wear in the actuating mechanism, but I really don't want to do unnecessary repairs on something this old, so I just imagine that's the way it is supposed to look. No one has ever criticized one of my brooms, but if they do, I will refuse to sell a defective broom

Well, we're almost done, then I'll discuss tools and take questions from the floor. Apprenticeship candidates can line up over there along the far wall under the coal oil lamps. I'm so sorry that we have to limit apprenticeships to fifty per month, and your non-refundable application fee is $100 but you would have to be blind to not see the excellent money making opportunities in a broom making career.


")


 But not making brooms. I din't know how yet.