To avoid these ads, REGISTER NOW!

How to Paint This?

Squints

Well-known member
Joined
Aug 12, 2011
Messages
104
Location
Great White North
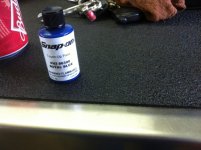
I want to paint the Snap-On logo on my stainless top the same color as my toolbox. I have a bottle of toolbox touch up paint to do it with (small brush)

Problem is i want it to look professional and I'm not one. :dunno:

How can I make it so the lines won't bleed, or maybe a technique so i don't have to painstakingly tape it (my taping skills lack!)

I remember seeing one that somebody did (extreme green I think) in a thread here but I've searched for nearly an hour with no luck! :Twitch:

Any help is appreciated!! :thumbup:
 

Attachments

  • IMG_0961.jpg
    IMG_0961.jpg
    145.7 KB · Views: 38
  • IMG_0958.jpg
    IMG_0958.jpg
    140.9 KB · Views: 24
To avoid these ads, REGISTER NOW!

walwalka

Well-known member
Joined
Mar 20, 2012
Messages
91
Location
ohio
Blue painters tape, mask it off. carefully cut the logo out with an exacto knife.
 

Davefr

Well-known member
Joined
Jan 7, 2010
Messages
11,833
Location
OR
1. Paint the recess area and don't worry about excess getting on the surface.

2. Let the paint dry

3. Use 800 grit wet dry paper and sand the surface. Adjust the grit to match the SS finish if needed.
 

Mr Ratchet

Well-known member
Joined
Mar 3, 2011
Messages
928
Location
Michigan
Just paint it like Davefr pointed out, but try to limit the excess. I then let it dry a little and wipe off the excess with solvent on a paper towel. Don't have it soaked and do it in more than one pass.
 
OP
S

Squints

Well-known member
Joined
Aug 12, 2011
Messages
104
Location
Great White North
1. Paint the recess area and don't worry about excess getting on the surface.

2. Let the paint dry

3. Use 800 grit wet dry paper and sand the surface. Adjust the grit to match the SS finish if needed.

Awesome!

Should i use the sandpaper wet? Will it effect the stainless..Scratching, discoloration?

Was it you who responded in the other thread? do you have a link? I looked for an hour!
thanks again!:beer:
 
OP
S

Squints

Well-known member
Joined
Aug 12, 2011
Messages
104
Location
Great White North
Just paint it like Davefr pointed out, but try to limit the excess. I then let it dry a little and wipe off the excess with solvent on a paper towel. Don't have it soaked and do it in more than one pass.

What do you mean by "solvent"? Varsol? Reducer? Acetone? Brake Cleaner?

Sorry just need a clarification....don't want to discolor the stainless
 
To avoid these ads, REGISTER NOW!

TheDogHouse

Banned
Joined
Mar 27, 2012
Messages
61
Paint inside the depressed areas, on the sides of the depressed areas, and even out of the depressed areas. Let it dry halfway. Take a stiff block or wooden block, and wrap a lint-free cloth around it. Spray the cloth with your solvent of choice, and block the area. This will remove the paint, leaving the depressed area painted, and leave a sharp, clean line around the logo. Old school trick learned from an old timer for painting hubcaps with depressed logos. I use reducer. Just a spray at a time, don't soak the cloth, and make sure it is lint-free. Any other way will leave irregular lines and look amateur-ish.
 
OP
S

Squints

Well-known member
Joined
Aug 12, 2011
Messages
104
Location
Great White North
Paint inside the depressed areas, on the sides of the depressed areas, and even out of the depressed areas. Let it dry halfway. Take a stiff block or wooden block, and wrap a lint-free cloth around it. Spray the cloth with your solvent of choice, and block the area. This will remove the paint, leaving the depressed area painted, and leave a sharp, clean line around the logo. Old school trick learned from an old timer for painting hubcaps with depressed logos. I use reducer. Just a spray at a time, don't soak the cloth, and make sure it is lint-free. Any other way will leave irregular lines and look amateur-ish.


Thank you!! No Taping or sanding! I like it !:thumbup:
 

rsanter

Well-known member
Joined
Dec 22, 2007
Messages
18,521
Location
visalia ca
Take the top off
Stand it on it's back end
Take the paint brush and dab the paint very wet into the recess
The paint will gelling or flow together and self leven in the recess and give a near flawless surface finish
This how many professional items are painted into their recesses

Let the paint dry and reinstall the top

Bob
 

vintagefan

Well-known member
Joined
Mar 2, 2012
Messages
613
This:

Paint inside the depressed areas, on the sides of the depressed areas, and even out of the depressed areas. Let it dry halfway. Take a stiff block or wooden block, and wrap a lint-free cloth around it. Spray the cloth with your solvent of choice, and block the area. This will remove the paint, leaving the depressed area painted, and leave a sharp, clean line around the logo. Old school trick learned from an old timer for painting hubcaps with depressed logos. I use reducer. Just a spray at a time, don't soak the cloth, and make sure it is lint-free. Any other way will leave irregular lines and look amateur-ish.

Combined with this:

Take the top off
Stand it on it's back end
Take the paint brush and dab the paint very wet into the recess
The paint will gelling or flow together and self leven in the recess and give a near flawless surface finish
This how many professional items are painted into their recesses

Let the paint dry and reinstall the top

Bob

Is the perfect way to go... :thumbup:
 
To avoid these ads, REGISTER NOW!
Top Bottom