

sko19
Member
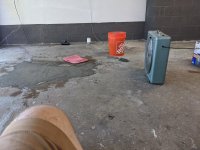
Imperfect floor and results.
 I wanted to make this post for others who have a far from the perfect garage floor who don't want to level it. I could not find any posts on an epoxy floor from anyone who had a terrible floor and after coating it without significant repair. I made the following post a while back asking what the potential outcome would be that you can see here.
I got many suggestions, and most were more work then I had the energy to do.
The only thing I did was patch the cracks using a patcher from Rust-Oleum patching, and I also fixed some of the pitting that was located in the center of the floor, and some of the patches were a few feet by a few feet. I still had lots of pitting that I did not match. Some cracks were huge and deep (multiple inches and very long 4 feet in one area! I used a foam window insulation to take up space and just shoved it in the gaps and used epoxy crack filler one was Rust-Oleum epoxy, and the other was Quikrete. I had an ancient oil stain; I used the Goof-Off (2 treatments). I have been working on this garage for months. I was nervous about how it was going to turn out. I went back and forth if I should use the Rust-Oleum Rock Sold because of the cost and how bad the floor was. I bit the bullet and did it this weekend.
I am happy how it turned out. I will need to put topcoat on it because a few areas absorbed the finishing and are not glossy, but I figured that would i would have to do that anyhow. As I was doing it, I noticed that the paint chips hid all the issues. I may have gone a little overboard on the chips ( i ended up using another bag), but it makes close to impossible to see any of the huge cracks and blemishes.
This post if for any of you guys that have been nervous about moving forward with the floor because of the shape yours is in. I hope it puts your mind at ease.
Attachments
-
 IMG_20200803_175523.jpg144.9 KB · Views: 31
 -
 IMG_20200803_175507.jpg146.5 KB · Views: 29
 -
 IMG_20200822_104607.jpg145.4 KB · Views: 32
 -
 IMG_20200906_121613.jpg143.5 KB · Views: 42
 -
 IMG_20200906_122221.jpg146 KB · Views: 40
 -
 IMG_20200906_181409.jpg148.1 KB · Views: 42
 -
 IMG_20200830_090256.jpg148.1 KB · Views: 35
Last edited: