To avoid these ads, REGISTER NOW!

Between 485 & 705 SQ/FT I Finally Get One Too! Auto/Machine Shop (21x24)

Workspaces between 485 and 705 squarefeet.

Slavboy1

Member
Joined
May 14, 2010
Messages
13
Well as the title might give away we're building a new house and I finally get to have my own shop (and make a thread about it!). It's not the, "no holds barred" "Budget? What's a budget?" shop of my dreams but after not having a garage for three years and my previous garage being 1.5 cars wide this is going to be a HUGE step up for me and should last me quite a while until we can save up for a detached multi-car, multi-level shop-mahal.

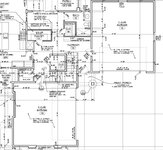
We will have two attached two car garages, the smaller will be for daily drivers. The other...well the other is where the magic is going to happen! It's 21x24 and will have scissor trusses to raise the ceiling height without making it oddly proportioned compared to the house. The intent for this garage is the rebuilding of my 1966 Mustang Fastback. I plan on doing a full Roadster Shop chassis and Coyote engine swap in this space.

67A72D1F-00BA-4F1C-A29A-6A35BCB35535.jpeg

469A429C-A27D-4919-8F2A-F8F56178973D.jpeg
Some key features I'm working with the builder to include are:
-Air Conditioned/Heated with split system to avoid mixing air with the house. Gotta keep those fumes outta the house.
-Plumbed sink
-Scissor trusses to accommodate two post lift
-Pad poured to Bendpak specs
-Wiring to support two fully electric cars in both garages
-Jackshaft openers and high lift garage doors

Given my intended use I'd love to hear any thoughts the hive mind here might have. Any lesson's learned from your experiences or things it looks like I've forgotten to consider. One thing I haven't figured out yet is the electrical plan. Given that I'm going to have a few 220v tools (welder, compressor, lift, etc), others that will need 3 phase converters (mill, lathe eventually) what should I plan on having serve this space? Should I do a dedicated sub panel in the garage? How many amps do I need in the garage? Presumably I can only run 1-2 tools at a time (welder and compressor, compressor and lift, etc) how many amps should I plan for?

Alright, that's all I have for now but I'll be sure to post photos when we break ground!
 
To avoid these ads, REGISTER NOW!

azk5

New member
Joined
Mar 21, 2021
Messages
3
Location
AZ
Wow, no one replied to this, I love the layout, being able to walk out of your house right into the garage is great. I like the sub-panel in the garage, with a lot of slots, 100 amp is plenty for your list, although you could be running AC, compressor, fridge, phase converter, lathe at the same time. The 220v equipment/outlets fill up a panel fast. What software made the rendering and where are you at?
 

Robert Haas

Well-known member
Joined
Sep 30, 2010
Messages
1,749
Consider blistering a compressor room. Putting a compressor in a well ventilated heavily sound proofed "closet" is the single biggest improvement any small 2 bay shop could have.

Lighting, lighting, lighting. White walls and enough light to do brain surgery with no shadows.
 

jbrentd

Well-known member
Joined
Jul 8, 2015
Messages
1,039
Location
Northeast Oklahoma
Wow, no one replied to this, I love the layout, being able to walk out of your house right into the garage is great. I like the sub-panel in the garage, with a lot of slots, 100 amp is plenty for your list, although you could be running AC, compressor, fridge, phase converter, lathe at the same time. The 220v equipment/outlets fill up a panel fast. What software made the rendering and where are you at?
I agree with these comments. I am in the planning stage myself for my detached shop and one thing I didn't think about was the code for how many wall receptacles can be on a circuit. In the house it's 10, but my local county has a special requirement that states no more than 2 per circuit in a garage. Talk about filling up a panel quickly.

Ohh, and it looks like he is using Sketchup as the software.
 

zmotorsports

ALLIANCE MEMBER
Joined
Oct 20, 2009
Messages
21,598
Location
Northern Utah
Nice layout. You will be glad you ran a sub-panel for the shop and 100 amps should be adequate for the equipment but not sure about the two EV in the long run. As long as the cars are charging and you're not welding or machining that may still be adequate. I had a 125-amp supply at my last place feeding our 1150 square foot detached shop and it was plenty. Even with me welding and my son using the lathe or mill we had adequate power. I have a 200-amp supply in my new shop and no issues with two of us working plus our 40' coach plugged in next door in the RV bay, even with friends who stop by with large coaches plugged into a "buddy plug" and running all rooftop air units.

Like Robert mentioned, don't go cheap on lighting. Use good quality lights and plenty of them. I have just over 100 ft. candles anywhere in my shop and about 80 ft. candles in the RV bay and I seldom need to use a drop light. As for receptacles, personally I hate extension cords so I would encourage you to install more outlets than you think you may need. For 110-volt outlets, I ran dual receptacles spaced every 6' so I can literally stand in one spot and reach two outlets. I also spread them out on breakers to avoid overloading one particular circuit. I would also encourage you to think about where you may use a welder and put a few 220-volt welder outlets where you may use them. I also installed one just inside one of my large overhead doors in the event I weld something outside I can merely plug the welder in just inside and drag the welder outside. I failed to do this at my last shop and regretted it many times when having to use a long extension cord from my welder area.

For any equipment that may not be along the wall perimeter I would suggest using electrical drops. I dropped a couple of 220-volt outlets from the ceiling for my manual mill and my son's CNC mill as well as a couple of 110-volt outlets dropped to avoid having to feed accessories on the mills with extension cords along the floor.
 
OP
S

Slavboy1

Member
Joined
May 14, 2010
Messages
13
First off wow, this new website software is very user friendly! Quoting you guys is much easier than I remember. Secondly, I had almost given up hope. Thanks azk5 for getting the party started!
Wow, no one replied to this, I love the layout, being able to walk out of your house right into the garage is great. I like the sub-panel in the garage, with a lot of slots, 100 amp is plenty for your list, although you could be running AC, compressor, fridge, phase converter, lathe at the same time. The 220v equipment/outlets fill up a panel fast. What software made the rendering and where are you at?
Appreciate it, I really have no frame of reference on amp requirements. Also, good to know on the 220v slots in the panel.
Consider blistering a compressor room. Putting a compressor in a well ventilated heavily sound proofed "closet" is the single biggest improvement any small 2 bay shop could have.

Lighting, lighting, lighting. White walls and enough light to do brain surgery with no shadows.
Robert, valid point and I might actually put an exterior shed for the compressor. Like you said there's nothing more brain rattling than when the compressor kicks on. Completely on board with the lighting, I have updated the electrical plan to increase the number of light fixtures in the garage/shop from 2 to 6 2'x4' LED fixtures. If anyone has recommendations for temp/brand I'm all ears, otherwise when it comes time to pick I'll do a little research on here.
I agree with these comments. I am in the planning stage myself for my detached shop and one thing I didn't think about was the code for how many wall receptacles can be on a circuit. In the house it's 10, but my local county has a special requirement that states no more than 2 per circuit in a garage. Talk about filling up a panel quickly.

Ohh, and it looks like he is using Sketchup as the software.
Jbrentd interesting about the code. That's gonna fill up a panel quick. CORRECT! Sketchup is my preferred for large design things like this. I use Fusion 360 for my smaller design projects.
Nice layout. You will be glad you ran a sub-panel for the shop and 100 amps should be adequate for the equipment but not sure about the two EV in the long run. As long as the cars are charging and you're not welding or machining that may still be adequate. I had a 125-amp supply at my last place feeding our 1150 square foot detached shop and it was plenty. Even with me welding and my son using the lathe or mill we had adequate power. I have a 200-amp supply in my new shop and no issues with two of us working plus our 40' coach plugged in next door in the RV bay, even with friends who stop by with large coaches plugged into a "buddy plug" and running all rooftop air units.

Like Robert mentioned, don't go cheap on lighting. Use good quality lights and plenty of them. I have just over 100 ft. candles anywhere in my shop and about 80 ft. candles in the RV bay and I seldom need to use a drop light. As for receptacles, personally I hate extension cords so I would encourage you to install more outlets than you think you may need. For 110-volt outlets, I ran dual receptacles spaced every 6' so I can literally stand in one spot and reach two outlets. I also spread them out on breakers to avoid overloading one particular circuit. I would also encourage you to think about where you may use a welder and put a few 220-volt welder outlets where you may use them. I also installed one just inside one of my large overhead doors in the event I weld something outside I can merely plug the welder in just inside and drag the welder outside. I failed to do this at my last shop and regretted it many times when having to use a long extension cord from my welder area.

For any equipment that may not be along the wall perimeter I would suggest using electrical drops. I dropped a couple of 220-volt outlets from the ceiling for my manual mill and my son's CNC mill as well as a couple of 110-volt outlets dropped to avoid having to feed accessories on the mills with extension cords along the floor.
zmotorsports, thanks! I figure it'll save me the hassle of having to go into the basement to reset a breaker when i do something dumb. The EVs would likely be their own circuit on the main panel (if code even allows that) and the EV plugs in the shop are just to future proof it as I plan on eventually building a detached three car shop with lofted design studio and suspended slab over machine/woodworking shop...a guy can dream right? so this shop would just become another daily driver garage.

Appreciate the confirmation on amperage requirements that puts me in my comfort zone with 100amp service. 100ft candles, got it, I'll look to replicate that as well. Great minds think alike, it's going to have a lofted ceiling due to scissor trusses, but I plan on putting a 220v drop in the ceiling to power the lift, so I don't have cables across the floor. Your comment got me thinking though, might be a good idea do do a single ceiling 220v drop for a welder incase I need to move around a chasis jig along with a cord reed for 110v tools. I also put a 220v outlet on either side of the garage door so I can conveniently weld outside if I need more space for a project. Aside from that I've been using Sketchup (as you've seen) to figure out where I'll have what equipment so I can tweak the electrical plan to support.

Thanks guys for all the feedback! Like I said I'll keep everyone posted and put up as many pics as I can when things start to move because I know that's what I like most about build threads. Looks like we won't be breaking ground for another 5-7 weeks though...maybe lumber prices will drop by then HA! Take care.
 
OP
S

Slavboy1

Member
Joined
May 14, 2010
Messages
13
So small update, still waiting on the site plan to be approved before breaking ground. But I've been going over line items with the builder and one thing we've knocked off the list was the epoxy floor in the garage. I've elected to go with ArmorClad/ArmorPoxy, I had him price out doing the three coat (primer, base, and clear) with traction additive and he quoted me an up-charge of $2,250-$2,500 over his normal which is the single coat Rustoleum. Seems reasonable considering it's 2x2 car garages and small price to pay for the insurance given the beating the floors will likely see.
 
OP
S

Slavboy1

Member
Joined
May 14, 2010
Messages
13
Well, have an unfortunate update. We've had to back out of our build...at least at it's current location. We had some set backs with the city...literally... due to a right of way. We had anticipated only having to keep a 15' setback along one side but the city permitting office decided we actually needed 25'. As a result the second two car garage (my shop) was going to get chopped in half. The whole point of this build was to get the shop I need and now that that was no longer an option we had to drop out. Our builder was great about it, completely understood and will be getting our deposit back to us. Now we're back to the drawing board...one thing is for sure though, there will be a build and it will be at least this amazing or better so stay tuned!
 

BoxedWino

Active member
Joined
Nov 2, 2016
Messages
41
Location
Leon Springs, Texas
Wow that is sad to hear, is a variance possible? Is there some reason why the setback needs to be 25'? Is the city planning to run a highway next to your house in the future or is this a historic right of way? If it's the former you probably want to think twice about putting too much money into the property.
 
OP
S

Slavboy1

Member
Joined
May 14, 2010
Messages
13
Yeah, it was a historic right of way, there's a gravel road along that side of the property that gives access to two other lots behind it. Not the end of the world, we've got some other options were considering so we'll see where this takes us. Either way though I'll make sure to keep the thread updated when we do what ever it is we're gonna do!
 
To avoid these ads, REGISTER NOW!
OP
S

Slavboy1

Member
Joined
May 14, 2010
Messages
13
Alright! We've got progress, we purchased a house so I won't get to make it EXACTLY what I want but it's a much better position than our current house. It has a two car garage that's a bit undersized but there is space to expand it when we get the money and it has 12.5' ceilings! So without further delay. Here's the plan...

Getting the floor epoxied early next month with 100% solids epoxy. Prime, base, top coat with traction additive.

Per the drawings the floor is thick enough to support a BendPak two post lift (minimum required is 4.25" and spec is 5").

House has 400 amp service via 2x200amp panels with room for expansion BUT the plan right now is to get a third 200 amp service just for the garage. This will support:

Tons of lighting
Car Lift (220v)
Compressor (220v)
Welder (220v)
Lathe (220v)
Mill (220v)
Split System Heat Pump (220v)
Tons of 110V outlets
2x 220v EV Charging Outlet (not needed yet but future proofing)
Future pool, shed, etc

Obviously not all of these will be running at the same time but I can see a situation where the lights are on, we have an EV charging, I'm welding and all of a sudden the compressor kicks on. If I can support that I doubt I'll ever need more capacity.

Some other modifications will be a jack shaft opener and high rise garage door tracks to accommodate the lift.

Below is the planned layout of equipment. Let me know if I haven't considered something or if you have any pitfalls I should look out for. I'll post more photos when there's something worth seeing, right now it's a completely empty garage.


Screen Shot 2022-02-16 at 7.11.34 AM.png
 
OP
S

Slavboy1

Member
Joined
May 14, 2010
Messages
13
Time for an update

After calling incessantly for three weeks I finally got the quote back from the electrician for the work that I wanted to have done. Came to nearly $19,000 dollars. Needless to say with the excessive delay and a quote that (in my opinion) is very high, I don't think they're interested. I get that electricians are a skilled trade and there are things I am neither qualified or comfortable doing but that seems excessive. Wish they had just said they're not interested up front, I would have completely understood.

Just to make sure I'm not crazy this is what we were looking at doing, does this seem like it should cost $19k?
  1. Replace both existing 200 amp 30 slot panels with 40 slot panels
  2. Shift all existing loads to one of the two 200 amp 40 slot panels
  3. Relocate the second panel to the garage
  4. Install the following circuits in the garage off the relocated panel
    1. 120v 15a Simplex dedicated outlet for jack shaft opener
    2. 120v 15a circuit and 9 led fixtures 15000 lumen 4000k each
    3. 240v 15a simplex dedicated outlet for 12,000 BTU mini-split
    4. 120v 20a circuit and 7 duplex outlets around perimeter of garage
    5. 240v 20a duplex outlet for lathe/mill
    6. 240v 25a simplex dedicated outlet in ceiling for lift
    7. 240v 30a simplex dedicated outlet for compressor
    8. 240v 50a simplex outlet for welder/car charger
    9. 240v 50a simplex outlet for second car charger
So I'm off to find another electrician for another quote. I understand often times you get what you pay for but...

Worst case scenario I'll have a qualified electrician do the 200 amp panel install and I'll handle installing the rest of the circuits.

I have learned a lot though over this process. For example:
  1. You can have more than 200 amps worth of breakers in a 200 amp panel. Should have been obvious but I never really thought about it.
  2. You should only plan to have 160 amps of load at any one time on a 200 amp panel
  3. You can have multiple 120/240v outlets on a 20am circuit but anything above 20 amps on 240v has to be a dedicated circuit.
For those electricians out there let me know if the above is incorrect.

In other news getting the floor epoxied in a couple weeks. Doing the normal primer, base, flake, topcoat with 100% solids. Not doing it myself though. As I get older I'm starting to realize what my time is worth and what home improvement projects I enjoy doing myself. Epoxy is not one of those things. Plus we haven't moved into the house yet so this will allow me to move all my tools directly into the garage and not have to worry about moving them back out again to epoxy and risk them getting rained on.

Finally, once I have some pictures I'll start posting them up, but right now we're primarily in the planning stages. Don't worry, having been a long time lurker on here I know it's all about the pics.
 
OP
S

Slavboy1

Member
Joined
May 14, 2010
Messages
13
Here's some pictures of my plans for electrical outlets. It's a bit expanded from the above plan. I've also included the diagram for compressed air. I figured if I'm opening the walls I might as well put the airlines inside and clean things up a bit.


Screen Shot 2022-02-24 at 4.01.00 PM.pngScreen Shot 2022-02-24 at 3.58.37 PM.png
 

blwn31

Active member
Joined
Aug 16, 2014
Messages
31
I'm not an carpenter or electrician, but, I build my own 2.5 car garage/shop with stepped trusses onto my existing 3 car garage. I added a 100 amp sub from an existing 125 amp sub downstairs of my house, paid an electrician to tell me what I needed. Ran some big 00 aluminum wire from sub to sub. I added 4 circuits of quad outlets every 6' both upper and lower. Each protected with a GFI outlets in the first position of the run/circuit. I ran a single 50 amp circuit for the welder/s (I have a 30' welder extension cord if I need to get outside or to the other side of the shop to weld.) I have a five 30 amp 220V circuits for mill, lathe, compressor, lift, and 5th wheel, and two 110v circuits for three zones of 8' (4, four foot 6500K T8's) florescent's, for a total of 18 florescent light assy's. Blinding is the word! Since the mill and lathe are in the old garage, I ran the wiring in the attic to twist lock outlets in the ceiling. Installed a twist lock outlet of the new shop in the ceiling for the lift too. Also have a dedicated circuit for the outside security lights, one for the garage door opener (side door operator) and one for the exterior outlets. All of my lights are on 2 way switches, so I can operate from either side of the shop. Wiring is easy, the only thing they want in my county is when they came to inspect, make sure all the grounds were crimped together, after passing inspection, hook everything up and put the heat to it. Get a home wiring book to help you out, also get friendly with your building department, they can be very helpful especially to the homeowner builder. Some of them are asses, but that's in every county/city. I can tell you, you will fill the new shop up so fast. Mine is jammed and it was supposed to be the shop I work on my cars in, yeah, looks like the rest of my garages, stuffed!

Keith
 
Last edited:

blwn31

Active member
Joined
Aug 16, 2014
Messages
31
I didn't run the air lines in the walls, there wasn't all that much room left to fit them with all the wiring I did. I did surface mount and kinda glad I did, gives me the freedom to modify where the drops are anytime I feel the need. Also, I did my airlines in copper, 3/4" trunk/main line with 1/2" drop lines, I run full pressure to each of the regulators. Currently have 4 drops with regulators in the new shop and one at the mill, one at the lathe, and one at the bead blaster in the old garage. It is so nice to have completely dry air even in the dead of winter. No no more freezing my air tools and clogging the bead blaster.

Keith
 
OP
S

Slavboy1

Member
Joined
May 14, 2010
Messages
13
Alright, getting my garage floor epoxied right now. Did 100% solids with base, flake, and top coat with anti-slip. Should be done later today and I'll post pics next week when I get a chance.

I initially went with the cheapest quote and he was actually going to use polyaspartic. He said all the right things, knew about 100% solids, knew how to fill control joints when others looked at me weird. BUT the guy never showed the day we had scheduled to get it done. I called him and he didn't seem to think it was a big deal he missed the date. Needless to say I went with one of the pricier guys and he's been great, very communicative and on time. I think this is a side hustle for him but he's done solid work so far. As much as I wish it wasn't true it seems you really do get what you pay for...

I didn't run the air lines in the walls, there wasn't all that much room left to fit them with all the wiring I did. I did surface mount and kinda glad I did, gives me the freedom to modify where the drops are anytime I feel the need. Also, I did my airlines in copper, 3/4" trunk/main line with 1/2" drop lines, I run full pressure to each of the regulators. Currently have 4 drops with regulators in the new shop and one at the mill, one at the lathe, and one at the bead blaster in the old garage. It is so nice to have completely dry air even in the dead of winter. No no more freezing my air tools and clogging the bead blaster.

Keith

Keith, I get what you're saying about being able to change stuff. I'm torn, but I think I'm going to go for the clean in wall look. I'm going to use RapidAir system 3/4" line just to make sure I don't have any flow issues. Worse case scenario I can surface run lines if I decide things really need to change. I'm going to use 2x6 blocking between studs to mount the "Through Wall Kits" so I don't pull on an air line and rip out a massive chunk of drywall.

Thanks again everyone for the feedback. Keep it coming and I promise photos are on the way.
 
OP
S

Slavboy1

Member
Joined
May 14, 2010
Messages
13
Some photos of the floor. Not happy with the result but the guy agreed with me and is going to make it right. It looks like there are some “dry” areas that didn’t get enough top coat. He’s going to do another coat. Thoughts? There are areas where you can pick at the flake and can even see some concrete through the flake.
 

Attachments

  • 55B5597E-F2D8-4DE8-BEC0-ACE6A1F94553.jpeg
    55B5597E-F2D8-4DE8-BEC0-ACE6A1F94553.jpeg
    603 KB · Views: 65
  • 9040C2F5-4FE1-4F7F-BADD-6770421BCC50.jpeg
    9040C2F5-4FE1-4F7F-BADD-6770421BCC50.jpeg
    704.9 KB · Views: 66
  • 0EC8300A-3C99-4157-B11A-1AA820A9202A.jpeg
    0EC8300A-3C99-4157-B11A-1AA820A9202A.jpeg
    512.1 KB · Views: 67
OP
S

Slavboy1

Member
Joined
May 14, 2010
Messages
13
Holy ****, that looks like a lot of flake in the 2nd pic?
So I think the term is “flake to rejection” essentially as much flake as will stick to the base coat. This way it increases the overall thickness of the coating and thus durability…or so I’m told by people who know stuff on here.
 
OP
S

Slavboy1

Member
Joined
May 14, 2010
Messages
13
Alright! More progress (I know I know, "pics or it didn't happen" working on that soon.

The garage floors are done, my installer made everything right. He ended up sanding down what he had installed and did ANOTHER top coat which seems to have filled in all the voids. So that's good news.

Secondly my electrician will be doing the electrical upgrade in the garage on the 9th. It'll be nice to have 240v 50a outlets for the first time in my adult life! He's been great though, his quote came in nearly 1/3 of the first quote I got and he's been very communicative and proactive in the process.

Again, I'll post pics as soon as I can.

Next projects will be installing airlines in the walls while they're open. I'll try and do a better job of documenting that since I'll be doing the work.
 
OP
S

Slavboy1

Member
Joined
May 14, 2010
Messages
13
Alright, just finished trailering the Mustang to its new home. Here’s a quick pic of it in the garage with the electrical going in behind it!33D8BA1E-5CF8-437E-9157-D66843EBC166.jpeg

P.S. Any idea why photos uploaded from a phone are turned 90 degrees?
 
To avoid these ads, REGISTER NOW!
Top Bottom