To avoid these ads, REGISTER NOW!

I love Butcher Block, but...

softailgarage

Well-known member
Joined
Apr 20, 2011
Messages
5,153
Location
Bullhead City, Az.
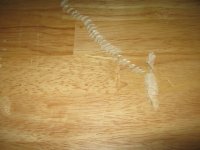
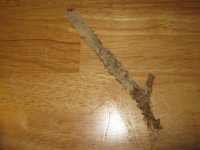
This is why it does not belong as a workbench top. I knew sooner or later this would happen and I tried to prevent it by putting a mat down, but trying to move a drill press tore thru the mat. Anybody know of a fix?:(

IMG_3295.JPG

IMG_3296.JPG

IMG_3297.JPG

IMG_3298.JPG :wtf:
 
To avoid these ads, REGISTER NOW!

JMartel

Well-known member
Joined
Jan 4, 2009
Messages
1,403
Location
Seattle, WA
Beltsander. 36 or 50 grit should work. Make sure you level the entire surface, not just the marks or you'll have a dished surface. Use a straight edge laterally, horizontally, and diagonally. After that, use 2 equal straight edges as winding sticks to check for twist. Then work your way up to 120 grit, switch to a random orbital sander and go to at least 220. Put on new finish.
 

Wood'nMetal

Well-known member
Joined
Jul 7, 2013
Messages
1,305
Location
PNW Oregon
Take it to a cabinet shop and have them run it through a drum sander. Usually doesn't cost but a few bucks or a half rack. Maybe consider topping with a piece of plexi?
 

fivespdcat

Well-known member
Joined
Oct 25, 2011
Messages
1,520
Sand out the splinters and leave it. It's a bench, call it a battle scar.
 

CNGsaves

Well-known member
Joined
Sep 26, 2012
Messages
13,233
Location
KS and OK
This may sound crazy, but I'd start with wetting down cloth and letting it sit overnight on those dents. The wood might expand to lessen some of the visible damage.

Once you have wood grain expanded as much as you can, then try filling some of the gouges with wood filler and glue. Build it up in thin layers over time as it dries out. Don't get in big hurry to fix it all in one day.

Thus, do not immediately start sanding the hell out of it. Do more research on "Out Of The Box" solutions. ;) Good luck.
 

archirelic

Well-known member
Joined
Sep 24, 2010
Messages
2,263
Location
texas
I'd overfill it with epoxy or a sawdust/wood glue mixture to where there's a noticeable bump, then hand sand it even with the rest after it's cured.

It's a workbench top, it's going to get some scratches and scrapes over time, I wouldn't sweat it too much.
 

Beachside Hank

Well-known member
Joined
Jul 9, 2013
Messages
116
Location
PALM BAY FL
Don't beat yourself up too badly over this, it's the wood's fault, not yours. The species is called Ramin (nothing to do with noodles), grown in the Pacific rim countries and used extensively in furniture made for export. It has been over- exploited and is now very much limited in commerce officially, but illegal use and export is rampant over there. My shop workbench is constructed of the same stuff, and it is nowhere near as durable as our domestic Rock Maple or Oak, or most any other continental U.S. hardwood species, it's main attraction is price point.
 

rlitman

Well-known member
Joined
Oct 18, 2010
Messages
24,756
Location
Long Island
This may sound crazy, but I'd start with wetting down cloth and letting it sit overnight on those dents. The wood might expand to lessen some of the visible damage.

Start with this. Then use a hot iron. As the wet spot heats to steam, it will pop up more dents. Nothing however will fix the broken fibers, so once you raise the grain/dents as much as possible, you'll have to scrape them down and then apply more finish. Or, use clear epoxy, wiped into the grooves.

Beachside Hank is completely correct. It is not a quality hardwood.
 

Jack Olsen

Super Moderator
Staff member
Joined
Mar 22, 2009
Messages
6,678
Location
Los Angeles
I got a beautiful piece of Maple butcher block and the first thing I did was bounced a belt sander on it with 40 grit. I tried to make the scars and divots more or less consistently spaced across the top. Then I stained it dark. Then marine varnish. Then I can just dribble some more stain on it if something cuts into it too deeply. (As your pictures show, the human eye is drawn more to a light spot on a dark background than a dark spot on a light background.)

I have three benches like that now. They're all scarred up and they're all awesome to work on.

If you try to keep it looking perfect, then you're right -- it doesn't belong in a working garage.

Look closely at the surface of this one. It's Birch -- and it's banged up plenty. Still looks nice, to my eye.

Center-H.jpg
 
Last edited:
OP
S

softailgarage

Well-known member
Joined
Apr 20, 2011
Messages
5,153
Location
Bullhead City, Az.
So there is hope! I really dont mind the scar... but it's the first one :( Sorta like the first time a girl shut you down, that gut wrenching feeling. There's no way in Hell I was going to take a belt sander to it, I damaged it enough. I thought about sawdust and white glue thinned out with water (it'll dry clear) and just done in baby steps. Yes, I could flip it, but it's 8' long and as you can see it's loaded up, would be a major PIA (and would have to move the drill press again :shocking:) All great idea's('cept maybe the belt sander), I think I'm going to try a slow fill with either putty or sawdust and the wet towel. More to follow...:thumbup: Thanks guy's.

IMG_3304.JPG
Bench #2 of 3
 

justanengineer

Well-known member
Joined
Apr 5, 2011
Messages
7,722
Location
Motor City
This is why it does not belong as a workbench top. I knew sooner or later this would happen and I tried to prevent it by putting a mat down, but trying to move a drill press tore thru the mat. Anybody know of a fix?:(

I'd suggest a BFH and some pent-up aggression. Its a workbench, use it and when it looks like total ***, sand or replace it.
 

Ron Fletcher

Banned
Joined
Mar 16, 2013
Messages
514
Location
Wood Crest Ridge
I got a beautiful piece of Maple butcher block and the first thing I did was bounced a belt sander on it with 40 grit. I tried to make the scars and divots more or less consistently spaced across the top. Then I stained it dark. Then marine varnish. Then I can just dribble some more stain on it if something cuts into it too deeply. (As your pictures show, the human eye is drawn more to a light spot on a dark background than a dark spot on a light background.)

I have three benches like that now. They're all scarred up and they're all awesome to work on.

If you try to keep it looking perfect, then you're right -- it doesn't belong in a working garage.

Look closely at the surface of this one. It's Birch -- and it's banged up plenty. Still looks nice, to my eye.

Center-H.jpg
I agree. A few scars here and there gives a bench character. It shows it is well used. Super bench, Jack!!
 
To avoid these ads, REGISTER NOW!

RivennHewn

Well-known member
Joined
Jun 4, 2011
Messages
10,405
Location
PNW
The wet towel thing is a waste of time.

The wood might swell some when wet, but it contracts as it dries.

Really all you're doing it slowing the whole process down having to wait for it to dry.

Decide if you can live with it, or if it's a deal breaker.

I like the 'fill it with epoxy' approach.

It's a work bench, it won't be the last scratch.
 
OP
S

softailgarage

Well-known member
Joined
Apr 20, 2011
Messages
5,153
Location
Bullhead City, Az.
So, I decided to go with sawdust and glue first, then lightly sand come morning, followed by a clear coat (if this works of course).

Believe it or not I actually keep a jar of sawdust for emergency patches, however it's a dark wood (I like to restore old park benches too). Popped off the dust collector from a palm sander and that sawdust gave me a good blend.
IMG_3306.JPG

Next, mixed up some Elmers white glue and water. The Elmer's will dry clear, a little model railroading trick I learned a long time ago.
IMG_3307.JPG

Blended the 2 sawdust's and first tried to brush it into the divots which really wasn't working well. I found that sprinkling from above was way easier, then dabbing it in with an old paint brush. I don't know what was so difficult, but for some reason, after trying different approaches, this was the only way it was going to work.
IMG_3308.JPG IMG_3310.JPG

A little messy...
IMG_3311.JPG

Cleaned up a bit, still looks like ****
IMG_3312.JPG

I then dropped some more adhesive over the top of one section as a test for a final coat. Let stand a couple of hours. Next I'll sand it down and see how it comes out. If this doesn't work, then maybe the BFH :bounce:
 

Attachments

  • IMG_3313.JPG
    IMG_3313.JPG
    105.8 KB · Views: 73

ddawg16

Well-known member
Joined
Jul 11, 2008
Messages
21,005
Location
S. California
It's patina.....adds 'character' to the bench......

It's not a beauty contest.....look at Jack's bench....it's showing it's 'bench rash'...
 

myamoto1

Well-known member
Joined
Jun 2, 2009
Messages
66
Location
SW Washington
You could get fancy and use another species of wood for an inlay. Initial it, date it, and finish over it. :D

Reminds me of my off-roading days. We'd take a paint pen and label the "battle damage" with the date and location. Of course, some guys pretty much just ended up repainting their rigs with the paint pen...
 

BJ42LX

Well-known member
Joined
Dec 29, 2010
Messages
2,811
Location
WNY
Looks like you already have a solution.

I've fixed dents in woodwork using the following:

1) soak the dent in water. The water swells the compressed wood fibers and will move them back toward level. This is like using a torch and dry ice to pull dings out of panels. Let the area dry thoroughly.

2) Fill the remaining dent with urethane. Let dry, sand flush and repeat. The urethane fills the rest of the dent leaving the native wood in place. If there are broken wood fibers try to push them down into the urethane before it dries. This preserves as much of the original color and texture of the wood as possible.

3) Once the repair is flat scuff the whole part/piece and give it one final coat of urethane for a smooth continuous finish.
 

melliott28

Well-known member
Joined
Jul 26, 2010
Messages
181
Location
Plano, TX
When I get a gouge or dent in my wood top, I just fill it with clear 2 part epoxy, sand it flush, and put poly on top. Even with the damage it takes, I still prefer a wood workbench top for general use.
 

rslaback

Well-known member
Joined
Jul 24, 2010
Messages
4,102
Location
Westcentral Wisconsin
The best way to take care of a scar like that is to make it look like it was done on purpose.

Find yourself a rubber bench mat like this, then trace the outline on the benchtop and use a router to cut a recess for the mat to fit in. Or just throw the mat over it and forget all about it.
 

wdrumheller

Well-known member
Joined
Nov 15, 2012
Messages
198
Location
Virginia
As some others have mentioned, the scar can stay.... HOWEVER...

This is what I would do in your situation because it seems important to you.

I would get out my router, and I would clamp some 2x4's in position and then I would use the router to make a 1/4" deep cut and cut out the bad spots. Then I would make a nice piece of wood the same shape as my cutout, and make it fit as tightly as possible, and then glue that sucker in there.

I would then sand the entire top, and then polyurethane the entire top, and that will just be a nice patch job.

Life is short. Keeping things nice and pretty is fruitless. Use them up, repair some, and then go with it. Don't sweat the small stuff.

I opened my car door into my wife's new Subaru this weekend and put a nice dent right in the fender of new car. I'll probably do some minor effort to repair it but then again, it's just another thing that will get damaged and used up with time. Things are going to get damaged.
 
To avoid these ads, REGISTER NOW!
Top Bottom