To avoid these ads, REGISTER NOW!

IDENTIFY THIS FLOOR JACK

Cordts

Member
Joined
Aug 25, 2022
Messages
9
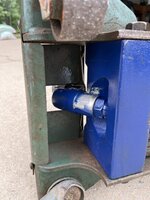
Can someone identify this floor jack. I believe I got it from sears in the 80’s. It’s leaking and I need to order parts. I can’t read the label on the top of the unit. I had this rebuilt by Tools and Hydro in Tennessee and less than a year later the pump valve is leaking. The rebuilder only gave me a 90 day warranty. Thanks
 

Attachments

  • image.jpg
    image.jpg
    673.4 KB · Views: 91
  • image.jpg
    image.jpg
    479.2 KB · Views: 87
  • image.jpg
    image.jpg
    326.3 KB · Views: 82
  • image.jpg
    image.jpg
    428.8 KB · Views: 86
Last edited:
To avoid these ads, REGISTER NOW!

LB-1911

ALLIANCE MEMBER
Joined
Sep 24, 2011
Messages
5,747
Location
Northwestern Il.
Can someone identify this floor jack. I believe I got it from sears in the 80’s. It’s leaking and I need to order parts. I can’t read the label on the top of the unit. Thanks
Does it resemble the one @

edit to add 2nd link 11:05
 
Last edited:

ex-x-fire

Well-known member
Joined
Nov 10, 2012
Messages
3,758
Location
Sheboygan Falls Wi.
Looks like my 1960-70 Walker J122. I rebuilt mine with a kit and it did stop working a few years later, I'd like to swap out the hydro unit for a new one if they're out there.
 

paulsomlo

Well-known member
Joined
Jul 16, 2013
Messages
3,914
Location
Northern Colorado
I own one, but I've never been in it. When you say the "pump valve", do you mean the release valve or the pump? Looking at the diagram, there's an o ring that seals the release valve from the outside world. Search around here on the forum, these are common jacks and there may be a rebuild thread. Or on Youtube. If "Hiball" sees this, he'll have an answer, as he's probably rebuilt hundreds of these.
 

Hiball

Well-known member
Joined
Apr 30, 2009
Messages
14,032
Location
Missery
Public service announcement… Don’t take anything to Tools and Hydro in TN.. Look at that tank nut.. Ouch.

On a more helpful note, If it’s leaking at the pump piston, which it appears it is. The entire assembly can be removed without removing the unit from the frame, Albeit easier to service with the unit locked in a vise. it will require a 1” wrench or socket if you remove all the caging/spring. It’s possible that the vee’s aren’t tightened enough or they where damaged upon installation. Impossible to know without putting eyes on the internals. I’m leaning towards too loose, unless some donkey tightened them down “prior” to pulling them into the cylinder and damaged them.

Btw J122/early 93632
 
To avoid these ads, REGISTER NOW!
OP
C

Cordts

Member
Joined
Aug 25, 2022
Messages
9
Public service announcement… Don’t take anything to Tools and Hydro in TN.. Look at that tank nut.. Ouch.

On a more helpful note, If it’s leaking at the pump piston, which it appears it is. The entire assembly can be removed without removing the unit from the frame, Albeit easier to service with the unit locked in a vise. it will require a 1” wrench or socket if you remove all the caging/spring. It’s possible that the vee’s aren’t tightened enough or they where damaged upon installation. Impossible to know without putting eyes on the internals. I’m leaning towards too loose, unless some donkey tightened them down “prior” to pulling them into the cylinder and damaged them.

Btw J122/early 93632
Hey. Thanks for the help. Are you referring to the Pump “V” Chevrons ??
 

Attachments

  • 682D228C-A65C-4883-A789-4C1DCA043560.jpeg
    682D228C-A65C-4883-A789-4C1DCA043560.jpeg
    311.2 KB · Views: 63
OP
C

Cordts

Member
Joined
Aug 25, 2022
Messages
9
I’m just gonna go ahead and open it up and replace the Chevron’s. Do you know where I can source these? May be a part number? Any tips on installing them. Again, thank you for your help
 

Hiball

Well-known member
Joined
Apr 30, 2009
Messages
14,032
Location
Missery
I’m just gonna go ahead and open it up and replace the Chevron’s. Do you know where I can source these? May be a part number? Any tips on installing them. Again, thank you for your help
Post #5 Has a good phone number for Hydraulic Parts supply in Sawyer KS.
 
OP
C

Cordts

Member
Joined
Aug 25, 2022
Messages
9
Public service announcement… Don’t take anything to Tools and Hydro in TN.. Look at that tank nut.. Ouch.

On a more helpful note, If it’s leaking at the pump piston, which it appears it is. The entire assembly can be removed without removing the unit from the frame, Albeit easier to service with the unit locked in a vise. it will require a 1” wrench or socket if you remove all the caging/spring. It’s possible that the vee’s aren’t tightened enough or they where damaged upon installation. Impossible to know without putting eyes on the internals. I’m leaning towards too loose, unless some donkey tightened them down “prior” to pulling them into the cylinder and damaged them.

Btw J122/early 93632
Hey there. The nut on the inside of the valve was really loose. Is there a tightening sequence or torque that I should use on that nut? I also realize that the nut was so loose that the plunger within the valve could easily move up and down
 

Attachments

  • image.jpg
    image.jpg
    728.9 KB · Views: 22

Hiball

Well-known member
Joined
Apr 30, 2009
Messages
14,032
Location
Missery
It’s definitely too loose, there is No torque spec per say. I make all final torque settings with the cylinder in the bore.

1. Assemble everything back together, including spring, covers and c-clip.

2. Mount the hex portion in a vise.

3. Start tightening the nut in small increments and push down on the pump piston/release. As you tighten the nut, it’s squeezes the vee’s and increases cylinder wall pressure. You don’t want to over compress the seals to the point where they can’t overcome the spring. I’ve been doing it so long that it’s more of a feel, versus typing on keyboard. Once I’m happy with the feel, I dot punch where the nut meets the stem to prevent it from backing off.

Hope this helps.

I suppose it would be a good idea prior to reinstalling all the components and settings the compression to check the seals to make sure everything is in order. Always work from the bottom up when installing/removing the piston from the cylinder, Do NOT ever try to install/remove from the top side as it will damage the seals. It will require removing the splined pin, if it’s an older model.
 
Last edited:
OP
C

Cordts

Member
Joined
Aug 25, 2022
Messages
9
Well. I’ll try again and edit this post. Thanks Capt
It’s definitely too loose, there is No torque spec per say. I make all final torque settings with the cylinder in the bore.

1. Assemble everything back together, including spring, covers and c-clip.

2. Mount the hex portion in a vise.

3. Start tightening the nut in small increments and push down on the pump piston/release. As you tighten the nut, it’s squeezes the vee’s and increases cylinder wall pressure. You don’t want to over compress the seals to the point where they can’t overcome the spring. I’ve been doing it so long that it’s more of a feel, versus typing on keyboard. Once I’m happy with the feel, I dot punch where the nut meets the stem to prevent it from backing off.

Hope this helps.

I suppose it would be a good idea prior to reinstalling all the components and settings the compression to check the seals to make sure everything is in order. Always work from the bottom up when installing/removing the piston from the cylinder. It will require removing the splined pin, if it’s an older model.
Yeah. That splined pin didn’t want to move
 

Hiball

Well-known member
Joined
Apr 30, 2009
Messages
14,032
Location
Missery
Yeah. That splined pin didn’t want to move
They can be a bear, Big Hammer, starting punch and finish with a pin punch. Try it both ways, sometimes it will go one way or the other more easily, especially if you see any swelling on one end or the other. It will require a solid base, I normally open the vise jaws just enough to cradle it and give it some whacks.
 
OP
C

Cordts

Member
Joined
Aug 25, 2022
Messages
9
Thanks for all your help. I finally worked on this and sure enough, the nut that holds the chevrons in place was loose. All good now.
 
To avoid these ads, REGISTER NOW!
Top Bottom