To avoid these ads, REGISTER NOW!

In progress... Epoxy Floor

nate379

Banned
Joined
Feb 2, 2009
Messages
7,279
Location
Palmer, AK
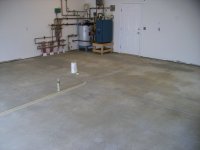
I have been working on epoxing the floor.

I bought 3 kits of Quick Crete grey and 3 kits of clear.

Got the slab all cleaned off this weekend. There was a fair amount of paint and caulking on the floor from when they built the place. A grinder with a flap disk and 4" floor scraper took care of that.

I first cleaned it with Purple Power. I put it in a garden sprayer and used a deck brush to clean it off. I tried using a hose to rinse it but it was getting the walls all wet plus hauling in dirt/mud from outside (hose bib is outside) so I ended up filling up pails and dumping it on the floor.

After that I used the "Bond Lok" which IMO is total junk/waste of time. They talk it up like it will burn your face off if you get in on you... and It's supposed to etch the floor, but really the purple power did a better job.

Next I used hydrochloric acid. I mixed it a quart to about 3/4 of a gal of water. I used the garden sprayer again. Let that sit for 10-15 mins and scrubbed it 2 times. It worked nicely, I guess what the Bond Lok should do.

I thought I had the floor clean before, but the stuff that came up with the acid was nuts.

After I got the floor all rinsed I went back with Ammonia mixed. about 50/50 with water. Sprayed that down, scrubbed and rinsed.... more stuff coming off with that. Note though, it's TERRIBLE on the nose, throat, eyes and lungs


I need to caulk the joints maybe tomorrow and then throw down the epoxy.
 
Last edited:
To avoid these ads, REGISTER NOW!
OP
N

nate379

Banned
Joined
Feb 2, 2009
Messages
7,279
Location
Palmer, AK
It should be. It was near dry a few hrs after I was done other than under the water heater/boiler where I couldn't get the sqweegee to fit.
 

bmwpower

Super Moderator
Staff member
Joined
Apr 24, 2005
Messages
12,578
Location
NJ
It should be. It was near dry a few hrs after I was done other than under the water heater/boiler where I couldn't get the sqweegee to fit.

It may be dry on the surface, but I'd be worried about moisture in the slab.

throw some plastic sheet on the floor, tape the edges and see if there is moisture under the plastic in the morning.
 
OP
N

nate379

Banned
Joined
Feb 2, 2009
Messages
7,279
Location
Palmer, AK
Well will prolly be only till next week when I can do it. Been pulling 6PM-6Am shifts and by the time I get home it's around 8 or so... sleep 5-6hrs and after I get chores down it's time for work.
 

nickwrx

Active member
Joined
Dec 1, 2008
Messages
44
that is some serious prep work! please let me know how it turns out,
 
OP
N

nate379

Banned
Joined
Feb 2, 2009
Messages
7,279
Location
Palmer, AK
May as well spend a bit of time doing it right then be lazy and throw $600 of epoxy down the ******* you know?

I have to vac and mop the floor again though, there is a bit of dirt from the muddy water that the squeegee didn't pick up.
 

TRTOOLSUPPLY

Well-known member
Joined
Apr 8, 2009
Messages
506
Hey Nate,
I think "we" need some photographic evidence ,if you get my drift?

PICTURES:lol_hitti......you know to show off your HARD work!!!!!!!:thumbup:
 
To avoid these ads, REGISTER NOW!
OP
N

nate379

Banned
Joined
Feb 2, 2009
Messages
7,279
Location
Palmer, AK
Well after 3 more full stregth acid washes I finally got the floor rough enough :wtf:

I washed it down with ammonia and then TSP afterwards. I have to go get a heat gun in a bit and dry the sole plate cause it's wet and wicking moisture on the slab. I need to caulk between the floor and that sole plate to since it wasn't done. They used foam under the wood though.

Rest of the slab is dry though. I kicked the heat up to 80 and opened the windows so the slab got nice and warm.

Did clean out the control cuts last night. Screwdriver, vac and propane torch worked out nice to dry it and clean it out.
 
OP
N

nate379

Banned
Joined
Feb 2, 2009
Messages
7,279
Location
Palmer, AK
Well the crack sealer kicked my ****.

The one cut that goes from the front to back of the garage apparently has no bottom. I bought 5 tubes thinking it was more than enough and I was only able to get about 75% of the cuts filled. Going to get more in a bit.

I had it all nice and level when I went to bed around 4 and I went to go check on it a bit ago and I guess it expands when it dries because it's raised about 1/8" past level. Would be nice if they mentioned that!

I'm going to try to cut it down with a razor blade, not sure if it will work though.
 

Attachments

  • Imgp1106.jpg
    Imgp1106.jpg
    45.2 KB · Views: 94
  • Imgp1108.jpg
    Imgp1108.jpg
    34.4 KB · Views: 92
  • Imgp1109.jpg
    Imgp1109.jpg
    30 KB · Views: 99
  • Imgp1138.jpg
    Imgp1138.jpg
    36.8 KB · Views: 98
  • Imgp1139.jpg
    Imgp1139.jpg
    27.1 KB · Views: 110
  • Imgp1140.jpg
    Imgp1140.jpg
    44.9 KB · Views: 133
Last edited:

wildcat12

Active member
Joined
Jun 9, 2009
Messages
33
Location
cookeville tennessee
razor scrapper should work fine. You might want to put a small torch on it first to make it easier to cut ( thats how we do it on the big box stores when we do joint filling jobs)
 
OP
N

nate379

Banned
Joined
Feb 2, 2009
Messages
7,279
Location
Palmer, AK
I didn't figure I needed a backer rod, but I should have guessed when it seemed like water was draining down that crack. I got it all done today though. Only took another 1.5 tubes to finish everything.

I think the trick to do it right is do 2 layers. Fill the crack about 3/4 full the first go and let it sit overnight. Then fill it flush the 2nd time.

The one section I ran out on came out nice today with no need to trim it down.

The rest I trimmed down with a razor and went back over it with some more filler to smooth it out and fill some air bubbles.


Tomorrow I just need to mask some things off and then I can throw the epoxy down. Then Sat I will put the clear. I needed to have it done for Monday (movers are bringing all my stuff) but I will just leave it all outside for a couple more days I guess. Ain't like someone is going to come buy and steal a 1000lb toolbox anyhow.
 
Last edited:
OP
N

nate379

Banned
Joined
Feb 2, 2009
Messages
7,279
Location
Palmer, AK
Threw down the epoxy this afternoon. Wasn't hard to do at all.

I remember reading on here that someone was saying to have a few rollers cause the epoxy gets too thick and also you need a heavy duty roller.

The stuff I used was nothing like that. I just used a normally $6-7 roller and no issues. It spreads just like an normal oil based paint as far as I could tell. I did my whole garage with 1 roller.

About the only thing that would make it easier is to use an 18" roller instead. My big roller and all the stuff for it is still packed up so I didn't want to spend the $$ on another one.

I have 1 more kit (bought 3) so I'm going to put a 2nd coat on tomorrow. I went and bought another one just in case I need it. The kit said 250 sq ft per gal and my garage is 625, so I guess I put it down thin or something?

This is the first product I have used that I actually got more coverage than the can lists.

Sorry no pics. I forgot the camera on top of the boiler when I took pics the other day.
 

nickwrx

Active member
Joined
Dec 1, 2008
Messages
44
Hey Nate, what do you think it will be like putting down the 2nd coat on top? Think there will be any adhesion issues? Just wondering.
My garage is 550sq/ft and was pretty much going to get 3 kits just in case and wanted to put it on heavy or like you are doing with 2 coats. But I was worried about adhesion.
And are you saying to go with a smaller roller?!
 
To avoid these ads, REGISTER NOW!
Top Bottom