To avoid these ads, REGISTER NOW!

Initial barn overhaul turned to garage project

Raul.P

Member
Joined
Nov 26, 2017
Messages
24
Location
Estonia
Hello!

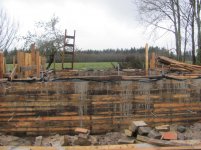
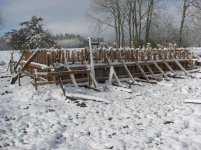
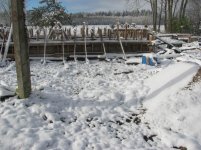
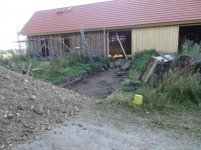
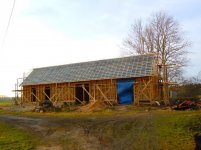
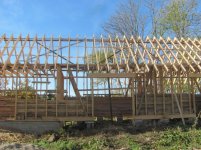
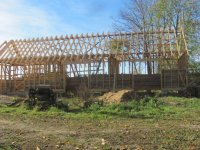
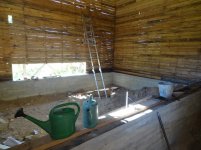
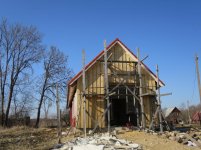
I am from Estonia and I wanted to share my garage story. In 2012 I started to completely overhaul the old barn where my grandparents used to keep animals - cows , chickens etc. It was in very bad shape and there was no point to save the old structure. So I demolished the old and started to build the new. At that time I could not imagine how long it takes to complete such project. 5 years later it still is not completed.
About two years ago I changed my mind about the barn which was initially meant to be a shelter for some animals and for tractors. I was getting tired of working on my cars outside without proper tools, so I decided to make a room I could use as a garage.
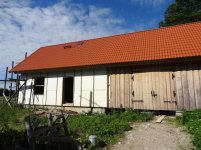
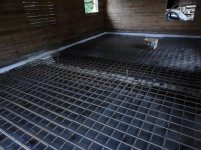
So here is how it is today - a room with internal mesurements 5m x8,5mx3.4m(height). The floor got poured two months ago. The Walls are insulated and I am working on the ceiling right now. After that I need to make carriage doors for the main exit and install windows . Then it is ready for the internal job.
I just can not wait to use the garage to work on cars, tractors etc. I already ordered a car lift from bendpak.
I am going to post some pictures from 2012 to today
 

Attachments

  • IMG_0344.jpg
    IMG_0344.jpg
    76.2 KB · Views: 213
  • Picture 016.jpg
    Picture 016.jpg
    120.7 KB · Views: 225
  • Picture 010.jpg
    Picture 010.jpg
    135.3 KB · Views: 215
  • Picture 541.jpg
    Picture 541.jpg
    151.7 KB · Views: 211
  • Picture 458.jpg
    Picture 458.jpg
    136.6 KB · Views: 228
  • Picture 457.jpg
    Picture 457.jpg
    124.7 KB · Views: 223
  • DSCN3981.jpg
    DSCN3981.jpg
    47.6 KB · Views: 229
To avoid these ads, REGISTER NOW!
OP
R

Raul.P

Member
Joined
Nov 26, 2017
Messages
24
Location
Estonia
some more pictures
 

Attachments

  • DSC06342.jpg
    DSC06342.jpg
    142.5 KB · Views: 193
  • DSCN0729.jpg
    DSCN0729.jpg
    113.7 KB · Views: 192
  • DSCN0728.jpg
    DSCN0728.jpg
    107.1 KB · Views: 181
  • IMG_4552.jpg
    IMG_4552.jpg
    142.3 KB · Views: 175
  • IMG_4551.jpg
    IMG_4551.jpg
    148 KB · Views: 184
  • DSCN0267.jpg
    DSCN0267.jpg
    138.6 KB · Views: 199
  • DSCN0263.jpg
    DSCN0263.jpg
    131.5 KB · Views: 191
OP
R

Raul.P

Member
Joined
Nov 26, 2017
Messages
24
Location
Estonia
photos from 2017:

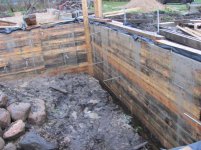
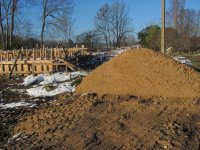
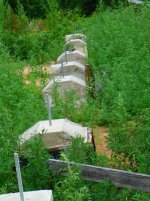
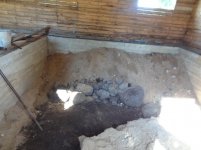
Before the concrete pour I had to fill and compact the sand under it. I used water to compact the sand. The big rocks on the picture are from the old foundation that was just rocks stacked together without mortar.
I also started to insulate walls.
 

Attachments

  • DSC09688.jpg
    DSC09688.jpg
    127.5 KB · Views: 172
  • DSC09695.jpg
    DSC09695.jpg
    153 KB · Views: 183
  • DSC09978.jpg
    DSC09978.jpg
    131.1 KB · Views: 194
  • DSC09970.jpg
    DSC09970.jpg
    102.8 KB · Views: 195
  • DSC09691.jpg
    DSC09691.jpg
    102.8 KB · Views: 188
  • DSC09690.jpg
    DSC09690.jpg
    78.9 KB · Views: 190

sublime68charger

Well-known member
Joined
Sep 9, 2014
Messages
5,415
Location
SW Wisconsin
nice work so far and Welcome and keep posting back pics of your progress!

I know my little Garage build has been going on for 5+ years as well!
 
OP
R

Raul.P

Member
Joined
Nov 26, 2017
Messages
24
Location
Estonia
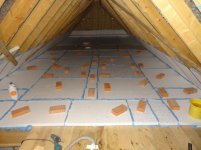
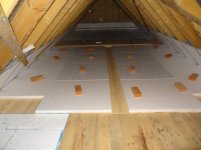
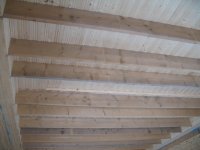
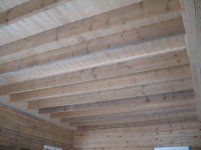
I have been busy with insulating the ceiling. I am using rigid foam sheets and it takes a lot of time to measure and cut them to fit properly. To make my life easier I decided to put the insulation on the top of the ceiling joists not between them. The ceiling joist are now visible from underside. Partially this decision was made due to the reason that there was not enough height for the two post lift that has overhead beam. So I made a higher section between the ceiling joist for the lift. I took some photos from the progress...
 

Attachments

  • DSC00096.jpg
    DSC00096.jpg
    86.2 KB · Views: 119
  • DSC00095.jpg
    DSC00095.jpg
    98.8 KB · Views: 118
  • DSC00094.jpg
    DSC00094.jpg
    74.1 KB · Views: 122
OP
R

Raul.P

Member
Joined
Nov 26, 2017
Messages
24
Location
Estonia
Looks great. Did you reuse materials out of the old barn in the new one?

Not very much. Suprisingly the logs were in good condition but some parts were badly rotten. I used the fieldstones from the old foundation to backfill in front of the garage door.
 

Attachments

  • DSC09732.jpg
    DSC09732.jpg
    150.1 KB · Views: 148

Riley

Well-known member
Joined
Feb 18, 2007
Messages
398
Great work saving a neat old building!

Are you using equipment or mostly man power for the excavation and material movement?

Any pictures of the raised ceiling areas?
 
OP
R

Raul.P

Member
Joined
Nov 26, 2017
Messages
24
Location
Estonia
Great work saving a neat old building!

Are you using equipment or mostly man power for the excavation and material movement?

Any pictures of the raised ceiling areas?

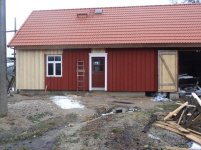
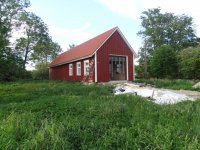
Thanks. I have a small tractor to move material but the excavation is done by hand. I take it as a work out. I have some recent photos but I found out today that the charging system of my camera does not work anymore. I managed to take photos from the windows and from the door that I have installed.
 

Attachments

  • DSC00526.jpg
    DSC00526.jpg
    88 KB · Views: 135
  • DSC00529.jpg
    DSC00529.jpg
    78.4 KB · Views: 122
  • DSC00525.jpg
    DSC00525.jpg
    135.3 KB · Views: 146
OP
R

Raul.P

Member
Joined
Nov 26, 2017
Messages
24
Location
Estonia
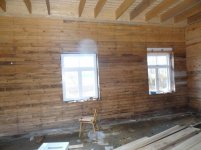
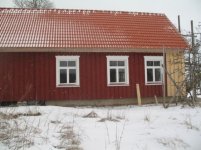
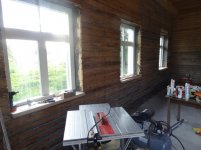
Little update. I finished installing the windows. I made some pictures of the ceiling too. As I am going to use tonque and groove clapboard on the inside walls then all the interior is going to be wooden. So my plan is to treat the wood with special fireproofing product that supposedly makes wood a lot more resistant for fire.
Here is a little video of this product in action:
 

Attachments

  • IMG_0113.jpg
    IMG_0113.jpg
    45.7 KB · Views: 87
  • IMG_0114.JPG
    IMG_0114.JPG
    138 KB · Views: 91
  • IMG_0115.jpg
    IMG_0115.jpg
    31.9 KB · Views: 98
  • IMG_0116.jpg
    IMG_0116.jpg
    52.9 KB · Views: 89
To avoid these ads, REGISTER NOW!
OP
R

Raul.P

Member
Joined
Nov 26, 2017
Messages
24
Location
Estonia
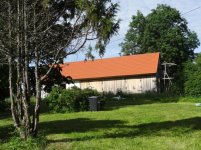
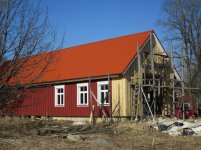
Recently the weather has started to warm up so I started the paint the walls and roof edges. I takes approximately a week to finish painting.
 

Attachments

  • IMG_5049.jpg
    IMG_5049.jpg
    116.4 KB · Views: 82
  • IMG_5051.jpg
    IMG_5051.jpg
    141.7 KB · Views: 86

Dividing Creek

Well-known member
Joined
Nov 17, 2011
Messages
188
Location
Central Virginia
All of the strip plank/tongue and groove on the interior looks very time consuming and labor intensive but is an awesome look. Will you finish it or leave natural ? A building to be very proud of.
 
OP
R

Raul.P

Member
Joined
Nov 26, 2017
Messages
24
Location
Estonia
Hi


A little update. I have almost finished the painting of the outside. Some parts need a second layer and then its done. I also started to install the tongue and groove which indeed is labour and time consuming but it is one of the cheapest options possible. It is approximately 3 times cheaper than plywood of similar thickness. A friend of mine made sills for the windows and for the door.

Will you finish it or leave natural

I am going to treat it with fire retarder and leave it as it is.
 

Attachments

  • DSC00612.jpg
    DSC00612.jpg
    82.5 KB · Views: 88
  • DSC00611.jpg
    DSC00611.jpg
    94.5 KB · Views: 92
  • DSC00610.jpg
    DSC00610.jpg
    86.3 KB · Views: 90
  • DSC00609.jpg
    DSC00609.jpg
    72.9 KB · Views: 93
  • DSC00607.jpg
    DSC00607.jpg
    148.5 KB · Views: 85
OP
R

Raul.P

Member
Joined
Nov 26, 2017
Messages
24
Location
Estonia
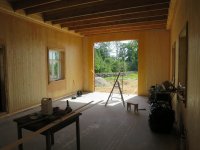
A small update. I have finished the inside with tonque and groove. Now it is time for the main door and to bring in electricity. I initially wanted to make the door myself but then I thought about the weight of the carriage doors and I decided to go with the sectional garage door.
Some pictures of the progress.
 

Attachments

  • IMG_6560.jpg
    IMG_6560.jpg
    137.8 KB · Views: 64
  • IMG_6561.jpg
    IMG_6561.jpg
    131 KB · Views: 59
  • IMG_6562.jpg
    IMG_6562.jpg
    116.9 KB · Views: 56
  • IMG_6563.jpg
    IMG_6563.jpg
    137.2 KB · Views: 60
OP
R

Raul.P

Member
Joined
Nov 26, 2017
Messages
24
Location
Estonia
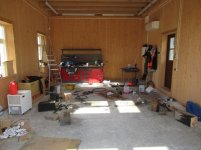
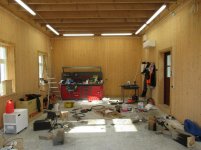
For an update I am going to post some pictures of my garage after the clutch and cambelt change on my citroen berlingo. I really need to install the two post lift as soon as possible although it was not so bad doing the job in the garage using blocks of wood to support the front end of the car.
 

Attachments

  • IMG_0539.jpg
    IMG_0539.jpg
    85.6 KB · Views: 82
  • IMG_0540.jpg
    IMG_0540.jpg
    92.9 KB · Views: 68
  • IMG_0541.jpg
    IMG_0541.jpg
    86.2 KB · Views: 74
To avoid these ads, REGISTER NOW!
Top Bottom