To avoid these ads, REGISTER NOW!

Inland Northwest 40X70 Stick Frame

Cougfan

Active member
Joined
Mar 26, 2012
Messages
41
Location
Spokane, WA
40X70 Stick Frame

I have been reading on this forum for a while and have gotten a ton of info from everyone, so I figured I needed to contribute a little as well.

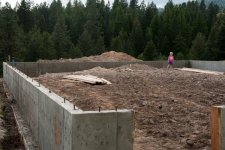
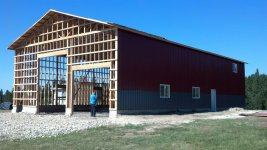
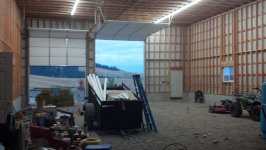
We are building a 40X70 stick frame shop just outside of Spokane. Here are a few pictures to get us started.
 

Attachments

  • IMG_8959.jpg
    IMG_8959.jpg
    99.1 KB · Views: 180
  • IMG_9031.jpg
    IMG_9031.jpg
    76.5 KB · Views: 185
  • IMG_9023.jpg
    IMG_9023.jpg
    103.1 KB · Views: 169
  • IMG_9018.jpg
    IMG_9018.jpg
    98 KB · Views: 178
  • IMG_9006.jpg
    IMG_9006.jpg
    122.8 KB · Views: 186
  • IMG_8973.jpg
    IMG_8973.jpg
    76.9 KB · Views: 205
  • IMG_8962.jpg
    IMG_8962.jpg
    136.7 KB · Views: 193
Last edited:
To avoid these ads, REGISTER NOW!
OP
C

Cougfan

Active member
Joined
Mar 26, 2012
Messages
41
Location
Spokane, WA
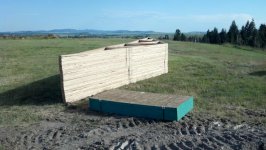
The pics here of the trusses were taken today.
 

Attachments

  • IMG_20130618_165841_595.jpg
    IMG_20130618_165841_595.jpg
    65.5 KB · Views: 228
  • IMG_20130618_162450_127.jpg
    IMG_20130618_162450_127.jpg
    89.1 KB · Views: 245
  • IMG_20130617_175726_778.jpg
    IMG_20130617_175726_778.jpg
    76.5 KB · Views: 227
  • IMG_20130617_175546_274.jpg
    IMG_20130617_175546_274.jpg
    75.6 KB · Views: 297
  • IMG_9284.jpg
    IMG_9284.jpg
    81.2 KB · Views: 254
  • IMG_9277.jpg
    IMG_9277.jpg
    88.2 KB · Views: 296
  • IMG_9141.jpg
    IMG_9141.jpg
    83.2 KB · Views: 278

Kinyocase

Active member
Joined
Nov 27, 2012
Messages
43
Location
Missoula, MT
This is one Gigantic shop! Looking forward to seeing the progress! Care to indulge as to what your plans are for this space? Looks like you have a really nice location to build on.
 
OP
C

Cougfan

Active member
Joined
Mar 26, 2012
Messages
41
Location
Spokane, WA
Thanks Kinyo. We are eventually going to be moving up there in a couple of years. The plan is to build the "shell" of the shop this year, then over the next year or so, I will finish off the inside. We are going to build a loft in the back of it and make it into living quarters. Somehow, I convinced my wife and kids to move up there and live in the shop while we build our house. So that is the plan for now.

So the shop will be 70 feet long. The back 20 feet will be two stories, and the front 50 feet will be a single room for general shop stuff (tractor parking, working on stuff, etc.) The lower floor on the back 20 will eventually be a wood working shop. The upper floor will stay living quarters for friends and family to stay when they come visit. That was part of the justification for building such a big shop. By having living quarters out there, we won't need "extra" bedrooms in the house to have people come visit.
 

ADSR

Well-known member
Joined
Jan 12, 2013
Messages
10,713
****** monster! I love it. Looks like it's moving along pretty well for you!
 
OP
C

Cougfan

Active member
Joined
Mar 26, 2012
Messages
41
Location
Spokane, WA
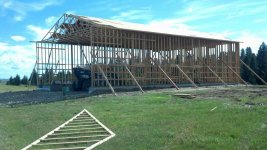
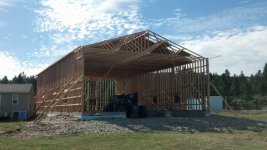
Trusses are mostly up and sheeting is going on the roof.
 

Attachments

  • IMG_20130627_163349_452.jpg
    IMG_20130627_163349_452.jpg
    116.1 KB · Views: 246
  • IMG_20130627_164426_872.jpg
    IMG_20130627_164426_872.jpg
    94.3 KB · Views: 250
OP
C

Cougfan

Active member
Joined
Mar 26, 2012
Messages
41
Location
Spokane, WA
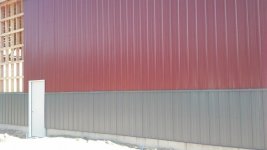
Siding is going up.
 

Attachments

  • IMG_20130706_094320_353.jpg
    IMG_20130706_094320_353.jpg
    101.4 KB · Views: 237
  • IMG_20130705_172940_484.jpg
    IMG_20130705_172940_484.jpg
    91.8 KB · Views: 175
  • IMG_20130705_172909_160.jpg
    IMG_20130705_172909_160.jpg
    62.5 KB · Views: 163

spotco2

Well-known member
Joined
May 18, 2012
Messages
1,050
Location
NW Georgia
Man, that thing is HUGE!

It's still not big enough though :)

I love the idea of living in the garage while building the house. Very smart move.
 
OP
C

Cougfan

Active member
Joined
Mar 26, 2012
Messages
41
Location
Spokane, WA
The shell is all done. Now to get to work on the floor...
 

Attachments

  • IMG_20130717_150033_453.jpg
    IMG_20130717_150033_453.jpg
    73.5 KB · Views: 230
OP
C

Cougfan

Active member
Joined
Mar 26, 2012
Messages
41
Location
Spokane, WA
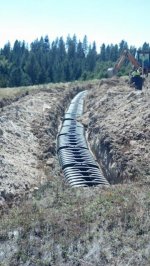
Time to post some more pictures. Septic system... We got approved for a traditional gravity system, so the overall system is pretty standard. It is a 1000 gallon tank with 4 runs of 67' drainfield lines. I opted to go with the infiltrators instead of your standard gravel fill. These things are pretty simple. They basically make a cavity underneath that black dome, and the effluent flows into it.
 

Attachments

  • IMG_20130819_135406_483.jpg
    IMG_20130819_135406_483.jpg
    120.7 KB · Views: 129
  • IMG_20130831_101907_410.jpg
    IMG_20130831_101907_410.jpg
    104.6 KB · Views: 133
  • IMG_20130819_150951_697.jpg
    IMG_20130819_150951_697.jpg
    55.7 KB · Views: 154
OP
C

Cougfan

Active member
Joined
Mar 26, 2012
Messages
41
Location
Spokane, WA
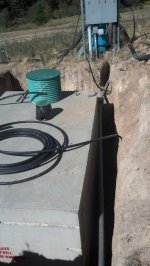
We also put in a 3000 gallon water holding tank (cistern). Our well is about 7 gallons a minute, but there is some sediment in it. So there are a couple of reasons that I wanted to put the cistern in. The main reason is that our wellhead is not easy to access in the winter or spring (snow and mud). I was worried that when our well pump goes out, if it is during those timeframes, we may not be able to get a truck down to the wellhead to replace the pump. The cistern should make the well pump last a lot longer (less cycling), and if the pump does go out in the winter, I can bring in a water truck to fill the cistern until we can get the pump replaced.

The second reason is to act as a settling tank for the sediment. Not many pics, but it is basically a big concrete box. It comes in two sections with a seal between the top half and bottom half.

The fittings at the bottom are inlet and outlet. The outlet is the Tee. One side will go to the shop where it will be filtered. The other side will be for irrigation water (unfiltered). MY water guy talked me into using those ford fittings. They are really slick as opposed to a barb fitting. They are a solid brass compression fitting for 200psi poly line. Supposed to be bomb proof and last forever...we'll see.
 

Attachments

  • IMG_20130831_101707_742.jpg
    IMG_20130831_101707_742.jpg
    92.3 KB · Views: 110
  • IMG_20130831_101615_251.jpg
    IMG_20130831_101615_251.jpg
    100.5 KB · Views: 92
OP
C

Cougfan

Active member
Joined
Mar 26, 2012
Messages
41
Location
Spokane, WA
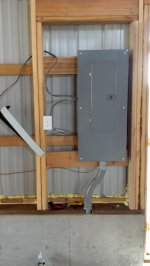
Next was the electrical. At first, I just wanted to get the power to the shop panel, get it approved, then move onto pouring the floor. When I went to go get it inspected, the inspector told me that I had to have exterior lights over all man doors, and an interior switch at every man door that would illuminate a path to the panel. That translated into, well, a change in plans. :willy_nil. So I ended up putting in more electrical than I wanted to at this point, but oh well.

I realized that I don't have a lot of pictures, so I will try to get some more in the coming days. We have 200 amp service to the shop. All outlets will be 20 amp outlets, and they are every 4 feet along the wall. I put them at 48" high, so I can put workbenches wherever I want, and I won't cover them up.

We went with 8-foot, 4 bulb, T5 high output strip lights. I debated the T8 vs. T5 for a long time, but finally decided on the T5 because they should last longer. The ceilings are 17 feet, so changing bulbs is going to be a chore. I also went with 5000k light so that it was more of a white daylight look. I have to tell you, they are beautiful. I absolutely love the light.

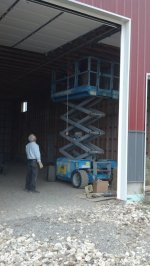
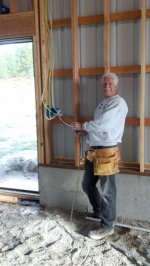
The electrical installation was pretty fun (the kids loved it). We rented an AWD scissor lift to do the ceiling work. That thing worked amazingly well. They aren't cheap, so we were in a rush to get a lot of stuff done quickly. I had my father-in-law helping, so we were able to get a lot of work done quick.
 

Attachments

  • IMG_20131011_174303_498 - Copy.jpg
    IMG_20131011_174303_498 - Copy.jpg
    78.4 KB · Views: 139
  • IMG_20131011_174213_857 - Copy.jpg
    IMG_20131011_174213_857 - Copy.jpg
    95.7 KB · Views: 164
  • IMG_20130929_131950_541.jpg
    IMG_20130929_131950_541.jpg
    107.3 KB · Views: 130
  • IMG_20130929_131922_666.jpg
    IMG_20130929_131922_666.jpg
    96 KB · Views: 126
  • IMG_20130907_133022_935.jpg
    IMG_20130907_133022_935.jpg
    72.3 KB · Views: 127
  • IMG_20130929_082921_573.jpg
    IMG_20130929_082921_573.jpg
    97 KB · Views: 158
To avoid these ads, REGISTER NOW!
OP
C

Cougfan

Active member
Joined
Mar 26, 2012
Messages
41
Location
Spokane, WA
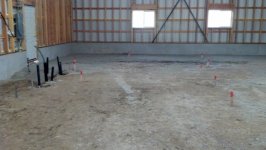
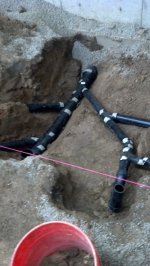
Electrical inspected and finaled...now back to the floor. I had to plumb in the drain-waste-vent system. This was a totally new endeavor for me, but I think I got it done well enough. We will have a full bathroom, kitchen sing, and washing machine drain.
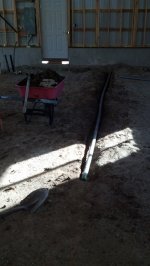
I also put in some electrical conduit under the floor for my eventual wood shop. There isn't any wire in it right now, but I it is there so that I can put in a couple of floor outlets in the middle of the shop.

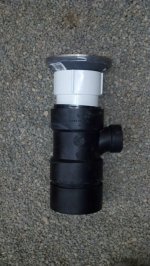
I put in two floor drains in the middle of the each bay, mainly for snowmelt, and the occasional wash down. I made the drain trap with some 4" ABS fittings. It should work well enough to trap sediment and anything else that falls through the drain grate.

Then we started grading. We used by brother in law's tractor with an 8'foot backblade to remove a decent amount of material. We were able to get it fairly well rough graded. Then I brought in gravel to finish off the final grade.

I was talked into using pea gravel because it does not need compacting (like ball bearings in a closed box). I would NOT do this again. I wish I had gone with 5/8's minus, and compactor. The pea gravel is a pain to deal with, especially when we were putting down the vapor barrier and foam boards. I think it will be fine, it was just a PITA and not worth it.
 

Attachments

  • IMG_20131018_105818_517.jpg
    IMG_20131018_105818_517.jpg
    95.7 KB · Views: 120
  • IMG_20131014_201107_080.jpg
    IMG_20131014_201107_080.jpg
    107.2 KB · Views: 77
  • IMG_20131019_164858_592.jpg
    IMG_20131019_164858_592.jpg
    84 KB · Views: 93
  • IMG_20131019_152558_806.jpg
    IMG_20131019_152558_806.jpg
    113.1 KB · Views: 83
  • IMG_20131019_152545_944.jpg
    IMG_20131019_152545_944.jpg
    84.1 KB · Views: 84
  • IMG_20131018_201152_795.jpg
    IMG_20131018_201152_795.jpg
    102.5 KB · Views: 95
  • IMG_20131018_201202_006.jpg
    IMG_20131018_201202_006.jpg
    106.1 KB · Views: 108

powerhound

Well-known member
Joined
Apr 23, 2012
Messages
89
Damn, that thing is BIG! I'll know exactly whos place that is when I see it from the road if I'm ever in the area.
 

Flatland Dave

Well-known member
Joined
Jan 1, 2010
Messages
1,363
Location
SoDak
Too bad you couldn't build that in a pretty place, Just kidding. Beautiful country there. Great shop, will be watching for updates.
 

davo727

Well-known member
Joined
Jun 17, 2012
Messages
1,660
With that much length on the infiltrators, what is the daily gallons flow number that it is based on ?

I haven't seen chambers that wide before either??
 
OP
C

Cougfan

Active member
Joined
Mar 26, 2012
Messages
41
Location
Spokane, WA
Randy, Thanks...Go Cougs!

2010, Make sure you post some pics of that monster when you get it done:thumbup:

Flatland, thanks for the comments, it really is beautiful up there. We have a hard time leaving it to come back into town to our current house.

Davo, It was designed for 480 gallons per day. It was originally designed for gravel, but the infiltrators are "equivalent or better", so it is acceptable to just put those in instead of gravel.
 
OP
C

Cougfan

Active member
Joined
Mar 26, 2012
Messages
41
Location
Spokane, WA
OK, now for the radiant heat. After we final graded with the gravel, we put down a 6 mil vapor barrier, then 2" foam insulation. We put the insulation up the perimeter and cut it on a 45° angle. I ended up cutting the top 1/2" down so that the foam doesn't show. I know that is going to make me lose some heat, but oh well.

The pex is on 12" spacing. I put a blank pex tube in so that I could run a slab thermocouple. That should allow me to keep the slab at a constant temp, and then run the wood stove to kick up the temp as needed.
 

Attachments

  • IMG_20131026_160005_333.jpg
    IMG_20131026_160005_333.jpg
    110.8 KB · Views: 114
  • IMG_20131026_163923_024.jpg
    IMG_20131026_163923_024.jpg
    85 KB · Views: 115
  • IMG_0274.jpg
    IMG_0274.jpg
    47.9 KB · Views: 106
  • IMG_0247.jpg
    IMG_0247.jpg
    143.5 KB · Views: 103
  • IMG_0234.jpg
    IMG_0234.jpg
    130.9 KB · Views: 104
  • IMG_20131027_163403_897.jpg
    IMG_20131027_163403_897.jpg
    90.2 KB · Views: 102
  • IMG_20131027_132615_916.jpg
    IMG_20131027_132615_916.jpg
    89.6 KB · Views: 102
OP
C

Cougfan

Active member
Joined
Mar 26, 2012
Messages
41
Location
Spokane, WA
More pics. We pour the floor on Tuesday!!!!
 

Attachments

  • IMG_0278.jpg
    IMG_0278.jpg
    126 KB · Views: 88
  • IMG_0268.jpg
    IMG_0268.jpg
    144.4 KB · Views: 79
  • IMG_0269.jpg
    IMG_0269.jpg
    145.4 KB · Views: 71
  • IMG_0286.jpg
    IMG_0286.jpg
    145.7 KB · Views: 81

MrScott99

Well-known member
Joined
Jan 25, 2019
Messages
60
Location
North Idaho
How have I not seen this thread before??

What an awesome shop. Looks like you are quite literally just over the hill from me.
 
To avoid these ads, REGISTER NOW!
Top Bottom