To avoid these ads, REGISTER NOW!

Inside Doc's Shop...

OP
D

DocsMachine

Well-known member
Joined
Sep 16, 2006
Messages
1,869
And DONE!

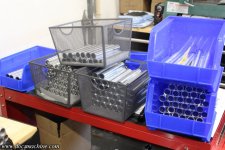
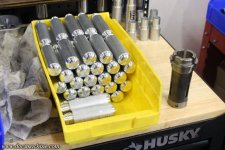
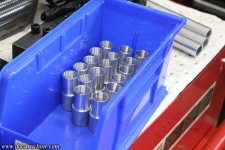
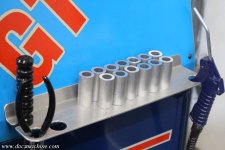
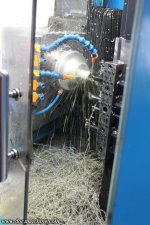
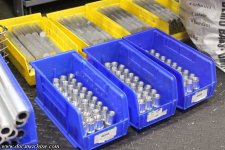
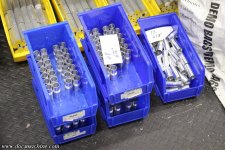
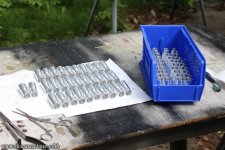
Over 250 pieces, that took an average of maybe around seven minutes each. (This isn't all of them, the cart isn't big enough to hold all the bins. :) )

progress029.jpg

I'd have lit up the turning center to start crankin' em through, but I have about five hundred and eleven other things screaming for my attention, so maybe tomorrow. Should be a nice break to have a 2:20 cycle time rather than an 8:05 :)

Oh, and there's gonna be some brass in there somewhere, too.

Doc.
 
To avoid these ads, REGISTER NOW!
OP
D

DocsMachine

Well-known member
Joined
Sep 16, 2006
Messages
1,869
Man, time flies even when you're not having any fun at all. :)

Sorry I haven't had much by way of updates lately- it's not that I haven't been doing anything, it's just that what I've been doing isn't all that photo-worthy. You lot have seen my lathes and turning centers before.

That said, I scrounged through my camera cards and found a few things. A couple of weeks back, I finally finished up a contract run...

progress030.jpg

... Of a part some of you may recognize and will hopefully shortly be up for sale. :)

progress031.jpg

Most everything else was more turning...

progress032.jpg

Yet more turning...

progress033.jpg

And then scrubbing and boxing, ready to ship off to the anodizer.

progress034.jpg

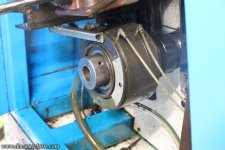
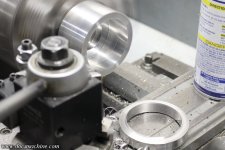
One fun bit was I made a special collet, to give a part a little more support. I started with a well-used extended-nose machinable collet, one out of a big batch I got off eBay a while back...

progress035.jpg

And set that up on the Sheldon lathe. These collets for some reason weren't machined for the usual spacer pins that let you tighten the collet into the taper, but not collapse it closed. I made do with three stainless washers from the bins (as they were thinner than the regular steel ones.)

progress036.jpg

That got drilled out...

progress037.jpg

Bored precisely to size (1.004")...

progress038.jpg

And checked for fit. Damn near perfect, if I do say so myself. :)

progress039.jpg

For a little panache, I kicked the compound over 'bout thar, and trimmed off a bit of superfluous metal.

progress040.jpg

Like so.

progress041.jpg

Why? The collet protrudes almost an inch more from the spindle face than a standard 5C, and so helps support a longer part that sticks out a little more than others. Besides helping support the part itself, a happy extra is that the part moves away from the spindle, giving a little extra room, in some cases, for certain odd tool setups on the gang-tooled CNC.

I've only had that happen once so far, but this collet would have helped with that, too.

And so, cleaned up, deburred and buffed a little...

progress042.jpg

And installed.

progress043.jpg

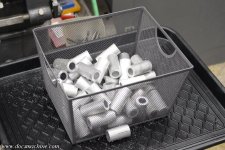
I only had time after that to just start on programming the part, and I still need to make another tool (or more accurately, finish one I started more than a year ago. :) ) but hopefully in the next couple of days I can get this basket of parts...

progress044.jpg

...Run, finished and boxed up, and get all of it off to the anodizers.

Lots in the works this week. Probably not much worth showing off, but it's all still progress.

Doc.
 
OP
D

DocsMachine

Well-known member
Joined
Sep 16, 2006
Messages
1,869
It's strange that, no matter how many tools you have, you still never seem to have the right ones. :)

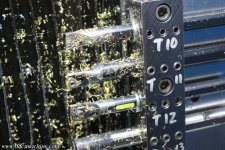
For this project I'd already modified a collet, and when it came time to run the part, I needed to be able to chamfer an inner passage. The tool block didn't already have a cutter that could do the job, and I didn't want to have to set up and prove a whole new toolset.

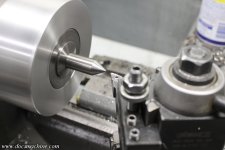
What I did have was a 60-degree diamond (shape) profiling cutter...

progress046.jpg

But it's too "thick". It's not meant to fit into small-diameter holes, and so the back of the toolholder hits and 'smears' the metal.

progress047.jpg

I'd started making a tool for exactly this a while ago, but I'd made it from undersized material. I either needed to whip up an adapter bushing, or just remake the tool. The latter was only moderately easier, so I sawed off a chunk of 5/8" O-1 (oil-hardening) tool steel, and turned a 60 degree point on it.

progress048.jpg

Set up in the mill, I cut a flat along the top...

progress049.jpg

And then milled half the point off.

progress050.jpg

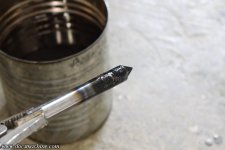
After that, I got out the seldom-used gas-axe, and by lucky chance (and a little laziness :) ) I had a can of some of the old ****** fluid left lying about. I heated the cutter to cherry red and quenched 'er in the oil- no pics, hard to juggle a lit torch, a bar of red-hot steel and a camera without either melting my face off or, y'know, burning the shop down. :)

progress051.jpg

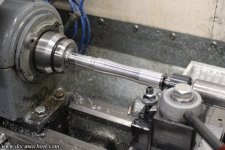
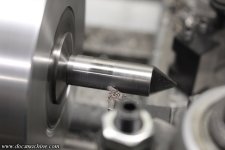
Now, as anyone who has heat-treated O-1 will tell you, it tends to "grow" slightly in the process- in my case, the treated end grew almost exactly .001", and since it was already a snug fit into the tool holder, I had to turn that thou back off, very carefully.

progress052.jpg

In that pic, the cutter is moving away from the chuck- the thin darker band at the far left is the starting point. The lighter colored dull band is untreated steel, and the shiny band is the heat-treated portion.

progress053.jpg

With a little strategic sanding and polishing here and there, it fit nice and snugly. Took a little trial-and-error to get it adjusted, but she works.

progress054.jpg

Interesting tidbit there: That tool is a one-off, basically meant just for this one part. Therefore I didn't bother assigning a tool number to it. I'd used the threading tool directly below it ("T15") to very lightly chamfer the outer corners, so I simply sent it down and to the left 'til the new tool went where I wanted it. :)

And she worked perfectly- which is more than I can say for the camera. :D

progress055.jpg

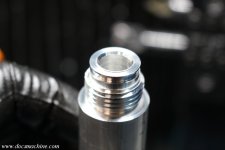
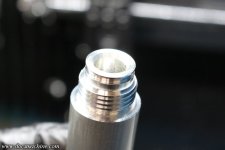
Hard to tell with the overexposure, but that burred, rolled corner from the original tool is gone, with a smooth, proper chamfer in it's place.

After that, I just had to chew my way through the rest of the parts.

progress056.jpg

Still a few steps left, but with luck, I hope to have these off to the anodizers by Saturday or Monday.

Doc.
 
OP
D

DocsMachine

Well-known member
Joined
Sep 16, 2006
Messages
1,869
Looks like it'll be Monday. :)

Whipped up a fresh program to round off the distal end...

progress057.jpg

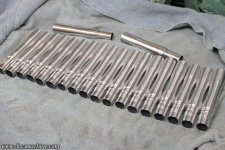
And ran the whole lot through. Nice little run, less than one minute cycle time, everything ran smoothly.

progress058.jpg

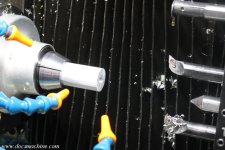
After that... allow me to pontificate a bit. The last time I ran this part, I did the drilling on the CNC, but threaded the end (female 1/8" NPT) on the turret lathe. That was because the Omniturn can't rigid tap, and I didn't, and still don't, have a floating tap holder big enough to hold an eighth-pipe tap- and, you know, actually fit in the machine. The two I have for the big turret are the size of a soda can and weigh about three pounds each.

In this case, I've been switching over to pre-set tool sets, to make programming easier, and enabling re-running previous parts just by switching to that program. (That is, without having to re-install, re-zero and re-prove a new tool set each time.) And, of course, I don't have one set up for drilling yet- point in fact, I'm not 100% sure how I'm even going to do that yet. :)

But, I do still have the two turret lathes, and those are easy enough to set up, especially just for drilling, and both were designed to run things like releasing tap holders.

I'd planned to use the big Warner & Swasey, since it has the functional flood oil, but I ran into a problem. The bar stock I'd used for this run was slightly on the large size- 1.003" to 1.004", which this stuff is usually .998" to 1.000". That doesn't sound like much- and it's not, generally speaking- but in the case of the big turret, the collets it uses and the collet mechanism have very little tolerance, and no real adjustability. I can get it to lock on this material, but I have to really lean on the mechanism- using a lot more force than I'd like.

With the 5C- far more common- I have something like five different 1" collets, ranging from about .999" to around 1.005", due to variations in manufacturer tolerances- and, since I got most of them used, possibly a touch of wear. :) And, the 5C system has an inherent adjustment built in- you can run it a touch loose for larger material, and a touch tight for smaller- although we're talking a few thousandths of an inch. :)

So, I instead opted for the smaller Rivett turret- which hasn't gotten enough use this year so far anyway. I still had to use one of the big tap holders- that ********* thing pointing away from the camera, on the turret.

progress059.jpg

But, this is the kind of process this sort of lathe was designed for, and I still find it kind of fun to run these old analog machines.

progress060.jpg

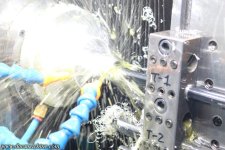
Would have been faster if I had the flood oil set up on this machine, but I've been reluctant to do so since the layout and position in the shop, doesn't lend itself well to containing the splash.

Anyway, griping aside, the whole lot is done, and just needs one more finishing step. I could easily be able to have these out the door Monday morning. :)

Doc.
 
OP
D

DocsMachine

Well-known member
Joined
Sep 16, 2006
Messages
1,869
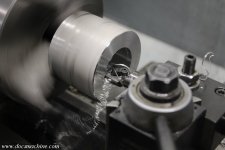
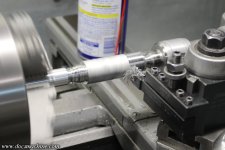
Today (Sunday) was comparatively easy. For this current run, all I needed to do was turn the OD of these parts down a few thou. So, as per long-established procedure, I chucked up a hunk of scrap in the Sheldon, turned a 60-degree point on it in place (ensuring concentricity) and proceeded to skim them down one at a time.

progress061.jpg

After a couple of hours, I had all of them run- except a couple I'm saving for something- and got them cleaned up, wrapped and boxed.

progress062.jpg

Said box, along with two other small batches of parts, should be on it's way in the morning, and it's time to move on to the next thing!

Doc.
 
OP
D

DocsMachine

Well-known member
Joined
Sep 16, 2006
Messages
1,869
As of July 1st, Doc's Machine & Airsmith Services has been in operation for twenty eight years. Officially started July 1, 1998.
I attribute my longevity to skill, determination, dedication, obstinacy, stubborness, sheer ignorance, misplaced optimism and just plain pig-headed obstreperousness. :)

And I couldn't have done any of it without you lot. Customers past, present and future, supporters, readers, Patrons, fans, friends and even those that simply don't wish me any specific harm. :D

I'm arguably the longest-running paintball machinist/airsmith, if we add the qualifiers of being always under the same shingle and in the same shop, and I hope to keep going for a long time to come.

Thank you all for your support, and I hope to have more to show you all in the near future!

Doc.

 
To avoid these ads, REGISTER NOW!

Xti04

Well-known member
Joined
Nov 11, 2016
Messages
2,338
Congrats Doc ! Paintball was a big part of my life as a teen, I worked at a mini golf course, go kart repair and paintball were my specialties there. I also learned how to do plumbing, lay carpet on mini golf courses, and generally how to do a million things that have shaped my adult life and skills. Keep it up !
 
OP
D

DocsMachine

Well-known member
Joined
Sep 16, 2006
Messages
1,869
Thanks guys! Hope you had a good Fourth! :)

In my earlier days as a car-guy, I was a bit of the local carburetor expert. The cheap cars us snot-nosed kids could actually afford often still had carbs, and were even back then old enough said carburetors always needed a good cleaning and rebuild. I was one of the few people that dared delve into the pits of those boxes of Black Magic- and also weird enough to actually own and read books about them. :)

As you might imagine, the interest and need of such dark arts has somewhat waned over the years, and the last rebuild I did was on the Quadrajet on my Cutlass, back around 2011-2012. :)

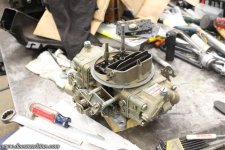
But, a friend of a friend heard through the grapevine I handled such matters, and he brought me a truly old-school hot-rod Holley last week.

progress068.jpg

I haven't rebuilt a double-pumper in several dogs' ages, but these things are fairly simple, and this particular one, as it turns out, was only in need of a cleaning. The guy clearly has some really old gas in it- it was urine yellow and when some spilled out onto the workbench, it literally took half a day to evaporate. :D You can see the faint stains to the right of the carb:

progress069.jpg

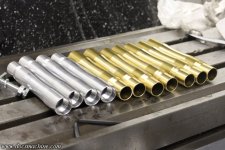
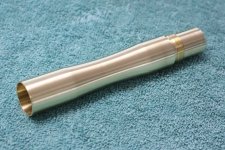
In other news, past few days I've been pushing parts through the Omniturn again- new YT video for ya- including a somewhat overdue batch of brass.

progress070.jpg

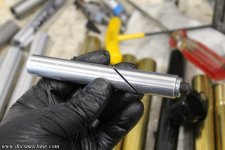
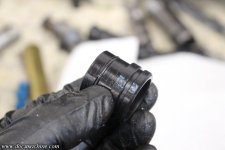
Problem is, I've been having issues with chatter, which is partly due to the tools- the cutting inserts- not being optimized in shape or angle for brass.

progress071.jpg

In the past I've been able to tweak the speeds & feeds to eliminate it, but in this case, I'm working to try and standardize a small library of programs. That lets me run another batch of parts later, with minimal setup. I want to keep the program dialed in for the usual aluminum parts, so that meant taking alternative steps.

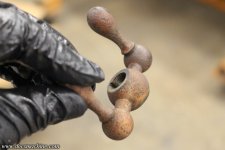
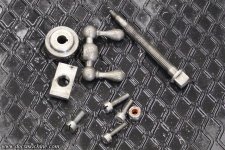
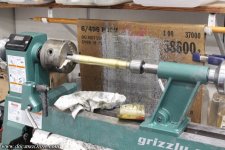
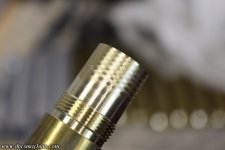
Chatter is of course simply a harmonic, and brass "rings" nicely- which is why they make bells and cymbals and things out of it- I simply needed to dampen those harmonics. So, after a little thought and some lathe time, I came up with this:

progress072.jpg

It's just an aluminum rod, turned to fit loosely in the brass material bore, with a bolt and a bandsawed wedge. When tightened into the bore, it adds mass and dampens the vibration.

progress073.jpg

progress074.jpg

And that solved the issue. No change in feeds and speeds, and as you can see in the above video, no chatter whatsoever.

progress075.jpg

Should have the rest of the brass done by this evening, and start on the profiling tomorrow.

Doc.
 

rharman

Well-known member
Joined
Apr 22, 2012
Messages
8,871
Location
SoCal
@DocsMachine - When I saw that Holley, first thig I thought of was Riley's Rebuilds. Young girl, now 20, that started a carb rebuild business when she was 13. Pretty interesting story...


OP
D

DocsMachine

Well-known member
Joined
Sep 16, 2006
Messages
1,869
Okay, that's pretty cool. I have to admit I'm surprised there's a market that big, but hey, with the reach of the internet- and, as I said, most people thinking a carb is some manner of dark magic :) - I guess there is.

I wonder if she also offers tuning advice, or just a straight up rebuild.

And... just Edelbrocks and DGVs? I suppose if that's enough to keep her in business, but man, you'd think that Holley services would more than double her traffic.

Doc.
 

zanyad

ALLIANCE MEMBER
Joined
Apr 26, 2018
Messages
2,804
Location
NE Ohio
So, after a little thought and some lathe time, I came up with this:

progress072.jpg


It's just an aluminum rod, turned to fit loosely in the brass material bore, with a bolt and a bandsawed wedge. When tightened into the bore, it adds mass and dampens the vibration.
Is that tapped on the left and clearance drilled on the right? That's the only way I could figure it working: when tightening the SHCS, the slot forces the two pieces against opposite sides of the bore. Wouldn't that push it out of round, though?
 
To avoid these ads, REGISTER NOW!
Top Bottom