To avoid these ads, REGISTER NOW!

Install Big Maxx heater before drywall?

onetechyguy

Well-known member
Joined
Apr 23, 2011
Messages
90
Hi, Getting ready to start installing my bigmax 75,000 btu gas heater and have some questions.

First, I have 3/4 black pipe coming in the front of the garage and need to continue it up to above the rafters and then elbow back about 20' to the rear of the garage to heater and reduce down. I was thinking of trying to keep the pipe in the studs so it will be hidden behind drywall and drill up thru the double 2x4 top plate to get up above the rafters. I could just extend the pipe beyond the 2x4's & then bring the pipe up to the rafters but the pipe will be exposed. I also might tee off the pipe in the first picture to elbow back outside for a gas grill in the future. Can I install shutoff valve for that outside? It is going to be a finished garage so I want it to be done right but if the pipe has to be exposed than I guess I can live with it. How is everyone doing it?
100_1456.jpg


100_1458.jpg


Second, The picture below is where I'm going to install the heater. I don't have any drywall up yet but I was going to install brackets, hang heater from threaded rod & complete the install with gas pipe & vent kit. I was planning on taking the heater back down then to insulate & get drywall installed. I know that is double work but my idea is that the drywallers will know where the gas pipe, vent, and mounting locations are to make appropriate holes in drywall. Should I just install one sheet of 5/8 drywall then install heater and leave it up and have drywallers finish so that I don't have to take heater down. Any advice?

100_1457.jpg


100_1459.jpg

This picture is the front to the back of the garage that I will need to run the pipe.
You can see that once I get it up above the celing it will be easy to get it to the back of the garage.

Thanks. Rick
 
Last edited:
To avoid these ads, REGISTER NOW!

kenfath

Well-known member
Joined
Oct 17, 2006
Messages
358
Location
Upland, CA
Sounds like you are on the right track! Using the cardboard from the shipping box and with the mounting angle brackets mounted to the heater cabinet, trace a template showing overall size of the heater, the openings in the brackets as well as the location of the vent, gas, electrical and thermostat wire openings. Use the template to help locate the exact position where heater will go as well as the location for all the connections. Then install the gas, vent and electrical, and have the drywall hung. IMO this is easier than double handling the heater.

How tall is your garage? Why did you want to use threaded rod? Have you considered lag bolting it to the ceiling joists after the drywall is finished? That is how we installed my 45000 heater. Placed a thin neoprene washer between the bracket and a fender washer, and this has eliminated any noise or vibration.
 

dave67fd

Well-known member
Joined
Apr 25, 2011
Messages
872
Location
Southern NH
Not quite sure why you installed EMT in the walls. Sounds like a waste of money IMO.

I mounted on 3/8 threaded rod and unistrut as well. Didn't install any isolators. No vibration or excess noise on mine without them.

I'm not one for hiding gas pipe within walls or studs if it can be helped. Do you have a more direct run from outside to the heater? Mine will be run along outside of my OSB.

DSC01231-1.jpg
 
Last edited:
OP
O

onetechyguy

Well-known member
Joined
Apr 23, 2011
Messages
90
Thanks Guys

Kenfath: My ceiling is 8'. I decided to use threaded rod going thru 2x6's screwed above to floor joists. I think it will be stronger that way than just using lad screws. I'm sure lag screws would be fine though.

CuriousB: Thanks, I try to be as neat as possible when installing. I will install mud rings. I had to install with the covers to pass inspection. Double work but it had to be done.

Dave67fd: Emt wasn't that expensive, it makes it very easy to add or replace wires in the future if the need arises.

I installed heater this weekend, ran the gas line & made hole in roof for vent. Hooked up electrical & thermostat temporarily to test it. Works perfectly!
I will be taking it down before drywall. I will post pictures in a little while.
 
OP
O

onetechyguy

Well-known member
Joined
Apr 23, 2011
Messages
90
Here are some pics:

IMG_0706.jpg


100_1462.jpg

I tee'd of the 3/4 to run a gas grill in the near future

100_1463.jpg


100_1464.jpg


100_1465.jpg


100_1466.jpg
 
Last edited:

fury9

Well-known member
Joined
Mar 4, 2012
Messages
1,277
Location
Mchenry, IlLaHnoYs
nice work, looks good to me and you even put a drip leg on it but I see no union anywhere and make sure you have access to that grill shut off in the wall. I would remove everything including the gas shut off for the heater and just cap it off. the drywallers will build around it.
 
OP
O

onetechyguy

Well-known member
Joined
Apr 23, 2011
Messages
90
Thanks, There is a union right below the shutoff valve on the heater. I am going to install an access panel to get at the shutoff valve for the gas grill.
 

fury9

Well-known member
Joined
Mar 4, 2012
Messages
1,277
Location
Mchenry, IlLaHnoYs
kick *** heater! wish I had one, nice to see actual plywood on the roof and walls too, 6/12? jack rafters and everything are nice and tight nice job!
 

Kevin54

MEMBER EMERITUS
Joined
Jan 12, 2005
Messages
29,341
Location
Urbana, Ohio
Are you sure you're even allowed to run gas pipe hidden in a wall. I didn't think it was allowed all for the fact that if you have a leak at a joint, you will have gas buildup in that cavity
 
OP
O

onetechyguy

Well-known member
Joined
Apr 23, 2011
Messages
90
I don't think that is a problem. The pipe coming into the garage with the shutoff for the gas grill is going to have an access panel. The only pipe that is actually hidden is a straight piece of black pipe about 36" running up from the access panel to the attic, no fittings are behind drywall. The few elbows and coupling will be accessable from the attic. The pipe running between the floor joists will also be accessable from the attic. I don't have any unions that are going to be hidden behind drywall. I still have to test for leaks, I am pretty confident everything should be ok and permanent. Thanks
 

Mmfh

MEMBER EMERITUS
Joined
Oct 8, 2011
Messages
1,423
Location
Portland Oregon
I notice you have single wall vent coming out of the back of the heater, you have "B" vent going through the roof, is that going to be a problem hooking the two together? Or do you just slide them together and put in a couple of screws to hold it?
 
OP
O

onetechyguy

Well-known member
Joined
Apr 23, 2011
Messages
90
That will be fine, the kit came with both pieces. I will screw it together once I'm done.
 

dave67fd

Well-known member
Joined
Apr 25, 2011
Messages
872
Location
Southern NH
The outer area of the b-vent should be sealed at the single to b-vent connection (high temp sealer). All connections need 3 screws at a minimum and also sealed with high temp sealer/silicone.
 

curiousB

Well-known member
Joined
Dec 15, 2011
Messages
143
Location
NW Chicago, IL
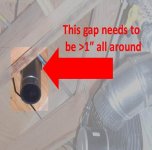
Just noticed in picts the clearance from cutout in roof sheathing doesn't look like 1" minimum from wall of B-Vent. Might want to widen that hole some.
 
To avoid these ads, REGISTER NOW!

jumpingryan

Well-known member
Joined
Jan 17, 2009
Messages
89
Location
Ontario, Canada
I used a wall thimble for my direct vent setup which provided plenty of space between the double wall pipe and the walls/insulation. Do vertical vented kits not use something similar?

A vertical kit usually has what is called a firebreak. It is basically a square piece of metal with a round hole in the centre for the vent pipe.

The venting I installed in my previous house, I used a firebreak that was square, and it had 4 clips around the circular vent hole. Those allowed you to make a square hole in your drywall for the round pipe to go through maintaining the 1 inch clearance around the pipe.

Here is a tip.... when you have the firebreak on the ground before install, buy from a hardware store square HVAC venting (usually around 7 inch by 7 inch for a 4 inch b-vent) that snaps together and fits around the clips. Make it the height above your expected insulation level. Screw/rivet the enclosure to the clips. It is FAR easier to do this on the shop floor than try to add it in while installed in the attic.

Then cut a hole in the drywall ceiling that fits the clips (and the enclosure) slide the whole thing up, and you now have your 1 inch standoff to blow in insulation, or surround with fibre glass with no worry of it touching the vent pipe.

As an added tip, use some of the scrap leftovers to make a cover for the top if you blow in insulation to guard against careless blown in installers.

Ryan
 

curiousB

Well-known member
Joined
Dec 15, 2011
Messages
143
Location
NW Chicago, IL
Yes but this garage doesn't have a horizontal ceiling. At least not yet. In the picture the roof sheathing at slope looks too close to the edge of the B Vent. Its a simple matter with a demel tool to trim back the sheathing at least 1" clerance. Its the roof cap that is holding the pipe centered in the hole.
 
OP
O

onetechyguy

Well-known member
Joined
Apr 23, 2011
Messages
90
So you think I should trim the roof sheathing a little more? I thought that it only needed a firebreak when going thru drywall because of insulation? Thanks
 

jumpingryan

Well-known member
Joined
Jan 17, 2009
Messages
89
Location
Ontario, Canada
Yes but this garage doesn't have a horizontal ceiling. At least not yet. In the picture the roof sheathing at slope looks too close to the edge of the B Vent. Its a simple matter with a demel tool to trim back the sheathing at least 1" clerance. Its the roof cap that is holding the pipe centered in the hole.

I wish I had some pictures to better explain.... unfortunately the house is sold now!

I wasn't providing a suggestion for holding the pipe from touching the roof sheathing..... it is all about providing the clearances from insulation when it does become time to insulate and drywall. Much easier to do now than retrofit later while stepping rafters and inside a hot attic.

The termination I suggested finishes well before the roof sheathing (a few inches past the insulation level will do.

The penetration from the vent clearances to sheathing is handled by the roof flashing, and your hole is cut 1 inch bigger than the roof flashing....

Anyways, best of luck to all....

Ryan
 

472scout

Well-known member
Joined
Sep 18, 2010
Messages
1,280
Location
back 40
One quick question. Do these not have a pilot light? I always had the idea that a pilot light in a garage is a bad idea.
 

curiousB

Well-known member
Joined
Dec 15, 2011
Messages
143
Location
NW Chicago, IL
One quick question. Do these not have a pilot light? I always had the idea that a pilot light in a garage is a bad idea.

No they are electronic ignition. They only have gas and flame during a call for heat. Your concern is still valid though. There are more expensive versions which are sealed such that the combustion air and exhaust are sealed to the outdoors. You just need to be careful about doing things with flammable vapor products if you have a heater like this.
 

Highbeam

Well-known member
Joined
Feb 15, 2011
Messages
2,292
Location
Mt Rainier foothills, WA
One quick question. Do these not have a pilot light? I always had the idea that a pilot light in a garage is a bad idea.

The codes still allow flames in the garage but they must be off the ground by a certain distance. Supposedly the dangerous fumes will pool on the ground but not be as bad a couple of feet up.

Solid fuel burning devices such as wood, pellet, or coal stoves are illegal in a garage even if the flame several feet from the floor. The fire code prohibits solid fuel burners outright. I think that this is a stupid rule.

It is perfectly legal to weld or use a torch on the floor.
 

dave67fd

Well-known member
Joined
Apr 25, 2011
Messages
872
Location
Southern NH
It is perfectly legal to weld or use a torch on the floor.

It is considered ok Probably because they are considered a controlled function. The welder is usually on or off and the torch, although could be left on it again is assumed it is to be shut off. Solid fuel burners will stay going untill all fuel is burned and 99% of the time is left unattended. Flame size is also an issue.

It is a stupid rule for those that are the educated and safety conscience but a good rule for those that lack common sense and intelligence so they win.
 

nwav8tor

Well-known member
Joined
Feb 21, 2012
Messages
239
Location
Spokane, WA
Onetechyguy,

On page E-10 of my Mr Heater manual under 'Gas Connection' it says: "A 1/8" NPT plugged tap shall be installed immediately upstream of the gas supply connection to the heater."

I see no such tap on your install. Is that because there is a tap on the main gas control valve assembly that came installed on the heater itself? Is it OK to leave out that tap if it's not specifically required by your local code agency?

BTW, Very nice work on all your framing, electrical and heat. I bet that'll be one sweet shop when it completed!

Paul
 
OP
O

onetechyguy

Well-known member
Joined
Apr 23, 2011
Messages
90
Thanks Paul,

I see what you mean in the manual. What do they mean by a A 1/8" NPT plugged tap? I have 3/4 reduced to 1/2 going thru a shutoff and then a union before going to the heater. I might have to ask a plumber or a plumbing supply store.

Thanks, Rick
 
OP
O

onetechyguy

Well-known member
Joined
Apr 23, 2011
Messages
90
I just read online that it is for a test gauge connection. Probably just a fitting with a 1/8 output that I would have to plug.
 

Mmfh

MEMBER EMERITUS
Joined
Oct 8, 2011
Messages
1,423
Location
Portland Oregon
Its like a "T" that you put in where you turn to go into the heater and down for a drip leg. It is just a place to screw in a Manometer so you can check pressures at the heater.

Normally would have a plug in the "1/8 hole.
 

nwav8tor

Well-known member
Joined
Feb 21, 2012
Messages
239
Location
Spokane, WA
Onetechyguy,

Check with a heating installer to see if that tap is really necessary before you go through the trouble to add one. I believe there is actually a tap inside the heater itself as part of the control valve assembly. Seems redundant to me to have to add another when there's already one there. Perhaps that requirement in the manual is a holdover from a previous iteration of the heater when the control valves didn't already have a tap.

Paul
 

Socophreak

Well-known member
Joined
Jun 18, 2010
Messages
231
Onetechyguy,

Check with a heating installer to see if that tap is really necessary before you go through the trouble to add one. I believe there is actually a tap inside the heater itself as part of the control valve assembly. Seems redundant to me to have to add another when there's already one there. Perhaps that requirement in the manual is a holdover from a previous iteration of the heater when the control valves didn't already have a tap.

Paul

It will be for checking incoming supply.

Certain valves are still produced without incoming pressure taps. It just ensures that there is at least 1 tap to check incoming pressure.

Just have to make sure the manifold pressure is 7" WC. Too much or too little may cause carbon monoxide

The manual has all of the information needed to set it up.
 

dave67fd

Well-known member
Joined
Apr 25, 2011
Messages
872
Location
Southern NH
Socophreak,

The OP has LP. "Line pressure" should be 13-14" wc (heater needs to maintain
10.4" w.c. minimum line pressure at full BTU output)

Manifold pressure is 10" w.c.

The gas valve manifold has a pressure gauge port for checking manifold pressure. The "T" is a trap for moisture and debris and should be checked and cleaned out yearly (with gas at tank off).

The plugged tap is used to check and test line pressures but many gas guys don't bother to modify a "t" fitting as the plugged taps i believe are not purchased that way. The line pressures should be checked with the heater disconnected so the gauge goes were the heater would connect for test pressures.
 
Last edited:

R6 Racer

Well-known member
Joined
Feb 21, 2010
Messages
1,632
Location
Northern Ontario Canada
Can anyone tell me if I can use 1/2" copper pipe sticks & the necessary joints sweated together for my natural gas feed line? Or does it have to be 1 continuous piece if copper is used?

Thanks in advance
Steve
 

nwav8tor

Well-known member
Joined
Feb 21, 2012
Messages
239
Location
Spokane, WA
It will be for checking incoming supply.

Certain valves are still produced without incoming pressure taps. It just ensures that there is at least 1 tap to check incoming pressure.

Just have to make sure the manifold pressure is 7" WC. Too much or too little may cause carbon monoxide

The manual has all of the information needed to set it up.

Socophreak,

The gas valve manifold has a pressure gauge port for checking manifold pressure. The "T" is a trap for moisture and debris and should be checked and cleaned out yearly (with gas at tank off).

The plugged tap is used to check and test line pressures but many gas guys don't bother to modify a "t" fitting as the plugged taps i believe are not purchased that way. The line pressures should be checked with the heater disconnected so the gauge goes were the heater would connect for test pressures.

Soooo,

If the heater's gas control valve does already have a plugged tap (mine has two, one at the inlet of the Honeywell valve and the other at the outlet), do I still need to install another one in the NG supply line upstream of the heater?

With the two taps in my Mr Heater control valve, it seems that BOTH line pressure and manifold pressure can be checked right at the valve and a tap upstream of the heater would be unnecessary...

Is that correct?

Thanks, I just want my install to be legal and not have any incorrect items be pointed out by the inspector,
Paul
 
Last edited:
To avoid these ads, REGISTER NOW!
Top Bottom