To avoid these ads, REGISTER NOW!

Insulating Old 2-car Garage

uberschall

Active member
Joined
Nov 14, 2011
Messages
36
Location
Just North of Detroit
With the temperature consistently below freezing lately, I'm caving in and insulating my old 2-car garage.

It's stick-built, originally constructed in 1931. New slab, sill plate, and roof in the last couple of years. 2 front facing tilt-up steel doors and a flimsy man door on the side. There are a few boards scabbed on for light storage and the door tracks, but the inside of the hip roof is otherwise accessible. No vents in roof or soffit.

I heat with a wood stove, chimney straight through the roof.

Looking for suggestions on insulation type and installation tips (i.e. do I need vapor barrier, etc), bearing in mind it's a rental and this is likely my last winter in the house, so cost>performance>looks.

Thanks in advance!
 
To avoid these ads, REGISTER NOW!

EOC_Jason

Well-known member
Joined
Jun 25, 2012
Messages
11,388
Location
Bentonville, AR
Before even tackling insulation I would seal up any cracks or gaps around the doors, walls, etc, etc... Just from keeping the cold seeping in that way could net you considerable heat retention.

If it's your last winter, I probably wouldn't waste the money insulating unless you can get some free batts or rigid foam board or something.
 
OP
U

uberschall

Active member
Joined
Nov 14, 2011
Messages
36
Location
Just North of Detroit
Before even tackling insulation I would seal up any cracks or gaps around the doors, walls, etc, etc... Just from keeping the cold seeping in that way could net you considerable heat retention.

If it's your last winter, I probably wouldn't waste the money insulating unless you can get some free batts or rigid foam board or something.

I've closed any gaps/cracks with expanding foam, and added seals to the doors when I moved in. Excellent tip nonetheless.

There doesn't seem to be a shortage of discounted insulating materials on CL locally, from batt and foam board to foil bubble. I have a couple projects to finish in the shop this winter, and if insulating will help cut down how much wood I burn and how often I need to run my Big Buddy for auxiliary heat, it will be worth the investment and a weekend's work.
 

sublime68charger

Well-known member
Joined
Sep 9, 2014
Messages
5,415
Location
SW Wisconsin
Can you post up a Pic of how your ceiling looks?

Heat goes up, what ever you can due to keep the heat from going up to the roof line will help.

My off the hip would be to tack up foam board under the ceiling and than add loose Batts on top of the foam board if your ceiling can support the extra weight.

also add your location to your profile.

will help with the response's that you will get.
 
OP
U

uberschall

Active member
Joined
Nov 14, 2011
Messages
36
Location
Just North of Detroit
I've updated my profile - I'm literally a few blocks north of Detroit.

The garage is 18' x 20' and I've got a couple pictures to help give you an idea what I'm working with structurally.

Here's the best shot I could get with the crappy iPad camera of inside the peak:

4042ab8c9604645873d20fd889803123.jpg

Where the roof meets the wall - no overhang:

fc42636dce9ffef44ea80bfaa769225c.jpg

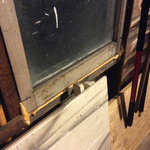
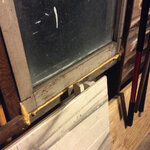
Some of my sealing efforts at the sill plate and around the window:

b63bb7050f9be8b8389fb6f0caf34492.jpg

About the best outside shot I could get in the dark:

f3035eef04b39082424f4cae524ce81f.jpg


Sent from my iPad using Tapatalk
 

Attachments

  • 4042ab8c9604645873d20fd889803123.jpg
    4042ab8c9604645873d20fd889803123.jpg
    1,001 KB · Views: 1
  • fc42636dce9ffef44ea80bfaa769225c.jpg
    fc42636dce9ffef44ea80bfaa769225c.jpg
    993.7 KB · Views: 1
  • f3035eef04b39082424f4cae524ce81f.jpg
    f3035eef04b39082424f4cae524ce81f.jpg
    826.1 KB · Views: 1
  • b63bb7050f9be8b8389fb6f0caf34492.jpg
    b63bb7050f9be8b8389fb6f0caf34492.jpg
    1 MB · Views: 1

matt_i

Well-known member
Joined
Mar 14, 2008
Messages
10,752
Location
SE Michigan
If you could get some 10 mil plastic (heavy stuff) and put it up with the orange cap-nails as a "ceiling" I think this is your best route given the specs of "last winter", "rental", "low investment". Seal any seams or laps with a high quality duct tape. Hopefully the framing is close enough to support it...but you might have to add some more. Must be careful near any flue/chimney piping....start with metal, then go to wood and then to the plastic.

You would reduce the cube of cold air and keep the air that does get heated from collecting up at the peak.

The idea of using rigid board and taping the seams as mentioned above is excellent. Add 1x4 "lip" along the top plate to give a surface for fastening the XPS with screws & washers.

Buy a pile of firewood and keep it stoked!
 
Last edited:

EOC_Jason

Well-known member
Joined
Jun 25, 2012
Messages
11,388
Location
Bentonville, AR
Do you need the extra height in the ceiling above the lights? If not, maybe get some of those big 4x8 foam boards from HD to create a false ceiling, I think the R5 rated are less than $20 a sheet, and they make some tongue & groove, or you could use some foil tape to seal between them. The lower ceiling would also mean less area to heat. Bonus would be you could take that foam board with you when you move.

Or maybe staple up some chicken wire and get some rolls of insulation.

I would say just staple the insulation up on the rafters against the roof, but those look spaced farther than 24" apart???
 
OP
U

uberschall

Active member
Joined
Nov 14, 2011
Messages
36
Location
Just North of Detroit
If you could get some 10 mil plastic (heavy stuff) and put it up with the orange cap-nails as a "ceiling" I think this is your best route given the specs of "last winter", "rental", "low investment". Seal any seams or laps with a high quality duct tape. Hopefully the framing is close enough to support it...but you might have to add some more. Must be careful near any flue/chimney piping....start with metal, then go to wood and then to the plastic.

You would reduce the cube of cold air and keep the air that does get heated from collecting up at the peak.

The idea of using rigid board and taping the seams as mentioned above is excellent. Add 1x4 "lip" along the top plate to give a surface for fastening the XPS with screws & washers.

Buy a pile of firewood and keep it stoked!

I had a roll of thick plastic I planned to sheet off the ceiling with a couple years back, but I lost it in the flood of '14...the last couple of winters were mild and I didn't have as many projects so I never revisited it. Great idea for a chimney surround, too.

Do you need the extra height in the ceiling above the lights? If not, maybe get some of those big 4x8 foam boards from HD to create a false ceiling, I think the R5 rated are less than $20 a sheet, and they make some tongue & groove, or you could use some foil tape to seal between them. The lower ceiling would also mean less area to heat. Bonus would be you could take that foam board with you when you move.

Or maybe staple up some chicken wire and get some rolls of insulation.

I would say just staple the insulation up on the rafters against the roof, but those look spaced farther than 24" apart???

The chicken wire idea is brilliant! The roof joists are actually 24" apart, but I suspect the false ceiling will be faster and cheaper - not to mention easier than custom cutting insulation for the roof.

The garage is only 18' x 20' so I should be able to make this happen for $150.

I'll update with the results of my efforts soon.

Thanks!
 
OP
U

uberschall

Active member
Joined
Nov 14, 2011
Messages
36
Location
Just North of Detroit
Update time! I tackled this project over the break and will cover everything in one post.

I decided to go with plastic sheet like I had planned in the past, mostly for cost and theoretical ease of installation.

The boards hanging from the roof are all over the map, so the only way to do a rigid ceiling "right" would be to tear everything out and establish a nice flat frame - something I definitely didn't want to get into.

First I cut a 2x2' sheet of steel for a chimney surround:
c4d5e619db85047c10552878cc7b2710.jpg

I used a few offcuts to make a frame that mounts to the uneven rafters:

998b461c26f96dcb3a7b39131e14c427.jpg

The plastic sheet came on a roll, 10' wide by 100' long. The garage is ~20' wide and 18' deep, so running the sheet width-wise allowed me some room for error and overlap at the seam.

I'm glad I used 4-mil sheet - working alone, anything thicker would have been a real bear on account of the extra weight. I started above the doors:

5b67b994c5dcb77ddf92c7b5b7789477.jpg

I used one of the "factory" edges as a guide and then worked from the center out to try and keep everything even. By the time I hung the second sheet, keeping the sheet taut and square was a lot easier, although I started from the back:

32868210b98ca52709f5d7ce0ba935b2.jpg

There's about a foot of overlap between the sheets, and I trimmed the edges to tidy it up when I was done hanging it all.

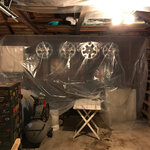
All done:
5c1c22914943138fcc516b2d1827d552.jpg

I secured the film using 1/2" staples and a manual stapler. Needless to say after shooting a few hundred, my hands were pretty tired. I doubt heavier film would have held with staples alone.

It hasn't been nearly as cold as it was a few weeks ago, but the warmer weather allowed me to get this done without the stove going (for obvious safety reasons) and stack a cord of wood.

Initial review is positive - the film definitely helps with the drafty feeling and it seems to be leveling out about 5 degrees warmer than before. The true test will happen when the mercury drops into the teens again - but it appears to have been worth a few hours of work and under $50 in materials.


Sent from my iPhone using Tapatalk
 

Attachments

  • c4d5e619db85047c10552878cc7b2710.jpg
    c4d5e619db85047c10552878cc7b2710.jpg
    885.2 KB · Views: 1
  • 998b461c26f96dcb3a7b39131e14c427.jpg
    998b461c26f96dcb3a7b39131e14c427.jpg
    1,016.6 KB · Views: 1
  • 5b67b994c5dcb77ddf92c7b5b7789477.jpg
    5b67b994c5dcb77ddf92c7b5b7789477.jpg
    760.9 KB · Views: 1
  • 32868210b98ca52709f5d7ce0ba935b2.jpg
    32868210b98ca52709f5d7ce0ba935b2.jpg
    1,001.5 KB · Views: 1
  • 5c1c22914943138fcc516b2d1827d552.jpg
    5c1c22914943138fcc516b2d1827d552.jpg
    943 KB · Views: 1

EOC_Jason

Well-known member
Joined
Jun 25, 2012
Messages
11,388
Location
Bentonville, AR
Nice... It's the same principle as the false ceilings you see in offices... Less sq ft that has to be heated / cooled. Now your heat should hopefully stay down lower instead of going up into the rafters!
 
To avoid these ads, REGISTER NOW!
OP
U

uberschall

Active member
Joined
Nov 14, 2011
Messages
36
Location
Just North of Detroit
Nice... It's the same principle as the false ceilings you see in offices... Less sq ft that has to be heated / cooled. Now your heat should hopefully stay down lower instead of going up into the rafters!

That's the plan. I knew I had to do something when I saw the cobwebs on the rafters moving from the heat rising!

Looks great. That's got to help.

Thanks, so far so good.

You still need ceiling joists, ceiling and wall insulation and ceiling and wall sheathing.

Bill

I know, I'd change the thread title to "sort of insulating" if I could, but if you read the first post you probably already knew that, haha
 

EOC_Jason

Well-known member
Joined
Jun 25, 2012
Messages
11,388
Location
Bentonville, AR
If for some reason you see it tearing away from the staples, you can get long 1/2 x 1" furring strips and screw them to the rafters to give a nice continuous grip on the plastic.

You can see how I did it for my greenhouse I built over my garden. Trying to get that tight by yourself while it was very gusty (before a cold front arrived) was soooo much fun... Something that probably should have taken only an hour took most of the day.
 

Attachments

  • 20161118_085719.jpg
    20161118_085719.jpg
    150.7 KB · Views: 21

rburke65

Well-known member
Joined
Nov 10, 2007
Messages
12,349
Location
Canfield, Ohio
For years while doing a body off restoration in a pole barn, I stapled plastic sheeting not only on the ceiling but also on the side walls. I made a ? 15' X 25' area just trying to keep warm. Worked well.
 
OP
U

uberschall

Active member
Joined
Nov 14, 2011
Messages
36
Location
Just North of Detroit
If for some reason you see it tearing away from the staples, you can get long 1/2 x 1" furring strips and screw them to the rafters to give a nice continuous grip on the plastic.

You can see how I did it for my greenhouse I built over my garden. Trying to get that tight by yourself while it was very gusty (before a cold front arrived) was soooo much fun... Something that probably should have taken only an hour took most of the day.

Looks good, man. Furring strips would be a good belt & suspenders approach. I figured I'd have to tack the plastic up first either way...especially since I was also working alone, but at least indoors.

For years while doing a body off restoration in a pole barn, I stapled plastic sheeting not only on the ceiling but also on the side walls. I made a ? 15' X 25' area just trying to keep warm. Worked well.

Hey, if it gets the job done! Were you restoring the Impala in your avatar?
 

xtremek

Well-known member
Joined
Apr 13, 2012
Messages
11,603
Location
St. Johns, Mi
If for some reason you see it tearing away from the staples, you can get long 1/2 x 1" furring strips and screw them to the rafters to give a nice continuous grip on the plastic......

I'm super cheap. I did this to my barn, in fact it's still up. But I was afraid of it tearing through, so I cut cereal boxes into squares and stapled through them. The tighter you can the plastic the better. I'm about 70% done with insulating the barn ceiling,
 

xtremek

Well-known member
Joined
Apr 13, 2012
Messages
11,603
Location
St. Johns, Mi
Yes, it really does help a ton. Duct tape the seams. The tighter the air pockets, the better the air acts as an insulator
 
OP
U

uberschall

Active member
Joined
Nov 14, 2011
Messages
36
Location
Just North of Detroit
If my stapler had some more...motivation, I would have used pieces of paint stir sticks under the staples.

So far it hasn't sagged or torn, so I can't complain.

Supposed to be well below freezing the rest of the week, so I'm looking forward to the improvement.

Thanks for all the comments and suggestions!
 
To avoid these ads, REGISTER NOW!
Top Bottom