
You are using an out of date browser. It may not display this or other websites correctly.
You should upgrade or use an alternative browser.
You should upgrade or use an alternative browser.
Iron (your restored Iron)
- Thread starter AdrianBoomer
- Start date
OP
AdrianBoomer
Well-known member
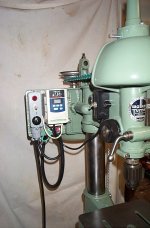
updates from iron land, would love to see where everyone is at. My hiatus is over LOL
Let's see that newly restored, painted, tweaked Iron!
Let's see that newly restored, painted, tweaked Iron!
Attachments


jweier111
Well-known member
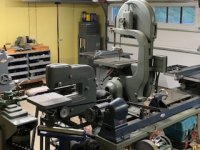
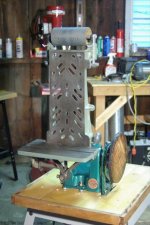
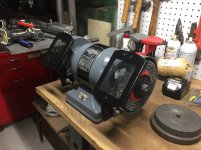
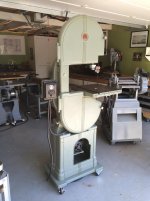
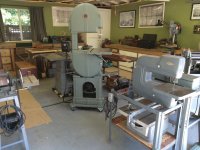
Really like your work on the restores AdrianBoomer. Here are a few of mine. I have a Craftsman badged 12" Parks planer and King Seeley 6" joiner in the queue right now. Also a Walker Turner Cabinet saw I'm planning to start on over the winter.
Attachments


OP
AdrianBoomer
Well-known member
Man, I love that bench grinder. I am looking for another one, thinking a 1940s or early 50s 115. craftsman. that band saw is looking great, my friend!Really like your work on the restores AdrianBoomer. Here are a few of mine. I have a Craftsman badged 12" Parks planer and King Seeley 6" joiner in the queue right now. Also a Walker Turner Cabinet saw I'm planning to start on over the winter.
jweier111
Well-known member
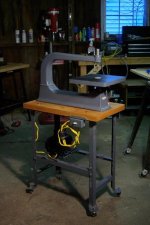
Thanks, I just picked up the grinder and did the restore recently. I'm already looking for another one for the basement shop. Red Leader has a couple of 115's from that time period on here and his restores are top notch. I'd love to find a 115.6965 or an S-5309. Out of curiosity is the stand for your planer original or did you build it?
OP
AdrianBoomer
Well-known member
that 115.6965 is my jam. need one......
I built that stand out of angle iron and plywood. It is heavy. It works well and looks original, I took the lines off an original.
I built that stand out of angle iron and plywood. It is heavy. It works well and looks original, I took the lines off an original.
jweier111
Well-known member
It sure does look original! Nice work. I have two of those planers in the garage right now. I've pulled some stand plans off Vintage Machinery, but I like the angle iron idea.
Roberts210
Well-known member
Saw this Famco ship's wheel press at an outdoor salvage yard for $100.

The brake, lever arm and pawl were missing but Famco still had them in stock... for $1,600! Screw that. I made them on my own.
Here's the pawl and lever arm I made.

And I used an old brass doorknob for a brake. Works great.

The brake, lever arm and pawl were missing but Famco still had them in stock... for $1,600! Screw that. I made them on my own.
Here's the pawl and lever arm I made.
And I used an old brass doorknob for a brake. Works great.
OP
AdrianBoomer
Well-known member
That press is beautiful. Love the fabrication and retrofit. Sweet find and clean up!
Roberts210
Well-known member
Thanks Adrian. I had my eye on a larger one, that was complete, but the machine shop decided not to sell it at the last minute. Don't really blame them. I don't intend to ever sell this one either.
E.rodz
Well-known member
i don't know if this will work for some in order to see pictures you will need to download the fix patch for photobucket. this is a Pullmax machine made for shaping sheet metal. for me i need to modify everything rather than make it the way the factory made it.


Roberts210
Well-known member
Love it e-rods. Outstanding work!
DocsMachine
Well-known member
- Joined
- Sep 16, 2006
- Messages
- 1,866
[T]hat is some massive Iron you have there. How does it run?
-Pretty good. Contrary to the photo I posted (it was the only one I had that showed almost the entire thing) I've had the head assembled and running for several months. I'm still doing detail work, but I've been using it semi-regularly for a while now.
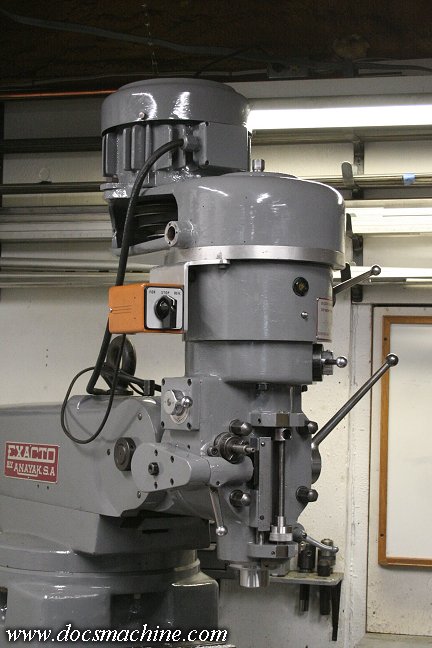
Doc.
OP
AdrianBoomer
Well-known member
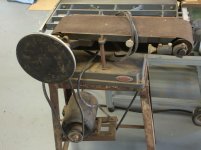
BTW, love that power king sander!!
Really like your work on the restores AdrianBoomer. Here are a few of mine. I have a Craftsman badged 12" Parks planer and King Seeley 6" joiner in the queue right now. Also a Walker Turner Cabinet saw I'm planning to start on over the winter.
michaelwolson
Well-known member
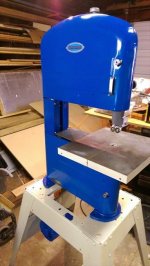
I'm currently in the middle of this one. Which has been dragging on for months because I don't have a lathe... Found it in a scrap pile at an estate sale. Bought it for $5.


The shafts and bushings were smoked so I ordered new ones. I'm going to have to ghetto lathe it on one of my drill presses to get the parts to all work together. It was originally machine gray but I decided to make it match my craftsman 150 drill press and went with gold.
I'm not sure if I should have painted the bed. My newer craftsman came with a painted/powdercoated? bed that I sanded then polished because the belt wore all the paint off.
Attachments


Last edited:
OP
AdrianBoomer
Well-known member
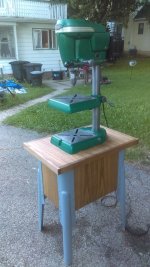
michaelwolson, nice work. Here is mine. some shots of my rebuild. I love this machine, I looked a looooong time to fin one. I originally wanted a Power king, I am extremely happy with the way this machine works and looks. When it was all polished up without the belts etc it was a steampunk sculpture LOL
Attachments
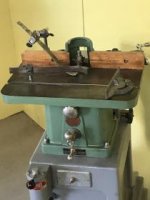
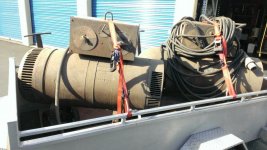
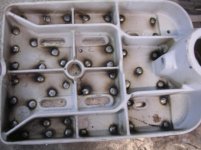
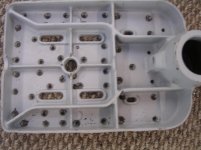
Here is my latest project:
Gallmeyer and Livingston Table Saw/ Jointer combo with a very heavy pedestal stand.
I really don't have a lot of background info on this item. If you all have any history on these, please let me know.
View media item 76192
View media item 76193
View media item 76194
Gallmeyer and Livingston Table Saw/ Jointer combo with a very heavy pedestal stand.
I really don't have a lot of background info on this item. If you all have any history on these, please let me know.
View media item 76192
View media item 76193
View media item 76194
Last edited:
drivesitfar
Well-known member
Erodz: i can't see the pictures you posted? are you using Photobucket? if you have the pictures on your laptop you can download them directly to GJ like i do with the paperclip just above where we write our posts. you can load up to 7 pics per posts. good luck
Roberts: man i'd love to have a nice press like that. nice job on the fix and probably works as well as if you bought the $1600 new parts for it. any idea how much your press weighs?
Roberts: man i'd love to have a nice press like that. nice job on the fix and probably works as well as if you bought the $1600 new parts for it. any idea how much your press weighs?
OP
AdrianBoomer
Well-known member
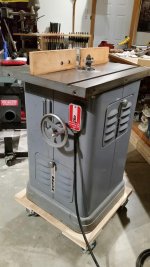
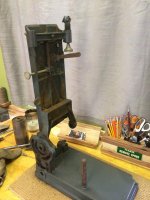
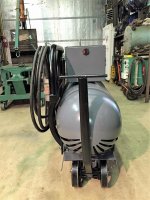
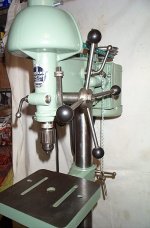
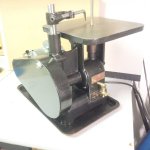
that power king sander reminded me that I love my Power King Shaper. Here are a few before and afters. A fun little machine, a went over board with the stand but it works and it is the hot rod of my shop tools, a conversation piece.
Keep them comin'!
Keep them comin'!
Attachments


rmack898
Well-known member
Here is my latest although it is not completely finished yet. It's a Walker Turner 900 series drill press.
In the before picture notice the arc of shame on it.
It's getting a DC treadmill motor and I still have to work out some of the motor control so that's why it's not done yet.
In the before picture notice the arc of shame on it.
It's getting a DC treadmill motor and I still have to work out some of the motor control so that's why it's not done yet.
Attachments


hsvtoolfool
Well-known member
Mac,
Can you provide any tips on welding/brazing a cast iron table
to repair the Arc Of Shame? Yours turned out 100% awesome.
I have the same issue with a 1920s Atlas, and that's the first
thing I want to tackle.
Thanks!
Can you provide any tips on welding/brazing a cast iron table
to repair the Arc Of Shame? Yours turned out 100% awesome.
I have the same issue with a 1920s Atlas, and that's the first
thing I want to tackle.
Thanks!
drivesitfar
Well-known member
Mac: i have a similar Walker Turner that an old machinist friend restored that even has a new old stock Walker Turner belt on it.
OMG that fix you did on the ARC OF SHAME is amazing. do tell how you did that if you don't mind saying.
also best of luck with the DC motor and i for one would like to own another old vintage drill press with a DC motor. Ryan had a thread about how he put a DC motor on his old Craftsman DP in case you might need some ideas or help. it's in this vintage tools section. sorry i don't have any pictures saved of my WT DP, but i'll take a few if anybody asks and post them.
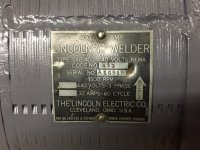
ALL: i had these 2 old Lincoln Torpedo welders from the 1940's and no way to power them up so a member agreed to restore one for me and keep the other one to use or do as he pleases and i think he did an amazing job. i've yet to see it in person and it weighs about 1500 pounds so it's not easy to move around, but it's coming home one day in the near future.
hope you like it as much as i do and some of the members thought it would make better YARD ART when i started a thread about it a couple years ago.
OMG that fix you did on the ARC OF SHAME is amazing. do tell how you did that if you don't mind saying.
also best of luck with the DC motor and i for one would like to own another old vintage drill press with a DC motor. Ryan had a thread about how he put a DC motor on his old Craftsman DP in case you might need some ideas or help. it's in this vintage tools section. sorry i don't have any pictures saved of my WT DP, but i'll take a few if anybody asks and post them.
ALL: i had these 2 old Lincoln Torpedo welders from the 1940's and no way to power them up so a member agreed to restore one for me and keep the other one to use or do as he pleases and i think he did an amazing job. i've yet to see it in person and it weighs about 1500 pounds so it's not easy to move around, but it's coming home one day in the near future.
hope you like it as much as i do and some of the members thought it would make better YARD ART when i started a thread about it a couple years ago.
Attachments


OP
AdrianBoomer
Well-known member
Mac, I too need to know how you cleaned up that table. The machined surface you created looks beautiful and I hope you will share your secret.
I have been looking/investigating old welders and this is starting to inspire me, but right now I am working on my Craftsman Socket/wrench collection for my 1930s box. I know it is not old Iron, but I enjoy using the old tools on my old machines, it just feels right.......
I would love to find a small milling machine like a Bench Master, I would love to see a pic one one if anyone has one")
I have been looking/investigating old welders and this is starting to inspire me, but right now I am working on my Craftsman Socket/wrench collection for my 1930s box. I know it is not old Iron, but I enjoy using the old tools on my old machines, it just feels right.......
I would love to find a small milling machine like a Bench Master, I would love to see a pic one one if anyone has one
rmack898
Well-known member
Drives,
Those Lincoln M/G welders are really cool, I remember my dad having one of them in his shop in the early 60's.
I have seen all kinds of repairs to erase the arc of shame from welding, to brazing, to JB weld and they all looked like poop.
Instead of trying to fill the holes, I just decided to cover them up. I turned the table upside down on a piece of 1/4" steel plate and traced the table on the plate. Then I cut the shape out of the plate for a new steel veneer.
I didn't want to bolt or rivet the veneer to the table so I drilled about 40 1/4" holes in the table (it already had a bunch of holes in so whats a few more). On the under side of the table I used a counter sink to taper all the holes. Then I carefully clamped the plate to the table and starting from the center and working my way out, I laid a real hot plug weld in all the holes filling the counter sunk area. The plug weld is actually in the steel veneer plate, not the cast iron table. When the weld cools, it shrinks up tight and clamps the veneer plate to the table.
Then I turned the table upside down on the mill table and drilled the center hole and milled the slots for the vise hold down bolts using the original hole and slots for a guide.
A little Roloc pad to clean it up and it was done. Then I thought I'd give it a little bling so I did some engine turning on it with a little 3/4" sanding disc.
So I really didn't repair the table, I just covered it up.
Attachments


Last edited:
drivesitfar
Well-known member
Mac: I understood most of what you did to fix your ARC OF SHAME, but there are some things i'm not sure of or how to actually do the work. I can say your finished product looks AMAZING and thanks for all the detailed information that i'm sure a lot of members understand and can use if they find a project that needs it.
thanks and WELL DONE!!
thanks and WELL DONE!!
Roberts210
Well-known member
Outstanding job Mack! Wow. Smart smart smart.
What kind of welder were you using and what was the amperage?
What kind of welder were you using and what was the amperage?
hsvtoolfool
Well-known member
Mac,
Thanks! That was an extremely clever solution.
Thanks! That was an extremely clever solution.
rmack898
Well-known member
Don,
The plug welds pulled the two pieces together pretty tight, I thought I might need to add a little body filler but a heavy coat of paint made the joint between the two go away.
Roberts,
I used a Miller 251 and ran it a little hot, about 18.5 volts and 300 IPM on the wire. The trick is getting a puddle through the 1/4" hole into the veneer plate and filling the hole fast, wire speed and amps are your friend here.
ndnchf
Well-known member


OP
AdrianBoomer
Well-known member
ndnchf
Well-known member
dang, that WT is beautiful, What color is that. I did a 16" bandsaw and found the original color at Benjamin Moore and had them mix it for me in one of their industrial paints. But I really like the color you chose!
Its Rustoleum sage green. Its hard to photograph as the color looks different depending on the light. But my photos are pretty close. Here are couple other pics with different lighting.
https://www.google.com/search?q=rustoleum+sage+green+gloss&tbm=isch&tbo=u&source=univ&sa=X&ved=0ahUKEwiL5O2b0Z3XAhVJzIMKHWy7DswQsAQIdg&biw=1152&bih=616
Attachments


Last edited: