jbmatth
Well-known member
I mentioned this in my introduction thread, but was asked to start a build thread as well.
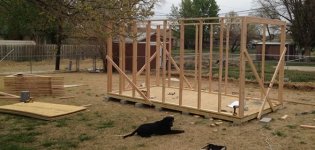
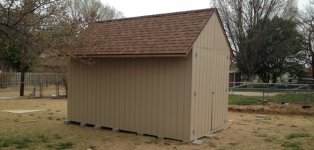
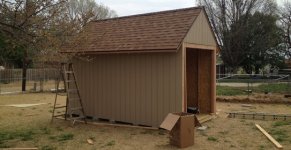
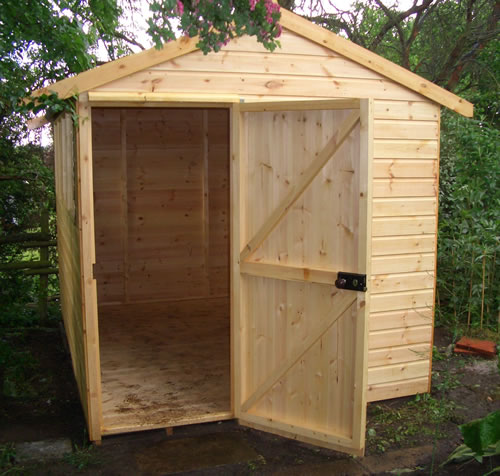
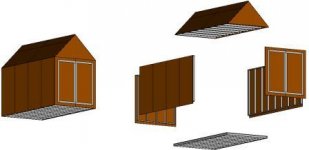
I'm going to be building an 8'x1?' garden shed. It'll be home to my riding mower, all other yard type tools, some misc. storage and power wheels for my girls. That way I have room to pull my car in and out of the garage without having to move everything out of the way. The shed is my own design that I've drawn up in MicroStation 3d. I'm debating on making it 12 or 16 feet long now and will have that decided before I buy materials in the next few weeks. I may have to just make it 12 because I'm only allowed $1000 for the full build and this will put me right in that ball park. I'll be doing most of the work on it myself over a 6 day weekend I have planned in April. If I get into a bind I'll call my FIL who lives here in town to come tell me how bad I messed things up.
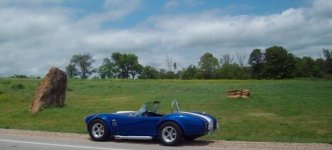
I would hold out for a larger budget so I can build up to the city limits of 200 sq ft without a permit, or 800 with a permit, but we don't plan to live in this house for more than another year or two and don't want to sink too much into it in the time being. I'll try to attach a picture of the shed design, and the car I'm trying to access more easily with this shed build.


I'm going to be building an 8'x1?' garden shed. It'll be home to my riding mower, all other yard type tools, some misc. storage and power wheels for my girls. That way I have room to pull my car in and out of the garage without having to move everything out of the way. The shed is my own design that I've drawn up in MicroStation 3d. I'm debating on making it 12 or 16 feet long now and will have that decided before I buy materials in the next few weeks. I may have to just make it 12 because I'm only allowed $1000 for the full build and this will put me right in that ball park. I'll be doing most of the work on it myself over a 6 day weekend I have planned in April. If I get into a bind I'll call my FIL who lives here in town to come tell me how bad I messed things up.
I would hold out for a larger budget so I can build up to the city limits of 200 sq ft without a permit, or 800 with a permit, but we don't plan to live in this house for more than another year or two and don't want to sink too much into it in the time being. I'll try to attach a picture of the shed design, and the car I'm trying to access more easily with this shed build.
Attachments

Last edited:
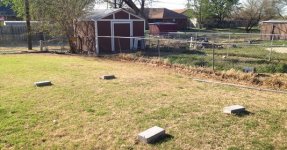
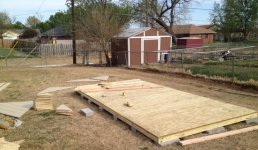
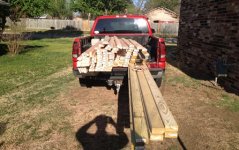
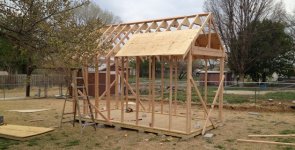
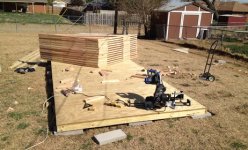
") I was able to size the shed down a bit and use nothing longer than a 12ft board and saved a bit on lumber. the 16fters were for the roof(flat 2/12 pitch). Settled on 10x10 with 1ft overhang.
I was able to size the shed down a bit and use nothing longer than a 12ft board and saved a bit on lumber. the 16fters were for the roof(flat 2/12 pitch). Settled on 10x10 with 1ft overhang.