OP
zmotorsports
ALLIANCE MEMBER
Nice work!
looking FABulous!
Thanks guys. I really appreciate the compliments.
Mike.

Nice work!
looking FABulous!
When is that steel cable getting replaced with kevlar?
Everything else is top notch. Great job!
KO
Mike,
I have a couple of questions if you don't mind.
1. Where did you source the D ring mounts?
2. Do you have any pictures of the underside of the bumper?
3. Did you add plates to the underside of the outer wings?
4. Now that you have had it completed for a while is there anything you would do different or improve?
Your bumper is the best one I have seen out there and I plan to build mine very similar to yours. I might make it a bit narrower but not much as I like the looks of yours. Thanks for the great write up.
Dan
 He kept walking around our Jeep and asking about everything he saw and I was just trying to keep up with all of the questions he was asking.
I think what's different (at least to me) is that your bumper doesn't look too bulky/chunky. Many of the bumpers I've looked at look to "short and fat" to me. That bulky look just doesn't do it for me.
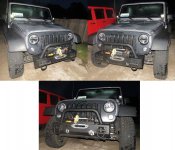
Thanks. I am still a cable guy. Haven't switched over to synthetic rope yet.
Mike.

Make the switch, once you go synthetic you will wonder how you lived without it.
Really nice work on the bumper. I only wish mine was that clean.
As a fellow jeeper.....nice
Built not bought ����
Damn nice welds Mike, and very good work, congrats

Kudos on the fabrication! Time to get out and wheel!

@zmotorsports Mike, as a new first time new jeep owner, and a long time admirer of yours, I was hoping you might still have the pictures that were supposed to be on this post (I know its more than 10 years old, so not holding my breath) but I'd love to see what you did here...I had a WARN Rockcrawler front winch bumper along with a WARN Powerplant winch/compressor combo on my Jeep that I had picked up at a reasonable price for the package when I first started building my Jeep. However, now after owning if for a year and a half and having more than a few people give me a hard time for having a "purchased" bumper on my Jeep, I decided it was time to sell the old winch and bumper and fabricate a new one.
I also wanted to sink the winch down into the bumper as low as possible to keep the radiator unobstructed for better airflow while I was at it.
I am putting together an on board air system, so for a winch I just needed a good solid brute. I went with the WARN 9.5XP which has the series-parallel wound 6 HP motor and old style contactor box.
This is the bumper/winch combo that I removed.

Off with the old.

First order of business was to mock up a cardboard template for the winch mounting plate and decide how to tie it into the frame rails.

Bumper attachment points fabricated and the winch mounting plate tacked into place.

New winch showed up.

Deciding on placement.

Along with the eight (8) 1/2" grade 8 bolts holding the bumper assembly on to the frame rails I also added two 5/16" tabs welded to the frame rails that the back of the winch mounting plate will bolt to with two 3/8" grade 8 bolts.

For the "D" ring/recovery points, I welded them directly to the frame attachment points for starters.


I then cut the opening for the roller fairlead as well as the two "D" ring/recovery points to protrude through the front of the bumper. This will allow the "D" rings to pull on the entire assembly rather than just the outside front section which could pull it away from the mounting points. This also keeps my attachment points hidden and out of sight for a much cleaner look.

Front section of 3/16" P&O welded on.

"D" rings welded to front section.

Test fitting the top section with the opening cut for the winch.

Top section welded on. By keeping the fitment nice and tight inside corner to inside corner allows a nice weld bead with very, very little dressing to make a nice rounded corner and removing hardly any weld. I also weld the backside for added insurance.

Now to add the left and right ears of the bumper.


Final welding done and metal finished.


Test fit now with the winch and then I can add my grille hoop and off to the powder coater it goes.

I will post up some pics of it after I get it back from the powder coater as well as once I get it installed on the Jeep.
Mike.
@zmotorsports Mike, as a new first time new jeep owner, and a long time admirer of yours, I was hoping you might still have the pictures that were supposed to be on this post (I know its more than 10 years old, so not holding my breath) but I'd love to see what you did here...

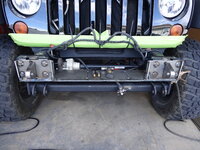
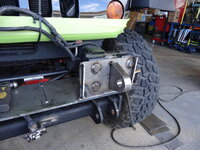
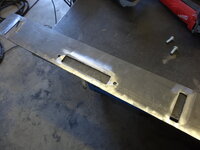

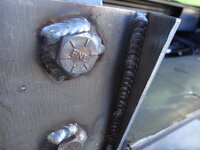
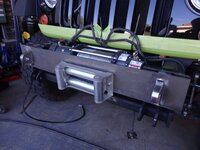
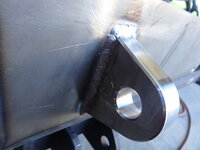
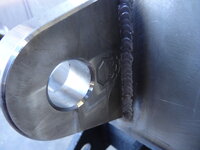
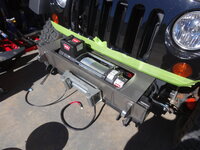
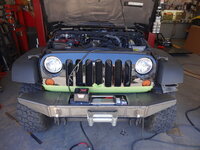
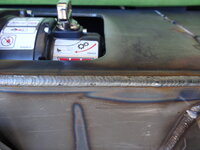
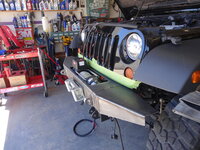
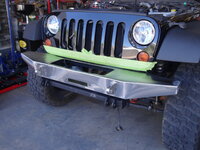
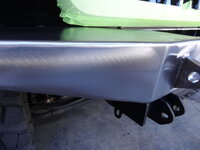
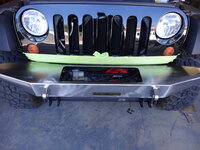
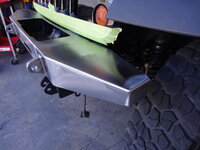
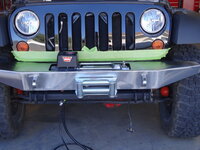
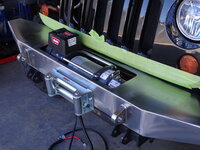
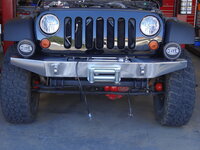
Stunning work as usual Mike, Thank you very much for digging out the old pictures.Unfortunately, that is all I have of the actual fabrication process, but hopefully you can get a feel for the design and execution.
Stunning work as usual Mike, Thank you very much for digging out the old pictures.